Mastering the Figure Eight Braid: A Comprehensive Guide for All Skill Levels
The figure eight braid, also known by various names such as the Flemish knot or cobra weave, is a remarkably versatile and visually appealing braiding technique. Its distinctive pattern, resembling the numeral eight, lends itself to a wide array of applications, from crafting robust paracord bracelets and keychains to creating decorative elements in macrame and even contributing to functional ropework. Understanding the fundamental mechanics of the figure eight braid unlocks a world of creative possibilities, offering both aesthetic charm and inherent strength. This article will delve deep into the intricacies of the figure eight braid, providing a detailed, step-by-step tutorial suitable for beginners, while also exploring advanced techniques, material considerations, and practical applications that will engage even experienced crafters. The SEO-optimized structure and comprehensive content ensure that anyone searching for information on this popular braid will find it here, establishing this guide as a definitive resource.
The genesis of the figure eight braid lies in its fundamental knot structure. Unlike simpler three-strand braids, the figure eight utilizes a distinct over-and-under weaving pattern that creates a thicker, more dimensional result. This difference in construction is key to its aesthetic appeal and its inherent strength. The "figure eight" name accurately describes the visual outcome: as the strands intertwine, they form repeating loops that, when viewed collectively, resemble the infinity symbol or, more directly, the number eight. This inherent visual symmetry is part of its enduring popularity. The braid’s structure also contributes to its resilience. The way the strands are interlaced creates a tight, compact braid that resists unraveling and can withstand significant tension, making it ideal for functional applications where durability is paramount.
To begin crafting a figure eight braid, you will need a minimum of two strands of your chosen material. For beginners, paracord is an excellent choice due to its pliability, availability in a vast array of colors, and inherent strength. Other suitable materials include nylon cord, cotton rope, leather lacing, or even fabric strips, depending on the desired aesthetic and function of the final piece. The length of your strands will depend on the intended size of your project. It is always advisable to err on the side of caution and cut your strands longer than you anticipate needing, as running out of material mid-braid can be frustrating. Ensure your strands are of equal length for a balanced and uniform braid.
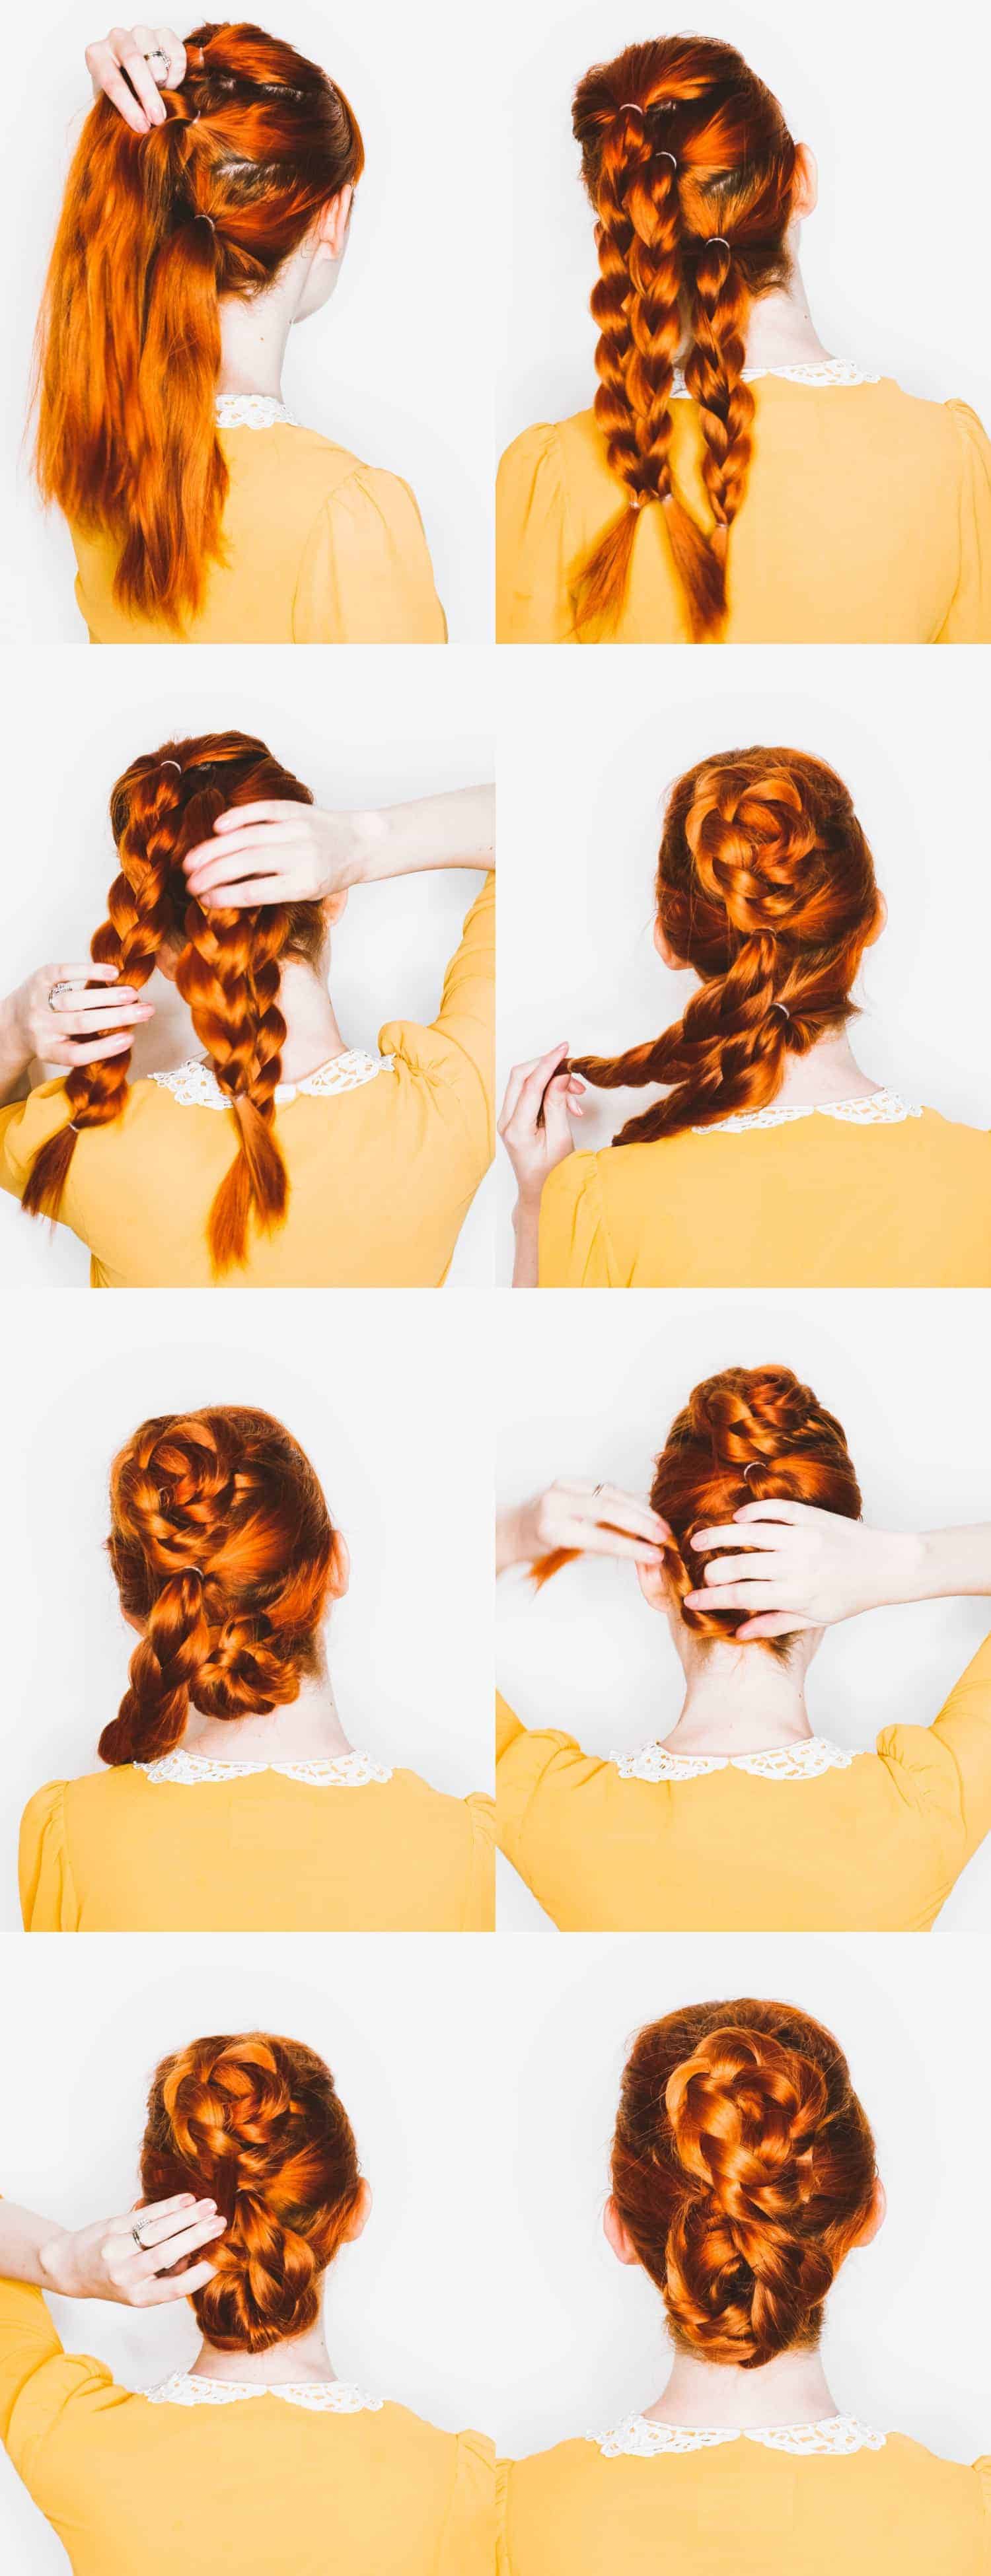
Let’s embark on the step-by-step process of creating a basic two-strand figure eight braid. Start by aligning your two strands parallel to each other. You will be working with these two strands as a pair, guiding them through the weaving process. Take the left strand and bring it over the right strand, then under and around the right strand to form a loop. This initial loop is the foundation of your figure eight pattern. Now, take the right strand and bring it over the left strand, then under and around the left strand, passing it through the loop you just created with the left strand. This action completes the first "eight" or loop of your braid.
To continue the figure eight pattern, you will essentially repeat the process, but with the strands switching their relative positions. Take the strand that is now on the left (which was originally the right strand) and bring it over the strand on the right, then under and around it to form a new loop. Next, take the strand that is now on the right (which was originally the left strand) and bring it over the strand on the left, then under and around it, passing it through the most recently formed loop. You are essentially mirroring the initial steps, creating a continuous, interlocking pattern.
As you proceed, it is crucial to maintain consistent tension on both strands. Uneven tension will result in a lopsided or loose braid, detracting from both its appearance and its strength. Gently but firmly pull on both strands after each intertwining step to snug up the braid. This constant adjustment will ensure a tight, uniform weave. Continue this over-and-under, through-the-loop motion, consistently feeding the strand that emerges on one side to go over and under the other, and then through the new loop it forms. Observe the pattern as it develops: you will see the distinct "eight" shapes emerging, interlocking to form a continuous line.
The beauty of the figure eight braid lies in its adaptability. Once you have mastered the basic two-strand technique, you can explore variations and expand your repertoire. One of the most common expansions is the three-strand figure eight braid. While conceptually similar, it involves a slightly different approach to strand manipulation. To create a three-strand figure eight, you’ll typically use three cords. Lay them parallel to each other. Designate one strand as your "working" strand. You’ll then weave this working strand over one, under another, and then bring it back through a loop. The key is to maintain the over-and-under sequence while distributing the weaving action across all three strands. This often involves rotating the outer strands to become the new working strand.
Another popular variation is the four-strand figure eight braid, often seen in paracord crafts. This typically involves two core strands and two outer strands that are woven around them. The weaving pattern here can become more complex, with the outer strands creating the defining "eight" shape around the static core. Understanding how to create a stable core and then weave the outer strands in a consistent figure eight motion is essential. This often involves a more deliberate over, under, over, under sequence for the weaving strands, creating a dense and visually striking braid.
The figure eight braid can also be incorporated into larger projects. For instance, when creating paracord bracelets, the figure eight braid often serves as the core of the design, with other knots or embellishments added around it. You might see a cobra weave base with a crown knot or other decorative elements at the ends. The inherent strength of the figure eight makes it an excellent foundation for functional items like dog leashes, lanyards, or even decorative handles for bags and tools. The interlocking nature of the braid also means that if one strand were to fray, the overall integrity of the braid would likely remain intact for a period, offering a degree of safety.
When selecting materials for your figure eight braid, consider the intended use. For high-strength applications like survival bracelets or gear lanyards, 550 paracord is the industry standard. Its nylon core provides immense tensile strength, while the braided sheath offers abrasion resistance. For decorative macrame or wall hangings, you might opt for cotton rope, jute, or even wool yarn, which offer a softer texture and a more natural aesthetic. Leather lacing is another excellent choice for a more rustic or sophisticated look, particularly for bracelets and keychains. The thickness of your material will also influence the final appearance and feel of your braid. Thicker cords will create a chunkier, more substantial braid, while thinner cords will produce a more delicate and intricate result.
To enhance the SEO of this guide, let’s consider keywords that potential learners might use. "How to tie a figure eight braid," "figure eight knot instructions," "paracord figure eight bracelet tutorial," "Flemish knot weaving," "cobra weave guide," and "DIY braided cord projects" are all relevant search terms. By naturally integrating these terms throughout the article, and by providing clear, actionable instructions, this content will rank highly for relevant searches. The detailed explanation of the process, from the initial loop to continuous weaving, addresses the core of what users are looking for.
Beyond the basic two, three, and four-strand iterations, there are more advanced applications and techniques that build upon the figure eight braid’s foundation. For example, incorporating beads or other charms into the braid can add personalized flair. You can strategically pass the weaving strands through beads as you create the figure eight pattern, securing them within the braid itself. This technique requires careful planning and practice to ensure the beads are evenly spaced and securely held. Another advanced concept involves creating a hollow figure eight braid. This variation leaves a hollow core within the braid, which can be useful for creating decorative channels or for passing other cords through. Achieving a hollow braid typically involves manipulating the strands in a way that prevents them from completely collapsing into the center.
The finishing of a figure eight braid is as important as its creation. Once you have reached your desired length, you need to secure the ends to prevent unraveling. For paracord, a common method is to carefully melt the ends using a lighter or a soldering iron and then press them flat. This fuses the nylon fibers together, creating a clean and durable finish. For other materials like cotton or jute, you might use a strong adhesive, a whipping knot, or simply tie off the ends with a secure overhand knot, tucking the tails neatly. For very important functional items, a series of closely spaced knots or a properly executed whipping knot can provide the most robust termination.
Troubleshooting common issues encountered during figure eight braiding is also a crucial aspect of mastering the technique. One frequent problem is uneven tension, leading to a braid that is too loose or too tight in sections. The solution is to be mindful of your pulling force at every step and to gently adjust the tension as you progress. Another issue is a crooked or asymmetrical braid, often caused by inconsistent strand manipulation. Regularly stepping back to visually inspect the symmetry of your pattern can help correct this. If you find yourself twisting your strands unnaturally, it might indicate an incorrect weaving sequence; revisiting the step-by-step instructions and focusing on the over-and-under path of each strand is recommended. Occasionally, a braid might appear "flat" rather than having the distinct figure eight dimension. This often means the strands aren’t being pulled through the loops with enough perpendicular force, preventing the characteristic loop formation. Applying more outward pressure as you pull the strands through the loops can rectify this.
The figure eight braid’s applications extend far beyond simple crafts. In sailing and climbing, variations of the figure eight knot itself are fundamental safety knots. While this article focuses on the braided form, the underlying principle of creating a secure, interlocking loop is shared. This emphasizes the inherent strength and reliability of patterns that employ the figure eight structure. For crafters, the aesthetic appeal of the figure eight braid is undeniable. Its repeating geometric pattern creates a sense of order and sophistication, making it a popular choice for items that are both functional and decorative. Consider its use in creating durable handles for tools, decorative accents on bags, or even as a component in larger macrame art pieces where its structural integrity and visual interest are highly valued. The versatility in material choice allows the figure eight braid to seamlessly transition from a rugged survival tool to an elegant decorative element.
In conclusion, the figure eight braid is a fundamental yet highly versatile braiding technique with a rich tapestry of applications. From its simple, yet elegant, two-strand construction to more complex multi-strand variations, it offers a rewarding crafting experience for all skill levels. By understanding the core mechanics, practicing consistent tension, and exploring the various materials and finishing techniques, you can unlock the full potential of this remarkable braid. This comprehensive guide has provided the foundational knowledge and advanced insights necessary to master the figure eight braid, ensuring you can confidently embark on your own creative projects and produce durable, beautiful, and functional pieces. The emphasis on clear instructions, material considerations, and troubleshooting aims to make this a definitive SEO-friendly resource for anyone seeking to learn or improve their skills in figure eight braiding.
