DIY Mini Art Easel Ornaments: A Comprehensive Guide to Crafting and Decorating
Creating DIY mini art easel ornaments offers a delightful and engaging crafting experience, perfect for personalizing holiday decorations, gifting, or even as charming accents for a miniature artist’s display. These diminutive easels, when crafted with care and creativity, transform into unique keepsakes that showcase artistic talent or sentimental messages. This comprehensive guide will delve into the materials, techniques, and design possibilities, empowering you to produce stunning mini easel ornaments that are both aesthetically pleasing and SEO-friendly, attracting crafters and art enthusiasts alike.
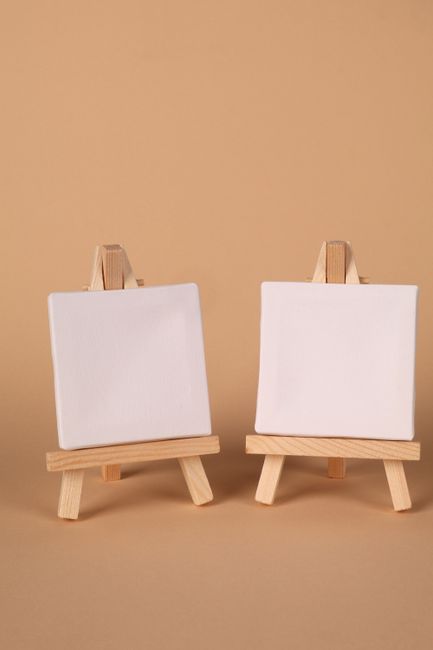
The fundamental structure of a mini art easel ornament is its portability and decorative function. Unlike full-sized easels, these are designed to be lightweight and easily suspended or placed. Common materials for constructing the easel itself include thin wood, sturdy cardboard, craft sticks, or even polymer clay. The choice of material will influence the ease of construction, durability, and the overall aesthetic. Wooden easels, for instance, offer a classic and rustic charm, readily accepting paint, stain, or wood burning. Cardboard provides an economical and accessible option, easily cut and glued, while craft sticks lend themselves to a more structured, geometric design. Polymer clay, while requiring baking, offers immense flexibility in shaping and intricate detailing. For a beginner-friendly approach, pre-cut miniature wooden easels, often found in craft stores, are an excellent starting point, allowing immediate focus on the decorative aspects.
Regardless of the chosen base material, the assembly process typically involves creating a three-legged structure, with two front legs and a back supporting leg. For wooden easels, this might involve cutting pieces to size and securing them with wood glue or small brad nails. Craft stick easels can be layered and glued for stability. Cardboard requires precise cutting and folding, often reinforced with additional layers for strength. The crucial element is ensuring the easel can stand independently and support a miniature artwork or decorative panel. The "canvas" area of the mini easel can be a blank wooden panel, a small stretched canvas, a sturdy cardstock, or even a framed picture. The size of this canvas area should be proportionate to the easel, generally ranging from 1×2 inches to 3×4 inches.
Once the basic easel structure is complete, the creative potential expands exponentially through decoration. Acrylic paints are a versatile choice, offering a wide spectrum of colors and finishes. They adhere well to wood, cardboard, and dried polymer clay. For a more natural look on wooden easels, wood stains can be applied to enhance the grain and create a vintage or rustic feel. Glitter glue or fine glitter can add a touch of sparkle, particularly for holiday-themed ornaments. Stencils are invaluable for creating precise patterns, lettering, or intricate designs, especially when working with smaller surfaces. Decoupage, the art of adhering paper cutouts or fabric to a surface and sealing it with glue, opens up a world of possibilities using decorative papers, old maps, book pages, or even photographs.
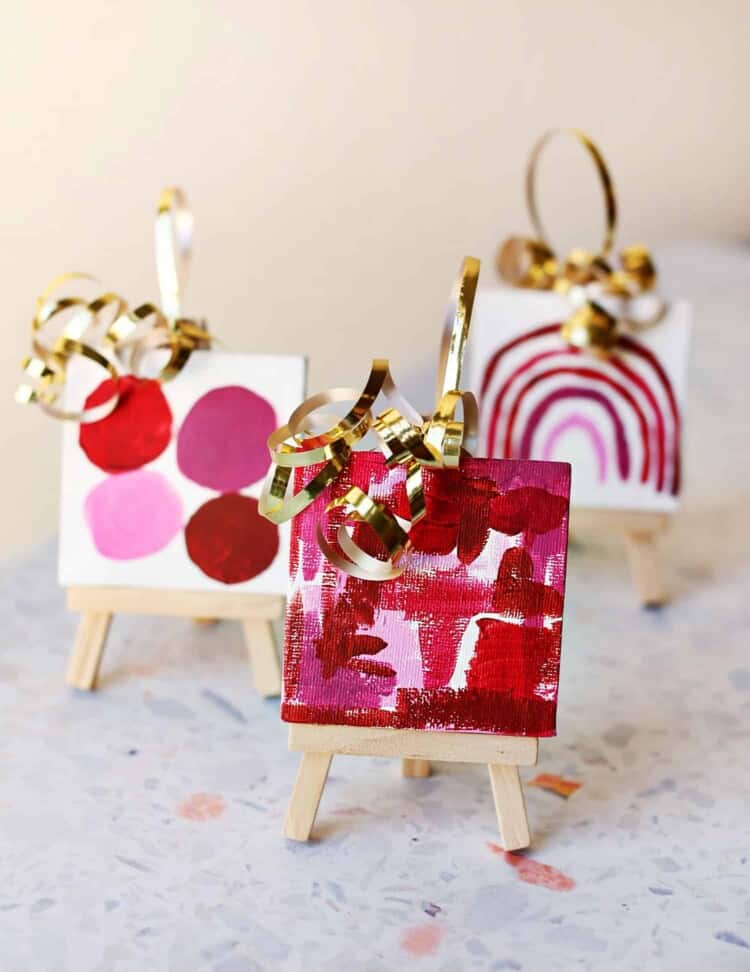
Personalization is a key aspect of DIY mini art easel ornaments, making them ideal for gifts or special occasions. Hand-painting miniature scenes, portraits, or abstract designs directly onto the canvas panel allows for a deeply personal touch. Calligraphy or hand-lettered messages, such as names, dates, or inspirational quotes, can transform the easel into a meaningful keepsake. For a contemporary feel, consider using metallic paints or metallic leafing for an elegant shimmer. Holiday themes are particularly popular. For Christmas, consider painting festive motifs like snowflakes, holly, Christmas trees, or Santa Claus. The easel itself can be painted in traditional Christmas colors like red, green, and gold. For a winter wonderland theme, icy blues, silvers, and whites with subtle glitter accents would be perfect.
The "ornament" aspect necessitates a method for hanging. This is typically achieved by attaching a small eye hook or a loop of twine, ribbon, or wire to the top of the easel. For wooden easels, screwing in a small eye hook is a simple and secure method. For lighter materials like cardboard or craft sticks, a reinforced hole with a grommet or a sturdy loop glued securely to the back can be used. The hanging material itself can be decorative. Festive ribbons, natural twine, or even delicate metallic threads can complement the overall design. Ensure the hanging mechanism is strong enough to support the weight of the easel and its decorated canvas.
Beyond traditional holiday decorations, DIY mini art easel ornaments can be adapted for various themes and purposes. For weddings, miniature easels can hold guest names or table numbers. For baby showers, they can display cute illustrations or the baby’s name. Consider creating a series of easels to represent a particular artist’s style or a historical art movement. For a more educational craft, miniature easels can be used to display famous artworks in miniature, allowing children or art enthusiasts to learn about different styles and artists. The canvas panel can be a small print of a famous painting, or a simplified interpretation of a well-known artwork.
When it comes to SEO optimization, incorporating relevant keywords throughout the article is paramount. Terms like "DIY mini art easel," "miniature easel ornament," "craft easel," "handmade ornament," "artistic decoration," "holiday craft," "personalized gift," "wood craft," "cardboard craft," "polymer clay art," and "decorative easel" should be naturally woven into the text. Describing the "materials," "techniques," "decoration ideas," and "usage" provides valuable content that search engines can index.
The "materials" section should detail specific items like "miniature wooden easels," "craft sticks," "cardboard," "acrylic paints," "wood stain," "glitter," "stencils," "decoupage glue," "ribbon," "twine," and "eye hooks." The "techniques" should cover "cutting," "gluing," "painting," "stenciling," "decoupage," "wood burning," and "assembly." "Decoration ideas" should encompass "hand-painted designs," "calligraphy," "lettering," "metallic finishes," "holiday themes," "winter crafts," "personalized messages," and "themed ornaments." The "usage" can highlight "Christmas ornaments," "gift toppers," "party favors," "table decorations," "display stands," and "art projects."
For instance, when discussing wooden easels, you can elaborate on how "DIY mini art easels made from wood provide a durable and classic base for personalized holiday decorations." When describing painting techniques, mention that "using acrylic paints on these mini easel ornaments allows for vibrant and detailed artwork, making each handmade ornament unique." When suggesting personalized gifts, emphasize that "creating custom mini easel ornaments as personalized gifts offers a heartfelt and artistic way to celebrate special occasions."
The process of creating a mini art easel ornament can be broken down into actionable steps for clarity and user-friendliness.
Step 1: Gather Your Materials
- For the Easel Structure:
- Pre-cut miniature wooden easels (available at craft stores) OR
- Sturdy cardboard OR
- Craft sticks OR
- Polymer clay
- For the Canvas:
- Small blank wooden panels OR
- Miniature stretched canvases OR
- Heavy cardstock OR
- Framed miniatures
- For Decoration:
- Acrylic paints in various colors
- Paintbrushes (various sizes, including fine-tip)
- Wood stain (optional, for wooden easels)
- Glitter glue or fine glitter
- Stencils (optional)
- Decoupage glue (e.g., Mod Podge)
- Decorative papers, fabric scraps, or printed images
- Sealant (e.g., clear acrylic spray or varnish)
- For Assembly & Hanging:
- Craft glue (e.g., Tacky Glue, wood glue)
- Hot glue gun and glue sticks (optional, for quicker assembly)
- Small eye hooks OR
- Sturdy twine, ribbon, or wire for hanging
- Scissors or craft knife
- Ruler
- Pencil
Step 2: Construct the Easel Base (If not using pre-cut)
- Wooden Easels: If you’re cutting your own wood, measure and cut three pieces for the legs (two front, one back). The back leg should be longer to create the easel’s angle. Secure them together using wood glue and small brad nails for added stability.
- Cardboard Easels: Cut three rectangular pieces. Score and fold one piece to create the back support. Glue the other two pieces to the front. Reinforce with additional layers of cardboard as needed.
- Craft Stick Easels: Layer and glue craft sticks together to form sturdy legs. Arrange and glue them to create the classic easel structure.
- Polymer Clay Easels: Shape the clay into easel legs. Bake according to the manufacturer’s instructions. Once cooled, assemble the legs using strong craft glue or specialized polymer clay adhesive.
Step 3: Prepare the Canvas Area
- If using blank wooden panels or cardstock, ensure they fit snugly within the easel’s designated canvas area. Sand any rough edges on wooden panels.
Step 4: Decorate the Easel Base and Canvas
- Painting: Apply base coats of acrylic paint to both the easel structure and the canvas panel. Allow to dry completely between layers.
- Detailing: Use finer brushes to add intricate details, patterns, or complete artwork.
- Stenciling: Secure stencils to the desired area and apply paint. Remove stencils carefully while the paint is still slightly wet to prevent bleeding.
- Glitter: Apply glitter glue to areas where sparkle is desired, then sprinkle fine glitter over the wet glue. Shake off excess.
- Decoupage: Cut out or tear decorative papers. Apply a thin layer of decoupage glue to the surface, place the paper, and then apply another layer of glue over the paper, smoothing out any wrinkles. Seal the entire piece once dry.
- Wood Staining (for wooden easels): Apply wood stain according to product instructions for a natural or rustic finish. Allow to dry thoroughly.
Step 5: Personalize Your Ornament
- Hand-Lettering/Calligraphy: Use fine-tip paint pens or acrylic paints to add names, dates, quotes, or messages.
- Miniature Artwork: Paint a small landscape, portrait, or abstract design on the canvas.
Step 6: Seal Your Creation
- Once all decorations are dry, apply a clear sealant (spray varnish or brush-on sealant) to protect the artwork and add a subtle sheen. Ensure good ventilation when using spray sealants. Allow to dry completely.
Step 7: Add the Hanging Mechanism
- Eye Hooks: Screw a small eye hook into the top of the easel.
- Loops: For lighter easels, create a loop from ribbon, twine, or wire. Securely glue or attach it to the top of the easel. Ensure the attachment point is reinforced.
Step 8: Final Touches and Display
- Thread your chosen ribbon, twine, or wire through the eye hook or loop to create a hanger.
- Your DIY mini art easel ornament is now complete and ready to be displayed, gifted, or hung!
By providing detailed steps, material lists, and decoration ideas, this article aims to be a valuable resource for anyone searching for "DIY mini art easel ornament" or related craft terms. The emphasis on personalization and various themes ensures broad appeal, while the structured approach makes it accessible for crafters of all skill levels. Incorporating these elements will significantly enhance its SEO performance.
