
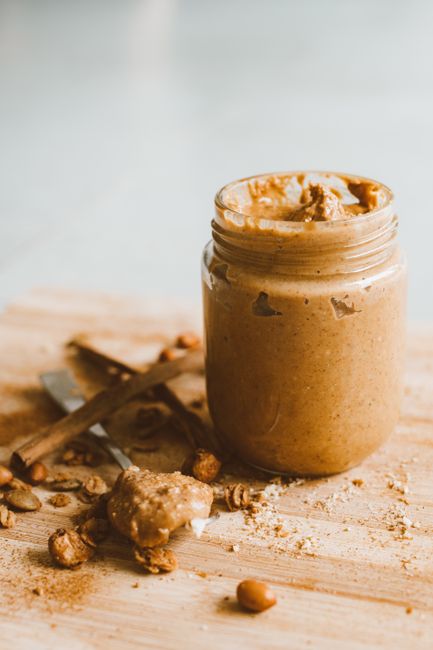
Crafting Your Own Nut and Coconut Butter: A Comprehensive Guide for Optimal Health and Flavor
The burgeoning interest in homemade, nutrient-dense foods has propelled nut and coconut butters from niche artisanal products to kitchen staples. Beyond the superior flavor and texture achievable through home preparation, making your own allows for complete control over ingredients, eliminating unwanted additives, sugars, and preservatives commonly found in store-bought varieties. This comprehensive guide delves into the techniques, equipment, and considerations for creating exceptional nut and coconut butters, empowering you to unlock a world of wholesome and delicious spreads.
The foundation of any successful nut or coconut butter lies in the quality of your base ingredients. Opt for raw, unsalted nuts and unsweetened shredded coconut whenever possible. Roasting nuts before processing can enhance their flavor and aroma, but it’s an optional step. If you choose to roast, preheat your oven to 300-350°F (150-175°C). Spread the nuts in a single layer on a baking sheet and roast for 8-15 minutes, or until fragrant and lightly golden. For coconut, roasting is less common, but a brief toasting of shredded coconut can add a subtle depth. Exercise caution to prevent burning, as this will impart a bitter taste. Allow any roasted nuts to cool completely before proceeding; warm nuts can melt the fats prematurely, hindering the emulsification process. Different nuts offer distinct flavor profiles and textures. Almonds yield a smooth, slightly sweet butter. Walnuts produce a richer, earthier spread with a higher omega-3 content. Cashews result in an exceptionally creamy, almost velvety butter due to their lower fat and higher starch content. Peanuts, a legume but commonly treated as a nut, offer a familiar and versatile base. Pecans lend a delicate, sweet, and slightly buttery flavor. Macadamia nuts are renowned for their incredibly rich, buttery texture and mild flavor. When it comes to coconut, unsweetened shredded coconut is the standard, providing a distinct tropical sweetness and creamy consistency.
The most crucial piece of equipment for nut and coconut butter production is a high-powered blender or a food processor. While less powerful appliances can technically achieve the task, they will require significantly more time, patience, and may not produce as smooth a consistency. Professional-grade blenders, such as Vitamix or Blendtec, are ideal due to their robust motors and blade design, capable of breaking down nuts and coconut efficiently. Food processors, particularly those with larger capacities and powerful motors, can also be effective, though the resulting butter might be slightly coarser. The process involves a gradual breakdown of the solid ingredients into their natural oils, creating a smooth, spreadable paste. This transformation occurs through the friction and heat generated by the blades. Begin by processing a moderate amount of nuts or coconut, avoiding overcrowding the appliance. Overfilling can strain the motor and lead to uneven processing. Pulse the ingredients initially to break them down into smaller pieces. Then, switch to a continuous blending setting. Throughout the process, you will observe the mixture progressing through several stages: a coarse meal, a sticky paste, and finally, a smooth, flowing butter. Scrape down the sides of the blender or food processor frequently with a spatula to ensure all ingredients are incorporated and to prevent any from adhering to the walls. This step is critical for achieving uniform smoothness.
The time required for processing varies depending on the type of nut or coconut, the power of your appliance, and the desired consistency. For high-powered blenders, it can take anywhere from 5 to 15 minutes to achieve a smooth almond or cashew butter. Peanut butter might take slightly longer. Coconut butter, especially from shredded coconut, can also take around 5-10 minutes. Food processors may require 15-30 minutes or more. Patience is paramount. Resist the urge to add liquids too early, as this can dilute the natural oils and create a thinner, less concentrated butter. If the mixture becomes too thick and your appliance struggles to blend, it’s an indication that the fats are starting to release. At this point, you can add a small amount of neutral oil to assist in the blending process. Recommended oils include coconut oil (which complements coconut butter perfectly), almond oil, or grapeseed oil. Add the oil one teaspoon at a time, allowing it to incorporate fully before adding more. This helps maintain the richness and texture of the butter. For those seeking a saltier profile, a pinch of sea salt can be added during the final stages of blending.
Customization is where homemade nut and coconut butter truly shines. Once you have achieved a smooth base, the possibilities for flavor enhancement are nearly limitless. For nut butters, consider adding sweeteners like maple syrup, honey, or date paste for a touch of sweetness. A dash of cinnamon or nutmeg can introduce warm, comforting notes. Vanilla extract provides a classic, versatile flavor. Cocoa powder or carob powder can transform your nut butter into a decadent chocolate spread. For a spicy kick, a pinch of cayenne pepper or chili powder can be surprisingly delicious, especially with peanuts or almonds. Edible seeds, such as chia seeds, flax seeds, or hemp seeds, can be incorporated for added nutritional value and a subtle textural contrast. If you’re making coconut butter, the base itself is already quite flavorful, but you can enhance it further. A swirl of chocolate chips or a sprinkle of shredded coconut for texture can be delightful. Spices like cardamom or ginger can offer a more complex flavor profile. Experiment with dried fruits like cranberries or goji berries for bursts of tartness and chewiness. The key is to add these flavorings in moderation, allowing the natural flavor of the nut or coconut to remain the star. Add sweeteners and spices gradually, tasting and adjusting as you go.
For those who prefer their butter unsweetened and unflavored, the process is even simpler. Focus solely on achieving the smoothest possible consistency from the nuts or coconut. This pure, unadulterated form is excellent for use in savory dishes, smoothies, or as a base for various culinary creations. It’s also a fantastic option for individuals managing sugar intake or adhering to specific dietary protocols like ketogenic or paleo diets. The natural oils in nuts and coconut are highly beneficial, providing healthy monounsaturated and polyunsaturated fats, as well as medium-chain triglycerides in coconut. These fats contribute to satiety, support brain health, and aid in nutrient absorption.
Storage of homemade nut and coconut butter is straightforward but requires attention to prevent spoilage and maintain optimal texture. Once processed, allow the butter to cool slightly before transferring it to an airtight container. Glass jars are ideal for storage. Refrigeration is generally recommended to prolong shelf life and maintain the desired consistency, especially for butters made with higher-fat nuts like macadamia. In the refrigerator, nut and coconut butters can typically last for several weeks to a few months. If you notice any separation of oil on the surface – a natural occurrence due to the fat content – simply stir it back in before use. Avoid exposing the butter to heat or direct sunlight, as this can accelerate spoilage. For longer-term storage, freezing is an option. Portion the butter into freezer-safe containers or bags. It can be frozen for up to six months. Thaw it in the refrigerator overnight before consuming. Proper storage ensures that you can enjoy the full flavor and nutritional benefits of your homemade creations for an extended period.
The texture of your finished butter is a matter of personal preference. For a chunkier, more rustic spread, reduce the processing time. You’ll want to stop when the mixture is still slightly gritty. For a super-smooth, velvety butter, continue processing until it reaches a flowing, pourable consistency. The presence of natural oils will dictate how smooth the butter becomes. Nuts with higher fat content, like cashews and macadamias, will naturally yield a creamier result. Coconut butter, when made from finely shredded coconut, also achieves a desirable creaminess. If your blender or food processor is struggling, and you haven’t yet added any oil, it might be a sign that you need to continue processing to release more of the natural fats. Be patient, as the transition from a paste to a smooth liquid can take time. The heat generated by the appliance’s motor plays a crucial role in emulsifying the oils, so don’t be alarmed by the warmth of the butter as it progresses.
Troubleshooting common issues is part of the learning process. If your butter is too thick and won’t blend, as mentioned, a small addition of neutral oil is the solution. If your butter is too oily and runny, it might be over-processed or you may have added too much oil. In this case, you can try to reintroduce some of the processed nut or coconut solids if you have any leftover, or blend in a small amount of a drier nut or seed (like almonds for nut butter, or a small amount of tapioca starch for coconut butter in very small quantities, though this is less ideal). If the flavor is bland, it could be due to using stale nuts or coconut, or not roasting them sufficiently (if roasting was part of the process). Adjusting with salt or spices can also revive a lackluster flavor. For a bitter taste, it’s usually a sign of burning during roasting or over-processing in the appliance. Unfortunately, burnt flavors are difficult to mask completely. Prevention by monitoring roasting times and appliance usage is key. Experimentation is your best tool for refining your technique and discovering your preferred flavor profiles and textures. Embrace the process, and enjoy the rewarding experience of creating your own delicious and healthy nut and coconut butters. The versatility of these homemade spreads extends far beyond toast; they are excellent additions to energy balls, baked goods, sauces, dressings, and even as a dairy-free creamer in beverages.

