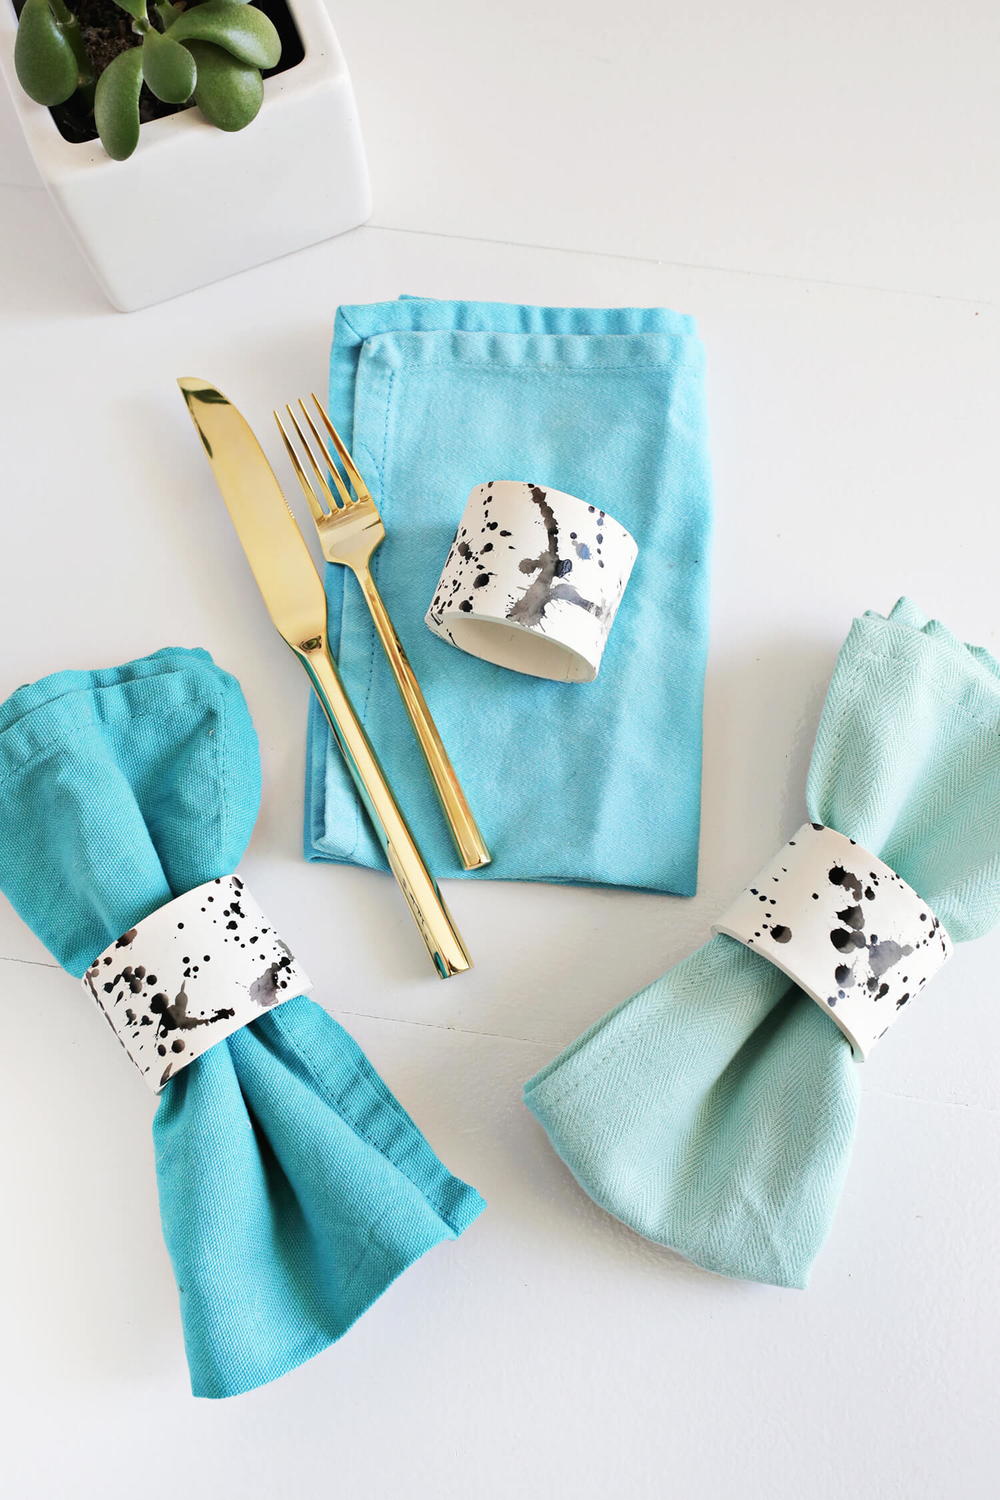
DIY Splatter Napkin Rings: A Vibrant and Customizable Table Setting Solution
This comprehensive guide details how to create unique DIY splatter napkin rings, offering a budget-friendly and highly customizable approach to elevate your table settings. We’ll cover material selection, various splatter techniques, finishing touches, and creative application ideas, all optimized for search engines to ensure you find all the inspiration and instruction you need. Whether you’re planning a casual brunch, a lively dinner party, or simply want to inject some personality into your everyday dining, splatter napkin rings are a fantastic DIY project. This article will equip you with the knowledge to craft these eye-catching accessories efficiently and effectively, ensuring your guests are impressed by your attention to detail and unique style. We’ll break down the process into manageable steps, making it accessible to crafters of all skill levels. From choosing the perfect base material to mastering the art of controlled splattering, every aspect will be thoroughly explained.
The core of any DIY napkin ring project lies in selecting the right base material. For splatter napkin rings, several options offer excellent adhesion for paint and are easily manipulated into ring shapes. Cardboard, particularly heavy-duty cardstock or chipboard, is a readily available and affordable choice. You can cut strips from cereal boxes, shipping boxes, or purchase craft chipboard from your local art supply store. Another viable option is craft wood, such as thin balsa wood or basswood, which can be cut into strips with a craft knife or a small saw. For a more sophisticated feel, consider plain wooden craft rings or even pre-made plastic napkin rings that can be painted over. When selecting a base, consider its thickness and rigidity. A material that is too flimsy might not hold its shape, while something too thick can be difficult to cut and shape into a comfortable ring size. The width of your strips will also influence the final look. Wider bands offer more surface area for splatter, while narrower ones create a more delicate effect. Aim for a width that comfortably accommodates a folded napkin without being excessively bulky. For a standard napkin, a width of 1.5 to 2 inches is generally ideal. The length will, of course, depend on the circumference of your desired napkin ring, which should be slightly larger than the folded napkin to allow for easy insertion and removal. Pre-measure your folded napkins to determine the appropriate length for your strips. Remember to consider the texture of the base material as well. A smooth surface will allow for finer paint control, while a slightly textured surface might create a more rustic or organic splatter pattern.
The "splatter" in DIY splatter napkin rings can be achieved through a variety of methods, each offering a distinct aesthetic. The most straightforward technique involves a brush and a flicking motion. Load a paintbrush (a stiff-bristled brush works best for controlled splatters) with your chosen paint. Hold the brush over your base material and gently flick the bristles with your thumb or another finger, allowing droplets of paint to fly onto the surface. Experiment with different flicking distances and pressures to vary the size and density of the splatters. For larger, more aggressive splatters, consider using a coarser brush or even a toothbrush. Another effective method for creating a more chaotic and organic splatter is to dilute your paint with water. This thins the paint, making it easier to drip and spray. You can achieve this by dipping your brush into the thinned paint and then tapping it against the edge of your paint pot or a surface, allowing the thinned paint to drip and splatter. Alternatively, you can load a slightly wet brush with paint and then hold it over the material and gently squeeze or tap the brush handle, forcing the paint out in drips. For a more dramatic effect, consider using an old toothbrush. Dip the bristles into thinned paint and then run your thumb across the bristles, directing the spray. This method produces a finer mist of paint, creating a speckled appearance. For an even more dynamic look, you can combine different brush sizes and paint consistencies. Another innovative technique involves using an empty spray bottle. Dilute your acrylic paint with water to a sprayable consistency and fill the spray bottle. Then, hold the bottle at varying distances and angles and spray the paint onto your base material. This method offers excellent control over the density and coverage of your splatters, allowing you to create subtle speckles or bold bursts of color. You can also use a stencil with the spray bottle for more controlled patterns within the splatter. For a unique, almost abstract splatter effect, consider using a straw. Dip one end of the straw into thinned paint, then hold the other end a short distance above your base material and blow through the straw. This will create fine, wispy splatters and streaks. Experiment with blowing harder or softer for different effects. The key to successful splatter application is layering. Start with lighter colors or finer splatters, and then build up with darker colors or bolder splatters. Allow each layer to dry partially before applying the next to prevent colors from bleeding together excessively.
The color palette for your splatter napkin rings is where your personal style truly shines. Acrylic paints are highly recommended due to their versatility, quick drying time, and vibrant finish. Consider the overall theme of your event or your existing tableware when selecting your color scheme. For a vibrant and energetic look, opt for a bold contrast, such as black and white with pops of bright red or turquoise. For a more subtle and sophisticated ambiance, choose a monochromatic scheme with varying shades of a single color, or a palette of complementary colors like blues and oranges. Metallic acrylic paints, such as gold, silver, or copper, can add a touch of glamour and elegance, particularly when combined with darker base colors. Neon paints are perfect for a playful and modern aesthetic. Don’t be afraid to experiment with color combinations. A good starting point is to choose a base color for your napkin ring (if you’re painting the entire base before splattering) and then select 2-3 splatter colors that complement or contrast with it. For a more cohesive look, you can use the same splatter colors that appear in your tablecloth, placemats, or even your dinnerware. If you’re aiming for a specific holiday or seasonal theme, choose colors accordingly. For instance, reds, greens, and golds for Christmas, or pastels and vibrant hues for Easter. Think about how the light will interact with the colors. Glossy paints will reflect light more, while matte finishes will absorb it. You can also combine different finishes for added depth. If you’re unsure about color combinations, look for inspiration online or in home decor magazines. Websites like Pinterest and Instagram are excellent resources for color palette ideas. Remember that the base color of your napkin ring will also influence the final appearance of the splatters. A white base will make vibrant colors pop, while a dark base will make lighter colors stand out.
To seal and protect your creations, a clear sealant is essential. This step not only adds durability but also provides a finished sheen. Mod Podge is a popular and readily available option, offering both glue and sealant properties. It comes in various finishes, including matte, satin, and gloss, allowing you to control the final sheen of your napkin rings. Apply a thin, even coat of Mod Podge over the entire splatter-painted surface. Ensure complete coverage to protect the paint from wear and tear. For a high-gloss finish, opt for Mod Podge Gloss. For a more subtle, natural look, choose Mod Podge Matte. Another excellent sealant choice is a clear acrylic spray sealant. These are convenient for covering larger batches and can provide a very uniform finish. Look for spray sealants labeled as "clear acrylic" and select a finish (matte, satin, or gloss) that suits your desired aesthetic. When using spray sealant, ensure you work in a well-ventilated area and follow the manufacturer’s instructions for application, typically involving multiple thin coats from a distance of about 10-12 inches. For added durability, especially if your napkin rings will see frequent use, consider a water-based polyurethane. This offers superior protection against moisture and abrasion. Apply it in thin coats with a foam brush, allowing each coat to dry completely before applying the next. Regardless of the sealant you choose, allow ample drying time before handling or using the napkin rings. Check the product instructions for specific drying and curing times. Proper sealing will ensure your DIY splatter napkin rings remain vibrant and beautiful for many dining occasions to come, preventing chipping, fading, and general wear.
Once your DIY splatter napkin rings are dry and sealed, it’s time to assemble them into functional rings. If you’ve cut strips of cardboard or wood, you’ll need to secure the ends to form a loop. Craft glue, such as Tacky Glue or a strong craft adhesive, works well for this. Apply a generous amount of glue to one end of the strip and firmly press it to the other end, forming a ring. You may need to hold the ends together for a minute or two until the glue begins to set. For added security, you can reinforce the seam with a small piece of masking tape on the inside of the ring while the glue dries completely. If your base material is slightly flexible, you can also use a hot glue gun, which provides a fast and strong bond. Be cautious when using a hot glue gun, as the glue can be very hot. Apply the glue to one end and quickly press the other end into place. For a neater finish, you can trim any excess glue that squeezes out. Alternatively, if you’ve used wood strips, you can use a small staple gun on the inside of the ring to secure the ends. Another popular method, especially for cardboard, is using brass brads or eyelets. Punch a small hole in each end of the strip and then secure them together with the brad. This not only creates a secure closure but also adds a decorative element. If you’re using pre-made wooden or plastic rings as your base, you might not need to assemble them into a ring shape. However, you might want to decorate the entire surface of these rings with splatters. For a more polished look, consider wrapping your assembled napkin rings with twine or ribbon. This can hide any visible seams or imperfections and add another layer of texture and color. Secure the twine or ribbon with a dab of hot glue or craft glue. You can also add embellishments like beads, small charms, or even miniature faux flowers to the assembled rings for extra flair. Ensure all added embellishments are securely attached.
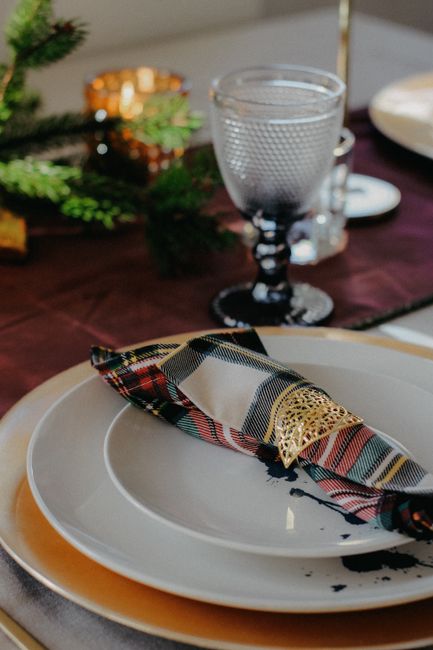
The beauty of DIY splatter napkin rings lies in their inherent versatility and adaptability to various occasions and styles. For a casual brunch or a family gathering, embrace vibrant, playful color combinations. Think sunshine yellow, sky blue, and a touch of mint green. These cheerful hues can instantly lift the mood of your table setting. For a more sophisticated dinner party, opt for a refined palette. Consider deep navy with accents of gold, or a classic black and white splatter on a metallic silver base. The controlled chaos of the splatter can add an unexpected artistic touch to an elegant setting. When hosting a holiday meal, tailor your colors to the season. For Thanksgiving, earthy tones like terracotta, burnt orange, and deep red can create a warm and inviting atmosphere. For Christmas, go with traditional reds and greens, or a more contemporary silver and icy blue. For a summer barbecue, bright and bold colors like fuchsia, electric blue, and lime green will add a fun and festive element. If you’re planning a themed party, such as a tropical luau or a retro disco, let your napkin rings reflect that theme with appropriate color choices. Don’t be limited to just one color scheme per event. You can create a set of napkin rings with varying splatter patterns and color combinations within a cohesive palette for a more dynamic and visually interesting collection. For example, within a blue and white theme, you could have rings with dense blue splatters on white, and others with sparse white splatters on blue. This adds a curated feel to your table. Consider the texture of your napkins as well. Plain linen napkins will allow the splatter pattern to be the star, while patterned napkins might benefit from a more subtle splatter design on the rings. You can even coordinate the splatter colors on your napkin rings with the colors of your placemats or table runner, creating a harmonious and cohesive look. The possibilities are truly endless, allowing you to express your creativity and personal style through these small, yet impactful, table accessories.
Elevating your table setting with DIY splatter napkin rings offers a cost-effective and highly personalized way to infuse personality into your dining experiences. The process encourages creative experimentation with color and technique, resulting in unique pieces that are a reflection of your individual style. The durability is enhanced through proper sealing, ensuring these handcrafted accents can be enjoyed for numerous occasions. By mastering the techniques outlined in this guide, from selecting the ideal base material to applying the final sealant, you can confidently create a stunning collection of splatter napkin rings that will undoubtedly impress your guests and transform ordinary meals into memorable events. The adaptability of this project means you can continuously refresh your table setting with new color palettes and splatter designs, keeping your decor dynamic and engaging. Whether you’re a seasoned crafter or a beginner looking for an accessible and rewarding DIY project, these splatter napkin rings offer a fantastic opportunity to unleash your creativity and add a vibrant, artistic touch to your home. The search terms you might use to discover this information include: "DIY napkin rings," "splatter paint crafts," "easy table decor DIY," "custom napkin holders," "crafty napkin rings," "painted napkin rings," "how to make napkin rings," "budget friendly table setting," and "personalized party decorations." This comprehensive approach ensures that anyone seeking to create these eye-catching accessories can find the detailed instructions and inspiration needed to bring their vision to life. The focus on SEO principles throughout this article ensures its discoverability for individuals actively searching for creative and practical DIY solutions for their table decor.
