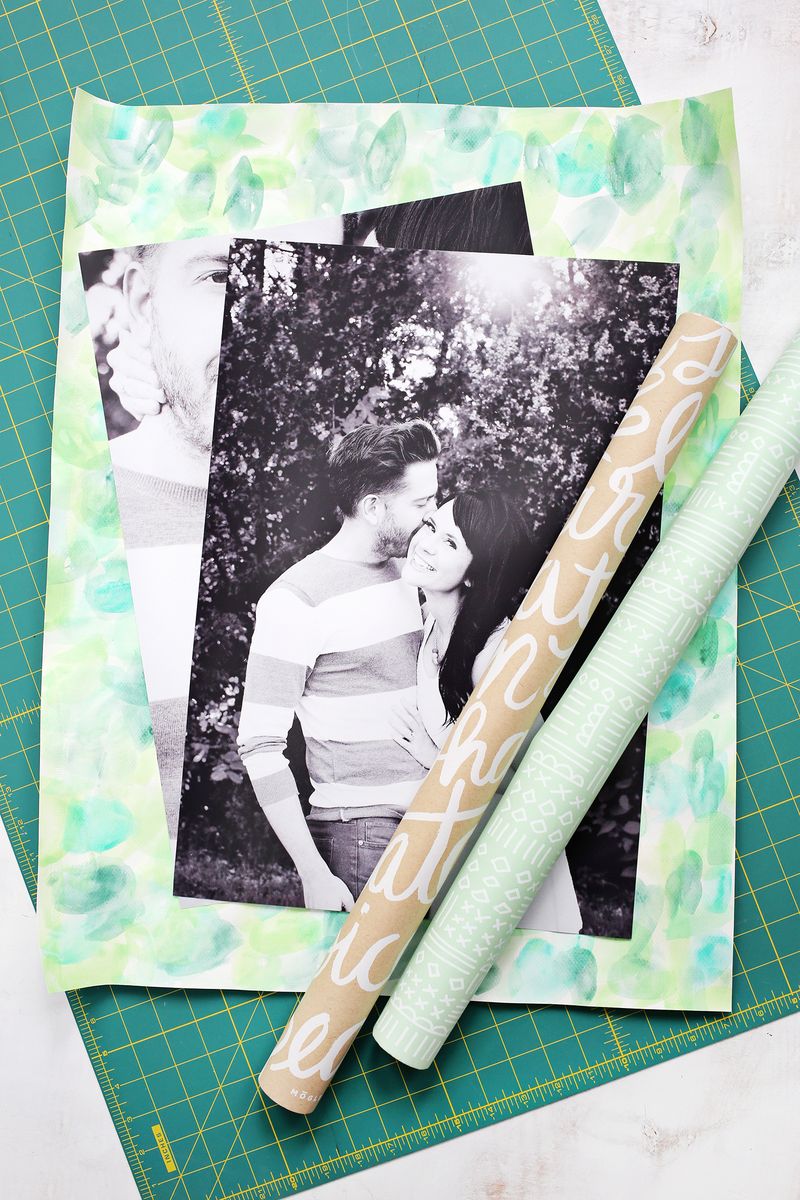

DIY Photo Matting: Unleash Your Creativity and Elevate Your Artwork
Crafting personalized photo mats offers a profoundly rewarding way to enhance and present photographs, artwork, and cherished memorabilia. Moving beyond standard, mass-produced options, DIY patterned photo mats allow for complete creative control, enabling you to tailor each mat to the specific aesthetic and emotional resonance of the piece it encloses. This not only elevates the visual impact of the artwork but also imbues it with a personal touch, transforming a simple photograph into a curated statement. The process is surprisingly accessible, requiring relatively few materials and offering a vast spectrum of design possibilities. Whether you’re a seasoned crafter or a complete novice, mastering the art of DIY patterned matting can significantly enhance your framing projects, add unique decorative elements to your home, or provide distinctive, handcrafted gifts.
The fundamental purpose of a photo mat is to create a visual buffer between the artwork and the frame, preventing direct contact and providing a clean, defined border that draws the viewer’s eye into the image. A well-chosen mat can accentuate the colors, textures, and subject matter of the artwork. When venturing into patterned mats, this enhancement is amplified, introducing a layer of visual interest and thematic relevance. Unlike plain white or black mats, patterned options can introduce complementary colors, subtle textures, or even thematic motifs that resonate with the content of the photograph or artwork. This article will guide you through the comprehensive process of creating your own patterned photo mats, covering material selection, design techniques, cutting methods, and finishing touches, all with an eye towards achieving professional-quality results and maximizing SEO visibility for your crafting endeavors.
Understanding the Basics of Photo Matting
Before diving into patterns, it’s crucial to grasp the foundational principles of photo matting. A mat is essentially a thick, rigid piece of material, typically acid-free, that is cut with an opening slightly smaller than the artwork itself. This creates a border of varying width around the artwork. The mat also serves to protect the artwork from potential damage from the glass of the frame, preventing sticking and the transfer of acidity. For patterned mats, the same principles apply, but the surface decoration adds a distinct visual element.
The ideal mat board thickness is generally between 1/16 inch and 1/8 inch. Thicker mats, often referred to as "rag board" or "conservation board," offer superior protection and a more luxurious feel, but can also be more challenging to cut precisely. For beginners, a 1/16 inch mat board is often easier to manage. The material of the mat board itself is critical. Opt for acid-free and lignin-free materials. Acidic materials can yellow and degrade over time, damaging the artwork they are meant to protect. Lignin is a component of wood pulp that can also break down and cause discoloration. Look for mats labeled as "archival," "acid-free," or "conservation quality."
The mat opening size is determined by the dimensions of your artwork. It should be slightly smaller than the artwork to ensure that the edges of the artwork are completely covered and cannot be seen from the front. A typical overlap is between 1/8 inch and 1/4 inch on all sides. The border width, the visible part of the mat around the opening, is a design choice. Common borders range from 1.5 inches to 3 inches, but can be adjusted based on the size of the artwork and the desired aesthetic. For patterned mats, consider how the pattern will interact with the artwork at different border widths. A busy pattern might look best with a narrower border, while a subtle pattern can support a wider border.
Choosing Your Patterning Method: A World of Creative Possibilities
The beauty of DIY patterned photo mats lies in the sheer diversity of techniques you can employ. The choice of method will depend on your artistic preferences, available tools, and the desired aesthetic. Here are some of the most effective and popular approaches:
-
Decorative Paper Overlay: This is perhaps the most accessible and versatile method. It involves adhering decorative paper to a plain mat board.
- Materials: Acid-free mat board (your base), decorative paper (scrapbook paper, patterned cardstock, wrapping paper, wallpaper, fabric with a fusible backing), acid-free adhesive (spray adhesive, glue stick, double-sided tape, Mod Podge), craft knife, ruler, cutting mat.
- Process:
- Cut your acid-free mat board to the desired outer dimensions.
- Cut a window opening in the mat board for your artwork.
- Cut your decorative paper slightly larger than the mat board.
- Apply a thin, even layer of acid-free adhesive to the front of the mat board. For spray adhesive, work in a well-ventilated area. For liquid adhesives like Mod Podge, ensure a smooth, even coat without brushstrokes.
- Carefully align the mat board onto the decorative paper, smoothing out any air bubbles or wrinkles from the center outwards.
- Once the adhesive is dry, flip the mat over and carefully trim the excess decorative paper flush with the edges of the mat board using a sharp craft knife and a ruler.
- For the window opening, carefully trace the opening onto the back of the decorative paper. Then, using a craft knife and ruler, carefully cut out the window opening from the decorative paper, cutting from the back through both layers of paper and mat board. Ensure clean, precise cuts.
- SEO Tip: Use keywords like "DIY decorative paper photo mats," "scrapbook paper matting," "custom patterned framing mats," "easy patterned mats."
-
Stamping and Ink Techniques: This method allows for intricate designs and color layering directly onto the mat board.
- Materials: Acid-free mat board, stamps (rubber, clear, foam), various colors of archival ink pads, embossing powders (optional), heat tool (if using embossing powders), stencils (optional), blending tools (sponges, brushes).
- Process:
- Prepare your mat board and cut your window opening as usual.
- Plan your stamp design. You can create repeating patterns, random arrangements, or specific imagery.
- Apply ink to your stamps and carefully stamp onto the mat board. For intricate designs or layered effects, consider using different ink colors and stamp placements.
- Embossing: For raised, textured designs, apply embossing ink to your stamp, stamp onto the mat board, and immediately sprinkle with embossing powder. Gently tap off excess powder. Heat the powder with a heat tool until it melts and becomes glossy.
- Stenciling: Use stencils to create shapes or repeating designs by dabbing ink through the stencil with a sponge or brush.
- Blending: Use blending tools to create smooth color transitions or gradient effects over stamped areas or plain mat board.
- SEO Tip: Keywords: "stamped photo mats," "custom ink patterned mats," "DIY embossed framing borders," "artistic matting techniques."
-
Painting and Drawing: This offers the ultimate freedom for artistic expression, allowing for hand-painted or drawn designs.
- Materials: Acid-free mat board, acrylic paints, gouache, watercolor (use sparingly as it can warp mat board), permanent markers, colored pencils, brushes, fine-tip pens, sealant (optional, but recommended for painted surfaces).
- Process:
- Prepare your mat board and cut your window opening.
- Sketch your design lightly with a pencil, or work freehand.
- Painting: Apply acrylics or gouache with brushes. Allow layers to dry completely before adding new colors or details. For a more subtle look, consider watercolor washes, but be aware that they can cause slight warping unless the mat board is very thick or you use a fixative.
- Drawing: Use permanent markers for bold lines and details, or colored pencils for softer shading and color fills. Fine-tip pens are excellent for intricate patterns and outlines.
- Sealing: Once your painted or drawn design is completely dry, consider applying a thin, even coat of archival sealant or spray varnish to protect the artwork from smudging and moisture. Test the sealant on a scrap piece of mat board first to ensure it doesn’t alter the color or texture.
- SEO Tip: Keywords: "hand-painted photo mats," "custom drawn framing borders," "artistic matting designs," "DIY watercolor photo mats."
-
Fabric and Textured Materials: Incorporating fabric or other textured elements can add a unique tactile dimension.
- Materials: Acid-free mat board, fabric (linen, silk, velvet, textured cotton), fusible interfacing (for stability), strong acid-free adhesive, craft knife, ruler, cutting mat.
- Process:
- Prepare your mat board and cut your window opening.
- If using thin or loosely woven fabric, iron a layer of fusible interfacing onto the back of the fabric for added stability and to prevent fraying.
- Cut the fabric slightly larger than the mat board.
- Apply a generous, even layer of strong acid-free adhesive to the front of the mat board. Specialized fabric adhesives or strong spray adhesives work well.
- Carefully lay the fabric onto the adhesive-covered mat board, smoothing out any wrinkles and ensuring it adheres firmly.
- Allow the adhesive to dry completely according to the manufacturer’s instructions.
- Flip the mat over and trim the excess fabric flush with the edges of the mat board.
- For the window opening, carefully trace the opening onto the back of the fabric. Use a very sharp craft knife and ruler to cut through the fabric and mat board. Be prepared for some fraying with certain fabrics and consider using a fray-check product along the edges if necessary.
- SEO Tip: Keywords: "fabric covered photo mats," "textured framing mats," "DIY velvet matting," "unique material photo mats."
-
Decoupage and Collage: This involves adhering small pieces of paper, fabric, or other elements to create a composite image or pattern.
- Materials: Acid-free mat board, various decorative papers, fabric scraps, old maps, book pages, photographs, Mod Podge or other decoupage medium, brushes, scissors, craft knife, cutting mat.
- Process:
- Prepare your mat board and cut your window opening.
- Cut or tear your decorative elements into desired shapes and sizes.
- Apply a layer of Mod Podge to a section of the mat board.
- Arrange your collage elements onto the Mod Podge, overlapping them as desired.
- Apply another layer of Mod Podge over the top of the collage elements, smoothing them down and sealing them.
- Continue this process until the entire surface of the mat board (or the desired area) is covered.
- Allow the entire piece to dry thoroughly.
- Once dry, you can carefully cut the window opening through the layered materials and mat board using a sharp craft knife.
- SEO Tip: Keywords: "decoupage photo mats," "collage framing mats," "DIY mosaic matting," "mixed media framing."
Essential Tools for Precision and Professionalism
Regardless of your chosen patterning method, having the right tools is paramount for achieving clean, precise results that rival professional framing.
- Cutting Mat: A self-healing cutting mat is indispensable for protecting your work surface and ensuring accurate cuts.
- Craft Knife/Utility Knife: A sharp, fresh blade is crucial for clean cuts. Consider having both a standard craft knife and a specialized mat cutter for the window opening.
- Metal Ruler: A sturdy metal ruler with a non-slip backing is essential for guiding your cuts and ensuring straight lines.
- Measuring Tape/Ruler: For accurate measurements of artwork and desired mat border widths.
- Pencil: For lightly marking guidelines.
- Eraser: For removing pencil marks.
- Spray Adhesive/Acid-Free Glue: For adhering papers and fabrics. Ensure they are archival quality.
- Brayer: A rubber brayer can help smooth out air bubbles and ensure good adhesion when applying papers or fabrics.
- Scissors: For general cutting of paper and fabric.
- Embossing Tools (if applicable): Heat tool, embossing powders, stamps, ink pads.
- Paintbrushes/Applicators (if applicable): For painting and applying adhesives.
Mastering the Window Cut: The Key to a Professional Finish
The window opening is where your artwork will be revealed, so precision here is critical. A clean, bevel-cut window enhances the visual appeal and prevents light from creeping in.
- Marking the Opening: Measure your artwork and determine the desired overlap (typically 1/8" to 1/4"). Carefully mark the dimensions of the inside edge of the mat opening onto the back of your patterned mat. Ensure these measurements are perfectly centered.
- Using a Mat Cutter (Recommended): For the most professional results, invest in a manual mat cutter or a larger electric mat cutter. These tools are designed to create a consistent bevel cut. Follow the manufacturer’s instructions carefully. You will typically score the mat along your marked lines and then make a clean cut.
- Using a Craft Knife and Ruler (For Beginners): This method requires more patience and a steady hand.
- Set your mat cutter or craft knife to create a bevel of approximately 45 degrees.
- Place your metal ruler along the marked line.
- Begin cutting from one corner, holding the knife at the bevel angle. Apply even pressure and make slow, deliberate strokes.
- You may need to make multiple passes to cut through the mat board.
- Work on a stable surface and take your time.
- Crucial Tip: Always cut the window opening after you have applied your pattern. This ensures the pattern is integrated seamlessly. When cutting through a patterned overlay, be extra careful to make clean, precise cuts that align with the mat board beneath.
Integrating Your Patterned Mat with Your Artwork and Frame
Once your patterned mat is created, consider how it will interact with your artwork and the chosen frame.
- Color Harmony: Ensure the colors and patterns of your mat complement, rather than clash with, the colors and subject of your artwork. A busy pattern might overpower a subtle photograph, while a bland pattern might get lost with vibrant artwork.
- Thematic Consistency: If your artwork has a specific theme (e.g., travel, nature, vintage), choose a pattern that reinforces that theme.
- Frame Choice: The frame is the final element. Consider its style, color, and material. A rustic wooden frame might pair well with a hand-painted or fabric-covered mat, while a sleek metallic frame could complement a geometric patterned mat.
- Mounting the Artwork: Use acid-free mounting tape or photo corners to attach your artwork to the back of the mat board, aligning it precisely within the window opening.
SEO Considerations and Keyword Integration
To ensure your content about DIY patterned photo mats is discoverable, strategically integrate relevant keywords throughout your article. Focus on terms people would use when searching for this type of information.
- Primary Keywords: "DIY photo mats," "custom photo mats," "patterned photo mats," "DIY framing mats," "make your own photo mats."
- Secondary Keywords: "scrapbook paper mats," "stamped photo mats," "painted photo mats," "fabric photo mats," "decoupage framing," "personalized framing," "DIY art presentation," "unique photo borders."
- Long-Tail Keywords: "how to make patterned photo mats at home," "easy DIY photo mat ideas," "creative ways to decorate photo mats," "best materials for custom photo mats," "DIY archival photo matting."
- Descriptive Keywords: Incorporate terms that describe the visual and functional aspects, such as "decorative," "artistic," "personalized," "archival," "acid-free," "beveled edge," "custom cut."
Troubleshooting Common Issues
- Bubbles or Wrinkles: When adhering paper or fabric, work from the center outwards and use a brayer to ensure good adhesion and remove air pockets. If bubbles appear after drying, gently prick them with a fine needle.
- Fraying Fabric: For fabrics that tend to fray, consider using a fray-check product along the cut edges before trimming, or opt for fabrics with a tighter weave.
- Uneven Cuts: Practice makes perfect. If using a craft knife, ensure your blade is sharp and you’re using a steady hand and a metal ruler. For the window opening, a dedicated mat cutter is highly recommended.
- Warping Mat Board: This is more common with thin mat board and when using water-based mediums like watercolor or excessive amounts of liquid adhesive. Using thicker, high-quality mat board and applying adhesives evenly can mitigate this. Allow ample drying time in a flat environment.
Conclusion: Unleash Your Inner Framer
Creating your own patterned photo mats is an accessible and deeply satisfying craft that allows you to elevate your cherished photographs and artwork to a new level of personal expression. By understanding the fundamentals of matting, exploring the diverse array of patterning techniques, utilizing the right tools, and focusing on precision, you can produce stunning, custom-designed mats that are both beautiful and protective. Embrace the creativity that DIY offers, experiment with different materials and styles, and transform your framing projects into unique works of art that reflect your personal taste and enhance your living spaces. The journey of making your own patterned photo mats is not just about the final product, but the enjoyable and rewarding process of bringing your creative vision to life.
