A frame dollhouse DIY sets the stage for a truly enchanting project, allowing you to craft a miniature world brimming with possibilities. Whether you’re a seasoned DIY enthusiast or a curious beginner, building a frame dollhouse offers a unique blend of creativity and craftsmanship.
Imagine the joy of designing and constructing a dollhouse from scratch, selecting the perfect wood, meticulously planning each room, and adding those special details that make it truly unique. From the initial design to the final finishing touches, this journey promises hours of rewarding and enjoyable work.
It’s an opportunity to unleash your inner artist and create a cherished heirloom that will be treasured for generations to come.
Frame Dollhouse DIY: A Beginner’s Guide: A Frame Dollhouse Diy
Dollhouses have been a beloved childhood toy for generations, captivating imaginations and fostering creativity. The DIY trend has further fueled this passion, allowing individuals to personalize and create unique dollhouses that reflect their style and interests. Among the various dollhouse construction methods, frame dollhouses have gained popularity due to their versatility and relative ease of construction.
Frame dollhouses offer a unique blend of customization and affordability, making them an appealing option for both seasoned crafters and beginners. Building a frame dollhouse allows you to design and construct a miniature world that reflects your personal vision. You can choose the size, shape, and style of your dollhouse, and personalize it with your favorite colors, materials, and details.
Benefits of Building a Frame Dollhouse
Frame dollhouses offer several advantages over traditional dollhouses, making them an attractive choice for DIY enthusiasts.
- Customization: Frame dollhouses allow for extensive customization. You can choose the size, shape, and style of your dollhouse, and personalize it with your favorite colors, materials, and details. This flexibility allows you to create a truly unique and personal dollhouse.
- Affordability: Frame dollhouses are generally more affordable than traditional dollhouses, as you can source materials from various sources, including thrift stores and online marketplaces. This allows you to create a beautiful dollhouse without breaking the bank.
- Ease of Construction: Frame dollhouses are relatively easy to build, even for beginners. The basic structure is simple, and the process involves assembling pre-cut pieces of wood. This makes it a manageable project for those with limited woodworking experience.
- Versatility: Frame dollhouses can be adapted to suit various themes and styles. You can create a traditional Victorian dollhouse, a modern minimalist design, or a whimsical fairy tale cottage. The possibilities are endless.
Materials and Tools

Before you dive into building your dream frame dollhouse, it’s essential to gather the necessary materials and tools. This section will guide you through the selection of materials, focusing on wood types and providing a comprehensive list of tools required for construction.
Wood Selection
The choice of wood is crucial for your frame dollhouse. It should be strong, durable, and easy to work with. Here are some popular options:
- Pine:This softwood is lightweight, affordable, and readily available. It’s easy to cut and shape, making it ideal for beginners. However, pine is susceptible to scratches and dents.
- Birch:A hardwood with a fine grain and smooth surface, birch is stronger and more resistant to scratches than pine. It’s often used for furniture making and provides a beautiful finish.
- Plywood:Made from thin layers of wood veneer glued together, plywood is strong, stable, and less prone to warping than solid wood. It’s an excellent choice for walls and floors, especially for larger dollhouses.
- MDF (Medium-Density Fiberboard):This engineered wood is made from wood fibers pressed together with resin. MDF is smooth, dense, and affordable, making it suitable for crafting intricate details and smooth surfaces. However, it can be more difficult to cut and may not be as strong as solid wood.
Building a frame dollhouse is a fun and rewarding DIY project, especially if you’re looking for a creative outlet and a way to personalize your home decor. While I’m busy crafting miniature furniture for my dollhouse, I can’t forget about the real world entertainment! Don’t miss out on catching the latest West End shows, grab your tickets now at dont miss out catch the latest west end shows now see tickets uk – I’m sure it’ll be a fantastic night out! Back to the dollhouse, I’m excited to get started on the next room, maybe a cozy library or a charming kitchen.
Tools for Construction
Having the right tools is essential for a successful dollhouse build. Here’s a list of essential tools:
- Measuring Tape:Essential for accurate measurements and planning.
- Pencil:For marking and transferring measurements.
- Saw:Choose a saw appropriate for the type of wood you’re using. A jigsaw is versatile for curved cuts, while a miter saw provides precise angle cuts.
- Screwdriver:Use a variety of screwdriver bits for different screw sizes.
- Hammer:For driving nails and securing pieces together.
- Clamps:For holding pieces securely while gluing or nailing.
- Level:To ensure walls and floors are straight.
- Sandpaper:For smoothing rough edges and surfaces.
- Glue:Choose a strong wood glue suitable for your project.
- Safety Glasses:Protect your eyes from sawdust and debris.
- Dust Mask:To prevent inhaling sawdust.
Design and Planning
Planning the design of your frame dollhouse is essential for a successful project. It ensures that your dollhouse is structurally sound, aesthetically pleasing, and meets your specific needs and preferences.
Floor Plan and Scale
A floor plan provides a visual representation of your dollhouse’s layout, including room sizes, placement of walls, doors, and windows. It helps you visualize the final product and make adjustments before you start building.
- Determining the Scale:The scale of your dollhouse refers to the ratio between the size of the dollhouse and the size of a real-life house. Common scales for frame dollhouses include 1:12, 1:24, and 1:48. Choosing the right scale depends on the size of your dolls and the space you have available for your dollhouse.
Building a frame dollhouse is such a fun DIY project, especially when you can personalize it with miniature details. I’m thinking of adding a tiny, adorable kitchen and maybe even a little bar stocked with some miniature drinks, like these key lime pie jello shots.
Of course, they’d be scaled down to dollhouse size, and maybe even made with edible glitter for extra sparkle! Now that I think about it, a miniature dessert bar would be the perfect addition to my dollhouse’s dining room.
- Creating a Floor Plan:You can create a floor plan using graph paper or specialized software. Start by measuring the dimensions of your chosen frame and then draw the Artikel of your dollhouse. Next, divide the space into rooms, considering the desired size and layout.
Building a frame dollhouse is a fun and creative project, especially for those who enjoy miniature crafting. After spending hours meticulously creating the tiny furniture and decorations, you might want to take a break and explore some easy Halloween looks! If you’re looking for inspiration, check out these 5 easy clean beauty Halloween looks for a spooky yet stylish transformation.
Once you’ve gotten your Halloween makeup fix, you can return to your dollhouse project with renewed energy and excitement.
- Adding Details:Once you have the basic layout, you can add details like doors, windows, staircases, and furniture. Remember to keep the scale in mind while adding these details.
Construction Process
Now that you have your materials and design planned out, it’s time to start building your frame dollhouse. This process will involve cutting and assembling the wood frame, creating the walls, roof, and floor. It’s a fun and rewarding experience, so let’s dive in!
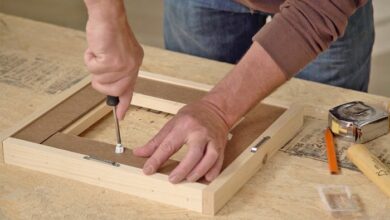
Cutting and Assembling the Wood Frame
The foundation of your dollhouse is the wood frame. It provides the structure and support for the walls, roof, and floor. This process requires precision and care, so make sure to follow these steps carefully.
- Measure and Mark:Using your design plan as a guide, measure and mark the wood pieces according to the dimensions of your dollhouse. Use a pencil or marker to make clear markings. Remember to consider the thickness of the wood when calculating the dimensions.
- Cutting the Wood:Carefully cut the wood pieces using a saw. A jigsaw or a miter saw can be helpful for making precise cuts. Make sure to wear safety glasses and gloves while cutting.
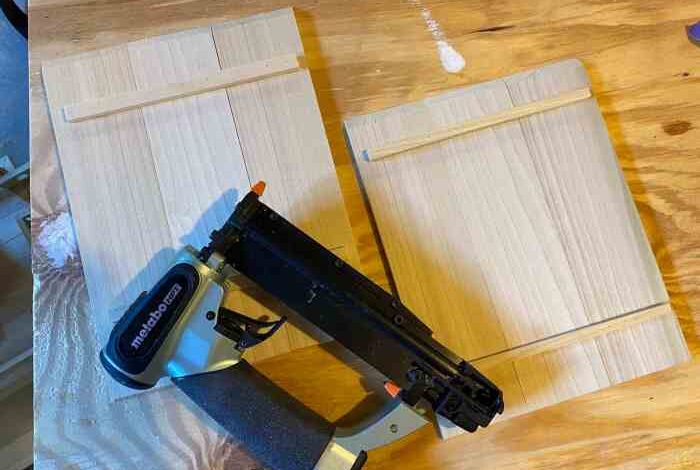
- Joining the Pieces:After cutting, you can use wood glue and nails or screws to join the pieces together. Use clamps to hold the pieces together while the glue dries. Ensure that all joints are tight and secure.
- Reinforcing the Frame:For extra stability, consider adding corner braces or support beams to the frame. These will help prevent the frame from warping or becoming unstable over time.
Adding Windows and Doors
Once the frame is complete, you can start adding the windows and doors. This step will bring your dollhouse to life and create the unique look you desire.
- Choosing Window and Door Styles:There are many different styles of windows and doors available, so choose the ones that best suit your design. You can find pre-made windows and doors at craft stores or online. Alternatively, you can create your own using cardboard or plastic sheets.
- Measuring and Cutting:Once you’ve chosen your window and door styles, measure and cut the openings in the frame. Use a saw or a router to create the openings. Ensure that the openings are the correct size for your windows and doors.
- Attaching Windows and Doors:You can attach windows and doors using glue, screws, or hinges. If you are using hinges, make sure to install them securely so that the windows and doors open and close smoothly.
Finishing Touches
The final stage of your frame dollhouse DIY project is where you bring your creation to life. This involves painting, applying finishes, and adding those unique details that make your dollhouse truly special. Let’s explore the process of adding finishing touches.
Painting and Finishing
This stage is all about bringing color and texture to your dollhouse. You can choose from a wide range of paints, stains, and varnishes to achieve the desired look.
- Choosing Paint Colors:The color palette you choose will set the tone for your dollhouse. Consider the style and theme of your dollhouse, the overall design, and the colors you want to use for furniture and accessories. For a classic look, you can opt for neutral colors like white, cream, or gray.
For a more vibrant and playful feel, you can use brighter colors like reds, yellows, blues, and greens. You can even use multiple colors to create a unique and eye-catching design.
- Applying Finishes:After painting, you can apply a finish to protect your dollhouse and enhance its appearance. Varnishes, waxes, and sealants are common finishes that add durability and a smooth, glossy, or matte finish. Choose a finish that complements the paint and provides the desired level of protection.
For example, a glossy varnish will enhance the vibrancy of the paint, while a matte varnish will create a more subtle and subdued look.
Adding Unique Touches
This is where you get to personalize your dollhouse. You can add unique touches that reflect your personal style and create a truly one-of-a-kind creation.
- Decorative Moldings:You can add decorative moldings to the walls and ceilings of your dollhouse to create a more intricate and elegant look. Moldings come in various styles, from simple and subtle to ornate and elaborate. You can find ready-made moldings at craft stores or create your own using wood strips or paper.
- Window Treatments:Adding curtains, blinds, or shutters to the windows can add a touch of realism and style to your dollhouse. You can use fabric scraps, paper, or even miniature blinds for this purpose. You can also create custom window treatments by using techniques like decoupage or painting.
- Lighting:Adding lighting to your dollhouse can create a magical and inviting atmosphere. You can use battery-powered LED lights or miniature light bulbs. Consider adding light fixtures to the ceiling, walls, or windows. For example, you can create a cozy ambiance by adding a small chandelier to the living room or a bedside lamp to the bedroom.
Safety and Maintenance
Building and enjoying your frame dollhouse is a rewarding experience, but it’s crucial to prioritize safety and proper maintenance to ensure its longevity. This section will guide you through essential safety practices and tips for keeping your dollhouse in excellent condition for years to come.
Safety Guidelines
Safety should always be paramount when working on any DIY project, and frame dollhouses are no exception. Here are some key safety guidelines to follow:
- Always wear safety goggles to protect your eyes from flying debris during cutting or sanding.
- Use a well-ventilated area when working with paints, adhesives, and other materials that may release fumes.
- Keep a fire extinguisher nearby in case of accidental fire.
- Supervise children closely when they are near tools, materials, or the finished dollhouse.
- Store sharp tools and materials securely when not in use.
Using Non-Toxic Materials, A frame dollhouse diy
The materials you choose for your frame dollhouse can significantly impact its safety, especially if children will be playing with it. It’s essential to use non-toxic materials whenever possible, particularly for surfaces that children may touch or put in their mouths.
- Paints: Opt for water-based, non-toxic paints that are specifically designed for use on children’s toys.
- Adhesives: Choose non-toxic, odorless adhesives that are safe for children. Hot glue guns are a good option for most projects.
- Wood: Ensure the wood you use is untreated and free from harmful chemicals. Plywood or MDF are popular choices for dollhouses.
Maintaining the Dollhouse
Proper maintenance is key to preserving your frame dollhouse and ensuring its long-lasting enjoyment. Here are some tips:
- Dust regularly: Dusting your dollhouse periodically will prevent the accumulation of dirt and grime, preserving its appearance and extending its life.
- Clean spills immediately: Promptly wipe up any spills or stains to prevent them from setting in and damaging the dollhouse.
- Avoid direct sunlight: Prolonged exposure to direct sunlight can fade paint and damage the materials, so place your dollhouse in a shaded area.
- Store carefully: When not in use, store your dollhouse in a dry, dust-free environment to protect it from damage.