DIY Perpetual Flip Calendar: A Timeless Display for Your Space
The perpetual flip calendar is a charming and practical desk accessory, offering a continuous display of dates without the need for replacement. Unlike traditional tear-off calendars or digital displays, a perpetual flip calendar relies on a mechanical system of flipping cards or panels to represent the day, month, and year. This DIY project allows you to craft a unique and personalized version, adapting its style and materials to your aesthetic preferences. Beyond its functionality, a handmade perpetual flip calendar adds a touch of vintage appeal and a conversation starter to any home or office. This comprehensive guide will walk you through the entire process of creating your own perpetual flip calendar, from conceptualization and material selection to assembly and finishing touches, with a strong focus on SEO best practices to ensure discoverability for those searching for "DIY perpetual calendar," "how to make a flip calendar," "perpetual desk calendar project," or "customizable date display."
Understanding Perpetual Flip Calendar Mechanics
The core principle behind a perpetual flip calendar is the sequential progression of days, months, and potentially years. Most DIY perpetual flip calendars utilize a system where individual cards or panels are designed to flip, revealing the next numerical or alphabetical sequence. Common configurations include:
- Day Wheels: Separate wheels or rotating cylinders represent the days of the week (Monday-Sunday) and the days of the month (1-31).
- Card Stacks: Multiple stacks of cards are used, with each stack representing a specific element (e.g., one stack for single digits of the day, another for tens of the day, one for the month, etc.).
- Sliding Panels: In some more complex designs, panels slide to reveal the correct date.
For a DIY project, the card stack or simple wheel mechanism is generally the most approachable. The key is to ensure a smooth flipping action and a clear display of the current date. When planning your build, consider how you will mount these elements and ensure they are easily accessible for manual adjustment. The longevity and "perpetual" nature of the calendar stem from this manual manipulation, making it an interactive and engaging piece. We will focus on a card-stack based design, as it offers the most flexibility for customization and requires less intricate woodworking or engineering than a multi-wheel system.
Material Selection for Your DIY Perpetual Flip Calendar
Choosing the right materials is crucial for both the aesthetics and functionality of your perpetual flip calendar. Consider durability, ease of working, and the overall look you aim to achieve.
For the Calendar Cards/Panels:
- Cardstock: Heavyweight cardstock (80lb or higher) is an excellent choice for its durability and ability to hold ink or paint well. It’s easy to cut and print on.
- Wood Veneer Sheets: For a more natural and rustic look, thin wood veneer sheets can be cut to size. These can be stained, painted, or left natural. They offer a unique tactile experience.
- Plastic Sheets (e.g., Acetate): Translucent or opaque plastic sheets can be used for a modern, sleek appearance. They are durable and can be easily cleaned.
- Thick Paper: While less durable than cardstock, thick, textured paper can offer a charming, vintage feel. Consider artisanal papers.
For the Calendar Structure/Base:
- Wood: Plywood, MDF, pine, or hardwood are all suitable. The choice depends on your woodworking skills and desired finish. Plywood offers good stability, while hardwoods provide a premium look.
- Metal: Sheet metal or metal rods can be used for a more industrial or minimalist design. This might require metalworking tools.
- Acrylic/Plastic: Clear or colored acrylic sheets can create a modern, floating effect. These can be cut with laser cutters or specialized saws.
- Recycled Materials: Consider repurposing sturdy cardboard boxes, old wooden crates, or even metal tins. This adds an eco-friendly and unique dimension to your "upcycled perpetual calendar."
For the Flipping Mechanism:
- Dowel Rods/Wooden Dowels: These are ideal for creating axels around which cards can be attached or for creating dividers in card stacks.
- Metal Rods/Wire: For a more industrial look, metal rods can serve the same purpose as dowels.
- Small Screws/Bolts and Nuts: These can be used to create pivot points for flipping elements.
- Binder Rings/Chicago Screws: These are excellent for binding stacks of cards together, allowing them to flip easily.
- Springs (optional): For certain designs, small springs might be incorporated to help the cards return to their position or to provide a smooth flipping action.
For Finishing and Decoration:
- Paint: Acrylic paints, spray paints, or wood stains.
- Markers/Pens: Permanent markers for writing dates and months.
- Stamps: Rubber stamps for adding decorative elements or pre-made date components.
- Mod Podge/Sealant: To protect painted or decorated surfaces.
- Sandpaper: For smoothing wood surfaces.
When sourcing materials, think about keywords like "DIY calendar parts," "craft supplies for calendars," "wood for craft projects," or "cardstock for printing."
Design and Planning Your Perpetual Flip Calendar
Before cutting, painting, or assembling, meticulous planning is essential. This stage will significantly influence the ease of construction and the final aesthetic.
Determine the Display Format:
- Day of the Week: Will you have a separate flip for Monday-Sunday?
- Day of the Month: This is the most crucial element. You’ll need to represent numbers 1-31.
- Single-digit day: A single set of cards for 0-9.
- Double-digit day: Two sets of cards: one for the tens digit (0-3) and one for the units digit (0-9). This allows for combinations like 01, 15, 28, etc.
- Month: A set of cards for January-December.
- Year (Optional): If you want a truly perpetual calendar that includes the year, you’ll need a way to represent multiple years. This can be achieved with a larger set of year cards or by designing a mechanism that allows for year updates every few years. For simplicity, many DIY versions focus on just the day and month.
Sketching Your Design:
Draw out your envisioned calendar. Consider:
- Dimensions: How large do you want your calendar to be? Will it sit on a desk, hang on a wall, or be a tabletop centerpiece?
- Card/Panel Size: The size of your flip elements will dictate the overall dimensions of your structure.
- Number of Stacks/Wheels: How many separate components will you need for your date display?
- Mounting Mechanism: How will the cards attach to the base or to each other? Will they be on dowels, held by binder rings, or attached with screws?
- Aesthetics: What style are you aiming for? Modern, rustic, vintage, minimalist? This will inform your material choices and finishing techniques.
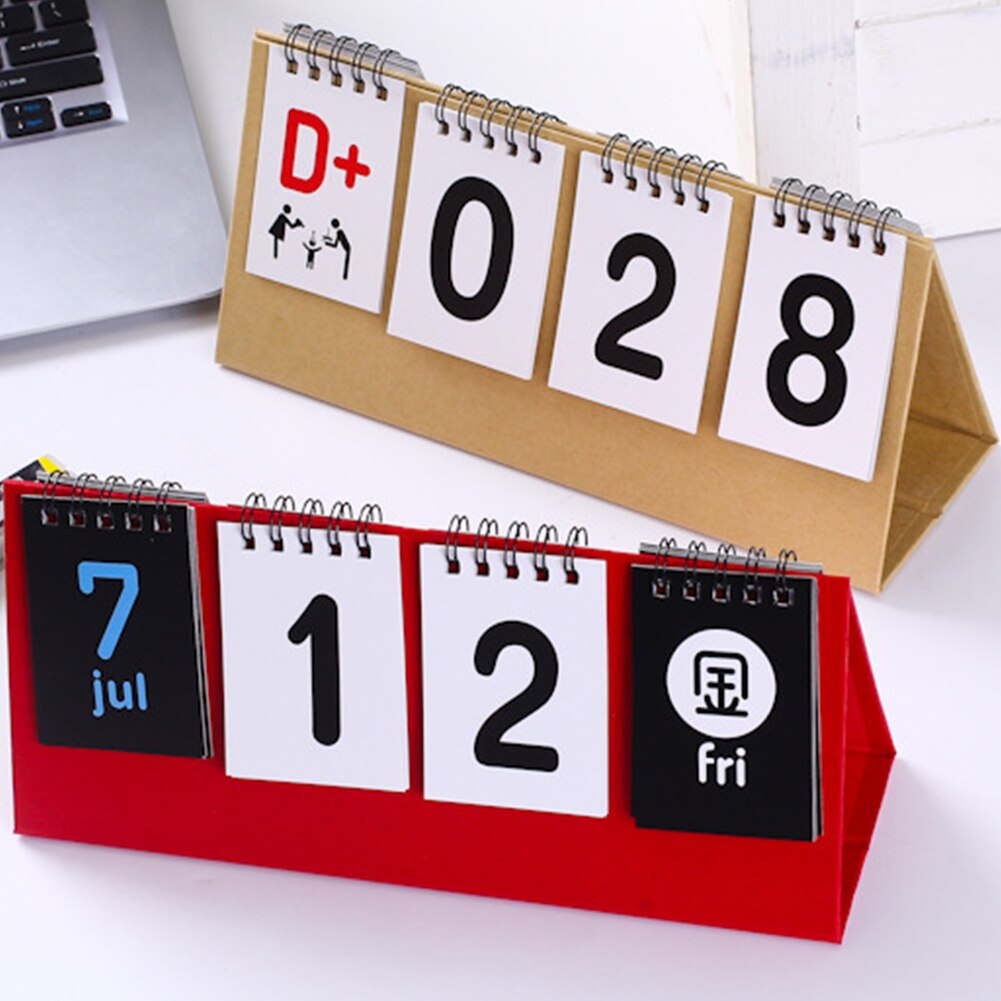
Example Design – Card Stack Method:
A common and straightforward DIY design involves using stacks of cards held together by binder rings or Chicago screws.
- Day Tens Stack: Cards with "0", "1", "2", "3".
- Day Units Stack: Cards with "0" through "9".
- Month Stack: Cards with "Jan", "Feb", "Mar", etc.
You’ll need a base structure to hold these stacks upright and allow them to be individually flipped. This could be a wooden box, a stand with slots, or a framed structure. For a truly "perpetual" feel, the day units stack will need to cycle through 0-9, and the day tens stack will advance when the units stack resets. Similarly, the month stack will advance when the day count reaches the end of the month. This requires careful consideration of how the stacks interact or are manually advanced.
When researching design elements, use terms like "perpetual calendar layout," "flip clock mechanism," or "date display ideas."
Step-by-Step Construction Guide
This guide focuses on a common card-stack based perpetual flip calendar with a wooden base.
Step 1: Prepare Your Cards/Panels
- Cut to Size: Cut your chosen material (cardstock, veneer, etc.) to the desired size for each date element. For example, if your "Day Tens" cards are 2 inches tall and 1 inch wide, cut all your "Day Tens" cards to this dimension.
- Design and Print/Write:
- Digital Design: Create your date and month designs in a graphics program (e.g., Canva, Adobe Photoshop, Illustrator). Ensure clear, legible fonts. You can create templates for easy printing. Consider different fonts for different elements to add visual interest.
- Handwritten: If you have neat handwriting, you can write the numbers and months directly onto the cards.
- Stamping: Use rubber stamps for numbers and letters for a consistent look.
- Numbering:
- Day Tens: 0, 1, 2, 3
- Day Units: 0, 1, 2, 3, 4, 5, 6, 7, 8, 9
- Month: Jan, Feb, Mar, Apr, May, Jun, Jul, Aug, Sep, Oct, Nov, Dec
- Hole Punching: Punch a hole near the top of each card. This will be used for mounting the cards onto dowels or binder rings. Ensure all holes are punched in the same location for each stack to allow for even flipping.
Step 2: Construct the Base Structure
- Cut Wood Components: Based on your design sketch, cut pieces of wood for your base. This could be a simple wooden box, a stand with upright supports, or a framed enclosure.
- Assemble the Base: Use wood glue and screws or nails to assemble the base. Ensure it is sturdy and stable.
- Create Card Mounting Points:
- For Dowels: Drill holes in the upright supports or within the base where the dowels will be inserted. The dowels will act as axles for your card stacks. Ensure the holes are slightly larger than your dowel diameter to allow for smooth rotation.
- For Binder Rings/Chicago Screws: You might simply need a stable surface to place the card stacks, or you might attach small brackets to hold the binder rings.
Step 3: Assemble the Flip Mechanisms
- Dowel Method:
- Slide your prepared cards onto the dowel rods in their respective order (e.g., Day Units cards from 0 to 9, Day Tens from 0 to 3, Months from Jan to Dec).
- Secure the dowels in the pre-drilled holes of your base structure. You can add a small dab of wood glue to the end of the dowel where it meets the base to prevent it from sliding out, but ensure the cards can still spin freely.
- Binder Ring/Chicago Screw Method:
- Group your cards into stacks (Day Tens, Day Units, Months).
- Thread binder rings or Chicago screws through the punched holes of each stack.
- Mount these stacks onto your base structure, either by placing them in slots, attaching them to stands, or securing the rings/screws to the base.
Step 4: Finishing and Decoration
- Sand Surfaces: Smooth any rough edges on your wooden components.
- Paint or Stain: Apply your chosen paint, stain, or sealant to the base structure and any visible wooden parts of the flip mechanism. Allow to dry completely.
- Decorate Cards (Optional): If you haven’t already, you can add decorative elements to your date and month cards.
- Labeling (Optional): If your design doesn’t have clear visual distinctions for each card, you might add subtle labels.
Step 5: Assembly and Testing
- Final Assembly: Ensure all components are securely in place.
- Test Flipping: Gently flip each set of cards to ensure smooth operation. Check that the numbers and months are legible when flipped. Adjust dowel tightness or binder ring tension if necessary.
- Date Setting: Manually set the calendar to the current date. This is your opportunity to ensure the progression works as intended.
When searching for assembly instructions, use terms like "how to make a wooden flip calendar," "DIY date display assembly," or "card flipping mechanism tutorial."
Advanced Features and Customization
Elevate your DIY perpetual flip calendar with these advanced ideas.
- Year Display: Incorporate a fourth stack for the year. This could be a single stack with numbers 0-9, or you might need a more complex mechanism to handle multiple digits for the year. For example, you could have a stack for the tens of the year (e.g., 20xx) and a stack for the units of the year (0-9).
- Weather Icons: Add small icons for sunny, cloudy, or rainy days to your day cards.
- Holiday Markers: Designate specific cards with small symbols or colors to indicate holidays.
- Personalized Messages: Instead of just months, create a stack of cards with personalized messages or affirmations that change daily.
- Material Fusion: Combine different materials, such as a wooden base with metal accents, or acrylic panels with wooden card edges.
- Illumination: Integrate small LED lights to illuminate the date display, adding a modern touch.
- Sound Mechanism: For a truly elaborate project, research and incorporate a simple chime or bell that rings on the hour or at specific times. This is a significant undertaking and would require advanced technical skills.
Consider searching for "custom perpetual calendar ideas," "unique date display projects," or "DIY desk organizer with calendar" to spark further inspiration.
Maintenance and Troubleshooting
A well-built perpetual flip calendar requires minimal maintenance, but occasional attention can ensure its longevity.
- Dusting: Regularly dust the calendar with a soft cloth to prevent dust buildup, especially around the flipping mechanisms.
- Lubrication (if needed): If cards start to stick, a very small amount of dry lubricant (like graphite powder) can be applied to the dowels or pivot points. Avoid oily lubricants, as they can attract dust.
- Tightening: Over time, screws or binder rings might loosen. Periodically check and tighten them as needed.
- Card Replacement: If a card becomes damaged or illegible, simply create a new one and replace it in the stack.
Common Troubleshooting:
- Sticking Cards:
- Ensure dowels are not too tight or too loose in their holes.
- Check for any obstruction or debris hindering movement.
- If using binder rings, ensure they are not bent or warped.
- Incorrect Date Progression:
- Double-check the order of your cards in each stack.
- If using a mechanical system for automatic advancement, review the gearing or linkage for any misalignment. For manual systems, ensure you are flipping the correct stacks.
- Wobbly Structure:
- Reinforce the base structure with additional screws or glue.
- Ensure dowels are firmly seated or that mounting points are secure.
When troubleshooting, use terms like "flip calendar repair," "date display not working," or "DIY calendar maintenance tips."
SEO Optimization Checklist
To maximize the reach of your DIY perpetual flip calendar article, incorporate the following SEO strategies:
- Keyword Integration: Naturally weave primary keywords like "DIY perpetual flip calendar," "how to make a flip calendar," "perpetual desk calendar project," and "customizable date display" throughout the article.
- Long-Tail Keywords: Include variations and more specific phrases like "easy perpetual calendar tutorial," "wooden flip calendar plans," "upcycled date display ideas," and "vintage desk calendar craft."
- Header Tags (H1, H2, H3): Use the main title as your H1. Subheadings like "Understanding Perpetual Flip Calendar Mechanics," "Material Selection for Your DIY Perpetual Flip Calendar," "Design and Planning," "Step-by-Step Construction Guide," "Advanced Features and Customization," and "Maintenance and Troubleshooting" should be H2s or H3s.
- Image Alt Text: If you include images, use descriptive alt text that incorporates relevant keywords (e.g., "DIY perpetual flip calendar assembly steps," "materials for making a flip calendar").
- Internal and External Linking: Link to other relevant DIY projects on your site (internal linking) and to reputable sources for materials or inspiration (external linking).
- Meta Description: Craft a compelling meta description that summarizes the article and includes primary keywords, encouraging clicks from search results.
- Readability: Use clear, concise language and short paragraphs. The structure outlined above naturally lends itself to good readability.
- User Intent: Address the user’s need for a comprehensive guide to creating a perpetual flip calendar, from understanding the concept to troubleshooting issues.
- Content Depth: Aim for a minimum word count (as specified) to demonstrate comprehensive coverage of the topic. The detailed steps, material suggestions, and customization ideas contribute to this depth.
- Unique Content: Ensure the information and advice provided are original and valuable.
- Schema Markup (Advanced): For even greater search visibility, consider implementing schema markup (e.g., for DIY projects or how-to guides).
By following this comprehensive guide and incorporating these SEO best practices, you can create a valuable resource for anyone looking to build their own perpetual flip calendar, ensuring it’s easily discoverable by a wide audience.
