25 Outdoor DIYs Tips for Plant Ladies is a comprehensive guide designed to help you transform your outdoor space into a lush, inviting oasis. Whether you’re a seasoned gardener or just starting out, these tips will empower you to create a beautiful and functional garden that reflects your personal style.
From creating a vertical garden using recycled materials to building a cozy outdoor seating area, this guide offers a variety of projects that cater to different skill levels and budgets. We’ll explore everything from choosing the right plants for your climate to nurturing your plants and adding personal touches that make your outdoor space truly unique.
Creating a Lush Outdoor Oasis
Transforming your outdoor space into a vibrant and inviting haven is a rewarding journey for any plant enthusiast. With careful planning and a touch of creativity, you can cultivate a flourishing oasis that brings joy and serenity to your home.
Essential Gardening Tools for Plant Ladies
Having the right tools is crucial for efficient and enjoyable gardening. Here are some essential tools that every plant lady should consider:
- Hand Trowel:This versatile tool is perfect for planting, transplanting, and weeding small areas.
- Gardening Gloves:Protecting your hands from thorns, dirt, and pests is essential. Choose gloves that provide a good grip and are breathable.
- Pruning Shears:These shears are ideal for trimming branches, deadheading flowers, and shaping plants.
- Watering Can:A watering can with a long spout allows for precise watering and prevents soil erosion.
- Garden Hose:For larger areas, a garden hose with a nozzle provides flexibility and control over water flow.
- Hand Rake:This tool is useful for gathering leaves, clearing debris, and leveling soil.
- Gardening Kneeler:A knee pad or kneeler provides comfort and support while working on the ground.
Designing a Visually Appealing and Functional Outdoor Space
Creating a visually appealing and functional outdoor space involves careful consideration of design principles.
- Plant Arrangement:Group plants with similar needs together, such as water requirements and sun exposure. Use a variety of heights and textures to create visual interest.
- Walkways:Plan walkways that lead visitors through the garden, providing access to different areas. Consider using materials like gravel, stepping stones, or pavers.
- Focal Points:Create focal points using statues, fountains, or large trees to draw the eye and create a sense of balance.
- Color Schemes:Choose a color scheme that complements your home and personal style. Consider using contrasting colors or shades of the same hue.
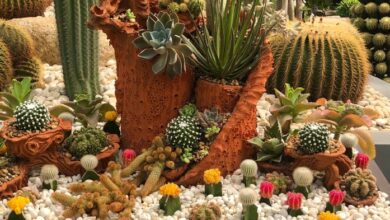
Choosing the Right Plants for Your Climate and Location
Selecting the right plants for your climate and location is essential for their success.
I’m always looking for ways to make my outdoor space more beautiful and inviting, and I recently came across a fantastic resource for plant ladies like me: 25 outdoor DIY tips! It’s packed with creative ideas for everything from building a raised bed to creating a stunning vertical garden.
If you’re looking for inspiration, check out at home with rachel denbow – her blog is full of amazing DIY projects and gardening tips that will help you transform your outdoor space into a green oasis. With these tips and a little bit of creativity, you can easily create a beautiful and functional outdoor space that you’ll love spending time in.
- Sunlight:Determine the amount of sunlight your garden receives throughout the day. Choose plants that thrive in the specific light conditions of your space.
- Soil Type:Test your soil to determine its pH level and nutrient content. Select plants that are well-suited to your soil type.
- Water Availability:Consider the amount of water available in your area and choose plants that have appropriate water requirements.
- Hardiness Zones:Research the hardiness zones for your location and select plants that can withstand the climate.
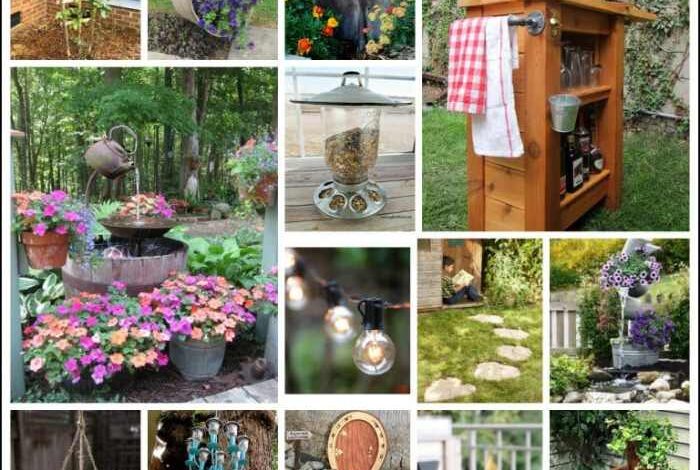
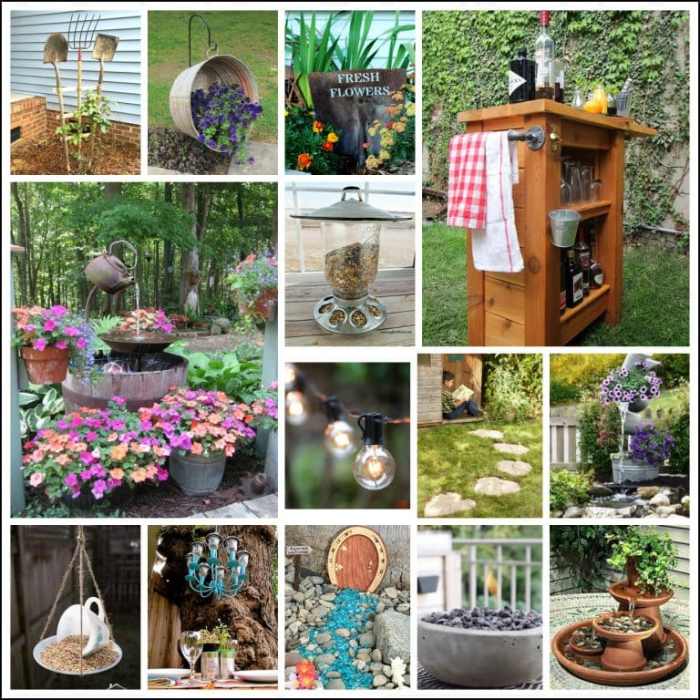
DIY Garden Projects for Plant Lovers

For the plant enthusiast who loves getting their hands dirty, DIY garden projects offer a wonderful way to personalize your outdoor space and cultivate a thriving haven for your beloved greenery. Whether you’re looking to add vertical interest, create a dedicated growing area, or provide support for climbing vines, these projects are sure to spark your creativity and enhance your gardening experience.
I’m always on the lookout for new and creative ways to spruce up my outdoor space, and that’s why I was so excited to discover the amazing gardening ideas featured in “at home with amber freidel in geneva illinois” at home with amber freidel in geneva illinois.
Her unique approach to container gardening and vertical planting has inspired me to try some of her DIY projects, and I can’t wait to share my results with you all in my upcoming “25 Outdoor DIY Tips for Plant Ladies” post!
Designing a Vertical Garden with Recycled Materials
Vertical gardens are a space-saving and visually stunning way to grow plants in limited areas. They also provide a unique opportunity to repurpose and upcycle materials, contributing to a sustainable gardening practice.Vertical gardens offer several benefits, including:
- Space Optimization:Vertical gardens maximize vertical space, allowing you to grow more plants in a smaller footprint. This is especially beneficial for small balconies, patios, or even indoor spaces with limited floor area.
- Aesthetic Appeal:Vertical gardens create a dynamic and visually appealing element in your outdoor space. The cascading greenery adds texture and color, creating a sense of life and vibrancy.
- Environmental Benefits:By using recycled materials, you’re reducing waste and contributing to a more sustainable approach to gardening. Additionally, vertical gardens can help regulate microclimates by providing shade and promoting air circulation.
Here’s a step-by-step guide to creating a vertical garden using recycled materials:
- Choose your materials:The possibilities for recycled materials are endless! Some popular choices include:
- Pallet boards:These are readily available and can be easily repurposed into vertical garden panels.
- Plastic bottles:Cut the bottom off plastic bottles and use them as individual planters.
- Metal sheets:Perforate metal sheets to create drainage holes and use them as a base for your vertical garden.
- Old window frames:Use old window frames as a structure for your vertical garden, adding a rustic charm.
- Prepare your materials:Clean and prepare your chosen materials to ensure they are free of dirt, debris, and any harmful substances. For wood, consider treating it with a sealant or stain to protect it from the elements.
- Create a drainage system:Ensure proper drainage to prevent waterlogging. You can use a layer of gravel or drainage holes in your containers to allow excess water to escape.
- Fill with potting mix:Fill your containers with a well-draining potting mix suitable for your chosen plants.
- Plant your seedlings:Carefully plant your seedlings in the containers, ensuring they have enough space to grow. Consider the size and mature height of your plants when spacing them.
- Water regularly:Water your vertical garden regularly, checking the moisture level of the soil. The frequency of watering will depend on the climate, plant type, and container size.
Building a Raised Garden Bed
Raised garden beds provide a controlled environment for growing vegetables, herbs, and flowers. They offer several advantages over traditional in-ground gardening, including:
- Improved Drainage:Raised beds allow for better drainage, preventing waterlogging and promoting healthy root development.
- Enhanced Soil Quality:You can create a custom soil mix tailored to the specific needs of your plants, ensuring optimal growing conditions.
- Pest and Weed Control:Raised beds make it easier to manage pests and weeds, as they create a barrier between your plants and the surrounding soil.
- Accessibility:Raised beds are easier to access, making gardening more comfortable for people with mobility issues.
Here’s a step-by-step guide to building a raised garden bed:
- Determine the size and shape:Consider the space available, the types of plants you want to grow, and your personal preferences when determining the size and shape of your raised bed.
- Choose your materials:Common materials for raised beds include:
- Wood:Cedar, redwood, and pressure-treated lumber are durable and weather-resistant options.
- Stone:Natural stone or concrete blocks provide a sturdy and long-lasting structure.
- Metal:Corrugated metal or steel can be used to create a modern and industrial look.
- Cut and assemble the frame:Cut your chosen materials to the desired dimensions and assemble the frame using screws, nails, or other fasteners. Ensure the frame is level and sturdy.
- Line the bed with landscape fabric:This will prevent weeds from growing through the bottom of the bed. Secure the fabric to the inside of the frame.
- Fill with soil:Fill the bed with a well-draining potting mix or a custom soil blend suited for your plants. You can add amendments like compost, fertilizer, or peat moss to improve the soil quality.
- Plant your seedlings:Once the soil is ready, carefully plant your seedlings or seeds, spacing them according to their specific needs.
Constructing a Simple DIY Trellis
Trellises provide vertical support for climbing plants, allowing them to grow upwards and create a beautiful and lush display. They can be constructed using a variety of materials and designs, adding a decorative element to your garden.
- Types of Trellises:Trellises come in various styles, including:
- Arbor:A freestanding structure with a lattice design, often used to create a shaded walkway or seating area.
- Obelisk:A tall, pointed structure that provides support for climbing plants that grow upwards.
- Espalier:A flat, vertical structure that trains plants to grow in a two-dimensional pattern, creating a unique and decorative display.
- Materials for Trellises:Common materials for constructing trellises include:
- Wood:Cedar, redwood, and pressure-treated lumber are durable and weather-resistant options.
- Metal:Steel or wrought iron can be used to create a more modern and industrial look.
- Bamboo:Natural bamboo poles can be used to create a rustic and eco-friendly trellis.
Here’s a simple guide to constructing a basic DIY trellis:
- Gather your materials:You will need four wooden stakes, a piece of lattice, and screws or nails. Choose stakes that are tall enough to support your climbing plants.
- Assemble the frame:Drive the stakes into the ground, creating a square or rectangular shape. Ensure the stakes are spaced evenly and firmly planted.
- Attach the lattice:Secure the lattice to the stakes using screws or nails, ensuring it is attached tightly and securely.
- Plant your climbing plants:Once the trellis is assembled, plant your climbing plants near the base of the trellis, allowing them to grow up the structure.
Enhancing Your Outdoor Space
Transforming your outdoor space into a lush oasis doesn’t require a massive budget or a complete overhaul. With a little creativity and resourcefulness, you can create a haven that reflects your personal style and brings you joy.
My latest obsession is creating a beautiful outdoor space, and I’ve been devouring DIY tips for plant ladies! From building raised beds to crafting whimsical garden art, the possibilities are endless. It’s all about bringing nature’s bounty closer, just like the renowned chefs who source local Irish produce for their authentic Thai dishes, creating culinary masterpieces.
With my own little green haven, I can grow fresh herbs and vegetables, just like those chefs, and bring a taste of the outdoors into my home.
Upcycling Materials for Unique Outdoor Furniture, 25 outdoor diys tips for plant ladies
Upcycling salvaged materials is a fantastic way to create unique and eco-friendly outdoor furniture.
- Repurposed Pallets:Pallets can be easily transformed into stylish benches, coffee tables, or even vertical gardens. Simply sand down the wood, paint it in your desired color, and add cushions for comfort.
- Old Doors:An old door can be hung horizontally on a wall, creating a unique backdrop for a cozy seating area.
You can also use it as a base for a table or a bench.
- Vintage Trunks:Vintage trunks add a touch of rustic charm and can be used as unique planters or side tables.
- Metal Pipes:Metal pipes can be used to create sturdy and modern-looking benches, chairs, or even planters.
Nurturing Your Plants

A thriving garden starts with understanding the unique needs of your plants. From watering to fertilization, there are key practices that ensure your outdoor oasis flourishes. Let’s explore how to provide the best care for your green companions.
Watering Techniques
Watering is a crucial aspect of plant care. The frequency and amount of water your plants need depend on factors like plant type, soil type, and climate. Overwatering can lead to root rot, while underwatering can cause wilting and stress.
- Water deeply and infrequently: Instead of frequent shallow watering, aim for deep watering that reaches the roots. This encourages deeper root growth and reduces the frequency of watering. A good rule of thumb is to water deeply once or twice a week, depending on the plant’s needs and weather conditions.
- Check soil moisture: Before watering, feel the soil with your finger. If the top inch of soil is dry, it’s time to water. If it’s still moist, wait a few days.
- Water in the morning: Watering in the morning allows the water to soak into the soil before the sun gets too hot. This minimizes evaporation and allows the plants to absorb water effectively.
- Use a watering can or hose: Watering cans are ideal for smaller plants, while hoses are useful for larger areas. Avoid using sprinklers, as they can lead to overwatering and fungal diseases.
Fertilizing Practices
Fertilizers provide essential nutrients for plant growth. However, over-fertilizing can be detrimental. Choose fertilizers specifically formulated for your plant type and follow the instructions carefully.
- Understand plant needs: Different plants have varying nutrient requirements. For example, flowering plants need more phosphorus for bloom production, while leafy greens require more nitrogen for foliage growth.
- Choose organic fertilizers: Organic fertilizers, such as compost, manure, and fish emulsion, are slow-release and beneficial to soil health. They provide a steady supply of nutrients and improve soil structure.
- Fertilize during the growing season: Most plants require fertilization during their active growing season, typically spring and summer. However, it’s important to check the specific needs of your plants.
- Avoid over-fertilizing: Too much fertilizer can burn roots and harm your plants. Always follow the recommended application rates and avoid fertilizing during hot or dry weather.
Common Plant Diseases and Pests
Knowing the common plant diseases and pests in your area is essential for early detection and prevention. Early identification and prompt action can prevent widespread damage.
- Identify the problem: Observe your plants closely for signs of disease or pest infestation. Look for discoloration, wilting, holes in leaves, or unusual growths.
- Natural remedies: Before resorting to chemical pesticides, try natural remedies. For example, neem oil can control various pests, while baking soda and water can treat fungal diseases.
- Preventative measures: Practicing good sanitation, such as removing diseased plants and debris, can help prevent the spread of diseases. Regularly inspecting plants and using preventative measures can minimize pest infestations.
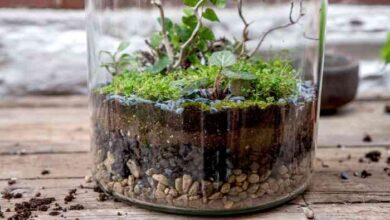
Propagating Plants
Propagating plants is a rewarding and cost-effective way to expand your garden. You can create new plants from cuttings, seeds, or divisions.
- Cuttings: Take cuttings from healthy stems or leaves and place them in a rooting medium, such as water or soil. Once roots develop, you can transplant them into individual pots or the garden.
- Seeds: Sow seeds in a seed starting tray or directly in the garden. Ensure the soil is moist and provide the appropriate light and temperature conditions for germination.
- Divisions: Some plants, like perennials, can be divided to create new plants. Carefully separate the roots and replant them in new locations.
Adding Personal Touches: 25 Outdoor Diys Tips For Plant Ladies
Your outdoor space is a reflection of your personality, so don’t be afraid to add your own unique touches. Whether it’s a whimsical sculpture, a soothing wind chime, or a cozy seating area, these personal details will make your garden feel truly yours.Adding personal touches to your outdoor space can transform it from a simple green area to a captivating haven that reflects your style and preferences.
It’s about incorporating elements that bring you joy, create a sense of peace, and enhance the overall ambiance of your garden.
Incorporating Decorative Elements
Decorative elements can add a touch of whimsy and personality to your outdoor space. Think beyond the usual garden ornaments and explore unique options like sculptures, wind chimes, or birdhouses. These elements can create focal points, add visual interest, and attract wildlife.Here are some ideas for incorporating decorative elements:
- Sculptures:A sculpture can be a striking focal point in your garden. Choose a sculpture that reflects your style, whether it’s a modern abstract piece, a whimsical animal, or a classic statue. Consider the size and placement of the sculpture to ensure it complements your garden’s design.
- Wind Chimes:Wind chimes add a soothing element to your garden. They create a gentle, melodic sound as the wind blows through them, promoting a sense of peace and tranquility. You can choose from various materials like metal, bamboo, or glass, each with a distinct sound and aesthetic.
- Birdhouses:Birdhouses not only attract birds to your garden but also add a charming touch. Choose birdhouses that complement your garden’s style and provide suitable nesting sites for different bird species. Remember to place them in a safe and accessible location.
Using Recycled Materials for Plant Markers
Recycled materials offer a sustainable and creative way to create unique plant markers. Not only are they environmentally friendly, but they also allow you to express your personal style.Here are some ideas for using recycled materials for plant markers:
- Ceramic Tiles:Use broken ceramic tiles to create unique and durable plant markers. You can paint them with plant names, decorative designs, or even use decoupage techniques to add a personalized touch.
- Wine Corks:Wine corks are an excellent option for creating rustic plant markers. Simply insert a toothpick or skewer into the cork and write the plant name with a permanent marker.
- Metal Cans:Clean and decorate empty metal cans to create sturdy plant markers. You can paint them, wrap them with twine, or even add embellishments like buttons or beads.
Creating a Cozy Outdoor Seating Area
A cozy outdoor seating area is an inviting space to relax and enjoy your garden. It’s an opportunity to create a personal sanctuary where you can unwind and connect with nature. Here’s a step-by-step guide for building a cozy outdoor seating area:
- Choose a Location:Select a spot in your garden that receives ample shade or sunlight, depending on your preference. Consider the view from the seating area and ensure it’s a peaceful and private location.
- Decide on Seating:Choose comfortable seating options like chairs, a bench, or even a hammock. Consider the size of your seating area and the number of people you want to accommodate.
- Add Cushions and Throws:Cushions and throws add a touch of warmth and comfort to your outdoor seating area. Choose colors and patterns that complement your garden’s aesthetic and reflect your personal style.
- Incorporate Lighting:Add ambient lighting to create a cozy atmosphere. String lights, lanterns, or solar-powered lights can add a magical touch to your seating area, extending your enjoyment into the evening hours.