Gift idea a simple diy scarf – Gift Idea: A Simple DIY Scarf – Imagine the warmth and joy of gifting a handmade scarf, crafted with love and care. A DIY scarf is more than just a piece of fabric; it’s a tangible expression of your thoughtfulness, a unique and personal gift that shows you put extra effort into making something special for the recipient.
This guide will walk you through the process of creating a simple DIY scarf, from choosing the perfect yarn to adding finishing touches. Whether you prefer knitting or crocheting, we’ll cover the basic techniques and provide tips for personalizing your creation.
The Thoughtful Gift of a DIY Scarf
A handmade scarf is a wonderful gift that demonstrates your thoughtfulness and care. Not only is it a practical item that can be worn year-round, but it also holds a unique charm that a store-bought scarf simply cannot replicate.
The personal touch you add to a DIY scarf makes it truly special and shows the recipient that you put time and effort into creating something just for them.
A simple DIY scarf is a great way to show someone you care, especially if you’re looking for a thoughtful and personal gift. It’s also a fun project to do while listening to a podcast, like at work with amber vander vliet , which is all about the challenges and triumphs of working women.
The warmth of the scarf will be a constant reminder of your love and care, just like Amber’s inspiring stories will remind you of your own strength and resilience.
Why a DIY Scarf Makes a Great Gift, Gift idea a simple diy scarf
A DIY scarf offers a multitude of benefits that make it an excellent choice for a thoughtful gift. Here are some reasons why:
- Personalization:You can customize the scarf to the recipient’s preferences, choosing their favorite colors, patterns, and textures. This allows you to create a truly unique and meaningful gift that reflects their personality.
- Uniqueness:No two handmade scarves are exactly alike. This makes your gift extra special and memorable. The recipient will appreciate the fact that you took the time to create something one-of-a-kind just for them.
- Thoughtfulness:A DIY scarf shows that you put effort and care into creating something for the recipient. It’s a gift that comes from the heart and will be cherished for years to come.
- Skill Demonstration:If you are a skilled knitter or crocheter, making a scarf allows you to showcase your talents and creativity. It’s a great way to share your passion with others.
- Cost-Effective:You can often create a beautiful and high-quality scarf for less than what you would pay for a similar one in a store. This makes it a budget-friendly gift option.
Choosing the Right Yarn

Selecting the right yarn is crucial for creating a scarf that feels good, looks great, and lasts. The type of yarn you choose will affect the scarf’s warmth, texture, and care requirements. Let’s explore some popular yarn types and their characteristics.
Wool
Wool is a natural fiber known for its warmth and breathability. It’s a good choice for scarves worn in cold weather because it can trap heat effectively. Wool also has a luxurious feel and can be found in a wide range of colors and textures.
However, wool can be itchy for some people, and it requires special care. Wool shrinks when washed in hot water, so it’s best to hand-wash it or use a gentle cycle in a washing machine.
Cotton
Cotton is another natural fiber that’s soft and breathable. It’s a good choice for scarves worn in warmer weather or for people with sensitive skin. Cotton is easy to care for and can be machine-washed and dried. However, cotton isn’t as warm as wool, and it can be prone to wrinkles.
Acrylic
Acrylic is a synthetic fiber that’s soft, affordable, and easy to care for. It’s a good choice for beginners because it’s less likely to snag or break. Acrylic is also machine-washable and dryer-safe. However, acrylic isn’t as warm as wool or as breathable as cotton.
It can also be prone to pilling, which is the formation of small balls of fibers on the surface of the fabric.
Yarn Weights
Yarn weights refer to the thickness of the yarn. The thicker the yarn, the heavier the fabric will be. Different yarn weights are suitable for different scarf styles. For example, a bulky yarn weight is ideal for a thick, cozy scarf, while a fine yarn weight is better for a delicate, lightweight scarf.
- Super Fine (Lace):This is the thinnest yarn weight and is often used for intricate lace patterns or lightweight scarves.
- Fine (Sock):This yarn weight is suitable for socks, but also for lightweight scarves with intricate details.
- Light (Sport):This yarn weight is good for summer scarves, lightweight shawls, or garments.
- Medium (DK):This yarn weight is versatile and can be used for a wide range of projects, including scarves, hats, and blankets.
- Bulky (Aran):This yarn weight is ideal for chunky scarves, hats, and sweaters.
- Super Bulky (Chunky):This is the thickest yarn weight and is used for very thick and cozy scarves, blankets, and other projects.
When choosing a yarn weight for your scarf, consider the style you’re going for and the season you plan to wear it in. For a warm winter scarf, a bulky or super bulky yarn weight is a good choice.
For a lightweight summer scarf, a light or medium yarn weight is more appropriate.
Scarf Knitting Techniques
Knitting a scarf is a great way to learn the basics of knitting and create a warm and cozy accessory. While there are many different techniques and patterns, the fundamental skills involved are relatively simple to master. This section will guide you through the essential knitting techniques needed to create a simple scarf.
Basic Knitting Stitches
Knitting involves two basic stitches: knit and purl. These stitches form the foundation for all knitting patterns.
- Knit Stitch:The knit stitch is the most basic stitch in knitting. It creates a vertical line on the fabric, forming the characteristic “V” shape of knit fabric. To knit a stitch, insert the right needle into the first stitch on the left needle from front to back, wrap the yarn around the right needle, and pull the yarn through the stitch on the left needle.
- Purl Stitch:The purl stitch creates a horizontal line on the fabric, forming a “bump” on the right side of the fabric. To purl a stitch, insert the right needle into the first stitch on the left needle from back to front, wrap the yarn around the right needle, and pull the yarn through the stitch on the left needle.
Casting On
Casting on is the process of creating the initial stitches on the needle to begin knitting. This creates the foundation for your scarf.
A simple DIY scarf makes a thoughtful and personal gift, especially if you know the recipient’s favorite colors or patterns. It’s a great way to show you care, and it’s something they can use all winter long. If you’re hosting a New Year’s Eve party, consider setting up a DIY wine bar with chilled wines and a stylish ice bucket, like the one you can find on this website.
It’s a fun way to get your guests involved and add a touch of elegance to your celebration. And while you’re at it, maybe even include a few DIY scarves as party favors for your guests to take home!
- Slip Knot:The slip knot is the first stitch you create on the needle. It forms a loop on the needle, ready for the first stitch. To make a slip knot, wrap the yarn around your finger, forming a loop. Bring the yarn over the loop, and pull it through the loop on your finger, creating a knot on the needle.
- Long-Tail Cast On:The long-tail cast on is a simple and versatile method for casting on stitches. It involves creating a tail of yarn on the needle and then creating loops using the tail and the working yarn. This method allows for a stretchy and even edge.
Binding Off
Binding off is the process of finishing the knitted piece by removing the stitches from the needle. This secures the stitches and creates a clean edge.
- Basic Bind Off:The basic bind off is the most common method for finishing a knitted piece. It involves knitting two stitches together and then slipping the first stitch off the left needle. This creates a secure edge that prevents the stitches from unraveling.
Knitting a Simple Scarf
Knitting a simple scarf is a great way to practice your basic knitting skills. Here’s a step-by-step guide:
- Cast On:Cast on the desired number of stitches for the width of your scarf. A typical width for a scarf is 60-80 stitches.
- Knit Rows:Knit every row until the scarf reaches the desired length. You can choose a simple stitch pattern, such as the garter stitch (knitting every row) or the stockinette stitch (knit one row, purl the next).
- Bind Off:When the scarf reaches the desired length, bind off the stitches to secure the edge.
Scarf Crocheting Techniques
Crocheting a scarf is a fun and rewarding project that can be easily learned with a little practice. The basic stitches are easy to master, and the repetitive nature of the work can be very relaxing.
Sometimes the simplest gifts are the most thoughtful. A hand-knitted scarf is a classic example, but if you’re looking for something a bit more unique, why not try making a cozy cat bed? It’s surprisingly easy and you can personalize it with your cat’s favorite colors and textures.
If you’re feeling ambitious, you can even learn to knit a cat bed from scratch, using a pattern like this one: make your own knit cat bed. Once you’ve mastered the cat bed, you can return to your scarf project with renewed confidence, knowing you’ve tackled a truly unique and rewarding DIY project!
Basic Crocheting Stitches
The most common crochet stitches used for scarves are the single crochet (sc) and the double crochet (dc). Understanding these two stitches will allow you to create a wide variety of scarf patterns.
Single Crochet (sc)
The single crochet stitch is the most basic stitch in crocheting. It is created by inserting the hook into the next stitch, yarn over, and pulling through both loops on the hook.
The single crochet stitch is often used to create a dense, tightly knit fabric.
Double Crochet (dc)
The double crochet stitch is a taller stitch than the single crochet. It is created by inserting the hook into the next stitch, yarn over, pull through a loop, yarn over, and pull through both loops on the hook.
The double crochet stitch creates a looser, airier fabric than the single crochet.
Chain and Foundation Row
Before you can begin crocheting your scarf, you need to create a chain of stitches to form the foundation row. The foundation row will determine the length and width of your scarf.
- To create a chain, hold the hook in your dominant hand and wrap the yarn around your finger, creating a loop.
- Insert the hook through the loop, yarn over, and pull through the loop to create the first chain stitch.
- Repeat this process until you have the desired number of chain stitches for your foundation row.
The number of chain stitches in the foundation row will determine the width of your scarf.
Crocheting a Simple Scarf
Once you have created your foundation row, you can begin crocheting your scarf using a simple stitch pattern. The most basic scarf pattern is the single crochet stitch, but you can also use the double crochet stitch or a combination of both.
- To crochet a simple scarf using the single crochet stitch, work a single crochet stitch into the second chain from the hook.
- Continue working a single crochet stitch into each chain stitch across the row.
- Turn the work, and chain one stitch.
- Repeat steps 2 and 3 until your scarf reaches the desired length.
You can add more complex stitch patterns to your scarf by alternating single crochet and double crochet stitches, or by using different stitch combinations.
Adding Personal Touches: Gift Idea A Simple Diy Scarf
A simple DIY scarf is a thoughtful gift, but adding a personal touch can make it truly special. Think about the recipient’s style and interests, and incorporate these elements into your design. You can add embellishments, incorporate color variations and patterns, or introduce unique design elements to create a one-of-a-kind scarf.
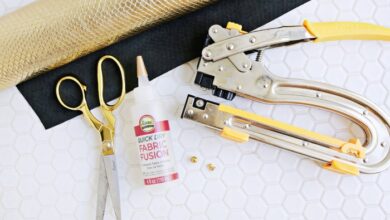
Embellishments
Adding embellishments is a great way to personalize a scarf. You can use a variety of materials, such as buttons, beads, or fringe. Consider the recipient’s style and the overall look of the scarf when choosing embellishments.
- Buttons: Buttons come in a wide variety of colors, sizes, and materials, making them a versatile embellishment option. You can use buttons to create a unique design on the scarf’s edges, or add a single button as a focal point.
For example, a vintage button can add a touch of nostalgia, while a large, statement button can create a bold look.
- Beads: Beads can add a touch of sparkle and elegance to a scarf. They come in a variety of materials, colors, and shapes, so you can choose beads that complement the scarf’s overall design. You can string beads onto the scarf’s edges or create a bead pattern throughout the scarf.
For example, a strand of silver beads can add a touch of glamour, while colorful wooden beads can create a more bohemian look.
- Fringe: Fringe is a classic embellishment that can add texture and movement to a scarf. It can be made from a variety of materials, such as yarn, leather, or fabric. You can add fringe to the scarf’s edges or create a fringe pattern throughout the scarf.
For example, a long fringe can add a dramatic look, while a short fringe can create a more subtle effect.
Color Variations and Patterns
Color variations and patterns can add visual interest to a scarf. Consider the recipient’s style and the overall look of the scarf when choosing colors and patterns.
- Color Blocking: Color blocking is a technique that uses different colors of yarn to create a geometric pattern. This technique can be used to create a bold and modern look. For example, you can use two or three colors of yarn to create stripes, or you can use a variety of colors to create a more complex design.
- Ombre: Ombre is a technique that uses a gradual transition of colors to create a soft and subtle look. You can create an ombre effect by using different shades of the same color, or you can use two or three different colors that blend together seamlessly.
- Fair Isle: Fair Isle is a traditional knitting technique that uses two or more colors to create intricate patterns. This technique can be used to create a sophisticated and timeless look. Fair Isle patterns can be simple or complex, depending on your skill level.
Unique Design Elements
You can add unique design elements to your scarf to make it stand out. Consider the recipient’s style and the overall look of the scarf when choosing design elements.
- Intarsia: Intarsia is a knitting technique that uses different colors of yarn to create images or designs within the fabric of the scarf. This technique can be used to create a personalized scarf with a special message or image.
- Lacework: Lacework is a delicate and intricate knitting technique that can be used to create a romantic and feminine look. You can use lacework to create a border on the scarf or to create a pattern throughout the scarf.
- Cable Knitting: Cable knitting is a technique that creates raised patterns by twisting the yarn. This technique can be used to create a textured and sophisticated look.
Finishing Touches
You’ve put in the time and effort to knit or crochet your scarf, and now it’s time to give it that final, professional touch. Blocking and finishing your scarf not only enhances its appearance but also ensures its durability and longevity.
Blocking
Blocking is the process of shaping and setting your knitted or crocheted scarf to its final size and shape. It helps to even out the stitches, remove any irregularities, and create a smooth, polished look.
- Wet Blocking:This method involves soaking the scarf in lukewarm water with a mild detergent, then laying it flat on a blocking mat or towel to dry. The weight of the water helps to stretch and reshape the fabric. It’s best suited for natural fibers like wool and cotton.
- Dry Blocking:This method is ideal for delicate fibers or those that shrink when wet. You can use pins or weights to hold the scarf in its desired shape while it dries.
Weaving in Ends
Weaving in ends is a crucial step to ensure a clean and professional finish. It involves hiding the loose yarn tails from the knitting or crocheting process.
- Using a tapestry needle:Thread the tapestry needle with the yarn tail and weave it through the stitches on the wrong side of the scarf. Use a technique called “weaving in the round” where you weave the yarn in a circular motion, hiding it within the fabric.
- Knotting:For extra security, you can tie a small knot at the end of the yarn tail before weaving it in. This helps to prevent the tail from unraveling.
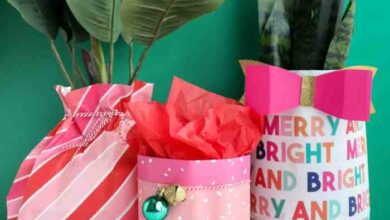
Presenting the Scarf as a Gift
- Gift wrapping:Choose a gift wrap that complements the scarf’s colors and style. Consider wrapping it in a neutral color like brown paper or using a patterned fabric.
- Gift tag:Add a personalized touch with a handwritten gift tag. You can include a heartfelt message or a simple “Happy Holidays!”