Our DIY wet bar is more than just a place to mix drinks, it’s a testament to your creativity and a reflection of your personal style. Building a wet bar yourself allows you to customize every detail, from the countertop material to the lighting scheme, creating a space that perfectly complements your home and your entertaining needs.
Whether you’re envisioning a sleek modern bar for sophisticated cocktails or a rustic farmhouse bar for casual gatherings, the possibilities are endless. This project will not only save you money but also provide a sense of accomplishment as you transform a space into a unique and functional gathering spot.
The Appeal of a DIY Wet Bar

Building a wet bar in your home can be a rewarding project that transforms your space into a stylish and functional entertainment hub. While professional installation is always an option, a DIY approach offers several advantages, from cost savings to personalized design and the satisfaction of a project well done.
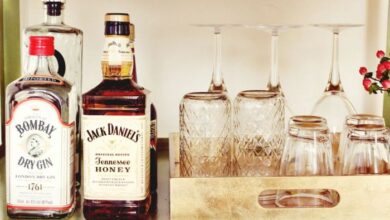
Our DIY wet bar is finally coming together, and I’m loving how it’s turning out! We’ve got the shelves stocked with our favorite spirits, and I’m adding some personal touches to make it feel extra special. I’m particularly excited about the frosted mason jar votives I picked up to add a touch of elegance and warmth to the space.
They’ll be perfect for creating a cozy ambiance when we’re entertaining guests.
Cost Savings
A DIY wet bar can significantly reduce the cost compared to hiring a contractor. By sourcing materials and completing the work yourself, you eliminate the labor costs associated with professional installation. This allows you to allocate your budget towards higher-quality materials or unique design elements that elevate the overall look and feel of your wet bar.
Customization
The beauty of a DIY wet bar lies in its ability to reflect your personal style and preferences. You have complete control over every aspect of the design, from the layout and materials to the color scheme and finishes. This freedom allows you to create a wet bar that seamlessly integrates with your existing décor or makes a bold statement as a unique focal point.
Unique and Creative Designs
DIY projects inspire creativity and allow you to explore unconventional ideas. Wet bars can be incorporated into various spaces, from dedicated bar areas to under-stair nooks or even within existing cabinets. Examples of unique wet bar designs include:
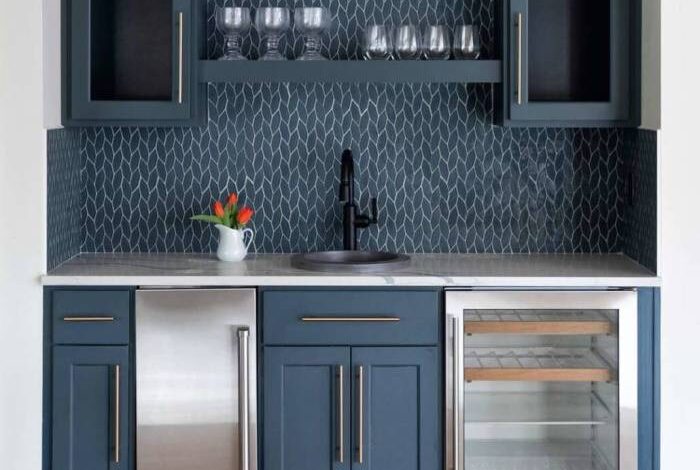
- Floating Wet Bar: A sleek and modern design that creates a sense of openness and maximizes space. This style often features a countertop that appears to float against the wall, supported by hidden brackets or a custom-built frame.
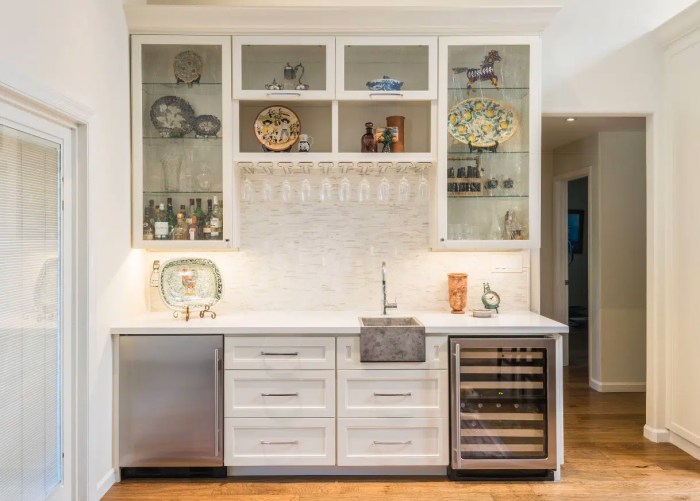
- Rustic Wet Bar: Embrace the charm of natural elements with a rustic wet bar. Reclaimed wood, exposed brick, and metal accents create a warm and inviting ambiance. Consider incorporating elements like a copper sink or a vintage-inspired bar cart to enhance the rustic theme.
Our DIY wet bar is finally coming together, and I’m loving the way it’s shaping up! We’ve been sourcing materials and inspiration everywhere, and I even found a fantastic resource for supporting BIPOC soap makers , which is something I’m passionate about.
It’s amazing to see so much talent and creativity in the soap-making community, and I’m excited to incorporate some of their beautiful products into our bar.
- Industrial Wet Bar: For a modern and edgy aesthetic, opt for an industrial wet bar. Metal pipes, exposed brick, and concrete countertops create a raw and industrial feel. Add vintage-inspired lighting fixtures and bar stools to complete the look.
Challenges and Considerations
While building a DIY wet bar is a rewarding project, it’s important to be aware of potential challenges and considerations:
- Space Limitations: Carefully assess the available space before embarking on the project. A well-designed wet bar should be functional and aesthetically pleasing without compromising on space or flow within the room.
- Plumbing and Electrical Work: Plumbing and electrical work are crucial aspects of a wet bar. Ensure you have the necessary skills or seek professional help for these tasks. Properly planning and executing plumbing and electrical connections is essential for safety and functionality.
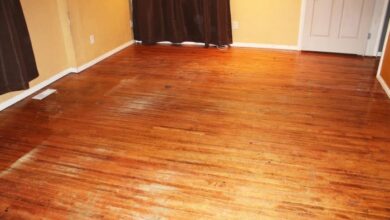
Our DIY wet bar is finally coming together! We’re using reclaimed wood for the shelves and adding some vintage barware for a touch of character. We’re even incorporating some elements of sister style sparkle and shine with mirrored accents and crystal decanters, so it’s going to be a truly glamorous space for entertaining guests.
- Materials and Tools: Selecting the right materials and tools is essential for a successful DIY project. Research and choose materials that suit your budget, style, and the intended use of the wet bar. Ensure you have the necessary tools for cutting, assembling, and installing the various components.
Planning Your DIY Wet Bar
The appeal of a DIY wet bar lies in its potential to transform a space into a sophisticated and functional entertainment area. But before you dive into the construction process, careful planning is essential. This will ensure your wet bar aligns with your vision and meets your needs.
Planning Checklist for Your DIY Wet Bar
Creating a comprehensive checklist is crucial for organizing your wet bar project. It helps to ensure that you have considered all essential aspects, from the initial concept to the final details. Here’s a checklist to guide you:
- Define your purpose:Determine the primary function of your wet bar. Will it be for entertaining guests, creating a cozy home bar, or both?
- Assess available space:Measure the area where you plan to build your wet bar. Consider the dimensions and any existing fixtures or obstructions.
- Determine your budget:Set a realistic budget for the project. Factor in materials, labor (if hiring), and any unexpected expenses.
- Decide on layout and features:Visualize the layout of your wet bar. Consider the placement of a sink, storage, countertop space, and optional features like a refrigerator or ice maker.
- Choose materials:Select materials that are durable, easy to clean, and match your aesthetic preferences. Popular options include wood, laminate, granite, and stainless steel.
- Plan for plumbing and electrical:Determine the location of water and electrical outlets for your sink, refrigerator, and other appliances.
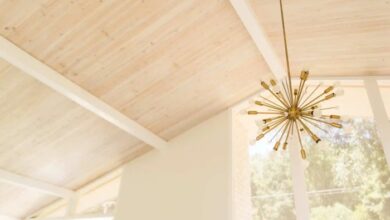
- Consider lighting:Plan for adequate lighting to illuminate the wet bar area. Think about ambient lighting, task lighting, and decorative elements.
- Plan for storage:Determine your storage needs and select appropriate cabinets, shelves, and drawers.
- Choose your bar stools:Select bar stools that are comfortable and complement the overall style of your wet bar.
- Gather necessary tools and equipment:Make a list of tools and equipment required for construction, including saws, drills, measuring tools, and safety gear.
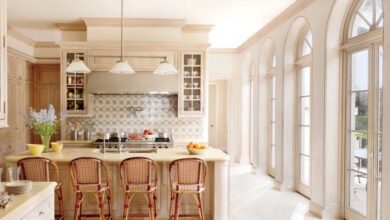
Designing a Basic Wet Bar Layout
A well-designed wet bar layout maximizes functionality and aesthetics. Here’s a basic layout that you can adapt to your specific needs:
| Element | Description | Dimensions | Materials |
|---|---|---|---|
| Countertop | Provides workspace for preparing drinks and serving guests. | 36 inches deep x 60 inches wide (minimum) | Granite, laminate, wood, stainless steel |
| Sink | Essential for washing glasses and mixing drinks. | 18 inches wide x 12 inches deep (minimum) | Stainless steel, ceramic, composite |
| Storage | Cabinets, shelves, or drawers for storing glassware, bar tools, and other supplies. | Depends on your needs and space. | Wood, laminate, metal |
| Refrigerator (optional) | Provides cold storage for drinks and snacks. | 18 inches wide x 30 inches deep (minimum) | Stainless steel, black, white |
| Ice maker (optional) | Convenient for providing ice for drinks. | 12 inches wide x 18 inches deep (minimum) | Stainless steel, black, white |
Essential Materials and Tools
The foundation of any successful DIY project lies in the right materials and tools. Building a wet bar is no different. You’ll need to carefully consider the components that will form the structure, functionality, and aesthetic appeal of your bar.
Let’s delve into the essential materials and tools that will make your DIY wet bar project a resounding success.
Countertop Materials, Our diy wet bar
Choosing the right countertop material is crucial for both functionality and aesthetics. The countertop will be the focal point of your wet bar, so it’s important to select a material that meets your needs and complements your overall design. Let’s compare and contrast the most popular countertop materials:
- Granite:Known for its durability, heat resistance, and unique patterns, granite is a popular choice for wet bars. It’s naturally scratch-resistant and can withstand heavy use. However, granite is also porous and requires regular sealing to prevent staining. It’s also one of the more expensive countertop options.
- Quartz:Engineered quartz is a non-porous material that is highly resistant to stains, scratches, and heat. It’s available in a wide range of colors and patterns, making it a versatile option. Quartz is generally more expensive than laminate but less expensive than granite.
- Laminate:Laminate countertops are a budget-friendly option that offers a wide variety of styles and colors. They are easy to clean and maintain, but they are not as durable as granite or quartz. Laminate countertops can be prone to scratches and heat damage.
- Butcher Block:Made from solid wood, butcher block countertops are a warm and natural option that adds a rustic charm to any space. They are highly durable and can be easily refinished. However, butcher block countertops are susceptible to scratches and water damage and require regular oiling to maintain their appearance.
Cabinets
Cabinets are the backbone of your wet bar, providing storage for glasses, bottles, and bar tools. When choosing cabinets, consider the following:
- Style:Choose a cabinet style that complements the overall design of your space. Traditional, modern, or contemporary styles are all viable options.
- Size:Determine the size of the cabinets based on your storage needs and the available space. You can opt for pre-made cabinets or custom-built cabinets to ensure a perfect fit.
- Material:Cabinet materials can range from wood to laminate to metal. Consider factors such as durability, moisture resistance, and budget when making your selection.
Sinks and Faucets
The sink and faucet are essential for serving drinks and washing glasses. Here are some considerations for selecting the right sink and faucet for your wet bar:
- Sink Style:Choose a sink style that complements your countertop and cabinet design. Undermount sinks offer a sleek and modern look, while top-mount sinks are more budget-friendly.
- Faucet Style:Consider the faucet’s finish, spout height, and functionality. Single-handle faucets are convenient, while two-handle faucets offer more control.
- Materials:Sinks can be made from stainless steel, porcelain, or composite materials. Faucets can be made from chrome, nickel, or brass.
Plumbing Supplies
Proper plumbing is essential for the functionality of your wet bar. Here are some key plumbing supplies you’ll need:
- Water Lines:You’ll need water lines to connect the faucet to the water supply.
- Waste Lines:Waste lines are necessary to drain the sink.
- P-Trap:A P-trap prevents sewer gases from entering your home.
- Drain Strainer:A drain strainer prevents debris from clogging the drain.
Essential Tools
You’ll need a variety of tools to build your DIY wet bar. Here’s a list of essential tools:
- Saw:A circular saw or a jigsaw will be necessary for cutting wood.
- Drill:A cordless drill is essential for driving screws and drilling holes.
- Measuring Tools:You’ll need a tape measure, level, and protractor for accurate measurements.
- Safety Equipment:Safety glasses, work gloves, and ear protection are crucial for protecting yourself while working.
Construction and Installation

Now that you have your plan in place, it’s time to roll up your sleeves and get building! This section will guide you through the step-by-step process of constructing your DIY wet bar, from framing to finishing touches.
Framing the Wet Bar
Framing forms the foundation of your wet bar. It provides structural support and defines the shape and size of your bar.
- Measure and Mark:Begin by carefully measuring the designated space for your wet bar. Mark the walls and floor with a pencil to indicate the exact dimensions of the framing.
- Construct the Frame:Use 2×4 lumber to create the frame. Cut the lumber to the required lengths and secure them together using wood screws or nails. Remember to use a level to ensure that the frame is square and plumb.
- Add Support:If your wet bar will be supporting a heavy countertop, add extra support beams or bracing to the frame for added strength.
- Attach to the Wall:Secure the frame to the wall studs using screws or nails. Ensure the frame is firmly attached to the wall for stability.
Installing Cabinets
Cabinets are the heart of your wet bar, providing storage space and a stylish aesthetic.
- Choose Your Cabinets:Select cabinets that fit your space and style. Consider the size, material, and finish of the cabinets. Pre-assembled cabinets are often easier to install than custom-built cabinets.
- Level and Secure:Before attaching the cabinets, use a level to ensure they are perfectly aligned. Secure the cabinets to the frame using screws or nails.
- Adjust for Plumbing:If you are installing a sink, make sure to leave adequate space for the plumbing fixtures. You may need to adjust the cabinet positions slightly to accommodate the plumbing.
Installing Countertops
The countertop is the crowning glory of your wet bar, providing a functional surface for mixing drinks and serving guests.
- Measure and Cut:Accurately measure the length and width of the countertop space. Use a circular saw or other appropriate tools to cut the countertop to size.
- Support the Countertop:Depending on the material, you may need to install support brackets or cleats to ensure the countertop is properly supported.
- Secure the Countertop:Use construction adhesive and clamps to secure the countertop to the cabinets. Allow the adhesive to dry completely before using the countertop.
Installing Backsplashes
Backsplashes add a decorative touch and protect the walls behind your wet bar from splashes and spills.
- Choose Your Material:Backsplashes can be made from various materials, including tile, mosaic, stone, or even wallpaper. Select a material that complements the style of your wet bar.
- Prepare the Surface:Before installing the backsplash, clean the wall surface and ensure it is smooth and level.
- Install the Backsplash:Follow the manufacturer’s instructions for installing the chosen backsplash material. For tile or mosaic, you may need to use mortar and grout. For wallpaper, use adhesive and a smoothing tool.
Installing Plumbing Fixtures
Installing plumbing fixtures, such as sinks, faucets, and drains, requires careful attention to detail to ensure proper connections and watertight seals.
- Connect the Sink:Install the sink according to the manufacturer’s instructions. Ensure the sink is properly secured and leveled.
- Install the Faucet:Install the faucet onto the sink, making sure the connections are tight and secure. Test the faucet for leaks before proceeding.
- Connect the Drain:Connect the drain pipe to the sink and secure it with a drain nut. Ensure the drain is properly connected to the plumbing system.