
Gift idea diy drums – Gift Idea: DIY Drums for Music Lovers – Looking for a unique and thoughtful gift for the music enthusiast in your life? Consider crafting a DIY drum set! This hands-on project is not only a fantastic way to express creativity but also a rewarding experience that allows you to create a personalized instrument.
This guide will walk you through the process of building a DIY drum set from scratch, starting with the fundamental components and design ideas to building, decorating, and accessorizing your masterpiece. Whether you’re a seasoned DIYer or a beginner, this step-by-step approach will empower you to create a drum set that’s as unique as the recipient.
Get ready to unleash your inner drummer and craft a gift that’s both practical and profoundly meaningful.
DIY Drum Basics
Creating your own drums can be a rewarding experience, allowing you to craft unique instruments that reflect your personal style and sound preferences. Understanding the basic components of a drum and the materials used in their construction is crucial for embarking on this DIY journey.
Drum Components
The core components of a drum include the shell, head, and hardware.
- Shell: The shell is the main body of the drum, responsible for resonating sound. It’s typically made from wood, metal, or plastic, and its size, shape, and material contribute significantly to the drum’s tone and volume.
- Head: The head is a thin membrane stretched across the shell, which vibrates to produce sound when struck. Heads are usually made from animal skin (calfskin, goatskin) or synthetic materials like Mylar.
- Hardware: This includes the lugs, tension rods, and hoops that hold the head in place and allow for tuning. The quality and design of hardware can impact the drum’s stability, tuning accuracy, and overall sound.
Materials for DIY Drum Construction
A wide variety of materials can be used for building drums, each offering unique sonic characteristics and aesthetic appeal.
DIY drums are a fun and creative gift idea for any music lover, but it’s important to be mindful of the rising trend of automotive fraud. According to a recent report by Equifax Canada, automotive fraud is on the rise , so be sure to take precautions when purchasing or selling used drums.
For instance, make sure to inspect the drums thoroughly and get a clear understanding of the seller’s history before making any purchases.
- Wood: Popular choices include maple, birch, oak, and mahogany, known for their warm, resonant tones. The thickness and type of wood affect the drum’s sound and sustain.
- Metal: Steel, brass, and aluminum are commonly used for drums, producing bright, metallic tones. The gauge of the metal affects the drum’s resonance and projection.
- Plastic: Acrylic and polycarbonate are durable and lightweight options, offering a clear, punchy sound. They are often used for practice drums or for creating unique effects.
Material Selection Tips
When choosing materials for your DIY drum, consider these factors:
- Desired Sound: Do you want a warm, resonant sound or a bright, punchy tone? The material choice will significantly impact the drum’s overall sound signature.
- Budget: Some materials, like exotic woods, can be expensive. Consider your budget and explore alternative options that fit your financial constraints.
- Skill Level: Certain materials, like wood, may require more advanced woodworking skills than others. Start with materials that align with your experience level and gradually explore more challenging options.
Drum Kit Design Ideas
Now that you have a basic understanding of the materials and tools needed for DIY drums, let’s dive into some creative design ideas! You can build a simple drum kit using household items or create a more elaborate set with unique features.
Simple Drum Kit Designs, Gift idea diy drums
Here are some ideas for simple drum kits that you can build with common household items:
- Bucket Drum Kit: This classic DIY drum kit uses various sizes of buckets for drums. You can use rubber bands, tape, or even paint to create different sounds and finishes.
- Cardboard Box Drums: Cardboard boxes are a great material for building drums. You can create a snare drum, a bass drum, or even a tom-tom by attaching a piece of stretched fabric or plastic to the box.
- Cereal Box Drums: Similar to cardboard box drums, cereal boxes can be transformed into drums. You can use rubber bands, tape, or even a piece of cardboard to create a drum head.
- Cookie Tin Drums: Cookie tins can be used to create small drums.
You can attach a piece of stretched fabric or plastic to the lid to create a drum head.
DIY Drum Kit Designs
Here is a table outlining some DIY drum kit designs, including the materials, tools, and estimated cost:
| Design | Materials | Tools | Estimated Cost |
|---|---|---|---|
| Basic Drum Set | Wooden boxes, fabric, rubber bands, paint | Saw, drill, screwdriver, staple gun | $20-$50 |
| Bucket Drum Set | Buckets, rubber bands, paint | None | $10-$30 |
| Cardboard Box Drum Set | Cardboard boxes, fabric, tape, paint | Scissors, tape measure, glue gun | $5-$15 |
Creative and Unique DIY Drum Kit Designs
Here are some creative and unique DIY drum kit designs that you can try:
- Recycled Material Drum Kit: Use recycled materials like old tires, plastic containers, and metal sheets to build a drum kit. This is a great way to reduce waste and create unique sounds.
- Acoustic Drum Kit with Electronic Triggers: Combine the acoustic sound of a traditional drum kit with the versatility of electronic drums by adding electronic triggers to your DIY drums.
This allows you to play different sounds and effects through a sound module.
- Portable Drum Kit: Build a compact and portable drum kit using small boxes or even travel cases. This is a great option for musicians who are always on the go.
- Drum Kit with Built-in Effects: Incorporate built-in effects like reverb or delay into your DIY drum kit. You can achieve this by using electronic components or by experimenting with different materials and construction techniques.
Building a DIY Drum

Now that you have a basic understanding of drum construction and design, let’s delve into the actual process of building a DIY drum. This section will guide you through the steps involved in crafting a basic drum, from cutting and shaping the shell to creating a drumhead and tuning your creation.
Looking for a unique and heartfelt gift for a music lover? DIY drums are a fun and creative option that can be tailored to their specific tastes. You can even find inspiration from the amazing musical talent showcased in at home with eden passante , where Eden Passante’s passion for music shines through.
Whether you’re crafting a simple set of drums out of household items or building a more elaborate percussion instrument, the joy of creating something special will make your gift truly unforgettable.
Drum Shell Construction
The drum shell is the foundation of your instrument. It’s the resonating chamber that produces the drum’s sound. You can choose to build your shell from various materials, including wood, plastic, or even metal. The most common material for drum shells is wood.
You can use plywood, which is readily available and relatively inexpensive. Plywood offers good strength and acoustic properties. Here’s how to construct a basic drum shell from plywood:
- Cutting the Shell:Measure and cut your plywood into the desired shape and size. For a simple drum, you can use a circular or rectangular shape. Use a jigsaw or a table saw for accurate cuts.
- Shaping the Shell:If you want a curved drum shell, you can use a drum shell template or a bending technique. For a curved shell, carefully bend the plywood into the desired shape and secure it with clamps or a drum shell mold.
DIY drums are a fantastic gift idea for any budding musician, and they can be surprisingly easy to make. You could even try incorporating some local Irish produce into your design, just like the renowned chefs who source their ingredients locally to create authentic Thai dishes, as seen in this article renowned chefs source local irish produce real taste thai food.
Maybe a drumhead made from a repurposed Irish oak barrel? The possibilities are endless!
- Assembling the Shell:Once you have your shaped plywood pieces, you can assemble them to form the shell. Use wood glue and clamps to secure the pieces together. You can also use screws or nails for added strength. Allow the glue to dry completely before proceeding.
Creating a Drumhead
The drumhead is the thin membrane stretched across the shell that vibrates to produce sound. You can create a drumhead using various materials, including:
- Animal Skin:Traditionally, drumheads were made from animal skin, such as calfskin or goatskin. Animal skin provides a natural and warm tone.
- Plastic:Modern drumheads are often made from synthetic materials like Mylar or polyethylene. These materials are durable, consistent, and offer a variety of sound characteristics.
- DIY Options:You can also create drumheads using readily available materials like:
- Cellophane:Stretch a sheet of cellophane over the drum shell and secure it with a rubber band or tape.
- Plastic Wrap:Similar to cellophane, you can use plastic wrap to create a makeshift drumhead.
- Thin Cardboard:Cut a circle of thin cardboard slightly larger than the drum shell opening. Attach it to the shell using tape or glue.
Tuning and Adjusting the Sound
Once you have your drum shell and drumhead, you need to tune it to achieve the desired sound. Tuning a drum involves adjusting the tension of the drumhead.
The tighter the drumhead, the higher the pitch. The looser the drumhead, the lower the pitch.
- Tuning Techniques:You can use a variety of methods to tune a drum, including:
- Lugs and Tension Rods:Most drums have lugs (metal rings) around the rim that hold the drumhead in place. Tension rods (screws) attach to the lugs and allow you to adjust the tension of the drumhead.
- Homemade Tuning System:For DIY drums, you can use a simple system like rubber bands or string to hold the drumhead in place and adjust its tension.
- Sound Adjustments:You can experiment with different materials for the drumhead, the thickness of the shell, and the placement of the tuning system to adjust the sound of your DIY drum. You can also add damping materials like felt or cloth to the inside of the drum to create a more muffled sound.
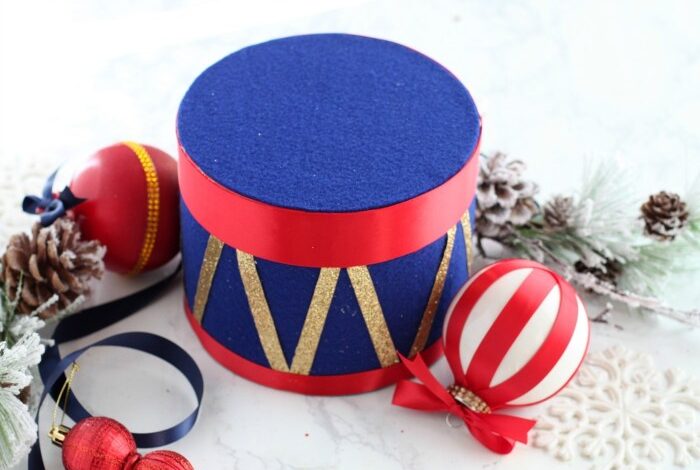
DIY Drum Decoration: Gift Idea Diy Drums
Now that you’ve built your DIY drums, it’s time to give them a personal touch with some creative decoration! Whether you prefer a minimalist look or a bold statement, there are countless ways to transform your drums into unique works of art.
Decorative Techniques and Materials
Decorating your DIY drums is a fun and expressive way to personalize your instrument. There are various techniques you can use, each with its own set of materials and tools.
| Technique | Materials | Tools |
|---|---|---|
| Painting | Acrylic paint, spray paint, paint brushes, masking tape | Paintbrushes, rollers, stencils, masking tape |
| Fabric Covering | Fabric, glue, scissors, staple gun | Scissors, staple gun, measuring tape |
| Decoupage | Paper, glue, sealant, paintbrush | Paintbrushes, scissors, sealant |
| Embellishments | Beads, buttons, feathers, glitter, rhinestones, fabric scraps | Glue, hot glue gun, needle and thread |
Tips for Unique Drum Designs
- Think about your style: Do you prefer a clean and simple design or something bold and colorful? This will help you narrow down your options for materials and techniques.
- Inspiration from music genres: Look to your favorite musical genres for inspiration. For example, a rock drum set might feature bold colors and graphic designs, while a jazz set could be more understated with elegant patterns.
- Incorporate personal elements: Add a touch of your personality to your drums by incorporating elements like your initials, favorite quotes, or even a family crest. This makes your drums truly unique.
- Experiment with textures: Mix and match different textures to create visual interest. For example, you could use smooth fabric on one drum and rough burlap on another.
- Use stencils for intricate designs: Stencils are a great way to create intricate designs without having to be a skilled artist. You can find stencils online or at craft stores.
- Layer different elements: Don’t be afraid to layer different elements on top of each other. For example, you could paint a base coat, then add a stencil design, and finish with some glitter or rhinestones.
DIY Drum Accessories
Now that you’ve built your DIY drums, it’s time to enhance your setup with some custom-made accessories! These additions not only improve playability but also add a personal touch to your drumming experience.
Building a Drum Stand with Recycled Materials
A drum stand provides stability and adjustability for your drums. You can build a sturdy and functional stand using recycled materials.
A simple drum stand can be made with a sturdy base, a vertical support, and a horizontal arm for holding the drum.
- Base:Use a heavy wooden board, a sturdy metal plate, or even a large piece of plywood as the base. Ensure it is wide enough to provide a stable foundation.
- Vertical Support:For the vertical support, you can use a length of PVC pipe, a metal rod, or even a strong wooden dowel. Make sure the material is strong enough to hold the weight of your drum.
- Horizontal Arm:The horizontal arm can be made from a length of wood, metal, or even a sturdy piece of plastic. You can use a bracket or a simple screw to attach the arm to the vertical support. You can adjust the height of the arm to suit your playing style.
You can also use a wing nut to secure the arm to the vertical support for easy height adjustment.
- Clamps or Brackets:Use clamps or brackets to secure the drum to the horizontal arm. These should be strong enough to hold the drum securely, but also allow for easy adjustment. You can use a combination of clamps and brackets to ensure the drum is held securely in place.
DIY Drum Sticks
Drum sticks are the essential tool for striking the drumheads. Here are some ideas for creating your own sticks:
- Wooden Dowels:Wooden dowels are a readily available material for making drum sticks. You can find them at most hardware stores. Simply cut the dowel to the desired length and shape the end to create the tip. You can use sandpaper to smooth out the stick and give it a comfortable grip.
For a heavier stick, use a larger diameter dowel. For a lighter stick, use a smaller diameter dowel.
- Bamboo Skewers:Bamboo skewers are another readily available material that can be used to make drum sticks. They are lightweight and have a natural grip. You can simply cut the skewers to the desired length and shape the end to create the tip.
You can also use a heat gun to slightly melt the tip of the bamboo to create a more durable tip.
- Plastic or Metal Rods:Plastic or metal rods can be used to make drum sticks, but they may be more challenging to shape. You can use a saw to cut the rods to the desired length and then use sandpaper or a file to shape the end to create the tip.
If you are using metal rods, be sure to use safety glasses and gloves when working with them.
DIY Drum Accessories
Here are some additional DIY accessories that can enhance your drumming experience:
- Drum Mutes:Drum mutes are used to dampen the sound of the drums. You can make your own drum mutes using materials like felt, foam, or even old towels. Simply cut the material to the size of the drumhead and attach it to the head with tape or Velcro.
- Drum Rugs:Drum rugs are placed under the drums to absorb sound and reduce vibrations. You can make your own drum rug using materials like carpet remnants, old rugs, or even thick fabric. Simply cut the material to the desired size and shape and use a sewing machine or fabric glue to create a rug.
- Drum Pedal:A drum pedal is used to play the bass drum. You can make your own drum pedal using a piece of wood, a metal rod, and a foot pedal. You can also use a bicycle pedal for the foot pedal.
The foot pedal is connected to the metal rod, which is then attached to the bass drum. The bass drum is usually mounted on a stand or on the floor.
- Drum Key:A drum key is used to tighten or loosen the tension of the drumheads. You can make your own drum key using a piece of metal or wood. Simply drill a hole in the metal or wood and insert a bolt or screw.
You can use the bolt or screw to tighten or loosen the tension of the drumheads.