Hi rez studios paladins uproar – Hi-Rez Studios, Paladins, and the Uproar sets the stage for this enthralling narrative, offering readers a glimpse into a story that is rich in detail and brimming with originality from the outset. The story begins with Hi-Rez Studios, a developer known for titles like Smite and Tribes: Ascend, venturing into the world of hero shooters with Paladins.
Paladins, released in 2016, quickly gained traction with its unique blend of hero-based combat and deck-building mechanics. However, the game’s journey wasn’t without its challenges, and the “uproar” surrounding it quickly became a defining moment in its history.
This uproar wasn’t a sudden storm; it brewed over time, fueled by a series of events and decisions that sparked discontent within the Paladins community. Players expressed their concerns about various aspects of the game, including balance changes, monetization practices, and communication from Hi-Rez Studios.
The situation escalated, with heated discussions erupting on forums, social media platforms, and even within the game itself. This controversy, however, wasn’t solely a negative event. It served as a catalyst for Hi-Rez Studios to re-evaluate their approach, prompting them to listen more closely to player feedback and make adjustments to address the community’s concerns.
Hi-Rez Studios and Paladins
Hi-Rez Studios is a prominent game developer known for its free-to-play online multiplayer games. The company has a history of creating popular titles across various genres, establishing itself as a significant player in the gaming industry. This blog post delves into the history of Hi-Rez Studios, examining its key games and achievements, and explores the development and release of Paladins, a hero shooter that has gained considerable traction.
Hi-Rez Studios: A Brief History
Hi-Rez Studios was founded in 2005 by Erez Goren, Todd Harris, and Stew Chisam. The company’s initial focus was on developing online multiplayer games, particularly for the PC platform. Their first major success came with the release of Global Agenda, a futuristic first-person shooter that gained a dedicated following.
The game introduced innovative features like the “Global Agenda” system, which allowed players to participate in a persistent world and influence the game’s narrative. Hi-Rez Studios further solidified its position in the gaming industry with the release of Tribes: Ascend, a reboot of the classic Tribes series.
The game featured fast-paced action, unique movement mechanics, and a strong emphasis on teamwork, attracting a large player base. The company’s commitment to free-to-play models and continuous updates helped sustain the game’s popularity for years.
Paladins: Development and Release
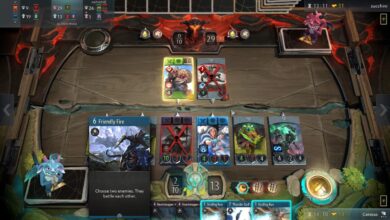
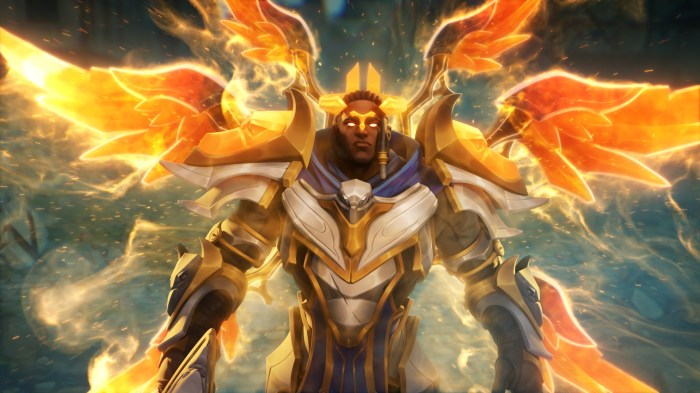
Paladins is a hero shooter developed and published by Hi-Rez Studios. It was released in open beta in 2016 and officially launched in 2018. The game combines elements of first-person shooters and MOBA games, featuring a diverse cast of characters with unique abilities and playstyles.
Paladins’ gameplay revolves around team-based combat, strategic positioning, and utilizing character abilities to outmaneuver opponents. The game’s initial reception was positive, with critics praising its fast-paced action, diverse roster of heroes, and engaging gameplay. Paladins’ free-to-play model and constant updates, including new heroes, maps, and game modes, contributed to its sustained popularity.
The Hi-Rez Studios Paladins uproar has been a wild ride, and honestly, it’s made me want to get away from the keyboard and do something fun. So, I went and got myself a new tattoo – my new pineapple tattoo is a real conversation starter! Maybe I’ll even get a Paladins-themed tattoo next, though I’m not sure how that would go down with the community right now.
Anyway, I’m just trying to stay positive and keep my eyes on the prize, which is a fun, fair, and exciting game of Paladins.
Paladins’ Gameplay Mechanics
Paladins’ gameplay is characterized by its hero-based system, where players choose from a wide range of characters with distinct abilities and roles. Each hero has a unique set of skills, including primary weapons, secondary abilities, and ultimate abilities. Players are divided into teams of five, and the objective of the game is to defeat the opposing team.
Matches are typically played on a variety of maps with different objectives, such as capturing points, destroying objectives, or escorting a payload.
Paladins’ Reception and Success
Paladins has garnered significant success since its release. The game has attracted a large and dedicated player base, with millions of active players worldwide. Its free-to-play model has made it accessible to a wide audience, and its constant updates have ensured that the game remains fresh and engaging.
Paladins has also been praised for its competitive scene, with numerous tournaments and leagues held around the world. The game’s balanced gameplay and diverse roster of heroes have fostered a thriving competitive community.
The “Uproar”: Hi Rez Studios Paladins Uproar
The “Uproar” surrounding Paladins refers to a period of intense player dissatisfaction and criticism directed towards Hi-Rez Studios, the game’s developers. This discontent stemmed from a series of events and decisions perceived as detrimental to the game’s balance, progression systems, and overall player experience.
Player Concerns and Grievances
The “Uproar” was fueled by a culmination of player concerns and grievances, primarily focused on the game’s evolving meta, balance issues, and the perceived lack of communication from Hi-Rez Studios. Players expressed their dissatisfaction through various platforms, including forums, social media, and streaming communities.
- Balance Issues and Meta Shifts:Players were frustrated by the rapid and unpredictable changes to the game’s meta, often resulting in overpowered champions or strategies dominating the game. These shifts often rendered previously viable champions and playstyles ineffective, leading to feelings of power creep and a lack of consistency in the gameplay experience.
- Progression System and Rewards:Players voiced concerns about the progression system, which they felt was overly grindy and unrewarding. They criticized the limited availability of desirable cosmetics and the perceived lack of meaningful rewards for dedicated players.
- Communication and Transparency:A lack of clear communication from Hi-Rez Studios regarding game updates, balance changes, and future plans further aggravated players. The perceived lack of transparency and responsiveness from the developers fueled the sense of frustration and contributed to the growing “Uproar”.
Examples of Player Feedback
- Forum Posts:Numerous forum posts and threads dedicated to expressing player grievances about the game’s balance, progression system, and lack of communication. Examples include posts titled “Paladins is Dying,” “The Game is Unbalanced,” and “Hi-Rez, Please Communicate With Us.”
- Social Media Discussions:Social media platforms like Twitter and Reddit became hubs for player discussions and complaints about Paladins. Hashtags like #PaladinsUproar and #SavePaladins were used to highlight the growing dissatisfaction and call for change.
- Streaming Communities:Popular Paladins streamers and content creators frequently voiced their concerns about the game’s direction and the developers’ decisions. These voices amplified the “Uproar” and reached a wider audience, further raising awareness of the issues.
Examining the Impact of the “Uproar”

The “Uproar” surrounding Hi-Rez Studios and Paladins was a significant event that had a ripple effect on both the game’s community and the studio’s reputation. This controversy sparked heated discussions and raised concerns among players, leading to a complex situation with both immediate and long-term consequences.
The Hi-Rez Studios Paladins uproar is a hot topic right now, and it’s easy to get caught up in the drama. But sometimes, a good dose of comfort is just what you need. If you’re looking for a way to unwind and reconnect with your inner child, check out this new cookbook for timeless comfort classics.
Maybe a little baking can help us all find some peace, even amidst the chaos of the gaming world.
Impact on Paladins’ Player Base
The “Uproar” undoubtedly affected Paladins’ player base, although the exact extent of its impact is difficult to quantify. It is reasonable to assume that some players may have felt disillusioned by the controversy and chosen to leave the game.
The Hi-Rez Studios Paladins uproar has been a rollercoaster ride of emotions for fans. The recent changes to the game have sparked a lot of debate, and it’s been fascinating to watch the community react. It’s a bit like the six months of the ABM Book Club – a group of passionate individuals discussing their thoughts and experiences with a shared passion.
Just like the book club, the Paladins community is finding ways to express their opinions and work towards a better future for the game. It’s a testament to the power of community and the importance of engaging in open dialogue.
The controversy could have also contributed to community division, as players took sides and engaged in heated debates.
“While some players might have left due to the controversy, it’s important to note that Paladins continues to have a dedicated and active community.”
Impact on Hi-Rez Studios’ Reputation
The “Uproar” undoubtedly had a negative impact on Hi-Rez Studios’ reputation. The controversy generated negative publicity and damaged the studio’s public image. This could have potentially impacted their ability to attract new players to their games and maintain existing player bases.
“The controversy surrounding Paladins could have impacted Hi-Rez Studios’ ability to attract new players to their games and maintain existing player bases.”
Changes and Actions Taken by Hi-Rez Studios
In response to the “Uproar,” Hi-Rez Studios took several actions to address the concerns of the community and mitigate the negative impact of the controversy. These actions included:
- Issuing public statements to address the concerns raised by the community.
- Implementing changes to their policies and procedures to prevent similar situations from occurring in the future.
- Engaging in more open and transparent communication with the community.
“Hi-Rez Studios took several actions to address the concerns of the community and mitigate the negative impact of the controversy.”
Lessons Learned
The Paladins “Uproar” serves as a powerful case study for game developers and publishers, offering valuable insights into the complexities of community management, communication, and the importance of fostering a healthy player environment.
The Importance of Community Engagement
Active and genuine community engagement is crucial for the long-term success of any game. It allows developers to understand player concerns, gather valuable feedback, and build trust.
- Transparent Communication:Developers should strive for open and transparent communication with their player base. This includes being proactive in addressing concerns, providing updates on game development, and explaining design decisions. The Paladins “Uproar” highlighted the detrimental impact of a lack of transparency and communication, leading to frustration and mistrust among players.
- Active Listening:It is essential for developers to actively listen to their community and take feedback seriously. This involves establishing channels for communication, such as forums, social media, and in-game feedback systems, and engaging in constructive dialogue with players.
- Community Involvement:Developers can empower their communities by involving them in the game development process. This could involve beta testing, surveys, or even allowing players to contribute ideas and suggestions. This fosters a sense of ownership and encourages players to feel heard and valued.
Best Practices for Handling Controversies, Hi rez studios paladins uproar
Controversies are inevitable in the gaming industry. How developers respond to these situations can significantly impact their reputation and player base.
- Acknowledge and Address Concerns:When a controversy arises, developers should acknowledge the issue promptly and demonstrate a willingness to address player concerns. Ignoring or downplaying issues will only escalate the situation.
- Open and Honest Communication:It is essential to communicate clearly and honestly with the community, explaining the situation and the steps being taken to resolve it. This fosters trust and helps prevent the spread of misinformation.
- Transparency and Accountability:Developers should be transparent about their decision-making process and take responsibility for any mistakes. This demonstrates a commitment to fairness and accountability, which is essential for rebuilding trust after a controversy.
Paladins Today
Paladins, the hero shooter developed by Hi-Rez Studios, has come a long way since its initial release in 2016. The game has experienced periods of both significant growth and challenges, but it remains a popular choice for competitive and casual players alike.
This section delves into the current state of Paladins, exploring its player base, ongoing updates, and esports scene, while also examining its long-term prospects and the role of the “Uproar” in shaping its trajectory.
Current State of Paladins
Paladins continues to boast a dedicated player base, with a significant presence on various platforms, including PC, PlayStation, Xbox, and Nintendo Switch. The game’s free-to-play model has contributed to its accessibility, attracting a diverse range of players. Hi-Rez Studios consistently releases updates and new content, keeping the game fresh and engaging for its player base.
These updates often introduce new champions, maps, game modes, and balance changes, ensuring a dynamic and evolving gameplay experience.
Esports Scene
Paladins has a thriving esports scene, with regular tournaments and leagues hosted by both Hi-Rez Studios and third-party organizers. The game’s fast-paced and strategic gameplay has made it popular among competitive players, who compete for prize pools and recognition.
The Paladins World Championship is the pinnacle of competitive Paladins, attracting top teams from around the globe. While the esports scene has experienced fluctuations in popularity, it remains a significant aspect of Paladins’ overall ecosystem.
Long-Term Prospects
Paladins’ long-term prospects are promising, given its established player base, ongoing updates, and growing esports scene. The game’s free-to-play model, coupled with its diverse champion roster and strategic gameplay, has positioned it for continued success. Hi-Rez Studios’ commitment to supporting the game through regular updates and content additions ensures its longevity and relevance in the competitive gaming landscape.
Impact of the “Uproar”
The “Uproar” played a crucial role in shaping Paladins’ trajectory, highlighting the importance of player feedback and communication. The community’s vocal dissatisfaction with certain aspects of the game, particularly regarding balance and content updates, led to significant changes within Hi-Rez Studios.
The studio responded to the “Uproar” by increasing its transparency and engagement with the community, leading to more collaborative development practices. This period of change ultimately resulted in a more responsive and player-centric approach to game development, which has benefited Paladins in the long run.