
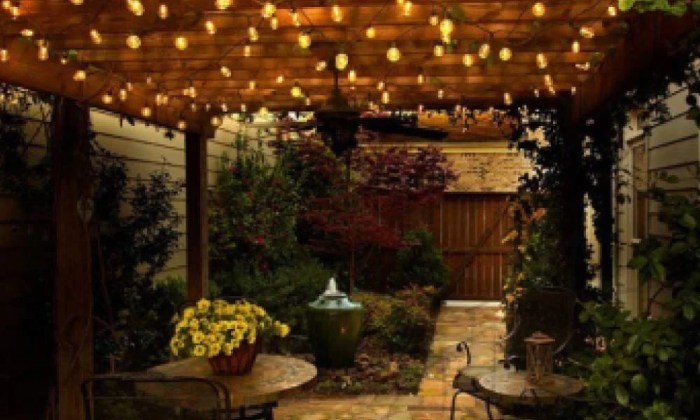
Create outdoor patio lighting without a pergola renter friendly – Create outdoor patio lighting without a pergola: renter-friendly ideas! Imagine transforming your patio into a magical oasis, even if you’re limited by your lease agreement. This guide will equip you with the know-how to craft a dazzling and inviting outdoor space without needing a pergola or making permanent changes to your rental property.
From utilizing string lights to strategically placing lanterns and lamps, we’ll explore renter-friendly solutions that allow you to personalize your patio and create a truly captivating ambiance.
We’ll delve into the world of outdoor lighting, exploring the different types of lighting that can enhance your patio, like ambient, task, and accent lighting. We’ll also discuss the benefits of using energy-efficient lighting options and choosing the right color temperature for a cozy atmosphere.
Get ready to illuminate your patio with style and practicality, all while respecting your rental agreement.
Renter-Friendly Lighting Solutions: Create Outdoor Patio Lighting Without A Pergola Renter Friendly
Creating a welcoming outdoor patio can be a challenge when you’re renting. You may not be able to make permanent changes to the space, but that doesn’t mean you can’t enjoy beautiful and functional lighting. This section will explore several renter-friendly lighting solutions that will transform your patio without requiring any drilling or permanent fixtures.
Using Adhesive Hooks and Clips to Hang String Lights
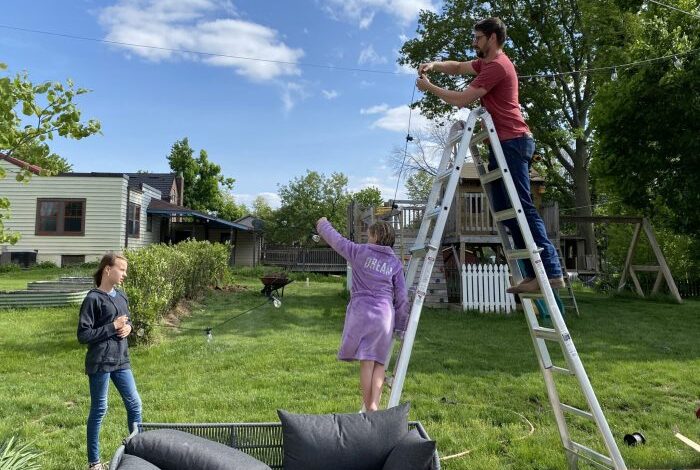
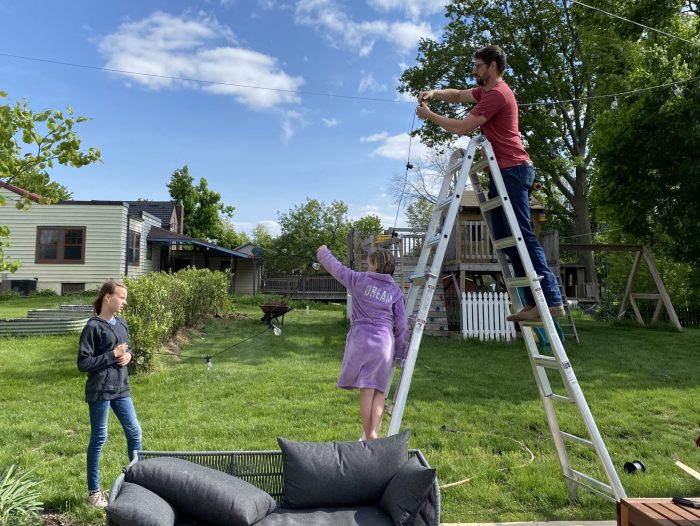
Hanging string lights is a popular way to create a warm and inviting atmosphere on a patio. However, many renters are hesitant to use nails or screws to attach the lights for fear of damaging the walls. Fortunately, there are renter-friendly alternatives available.Adhesive hooks and clips offer a simple and effective way to hang string lights without causing any damage.
These hooks are designed to adhere strongly to various surfaces, including painted walls, brick, and even stucco. They can be easily removed without leaving behind any residue or damage.Here’s a step-by-step guide on how to use adhesive hooks and clips to hang string lights:
- Choose the right hooks and clips:Look for heavy-duty adhesive hooks and clips specifically designed for outdoor use. Ensure they have a strong adhesive that can withstand the weight of the string lights.
- Clean the surface:Before applying the hooks, clean the surface with rubbing alcohol to remove any dirt, dust, or grease. This will ensure a strong bond.
- Apply the hooks:Follow the manufacturer’s instructions carefully when applying the hooks. Most adhesive hooks require you to press firmly against the surface for a few seconds to activate the adhesive.
- Hang the string lights:Once the hooks are securely attached, hang the string lights by threading them through the clips or loops on the hooks. Make sure the lights are evenly spaced and secured.
Remember to avoid hanging the lights too close to any heat sources, such as grills or fire pits.
Creating a Temporary Lighting Installation with Freestanding Planters and Lanterns
Freestanding planters and lanterns can be used to create a temporary lighting installation that is both stylish and functional. This approach is ideal for renters who want to add a touch of ambiance to their patio without making any permanent changes.
- Choose the right planters and lanterns:Select planters and lanterns that complement the style of your patio. Consider using a variety of sizes and materials to create visual interest.
- Arrange the planters and lanterns:Place the planters and lanterns around your patio, grouping them together or scattering them strategically. Experiment with different arrangements to find the look that you like best.
- Add candles or LED lights:Fill the lanterns with candles or LED tea lights to create a warm and inviting glow. Choose candles with a pleasant scent to enhance the ambiance of your patio.
For added safety, opt for LED tea lights, as they are flameless and do not pose a fire hazard.
Installing Solar-Powered Lights Without Drilling or Permanent Fixtures, Create outdoor patio lighting without a pergola renter friendly
Solar-powered lights are an excellent choice for renters because they don’t require any electrical wiring or drilling. They rely on sunlight to charge their batteries, providing illumination throughout the night.
- Choose the right solar lights:There are a wide variety of solar-powered lights available, including string lights, path lights, and spotlights. Select lights that meet your specific needs and preferences.
- Place the lights in a sunny location:Solar lights need to be placed in a location that receives direct sunlight for at least 6 hours per day. This will ensure that the batteries are fully charged and the lights can illuminate your patio throughout the night.
- Secure the lights:Some solar lights come with stakes that can be easily inserted into the ground. Others may have clips or adhesive pads that allow you to attach them to fences, railings, or other surfaces. Choose a method that is suitable for your patio and the type of lights you have selected.
Ensure that the solar panel is positioned in a way that maximizes sunlight exposure for optimal charging.
Accent Lighting with Outdoor Lamps
Portable lamps offer a fantastic solution for renters seeking to enhance their outdoor patio’s ambiance without permanent installations. These versatile fixtures provide the flexibility to experiment with different lighting styles and create a personalized atmosphere.
Placement and Design Considerations for Accent Lighting
Strategically placing lamps around your patio can transform the space into a visually appealing and inviting area. The placement of lamps can highlight specific features of the patio, such as architectural elements, plants, or seating areas. Consider the following design elements:
- Highlighting Architectural Features:Place lamps near walls, columns, or any other architectural features to create a sense of depth and dimension. The soft glow of the lamps will draw attention to these elements, enhancing their visual appeal. For instance, placing a lamp next to a brick wall or a wooden pergola can create a warm and inviting atmosphere.
- Enhancing Seating Areas:Strategically place lamps around seating areas to create a cozy and intimate ambiance. Position lamps behind or beside chairs or sofas to cast a soft, inviting glow. This will make the seating area more inviting and encourage relaxation. For instance, place a lamp next to a comfortable lounge chair to create a perfect reading nook.
- Accentuating Plants and Greenery:Use lamps to illuminate your patio’s plants and greenery, highlighting their textures and colors. Place lamps behind or near plants to create a dramatic effect, especially during the evening hours. This can create a visually stunning focal point, transforming your patio into a serene oasis.
Creating a Cozy Ambiance with Lampshades and Decor
Lampshades and decorative elements play a crucial role in shaping the ambiance of your outdoor patio. They can add a touch of personality and warmth to the space, making it feel more inviting and comfortable.
- Warm and Inviting Ambiance:Choose lamps with warm-toned bulbs and lampshades in soft colors like beige, cream, or terracotta. These colors create a warm and inviting atmosphere, making the patio feel cozy and comfortable. Consider using lampshades with intricate patterns or textures to add visual interest and a touch of elegance.
- Decorative Touches:Add decorative elements to your lamps to enhance their visual appeal and create a unique ambiance. Consider using lampshades with tassels, fringes, or other decorative accents. You can also use decorative covers or wraps to add a touch of color or pattern to your lamps.
Creating a cozy outdoor patio lighting scheme without a pergola can be a fun renter-friendly project. You can even get creative with your lighting by incorporating DIY frosted glass panels! I’ve been experimenting with frosted pattern privacy glass DIY techniques, and I think they’d look amazing as lantern covers or even as accents on string lights.
The possibilities are endless, and it’s a great way to add a touch of personality to your patio without needing to make permanent changes.
Creating a cozy outdoor patio space doesn’t have to involve permanent structures like pergolas, especially if you’re a renter. String lights are a classic choice, but if you’re looking for something a bit more sophisticated, consider solar-powered spotlights or lanterns.
These offer a modern, minimalist look while being eco-friendly and renter-friendly. For those who want a truly customized experience, check out the new advanced enterprise offerings from Zoom, which boost efficiency, reliability, security, and compliance for enterprise organizations , and can be used to manage smart home lighting systems.
Whether you’re looking for a simple solution or a more complex setup, there are plenty of options to create a beautiful and functional outdoor patio space without breaking the bank or your lease agreement.
Creating a cozy outdoor patio space without a pergola can be a challenge, but it’s definitely achievable! Adding a touch of whimsy can transform the space into a magical retreat. For a renter-friendly solution, consider string lights and a collection of dreamy photo art displays, like the ones featured on this website , to create a captivating ambiance.
The soft glow of the lights, combined with the captivating visuals, will make your patio feel like a haven for relaxation and enjoyment.