20 clay craft projects offer a world of creative possibilities, from simple beginner-friendly creations to intricate, advanced pieces. Whether you’re a seasoned artist or just starting out, there’s a project here to spark your imagination and ignite your passion for working with clay.
This comprehensive guide delves into the fascinating world of clay craft, exploring its history, techniques, and endless applications. We’ll guide you through the basics, from kneading and wedging clay to creating basic shapes and joining pieces. You’ll discover a range of projects, from decorative and functional pieces to sculptures, jewelry, and even projects tailored for children.
Get ready to unleash your creativity and bring your clay visions to life!
Introduction to Clay Craft: 20 Clay Craft Projects
Clay craft, the art of shaping and manipulating clay, is a timeless and versatile art form that has been practiced for millennia. From ancient pottery to modern sculptures, clay has played a significant role in human history and artistic expression.
History and Origins of Clay Craft
Clay craft has deep roots in human history, dating back to the Neolithic period (around 10,000 BC). Early civilizations, such as the Sumerians and Egyptians, used clay for pottery, bricks, and figurines. Clay was a readily available material, and its malleability and ability to harden when fired made it ideal for creating functional and decorative objects.
Types of Clay Used in Crafting, 20 clay craft projects
There are various types of clay used in crafting, each with its unique properties and applications.
- Earthenware Clay:This type of clay is commonly used for pottery and ceramics. It is relatively low-firing, meaning it is fired at lower temperatures (around 1,800°F). Earthenware clay is porous and often glazed to make it waterproof.
- Stoneware Clay:Stoneware clay is a more durable type of clay that is fired at higher temperatures (around 2,300°F). It is known for its strength, density, and ability to hold intricate details.
- Porcelain Clay:Porcelain clay is a fine-grained, white clay that is highly valued for its translucency and durability. It is fired at very high temperatures (around 2,600°F) and is often used for delicate and intricate ceramic pieces.
- Polymer Clay:Polymer clay is a synthetic clay that is air-dry or oven-bake. It is available in a wide range of colors and can be molded, sculpted, and textured. Polymer clay is popular for jewelry making, figurines, and other small crafts.
Tools and Equipment for Clay Projects
The tools and equipment needed for clay projects vary depending on the type of clay being used and the complexity of the project. However, some essential tools include:
- Clay tools:These tools are specifically designed for shaping, smoothing, and texturing clay. They include tools for cutting, scoring, and creating different shapes.
- Work surface:A flat, smooth surface is essential for working with clay. A table covered with a plastic sheet or a dedicated clay work surface is ideal.
- Kiln:A kiln is a high-temperature oven used for firing clay objects. Kilns come in various sizes and types, depending on the needs of the artist.
- Glaze:Glaze is a glassy coating applied to clay objects to create a smooth, waterproof finish. Glazes come in a wide range of colors and finishes.
Basic Clay Techniques

Before diving into intricate clay projects, mastering fundamental techniques is crucial. This section explores the essential processes of kneading and wedging clay, shaping basic forms, and joining clay pieces effectively.
Kneading and Wedging Clay
Kneading and wedging are crucial steps in preparing clay for sculpting. These techniques ensure uniform consistency and eliminate air pockets, preventing cracks and imperfections in your final piece.
I’ve been having so much fun exploring these 20 clay craft projects – from whimsical animals to intricate jewelry, the possibilities are endless! But while I’m getting creative with my hands, I’ve also been learning about the power of plants, especially what are adaptogenic herbs and their ability to help the body adapt to stress.
I think it’s amazing how nature can provide both creative inspiration and natural support – a perfect combination for a balanced life! So, back to my clay – I’m off to create some stress-busting sculptures!
- Kneading: This process involves working the clay with your hands, similar to kneading bread dough. The goal is to soften the clay and distribute moisture evenly. Kneading helps remove any air bubbles trapped within the clay, making it more workable.
I’m currently working on a list of 20 clay craft projects for my blog, and I’m trying to find some creative inspiration. While browsing the news, I stumbled upon an interesting announcement from CMC Metals Ltd. cmc metals ltd announces proposed amendment of warrants.
I’m not sure how this relates to clay crafts, but it’s fascinating to see how different industries are evolving. Back to my clay projects, I think I’ll try making some miniature animals – maybe a clay cat or a dog.
You can achieve this by pressing, folding, and stretching the clay repeatedly.
- Wedging: Wedging takes kneading a step further by removing air pockets and ensuring a consistent texture throughout the clay. This is achieved by repeatedly slamming the clay onto a flat surface, folding it in half, and repeating the process.
This action forces out air bubbles and creates a more homogenous clay body. Wedging is essential for larger projects and when working with clay that has been stored for a while.
Creating Basic Shapes
Basic shapes are the foundation of many clay projects. Mastering these forms will allow you to create more complex and intricate sculptures.
- Sphere: To form a sphere, roll a ball of clay between your palms, applying even pressure to create a smooth, round shape. You can also use a rolling pin to achieve a more uniform sphere.
- Cylinder: Start with a ball of clay and roll it into a long, even cylinder using your palms or a rolling pin. To ensure a straight cylinder, use a ruler or straight edge as a guide.
- Cone: Begin with a cylinder. Then, gently taper one end of the cylinder to create a pointed tip. You can use a tool or your fingers to shape the cone.
Joining Clay Pieces
Joining clay pieces is an essential skill for creating more complex sculptures. There are several methods for attaching clay pieces:
- Slip and Score: This is the most common method for joining clay pieces. It involves scoring both surfaces to be joined with a tool, creating a rough texture. Then, apply slip (a thin, watery clay mixture) to one of the scored surfaces.
Press the two pieces together firmly, ensuring the slip spreads evenly across the joint.
- Coil Building: This technique involves rolling clay into long, thin coils and then joining them together to form a desired shape. This method is particularly useful for creating large-scale sculptures and intricate designs.
- Slab Construction: Slab construction involves rolling out clay into flat sheets and then joining them together to create a form. This technique is often used for creating decorative plates, bowls, and other functional objects.
Beginner-Friendly Projects
Starting your clay journey can be exciting, and it’s best to begin with projects that are easy to manage and build confidence. These beginner-friendly projects are designed to introduce you to the basics of clay manipulation and allow you to experiment with different techniques.
From whimsical pinch pots to intricate sculptures, there’s a world of creativity waiting to be explored in 20 clay craft projects. As you get your hands dirty with the earthy magic of clay, remember to support the talented artisans who are shaping the future of soap making.
Check out this list of bipoc soap makers to support and discover the unique scents and textures they’ve crafted. Whether you’re a seasoned clay enthusiast or a curious beginner, these projects will inspire you to get creative and support BIPOC businesses along the way.
Simple Clay Projects
These five projects are ideal for beginners, as they require minimal tools and skills. They’re perfect for exploring the versatility of clay and discovering your creative potential.
- Clay Pinch Pot: Pinch pots are a classic introduction to pottery. They are made by simply pinching and shaping the clay with your fingers.
- Start with a small ball of clay and gently press it into a flat disc.
- Carefully pinch the edges of the disc, gradually pulling them upwards to form a cup-like shape.
- Continue pinching and shaping the clay until you achieve your desired size and form.
- Use a tool or your fingers to create a smooth, even surface.
- Once your pinch pot is complete, allow it to dry thoroughly before firing or painting.
- Clay Beads: Creating clay beads is a fun and simple way to personalize your jewelry. You can experiment with different shapes, sizes, and patterns.
- Roll small balls of clay into desired sizes.
- Use tools or your fingers to shape the beads into desired forms, such as round, oval, or cylindrical.
- Add texture or patterns using tools, stamps, or your fingers.
- Once the beads are dry, bake them according to the clay manufacturer’s instructions.
- After baking, you can paint or glaze the beads to add a unique touch.
- Clay Animals: Sculpting simple clay animals is a great way to develop your creative skills.
- Start with a ball of clay and use your fingers to shape the animal’s body.
- Add details like legs, tails, and ears by rolling out small pieces of clay and attaching them to the body.
- Use tools to create eyes, noses, and other facial features.
- Once the animal is complete, allow it to dry thoroughly before baking or painting.
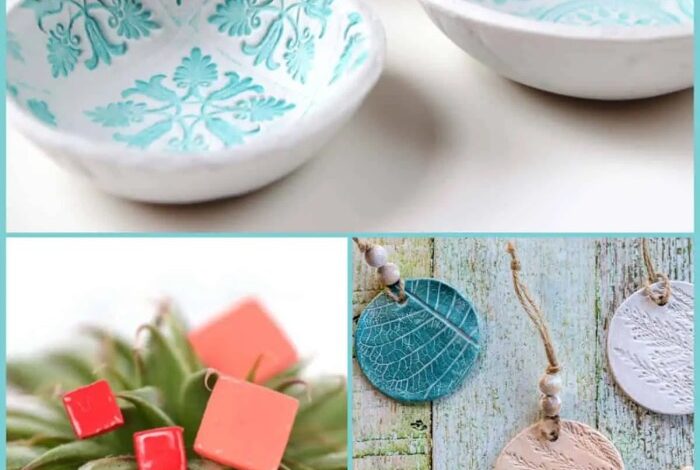
- Clay Leaf Impressions: This project involves using natural objects to create unique textures and patterns in clay.
- Roll out a flat sheet of clay.
- Press a leaf onto the clay to create an impression.
- Carefully remove the leaf, leaving behind a detailed imprint.
- You can use a tool to enhance the impression or add additional details.
- Allow the clay to dry thoroughly before baking or painting.
- Clay Tile: Creating a simple clay tile is a great way to learn about surface decoration and glazing.
- Roll out a flat sheet of clay.
- Cut the clay into a square or rectangular shape.
- Use tools or your fingers to create patterns, designs, or text on the tile’s surface.
- Allow the tile to dry thoroughly before glazing and baking.
Tips and Tricks for Success
- Start with a small project: Avoid overwhelming yourself with complex projects. Start with something simple and gradually work your way up to more challenging ones.
- Practice regularly: The more you work with clay, the better you will become at manipulating it. Set aside some time each week to practice your skills.
- Don’t be afraid to experiment: Clay is a forgiving medium. Experiment with different techniques and see what works best for you.
- Be patient: Working with clay takes time and patience. Don’t get discouraged if your first projects aren’t perfect. Just keep practicing and you will improve over time.
Intermediate Clay Projects
You’ve mastered the basics and are ready for some more challenging clay creations! This section dives into intermediate clay projects that will test your skills and expand your creative horizons. We’ll explore projects with more intricate designs, textures, and techniques, pushing you to think outside the box and refine your craft.
Sculpting a Realistic Animal
Sculpting a realistic animal requires careful observation and attention to detail. This project challenges you to capture the form, texture, and personality of an animal in clay.
- Choose your animal:Select an animal that inspires you. It can be a common pet, a majestic wild animal, or even a mythical creature. Research its anatomy, paying attention to its proportions, muscle structure, and unique features.
- Sketch and plan:Before starting, sketch your animal from different angles. This will help you visualize its form and proportions. Consider the animal’s pose and the overall composition of your sculpture.
- Build the armature:An armature provides a strong base for your sculpture. Use wire or a combination of wire and aluminum foil to create a skeletal framework that mimics the animal’s skeleton. This will help you maintain the correct proportions and prevent sagging.
- Add clay layers:Start by adding a thin layer of clay over the armature, building up the form gradually. Use tools to shape and refine the clay, paying attention to the animal’s muscles, curves, and contours.
- Create texture:Use various tools to add texture to your sculpture. You can use a needle tool to create fur, a sponge to create scales, or a toothbrush to create feathers.
- Add details:Once the basic form is complete, add details such as eyes, nose, mouth, and any other distinguishing features.
Creating a Mosaic Tile
Mosaic tiles are a beautiful and versatile form of art. They can be used to create intricate patterns, decorative accents, or even full-fledged murals.
- Choose your design:Start by sketching out your desired mosaic design. Consider the colors, shapes, and patterns you want to incorporate.
- Prepare your tiles:Cut your clay into small, even squares or rectangles. You can use a ruler and a sharp knife or a clay cutter to create precise shapes.
- Create your base:You can use a piece of wood, a ceramic tile, or even a canvas as a base for your mosaic. Apply a layer of adhesive to the base and arrange your tiles in the desired pattern.
- Add grout:Once the adhesive is dry, apply grout between the tiles. Use a grout float to smooth out the grout and remove excess.
- Finish and seal:Once the grout is dry, clean any excess grout with a damp cloth. You can then seal the mosaic with a sealant to protect it from moisture and dirt.
Constructing a Functional Clay Vessel
Creating a functional clay vessel, like a vase or a mug, involves understanding the properties of clay and mastering techniques for creating a sturdy and watertight piece.
- Choose your shape:Decide on the shape and size of your vessel. Consider the purpose of the vessel and how it will be used.
- Prepare your clay:Knead the clay thoroughly to remove any air bubbles.
- Create the form:Use hand-building techniques like coil building or pinch pots to create the basic shape of your vessel.
- Add a handle (optional):If you are making a mug or a pitcher, add a handle using a coil or a slab of clay.
- Smooth the surface:Use your fingers, a sponge, or a tool to smooth out the surface of your vessel.
- Dry and bisque fire:Allow the vessel to dry completely. Then, bisque fire the piece in a kiln at a low temperature to harden the clay.
- Glaze (optional):If desired, apply a glaze to the vessel to add color and create a waterproof finish. Glaze the piece and fire it again in the kiln at a higher temperature.
Building a Detailed Figurine
Creating a detailed figurine requires precision, patience, and an eye for detail. This project allows you to express your creativity and storytelling abilities through clay.
- Choose your subject:Select a subject that inspires you. It can be a person, a creature, or even a fantasy character.
- Sketch and plan:Sketch your figurine from different angles to understand its proportions and features.
- Build the armature (optional):For larger or more complex figurines, an armature can provide support and prevent sagging.
- Add clay layers:Start by adding a thin layer of clay over the armature (if used) or directly on a work surface. Use tools to shape and refine the clay, creating the basic form of your figurine.
- Create details:Use tools to create intricate details such as hair, clothing, facial features, and accessories.
- Add texture:Use various tools and techniques to add texture to your figurine. For example, you can use a needle tool to create wrinkles in clothing, a sponge to create fabric texture, or a toothbrush to create hair.
- Paint and finish:Once the figurine is dry, you can paint it with acrylics or other suitable paints.
Creating a Decorative Relief Panel
A relief panel is a three-dimensional artwork that is attached to a flat surface. It can be used to decorate walls, furniture, or even jewelry.
- Choose your design:Sketch out your desired design for the relief panel. Consider the overall composition, the depth of the relief, and the textures you want to incorporate.
- Prepare your base:Use a piece of wood, a ceramic tile, or even a canvas as a base for your relief panel.
- Create the relief:Use hand-building techniques like slab building or coil building to create the three-dimensional elements of your design.
- Add details and texture:Use tools to add details and texture to your relief panel. You can use a needle tool to create lines, a sponge to create patterns, or a toothbrush to create a rough texture.
- Finish and seal:Once the relief panel is dry, you can paint it with acrylics or other suitable paints. You can also seal it with a sealant to protect it from moisture and dirt.
Advanced Clay Projects
Taking on advanced clay projects allows you to push your creative boundaries and explore more complex techniques. These projects require a high level of skill, patience, and attention to detail, making them ideal for experienced clay artists looking to challenge themselves.
Advanced Clay Projects
Advanced clay projects involve techniques like:* Sculpting with armatures:Armatures provide a sturdy framework for larger or more complex sculptures, allowing for intricate details and dynamic poses. They are typically made from materials like wire, metal rods, or foam.
Detailed surface treatments
Advanced projects often involve intricate surface treatments that add depth and visual interest. This might include creating textures using tools, applying glazes with multiple layers, or incorporating elements like metal leaf or other materials.
Advanced glazing techniques
Glazing techniques like sgraffito, slip trailing, and luster glazing require precision and understanding of glaze chemistry. These techniques can create unique and visually striking finishes.
Working with multiple clay types
Advanced clay artists often work with different clay types, each with its own unique properties. This can involve combining different clays for specific effects or using porcelain for delicate details.
Firing techniques
Advanced clay projects often involve using specialized firing techniques, such as raku firing or pit firing, to achieve unique finishes and effects.
Examples of Successful Advanced Clay Projects
Here are some examples of successful advanced clay projects:* Ceramic Sculptures by Jun Kaneko:Jun Kaneko is a renowned ceramic artist known for his large-scale sculptures that often incorporate intricate details, vibrant glazes, and playful forms. His works are a testament to the mastery of advanced clay techniques.
Figurative Ceramics by Rebecca Louise Law
Rebecca Louise Law is a British artist who creates intricate figurative ceramic sculptures that are known for their delicate details and expressive forms. Her works often explore themes of the human body and its relationship to nature.
Ceramic Vessels by Grayson Perry
Grayson Perry is a British artist known for his ceramic vessels that often feature intricate designs, humorous imagery, and social commentary. His works demonstrate the versatility of clay as a medium for expressing artistic ideas.
Ceramic Wall Tiles by William De Morgan
William De Morgan was a British artist and potter known for his beautiful and intricately designed ceramic wall tiles. His tiles are characterized by their vibrant colors, elaborate patterns, and use of different glazes.
Ceramic Installations by Ai Weiwei
Ai Weiwei is a Chinese contemporary artist known for his politically charged ceramic installations. His works often use thousands of hand-crafted ceramic pieces to create large-scale installations that comment on social and political issues.