DIY Balloon Garland for Front Door: A Step-by-Step SEO Guide
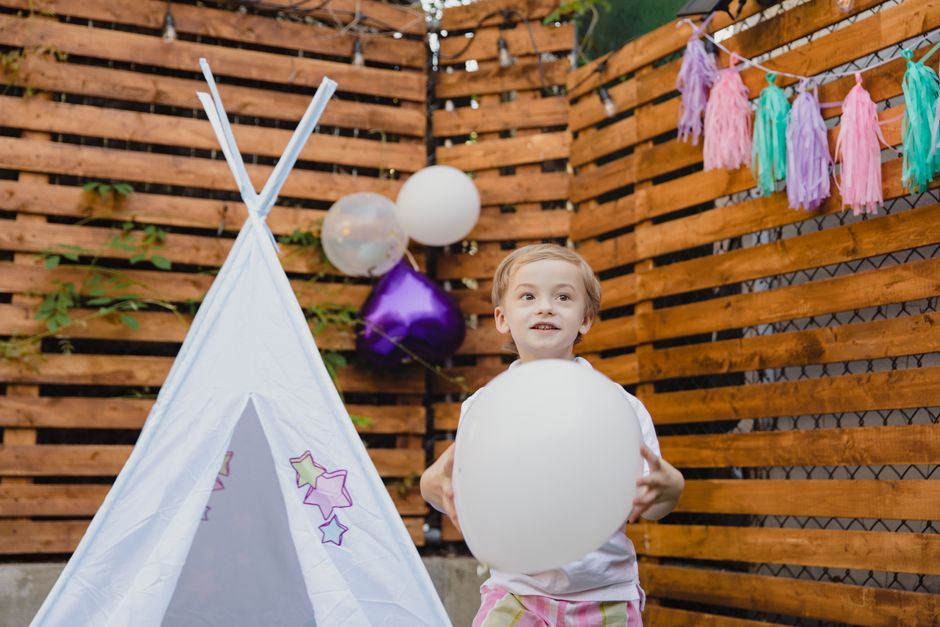
Creating a stunning balloon garland for your front door is an achievable DIY project that significantly enhances curb appeal for any occasion, from birthdays and holidays to casual celebrations or simply to brighten your everyday entrance. This comprehensive guide will walk you through the entire process, from planning and material selection to assembly and installation, ensuring a professional-looking result. We’ll focus on SEO best practices throughout, integrating relevant keywords naturally to help your content rank well for searches like "DIY balloon garland front door," "how to make a balloon arch porch," "easy outdoor balloon decor," and "festive front door balloons." Understanding the foundational principles of balloon garland construction is key. A garland, in essence, is a chain of balloons of varying sizes, artfully arranged to create a flowing, organic, or structured shape. For an outdoor application like a front door, durability and weather resistance are paramount considerations. This guide prioritizes techniques and materials that will withstand outdoor elements while maintaining visual appeal.
Essential Materials for Your Front Door Balloon Garland
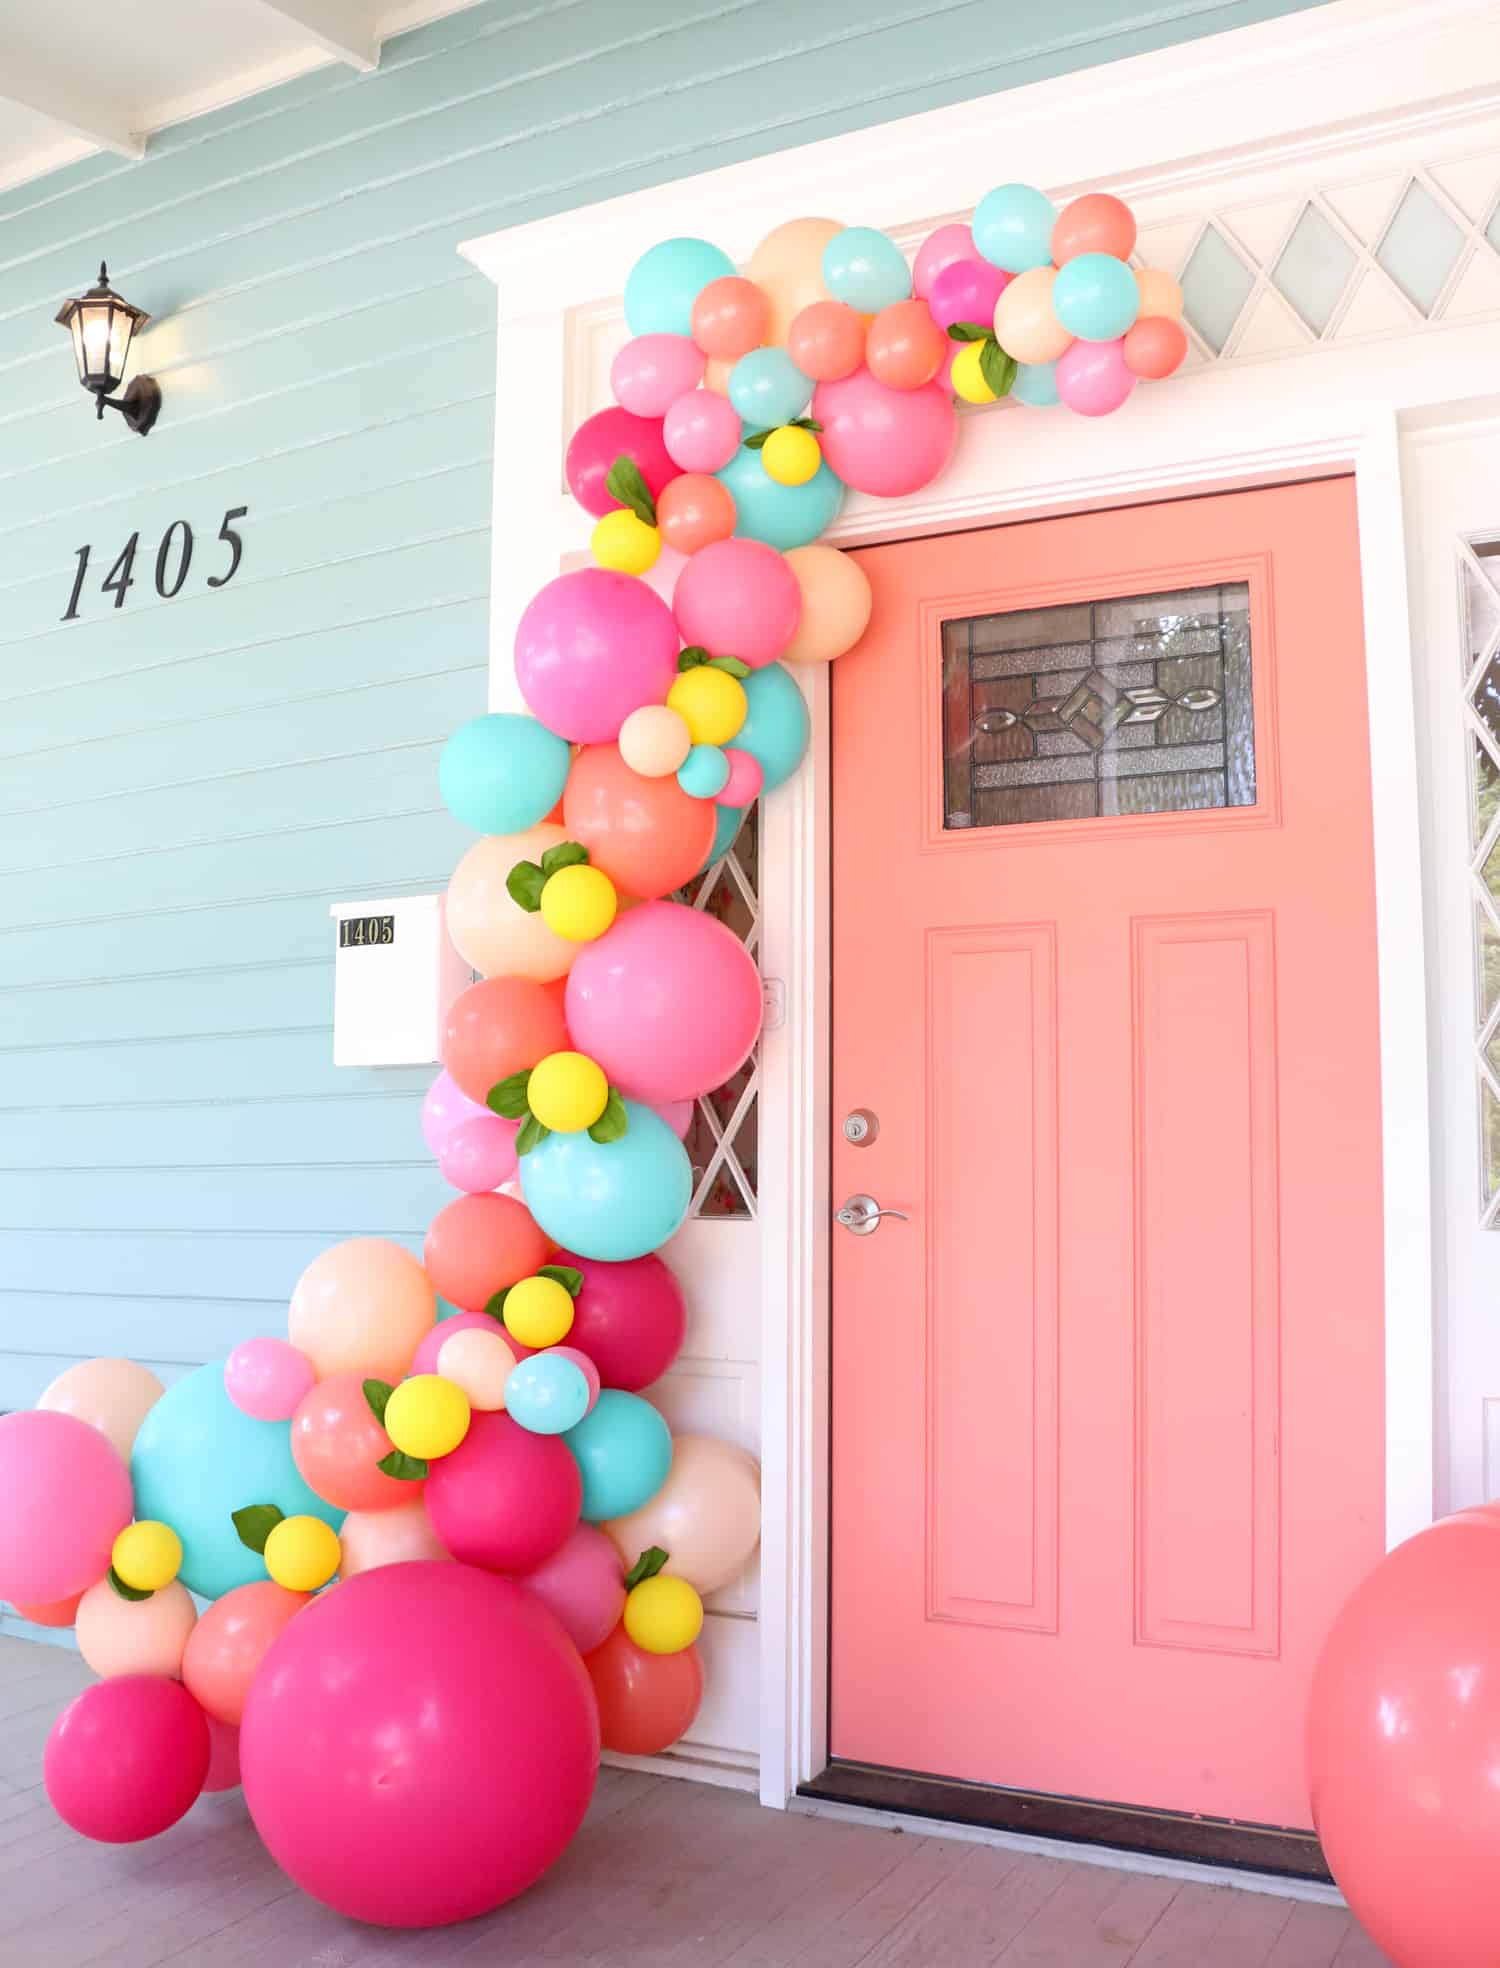
The success of your DIY balloon garland hinges on using the right materials. First, you’ll need a selection of balloons. Opt for high-quality latex balloons in a variety of sizes. Common sizes include 5-inch, 10-inch, and 11-inch balloons, with larger 18-inch or even 36-inch balloons adding impactful accents. The color palette is crucial for setting the tone. Consider the occasion: bright, cheerful colors for birthdays; patriotic hues for national holidays; autumnal shades for fall; and classic red and green for Christmas. Mixing finishes, such as matte and metallic, can add depth and visual interest. For securing the balloons, balloon tape (also known as balloon strip or balloon arch tape) is indispensable. This is a plastic strip with pre-made holes to insert balloon knots, forming the base of your garland. Alternatively, you can use fishing line or heavy-duty twine for a more manual approach, but balloon tape significantly speeds up the process and creates a more uniform structure. You will also require balloon dots or glue dots. These strong adhesive dots are perfect for filling in gaps between balloons, attaching accent balloons, and securing the garland to your doorframe or other support structures. A balloon pump is a non-negotiable item, especially for inflating numerous balloons. An electric balloon inflator will save considerable time and effort, while a hand pump is a more budget-friendly option. Don’t forget scissors for trimming excess tape or string, and potentially command hooks or temporary adhesive hooks for hanging the garland if you’re not attaching it directly to the doorframe. For outdoor garlands, consider a UV-protective spray to mitigate balloon degradation from sunlight. This will significantly extend the lifespan and vibrancy of your decoration.
Planning Your Front Door Balloon Garland Design
Before you begin inflating, meticulous planning is essential for a professional and cohesive look. Begin by considering the size and shape of your front door and porch area. A grand entryway might accommodate a full, cascading arch, while a smaller door might be best suited for a more restrained, linear garland draped across the top or down one side. Sketch out your desired design. This doesn’t need to be an elaborate artistic rendering, but a simple visual representation of where you envision the balloons, their relative sizes, and how you want them to flow. Think about your color scheme in detail. Do you want a monochromatic look with varying shades of one color? A rainbow effect? Or a curated palette of complementary colors? Websites like Pinterest and Instagram are excellent resources for inspiration, offering countless "front door balloon garland ideas" and "party balloon arch designs." Measure the dimensions where your garland will be placed. This will help you estimate the number of balloons needed. A general rule of thumb is to have more balloons than you think you’ll need; it’s better to have extras than to run out mid-project. For a fuller look, you’ll need more balloons. Consider the "wow" factor. Do you want a simple cluster of balloons, or a dramatic, full arch? For outdoor displays, anticipate wind and weather. A garland that is too sparse or lightly attached may be blown away. Secure attachment points and a dense construction are key for outdoor durability.
Inflating and Assembling Your Balloon Garland Base
The heart of your balloon garland is the balloon tape. This plastic strip with evenly spaced holes is where your balloons will be attached. You can purchase these in various lengths, and they can be easily joined together to create longer garlands. Inflate your balloons to various sizes using your electric or hand pump. For a natural, organic look, vary the inflation levels of your balloons. Do not overinflate, as this can lead to balloons popping prematurely, especially in warm weather. Aim for a slightly rounded, plump shape. Once inflated, tie a knot in each balloon. It’s helpful to have a designated person or area for balloon inflation and tying to streamline the process. Now, begin attaching the balloons to the balloon tape. Insert the knot of each balloon through a hole in the tape. Alternate balloon sizes as you work along the tape to create visual interest and a staggered effect. You can also cluster smaller balloons together. For a denser garland, you might skip holes or use multiple balloons per hole. Gently pull the balloon knot through the hole and then twist it around the tape to secure it. Continue this process, filling the balloon tape with balloons in your desired pattern and color distribution. Don’t be afraid to adjust as you go, moving balloons around to achieve the perfect arrangement. For a truly full garland, you can use two rows of balloons attached to the same balloon tape, or layer smaller balloons over larger ones.
Adding Depth and Dimension: The Art of Layering Balloons
Once your base balloon tape is filled, it’s time to elevate your garland with additional balloons to create a more dynamic and professional appearance. This is where you’ll start to fill in gaps and add clusters. Use your balloon dots or glue dots to attach smaller balloons directly to the larger ones already on the tape. This technique is crucial for achieving a "full" and "lush" look. Think of it like adding filler flowers to a bouquet. Attach clusters of 2-3 small balloons (e.g., 5-inch) to strategically chosen spots. These smaller balloons help conceal the balloon tape and create a more organic, rounded shape. You can also use larger accent balloons (18-inch or 36-inch) at key points in the garland – perhaps at the apex of an arch or as a focal point. Secure these larger balloons using balloon dots, ensuring they are firmly attached to the underlying structure. Don’t be afraid to layer balloons of the same size but different colors to create ombre effects or interesting color blocks. For a more dramatic look, consider attaching balloons in a slightly offset manner, creating a more voluminous and less linear appearance. This layering process is where your DIY garland transforms from a simple string of balloons into an impressive piece of decor. Experiment with different cluster sizes and placements until you achieve the desired aesthetic. The goal is to minimize visible balloon tape and create a seamless, flowing effect.
Securing Your Front Door Balloon Garland Outdoors
Outdoor installation requires careful consideration of stability and durability. First, identify your attachment points. For many front doors, the doorframe itself offers solid anchor points. You can use strong, temporary command hooks or adhesive hooks that won’t damage your paint. If your doorframe isn’t suitable, consider using sturdy outdoor furniture, railings, or even small posts positioned on either side of the entrance. Before attaching the garland, drape it loosely over your doorframe or desired location to visualize the final placement and determine the best anchor points. Once you have your points, begin securing the garland. Thread fishing line or heavy-duty twine through the balloon tape at strategic intervals and tie it securely to your chosen anchor points. For particularly windy areas, you may need to add additional anchor points or use a denser balloon construction to provide more weight and resistance. If you’re creating a balloon arch that spans across the doorway, ensure the base is weighted down or securely anchored to prevent it from tipping. You can use sandbags, weights, or stakes for this purpose. Use additional balloon dots to secure the garland to the door itself, or to any other surfaces it might brush against, preventing unwanted movement and abrasion. If your garland is very long, you might need to add support in the middle by creating a slight curve and attaching it to a point on the wall or door. This will prevent it from sagging excessively. For added longevity, consider spraying the entire garland with a UV-protective spray designed for balloons. This will help prevent them from drying out and popping due to sun exposure.
Troubleshooting and Maintenance for Outdoor Balloon Garlands
Even with careful planning and installation, outdoor balloon garlands can encounter challenges. One common issue is balloon deflation. Latex balloons naturally lose air over time, and this is accelerated by heat and sunlight. If you notice a few balloons deflating significantly, you can often replace them by carefully detaching the deflated balloon (cutting the knot) and inserting a new, inflated one using a balloon dot. Another concern is wind. If your garland is in a very windy location, you may need to reinforce your anchor points or add more balloons for weight. Consider a more compact and tightly packed garland design in windy conditions. Rain can also impact your garland. While a light shower is usually fine, heavy rain can cause balloons to become waterlogged and heavy, potentially causing them to sag or detach. If heavy rain is forecast, you might consider bringing your garland indoors temporarily if possible. For garlands intended for longer displays, such as holiday decorations, regular checks are advisable. Inspect for any loose balloons, weak attachment points, or signs of wear and tear. Addressing minor issues promptly can prevent larger problems. Sunlight is the biggest enemy of outdoor latex balloons. The UV rays degrade the latex, causing them to become brittle and prone to popping. As mentioned, UV-protective spray can help. For very long-term displays, consider using artificial or faux balloons which are more weather-resistant. However, for most DIY celebrations, a well-constructed latex balloon garland can last several days to a week, depending on conditions.
SEO Keywords and Integration Strategy for "DIY Balloon Garland for Front Door"
To ensure this article ranks highly for relevant search queries, strategic keyword integration is vital. We’ve already naturally incorporated terms like "DIY balloon garland front door," "front door balloon decor," and "how to make a balloon arch porch." Further enhancing SEO involves targeting long-tail keywords and related phrases. Consider using variations such as "easy front door balloon garland tutorial," "outdoor balloon arch for party," "DIY porch balloon decorations," and "festive front door balloon ideas." These phrases are likely to be used by individuals actively searching for this specific project. Throughout the article, maintain a natural flow, avoiding keyword stuffing. Each section should address a specific aspect of the process, making it easy for readers to find the information they need. For example, within the "Materials" section, include phrases like "best balloons for outdoor garland" and "where to buy balloon tape." In the "Assembly" section, incorporate "step-by-step balloon garland instructions" and "how to attach balloons to balloon strip." The "Securing" section should naturally include "outdoor balloon garland installation" and "how to hang balloons on front door." Think about user intent: someone searching for "DIY balloon garland front door" is looking for practical, actionable advice. Therefore, the content should be informative, detailed, and easy to follow. Using headings and subheadings that incorporate these keywords will also improve readability and SEO. For instance, a subheading like "Step 3: Assembling Your Balloon Garland Base on Balloon Tape" directly addresses a user’s likely search query. Regularly review search engine results pages (SERPs) for your target keywords to understand what kind of content is ranking and adapt your strategy accordingly. Ensure image alt text for any accompanying images is descriptive and includes relevant keywords. For example, "DIY balloon garland installation on front door" or "Colorful balloon arch for outdoor party." This comprehensive approach to content creation and keyword integration will maximize visibility and attract the intended audience.
