
DIY Decorative Clay Bells: Craft Your Own Unique Chimes with This Comprehensive Guide
Creating decorative clay bells offers a fulfilling and budget-friendly way to add a touch of handmade charm to your home or garden. Beyond their aesthetic appeal, these DIY creations can produce delightful tinkling sounds, reminiscent of wind chimes, or serve as unique ornaments for holidays and special occasions. This comprehensive guide will walk you through every step, from selecting the right clay to finishing your bell, ensuring a successful and rewarding crafting experience. We’ll delve into material choices, essential tools, shaping techniques, firing methods (both kiln and oven), decorating ideas, and even offer tips for incorporating them into various decorative projects.
Understanding Your Clay Options for Decorative Bells
The foundation of any successful clay project is the clay itself. For decorative clay bells, you have several excellent options, each with distinct properties and benefits.
-
Air-Dry Clay: This is arguably the most accessible and beginner-friendly option. Air-dry clay hardens on its own at room temperature without the need for a kiln or oven. It’s readily available in craft stores, comes in various colors, and is generally forgiving for beginners. The key advantage is its simplicity; no special equipment is needed for curing. However, air-dry clay is typically less durable and more susceptible to moisture than fired clays. For outdoor use, it’s crucial to seal it thoroughly with a weatherproof varnish. It’s ideal for indoor decorations, mobiles, and projects where extreme durability isn’t a primary concern.
-
Polymer Clay: Polymer clay is a versatile and popular choice for crafters. It remains pliable until baked in a standard home oven at a specific temperature recommended by the manufacturer. Once baked, it becomes hard, durable, and often exhibits a subtle sheen. Polymer clay comes in an extensive range of colors, including metallics, translucents, and even glitters, offering immense decorative possibilities. It’s also relatively easy to sculpt and manipulate, making it suitable for intricate designs. However, it can be more expensive than air-dry clay, and proper ventilation during baking is important.
-
Ceramic/Earthenware Clay (for Kiln Firing): This is the traditional choice for pottery and offers the highest level of durability and a professional finish. Earthenware clay requires firing in a ceramic kiln to achieve its hardened state. This method results in a robust, waterproof, and permanent piece. While offering superior quality, it necessitates access to a kiln, either your own or through a local pottery studio or community art center. For those serious about clay work and seeking the most professional results, kiln-fired clay is the ultimate choice.
Essential Tools and Supplies for DIY Clay Bells
Gathering the right tools will streamline your crafting process and enhance the quality of your finished bells.
- Clay: As discussed above, choose the type that best suits your needs and resources.
- Work Surface: A smooth, non-porous surface is ideal. A large tile, a piece of glass, or a dedicated crafting mat works well. Avoid porous surfaces like untreated wood, which can absorb moisture from the clay.
- Rolling Pin or Clay Roller: For achieving even thickness when flattening clay.
- Cutting Tools: A craft knife, a utility knife, or specialized clay cutters can be used to shape and trim the clay. A sharp blade is crucial for clean cuts.
- Sculpting Tools: A variety of clay sculpting tools, from basic wooden dowels and pointed tools to needle tools and ribbon tools, will help you refine shapes, add details, and create textures. Even household items like toothpicks, skewers, and the blunt end of a pencil can be surprisingly useful.
- Water: A small bowl of water is essential for smoothing edges, attaching pieces, and keeping your hands and tools moist when working with air-dry or earthenware clay.
- Sponge: A damp sponge is excellent for smoothing surfaces and blending seams.
- Hole Punch or Awl: For creating holes for hanging your bells.
- Drying Rack or Surface: For air-dry clay, a flat, well-ventilated surface is needed. For kiln-fired clay, a drying rack is also important.
- Decorating Supplies: This will vary greatly depending on your chosen decoration method and includes paints, glazes, stamps, texture tools, beads, and sealants.
Step-by-Step Guide to Crafting Your Decorative Clay Bell
Let’s dive into the practical steps of creating your decorative clay bells.
1. Preparing Your Clay:
- Air-Dry/Polymer Clay: Knead the clay thoroughly until it’s soft, pliable, and free of air bubbles. This process, often called "conditioning," is crucial for achieving a smooth finish and preventing cracking. If your clay is too stiff, a tiny bit of water can help (for air-dry) or a clay softener can be used (for polymer).
- Earthenware Clay: If using natural earthenware clay, it may need to be wedged to remove air pockets and achieve a uniform consistency.
2. Shaping the Bell Form:
There are several ways to create the basic bell shape:
- Pinch Pot Method: Take a lump of clay and form it into a ball. Insert your thumb into the center of the ball, creating a well. Gently pinch and rotate the clay, working your way up the sides to create a hollow form. Continue pinching and smoothing until you achieve the desired bell shape and thickness (aim for about 1/4 inch for durability). This method is excellent for creating organic, slightly irregular, and charming bells.
- Coil Building: Roll out long, snake-like coils of clay. Begin by forming a flat base, then attach coils one by one, smoothing them together to build up the walls of the bell. This technique allows for more control over the size and shape of the bell and can be used to create more symmetrical forms.
- Slab Building: Roll out a sheet of clay to an even thickness. You can cut out a large circle for the base and then a curved rectangle that will form the body of the bell. Score and slip (apply a thin mixture of clay and water) the edges to join them securely. This method is good for creating more precise and uniform bell shapes.
- Molding (for Polymer Clay): For polymer clay, you can also press it into pre-made bell molds or use tools to shape it around a cylindrical form (like a marker or dowel) and then gently taper the top.
3. Creating the Clapper (Optional but Recommended):
For a functional chiming bell, you’ll need a clapper.
- Clay Clapper: Roll a small ball of clay. You can either thread a piece of string or wire through it before it hardens, or create a small loop on top to attach later. Alternatively, you can suspend a small, hardened clay bead from the inside of the bell.
- Non-Clay Clapper: You can also use beads, small metal charms, or even small stones as clappers. Ensure they are securely attached.
4. Adding Hanging Mechanism:
This is a crucial step for any bell.
- Hole for Hanging: Before the clay dries significantly, use an awl or a small punch to create a hole at the top of the bell. This hole should be large enough to thread a string, twine, wire, or ribbon through for hanging. If you’re using a separate clapper, ensure the hole is positioned so the clapper can hang freely inside the bell.
- Loop Attachment: For polymer clay or earthenware, you can also sculpt a small loop directly onto the top of the bell and attach it securely using the score-and-slip method.
5. Refining and Decorating Your Bell:
This is where your creativity truly shines.
- Smoothing: Once the basic shape is formed, use a damp sponge and your fingers to smooth out any unwanted bumps or fingerprints. For air-dry and earthenware clay, be careful not to add too much water, which can weaken the clay.
- Adding Texture: Use various tools to create interesting textures. Stamps, combs, stencils, leaves, or even rough surfaces can be pressed into the clay.
- Incising Designs: Use a pointed tool or a craft knife to carve or etch designs into the clay.
- Adding Embellishments: Press small beads, seed beads, or small decorative elements into the wet clay. Ensure they are securely embedded.
- Cutting Windows or Shapes: For a more delicate look, you can carefully cut out small shapes or "windows" from the bell’s surface. Be mindful of structural integrity.
6. Drying and Curing Your Bells:
The method for drying or curing depends on the type of clay used.
- Air-Dry Clay: Place your bells on a flat, well-ventilated surface away from direct heat or drafts. Allow them to dry completely. This can take 24-72 hours, depending on the thickness of the clay and the humidity in your environment. Turn them occasionally to ensure even drying.
- Polymer Clay: Follow the manufacturer’s instructions for baking. Typically, this involves baking in a preheated oven at a specific temperature (usually between 230-275°F or 110-135°C) for a set amount of time, usually 15-30 minutes per 1/4 inch of thickness. Ensure good ventilation during baking and allow the clay to cool completely in the oven.
- Earthenware Clay (Kiln Firing): Allow the clay bells to dry thoroughly (bone dry). They then need to be fired in a ceramic kiln to cone 04 to 06 for earthenware. If you plan to glaze them, a second firing will be required after glazing.
7. Finishing and Sealing:
Once your bells are dry or cured, it’s time for the final touches.
- Sanding (Optional): For a smoother finish, you can lightly sand air-dry or cured polymer clay with fine-grit sandpaper.
- Painting:
- Acrylic Paints: These are excellent for all types of clay. Apply multiple thin coats for best coverage. You can use brushes, sponges, or even spray paints.
- Ceramic Glazes: If you’ve used kiln-fired clay and have access to glazes and a kiln, this is the professional way to color and seal your bells.
- Sealing:
- Air-Dry Clay: It’s crucial to seal air-dry clay, especially if it will be exposed to moisture or the outdoors. A clear acrylic sealant, polyurethane varnish, or a weatherproof outdoor sealant will protect the clay from damage and enhance its longevity. Apply several coats for maximum protection.
- Polymer Clay: While polymer clay is durable once baked, sealing it with a clear acrylic sealant can add an extra layer of protection and a desired sheen.
- Kiln-Fired Clay: Glazes provide the sealing for kiln-fired clay.
Creative Decorative Ideas for Your Clay Bells
The decorative possibilities are endless. Here are some popular and effective ideas:
- Nature-Inspired: Press leaves, small flowers, or even twigs into the clay before it dries. Paint the bells in earthy tones or metallic finishes to mimic natural elements.
- Holiday Themed: Create festive bells for Christmas (red, green, gold, snowflake designs), Easter (pastel colors, bunny motifs), or other holidays.
- Bohemian Chic: Use intricate patterns, mandala designs, or metallic paints for a bohemian vibe. Incorporate beads and tassels for added flair.
- Whimsical and Fun: Paint bright, cheerful colors, add googly eyes, or sculpt small animal features onto your bells for a playful look.
- Textured Wonders: Experiment with different textures using stamps, lace, or even bubble wrap to create unique surfaces.
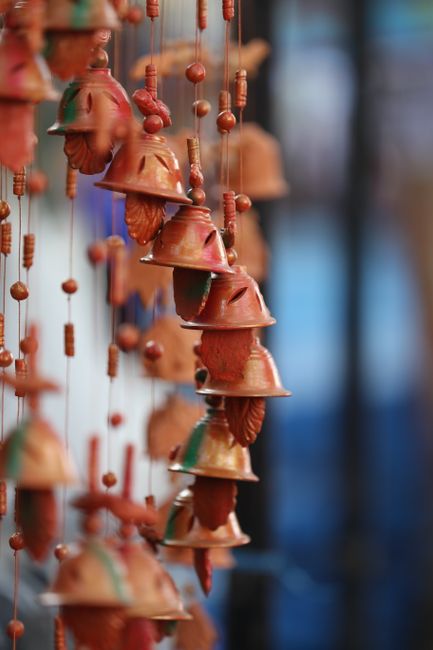
- Mobiles and Garlands: String multiple clay bells together to create beautiful hanging mobiles for nurseries, windows, or patios. They can also be incorporated into decorative garlands.
- Garden Ornaments: Seal your bells thoroughly for outdoor use. Hang them from tree branches, pergolas, or garden hooks to add a touch of sound and color to your outdoor space.
Tips for Success and Troubleshooting
- Even Thickness: Aim for consistent clay thickness throughout your bell to prevent uneven drying or cracking.
- Avoid Cracking: Cracking often occurs due to uneven drying, adding too much water to air-dry clay, or stress points in the design. Ensure slow, even drying and reinforce joins if necessary.
- Secure Attachments: When adding decorative elements or hanging loops, make sure they are securely attached. Score and slip (using clay slip) is your best friend for joining pieces.
- Ventilation is Key: When working with polymer clay and baking it, ensure good ventilation in your kitchen.
- Patience: Clay crafting requires patience. Allow adequate drying and curing times for the best results.
- Experiment: Don’t be afraid to experiment with different techniques and materials. The joy of DIY is in the exploration!
By following these comprehensive steps and creative ideas, you can embark on a rewarding journey of crafting beautiful and unique decorative clay bells. These handmade treasures will add a personal touch and delightful charm to any space.
