
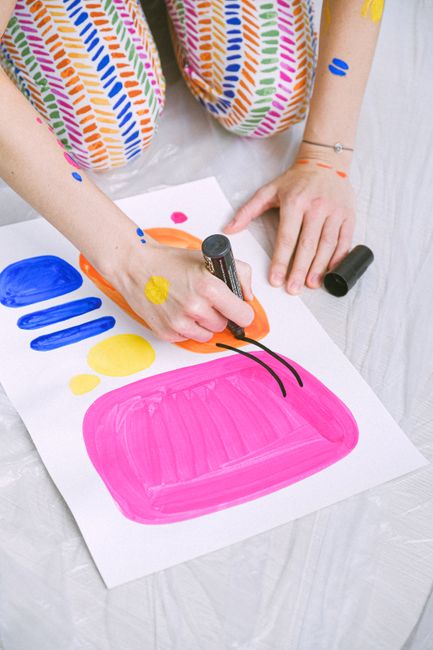
DIY Abstract Painted Pillows: Unleash Your Inner Artist and Transform Your Home Decor
Abstract art offers a boundless canvas for self-expression, and what better way to infuse your living space with personality and vibrant energy than through DIY abstract painted pillows? Moving beyond the confines of mass-produced decor, this project empowers you to create unique statement pieces that are both functional and visually captivating. Forget intricate patterns or precise lines; abstract painting embraces spontaneity, fluid movement, and the interplay of color and texture. This comprehensive guide will walk you through every step of creating your own stunning abstract painted pillows, from selecting the right materials to mastering various techniques, ensuring your handcrafted treasures become the focal point of any room.
The beauty of abstract art lies in its liberation from representation. Instead of depicting recognizable objects or scenes, abstract art focuses on elements like color, form, line, and texture to evoke emotions, moods, and ideas. When applied to pillows, this artistic freedom translates into endless possibilities for personalization. Whether your style leans towards bold and energetic splashes of color, subtle and moody washes, or graphic geometric interpretations, abstract painting allows you to translate your aesthetic vision directly onto fabric. This DIY project isn’t just about decorating; it’s about creating art that you can literally sink into, adding a touch of handmade charm and a story to your home.
Materials are crucial for a successful DIY abstract painted pillow project. High-quality fabric paint is paramount. Look for paints specifically designed for textiles, as they will remain flexible after drying, preventing cracking and stiffness. Brands like Jacquard Textile Color, DecoArt Fabric Paint, and Tulip Soft Fabric Paint are excellent choices, offering a wide spectrum of colors and finishes. Consider both opaque and transparent options, as they can be layered to create depth and unique effects. Beyond the paint itself, you’ll need a variety of brushes. Assorted sizes and shapes are essential: wide, flat brushes for broad strokes and washes, round brushes for finer details and lines, and even fan brushes for creating interesting textures and blending. Don’t underestimate the power of unconventional application tools. Sponges, palette knives, old credit cards, even your fingers can be used to create dynamic and unexpected textures. For a more controlled drip effect, squeeze bottles are invaluable.
The canvas for your abstract masterpiece is your pillow cover. While pre-made pillow covers are readily available, consider the fabric type. Natural fibers like cotton and linen tend to absorb paint beautifully and offer a lovely tactile quality. Synthetic blends can also work, but always test your paint on a scrap piece of fabric first to ensure good adhesion and desired results. Pre-washing your pillow covers is an essential but often overlooked step. This removes any sizing or finishing treatments that might interfere with paint adhesion and also pre-shrinks the fabric, preventing your finished pillow from distorting after future washes. Ironing your pillow covers to a smooth, taut surface will also provide a better base for painting, ensuring even application and preventing unwanted wrinkles or folds from disrupting your design.
Safety and preparation are key to a smooth and enjoyable painting experience. Work in a well-ventilated area, especially when using fabric paints, as some can release fumes. Protect your workspace with old newspapers, drop cloths, or plastic sheeting to prevent accidental spills and stains. Consider wearing old clothes that you don’t mind getting paint on. For larger pillow covers or designs that involve multiple layers or extensive paint application, you might want to insert a piece of cardboard or plastic sheeting inside the pillow cover. This prevents the paint from bleeding through to the other side and creates a taut surface for painting, similar to stretching a canvas.
Now, let’s dive into the exciting world of abstract painting techniques. The "splatter" technique is a classic for a reason. Load a brush with diluted fabric paint, hold it over your pillow cover, and flick your wrist. Vary the distance from the fabric and the amount of paint on the brush to create different sizes and densities of splatters. For a more controlled splatter, use a toothbrush dipped in paint and run a comb or stick through the bristles. The "drip" technique involves diluting paint with a fabric medium or water until it reaches a fluid consistency. Load a squeeze bottle or a brush with the diluted paint and allow it to drip naturally down the fabric. Experiment with layering different colors of drips to create depth and visual interest.
The "wash" technique is perfect for creating soft, blended backgrounds or subtle color transitions. Mix a generous amount of fabric paint with a fabric medium or water to create a watercolor-like consistency. Apply the diluted paint to your pillow cover with a large, flat brush, working in broad strokes. You can blend colors by applying a second wash of a different color while the first is still wet. "Stamping" is another versatile technique. You can use store-bought foam stamps, carve your own from potatoes or craft foam, or even use everyday objects like bubble wrap or crumpled paper. Dip the stamp into paint and press it firmly onto the fabric to create repeating patterns or random textures.
"Palette knife painting" offers a more sculptural and textured approach. Load a palette knife with thick fabric paint and apply it to the fabric with sweeping, scraping, or dabbing motions. This technique creates bold, impasto-like effects. "Masking" can add a graphic and defined element to your abstract designs. Use masking tape or painter’s tape to create sharp lines, geometric shapes, or areas you want to keep paint-free. Apply paint over the masked areas, and once dry, carefully peel away the tape to reveal crisp, unpainted sections. Experiment with different tape widths and placements for varied results.
Consider the power of layering and texture. Don’t be afraid to combine techniques. A splattered background can be enhanced with stenciled shapes, or a wash can be overlaid with palette knife strokes. Build up layers of color, allowing each to dry partially or completely between applications. This creates depth and dimension. Incorporating textured elements can elevate your design. Fabric mediums that add texture, like a puff paint additive or a fabric thickening gel, can be mixed with your paints to create raised areas or interesting surface qualities. Even the natural texture of the fabric itself plays a role; consider the weave and how it interacts with the paint.
Color theory is your friend, even in abstract art. Think about the emotions and moods you want to evoke. Warm colors like reds, oranges, and yellows tend to be energetic and stimulating, while cool colors like blues, greens, and purples are calming and serene. Consider color combinations that create contrast, harmony, or tension. Complementary colors (opposites on the color wheel) create strong visual impact, while analogous colors (next to each other on the color wheel) offer a more harmonious feel. Don’t be afraid to experiment with unexpected color pairings; sometimes the most striking results come from breaking the rules.
After you’ve unleashed your creativity and your abstract masterpiece is complete, proper drying and setting are crucial for longevity. Allow the painted areas to dry completely, which can take anywhere from 24 to 72 hours depending on the thickness of the paint and humidity levels. Once dry, most fabric paints require heat setting to make them permanent and washable. Follow the manufacturer’s instructions for heat setting, which typically involves ironing the painted fabric on a medium-high heat setting (without steam) for a specific amount of time. Iron on the reverse side of the fabric if possible, or place a pressing cloth between the iron and the painted surface. This process cures the paint, making it durable and resistant to fading and washing.
Caring for your DIY abstract painted pillows is straightforward. Machine wash them on a gentle cycle with cold water and mild detergent. Avoid using bleach or harsh stain removers, as these can damage the paint. Tumble dry on low heat or air dry for best results. Iron on the reverse side or with a pressing cloth as needed. By following these care instructions, your unique, handcrafted pillows will maintain their vibrant beauty for years to come, continuing to add a personalized touch to your home.
Beyond the aesthetic appeal, the process of creating DIY abstract painted pillows offers significant benefits. It’s a therapeutic and meditative activity, allowing you to de-stress and engage in mindful creation. It’s also an incredibly cost-effective way to update your home decor. Instead of purchasing expensive designer pillows, you can transform plain, inexpensive ones into bespoke works of art. Furthermore, it’s an excellent opportunity to upcycle old or plain pillows that you might otherwise discard. This project is also highly adaptable for different skill levels. Beginners can start with simple splatters and washes, while more experienced artists can experiment with complex layering, mixed media, and intricate textures.
Consider the potential for themed abstract pillows. While abstract art doesn’t represent specific subjects, you can still draw inspiration from themes. For a coastal vibe, use blues, greens, and sandy tones with fluid, wave-like strokes. For a more urban feel, incorporate grays, blacks, and pops of vibrant color with geometric shapes. A bohemian aesthetic might call for earthy tones, intricate stippling, and layered textures. The possibilities are truly endless, limited only by your imagination.
When planning your designs, consider the overall color palette of the room where the pillow will be displayed. While abstract art offers freedom, a cohesive color scheme will ensure your new pillows complement your existing decor. You can also create a set of pillows with a unifying color palette but varying abstract patterns for a dynamic and layered look. Think about the scale and proportion of your designs. A large, bold abstract pattern can be a dramatic statement piece, while smaller, more intricate abstract elements can add subtle interest.
This DIY project is also perfect for collaborative efforts. Get the whole family involved and let everyone contribute their unique artistic vision to different pillows, or even to different sections of the same pillow. This fosters creativity and creates shared memories. The joy of giving a handmade gift is unparalleled. A custom-designed abstract painted pillow is a thoughtful and personal present that will be cherished by the recipient.
In conclusion, DIY abstract painted pillows offer a rewarding and accessible path to infusing your home with unique style and artistic flair. By understanding the materials, embracing various techniques, and allowing your creativity to flow, you can transform ordinary pillow covers into extraordinary pieces of functional art. This project empowers you to express your individuality, add vibrant color and texture to your living spaces, and experience the satisfaction of creating something beautiful with your own hands. So gather your supplies, clear your workspace, and embark on a journey of abstract expression – your home decor will thank you for it.

