Sister style theres no place like home – Sister Style: There’s No Place Like Home explores the fascinating connection between fashion, family, and the power of shared identity. It’s not just about dressing alike; it’s about how sisters use style to express their unique bond, drawing inspiration from their shared experiences, home, and childhood memories.
Think about those iconic fashion duos like the Olsen twins or the Hadid sisters – their individual styles might differ, but there’s an undeniable thread of shared aesthetic that connects them. This is what “Sister Style” is all about: the way we express our family connection through fashion, creating a visual language that speaks volumes about our shared values and experiences.
The Concept of “Sister Style”: Sister Style Theres No Place Like Home
The term “sister style” refers to a shared aesthetic sensibility between sisters, often characterized by similar fashion choices, personal style, and overall aesthetic preferences. This phenomenon transcends mere coincidence; it reflects a deep-rooted connection stemming from shared experiences, values, and influences.
The Influence of Shared Experiences and Values, Sister style theres no place like home
Sisters often grow up in the same environment, sharing similar experiences, values, and cultural influences. These shared formative years contribute to a common understanding of beauty, style, and self-expression. They might have similar fashion icons, favorite brands, or even a shared history of experimenting with different styles together.
Sister style is all about sharing, whether it’s clothes, stories, or a love for home. And now, thanks to the Bitget Wallet’s Omniconnect Dev Kit , we can share the exciting world of Web3 with even more people. It’s a reminder that even as we explore new frontiers, the bonds of sisterhood and the comfort of home remain central to our lives.
For instance, sisters who grew up in the 90s might have a shared affinity for grunge fashion, while sisters who grew up in the 2000s might gravitate towards trends like pop punk or boho chic.
Sister style is all about creating a space that feels like a sanctuary, a place where you can truly relax and be yourself. And what better way to achieve that than by maximizing your bedroom storage? Check out these 7 tried and tested bedroom storage tips to maximize your space – you’ll be amazed at how much more organized and peaceful your room can feel! After all, a clutter-free bedroom is a happy bedroom, and that’s what sister style is all about.
Examples of “Sister Style”
Many famous sisters exemplify the concept of “sister style.” For example, the Olsen twins, Mary-Kate and Ashley, have built a fashion empire based on their shared aesthetic, known for its minimalist and bohemian style. Similarly, the Hadid sisters, Gigi and Bella, are known for their effortlessly chic and sophisticated looks, often featuring high-fashion pieces and a preference for neutral colors.
“Sisters are like built-in best friends.”
Unknown
While the Olsen twins favor a more relaxed and bohemian aesthetic, the Hadid sisters lean towards a more polished and glamorous style, both demonstrating how “sister style” can manifest in diverse ways. These shared aesthetic choices often become a signature element of their individual brands and public personas.
Home as a Source of Inspiration
Our homes are more than just shelters; they’re sanctuaries where we cultivate our identities and express our unique personalities. This intrinsic connection between home and self naturally extends to our personal style, making our homes a rich wellspring of inspiration for fashion choices.
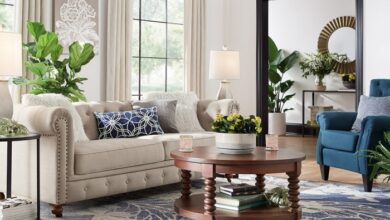
The Influence of Home Decor
The colors, textures, and patterns we choose for our homes often reflect our aesthetic preferences and personal style. These same elements can seamlessly translate into our wardrobes. For example, if your home is adorned with vibrant hues and bold prints, you might gravitate towards similarly vibrant and expressive clothing.
Conversely, a minimalist home with muted tones may inspire a more understated and refined fashion sense.
Family Traditions and Childhood Memories
Family traditions and childhood memories hold a special place in our hearts and often shape our sense of identity. These experiences can deeply influence our style choices. For example, a family tradition of wearing a specific outfit for a holiday celebration may become a cherished part of your personal style.
Similarly, a childhood memory of your grandmother’s elegant jewelry might inspire you to incorporate vintage pieces into your wardrobe.
Designers and Brands Inspired by Home
Many designers and brands draw inspiration from the concept of home in their collections, reflecting the comfort, familiarity, and sense of belonging that it evokes.
- Ralph Lauren, known for his classic Americana aesthetic, often incorporates elements of home decor, such as plaids, stripes, and floral patterns, into his clothing lines. His designs evoke a sense of nostalgia and timeless elegance, reminiscent of cozy living rooms and family gatherings.
- Dries Van Noten, a Belgian designer, is renowned for his intricate prints and textures that often draw inspiration from traditional textiles and patterns found in homes around the world. His collections often feature a mix of vintage and contemporary influences, reflecting a sense of comfort and familiarity.
- Chloé, a French fashion house, has long been known for its romantic and feminine aesthetic. Their collections often feature soft fabrics, delicate lace, and flowing silhouettes, reminiscent of a cozy and inviting home.
The Power of Shared Identity

Sister style goes beyond just coordinating outfits; it’s a powerful way for sisters to express their shared identity and strengthen their familial bonds. Fashion becomes a language, a way of communicating their connection and celebrating their unique sisterhood.
Sister style is all about finding that perfect balance between comfort and confidence, just like finding the right machine learning strategy. It’s about knowing what works best for you and your goals, whether it’s a classic black dress or a cutting-edge algorithm.
But just like you can’t expect a machine learning model to magically solve all your problems, you can’t expect a single outfit to make you feel amazing every time. Sometimes, you need to experiment, explore new options, and even learn from failures.
That’s why it’s important to be aware of the common reasons why machine learning strategies fail , so you can avoid them and create a winning style, both in fashion and in your data science projects.
Fashion as a Unifying Force
Fashion plays a significant role in creating a sense of belonging and community among sisters. When sisters dress similarly, it can visually reinforce their shared history, values, and experiences. It’s a subtle way of saying, “We’re in this together.” This shared aesthetic can create a sense of unity and belonging, especially during important life events or celebrations.
Think of sisters coordinating outfits for a wedding, a graduation ceremony, or even just a casual day out. These coordinated looks become a visual representation of their shared joy and support.
Sister Style as Communication
Sister style is not just about looking alike; it’s also about communicating their individuality and their relationship. It’s a form of nonverbal communication, a way of expressing their unique bond and understanding. For example, sisters might adopt a similar style but with individual twists, reflecting their personal preferences and personalities.
This allows them to express their individuality while still maintaining a shared aesthetic.
“Sister style is like a secret code, a way of saying ‘I get you’ without saying a word.”
Anonymous
Exploring Different Styles and Trends
![]()
Sister style is not just about sharing clothes; it’s about expressing a shared aesthetic and a sense of unity. As sisters navigate the ever-changing landscape of fashion, they find inspiration in different trends, adapting them to their unique personalities while still maintaining a sense of cohesion.
From vintage elegance to modern minimalism, each style offers a unique way to express sisterhood through fashion.
Different Sister Style Trends
Sister style trends can be categorized into various styles, each reflecting a different aesthetic and approach to fashion.
| Style | Clothing Items | Accessories | Makeup Techniques |
|---|---|---|---|
| Vintage |
|
|
|
| Bohemian |
|
|
|
| Minimalist |
|
|
|
| Modern |
|
|
|
Cultural and Societal Influences
Sister style trends are not static; they evolve constantly, influenced by cultural shifts, societal trends, and the changing landscape of fashion. The rise of social media has played a significant role in shaping sister style trends, providing a platform for sisters to share their fashion choices and inspire each other.
Cultural influences, such as music, art, and pop culture, also play a role in shaping the way sisters express their shared style. For example, the resurgence of 90s fashion has inspired many sisters to embrace grunge and retro aesthetics.
The influence of social media and cultural trends can lead to a shift in the popularity of certain styles and the emergence of new trends.
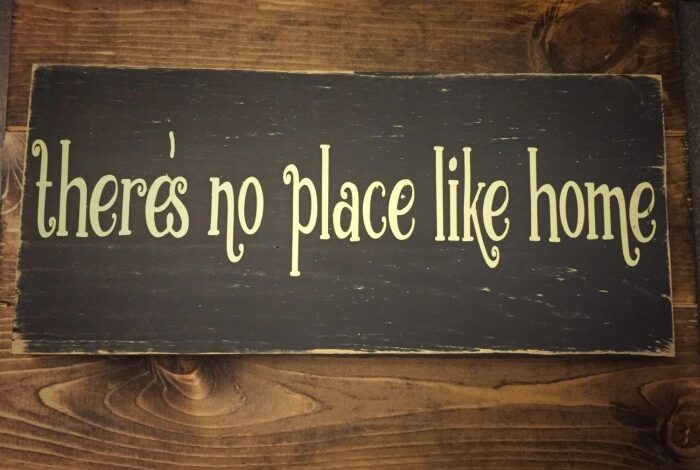
There’s No Place Like Home
A Visual Representation
A Visual Representation

The concept of “sister style” and “home” as a source of inspiration can be beautifully captured through a mood board. This visual representation brings together various elements that evoke a sense of warmth, comfort, and shared identity, reflecting the unique bond between sisters.
A Visual Representation of Sister Style and Home
The mood board is a collage of images that tell a story. It showcases the interconnectedness of sisterhood, fashion, and the comforting embrace of home. The central theme revolves around the idea that home is not just a physical space but also a source of inspiration for personal style.
- Sisters:The mood board features photographs of sisters, capturing their unique personalities and shared bond. The images highlight their individual styles while emphasizing the sense of unity and connection they share.
- Fashion Items:A selection of fashion items, including vintage dresses, handcrafted jewelry, and personalized accessories, are strategically placed to represent the sisters’ individual style preferences. These items evoke a sense of individuality and the shared passion for fashion.
- Home Decor:The mood board includes images of cozy living rooms, well-stocked bookshelves, and personalized spaces. These elements represent the warmth and comfort of home, suggesting that the sisters’ shared identity is deeply rooted in their shared living space.
- Nature and Travel:Images of natural landscapes, vibrant cityscapes, and travel souvenirs are included to reflect the sisters’ shared experiences and their desire to explore the world together. These elements emphasize the idea that their style is influenced by their shared adventures.
“Home is where the heart is, and our style is a reflection of our hearts.”
The mood board’s overall aesthetic is warm, inviting, and filled with a sense of nostalgia. The colors used are soft and muted, creating a calming atmosphere. The overall effect is one of comfort, belonging, and shared identity, reflecting the essence of “sister style” and the profound impact of home as a source of inspiration.