Elsies dream diy light fixture – Elsie’s Dream DIY light fixture is more than just a lighting project; it’s a journey into creativity and a chance to bring a touch of personalized charm to your home. Inspired by the desire to create something unique and beautiful, Elsie’s Dream is a testament to the power of DIY and the satisfaction of crafting something with your own hands.
This project, while ambitious, is accessible to anyone with a passion for crafting and a willingness to learn.
This guide will walk you through each step of the process, from gathering materials to installing the finished fixture. We’ll cover everything from choosing the right light bulbs to ensuring electrical safety, all while exploring the endless possibilities for customization and personalization.
Whether you’re a seasoned DIY enthusiast or a curious beginner, this guide will empower you to create your own Elsie’s Dream and illuminate your space with a touch of personal style.
Elsie’s Dream DIY Light Fixture: A Whimsical and Stylish Illumination
Elsie’s Dream DIY light fixture has captured the hearts of DIY enthusiasts and design lovers alike. Its captivating charm lies in its whimsical design, offering a unique blend of rustic elegance and modern aesthetics. This project allows you to create a stunning statement piece for your home, adding a touch of personality and individuality to any space.
The inspiration behind Elsie’s Dream DIY light fixture stems from a desire to create a light source that is both functional and visually captivating. Its design draws inspiration from nature, incorporating elements of organic shapes and textures, reminiscent of blooming flowers or delicate branches.
I’m finally tackling Elsie’s dream DIY light fixture, a project I’ve been putting off for ages. The plan is to use reclaimed wood and vintage glass, but first, I need to find the perfect fabric shade. I’m thinking something bold and textured, maybe inspired by the sleek winter office looks in the L.K.
Bennett winter guide – I love their use of color and pattern. Once I find the perfect shade, I can get started on building the fixture, and then my living room will be bathed in the warm glow of DIY magic!
The result is a light fixture that feels both ethereal and grounded, seamlessly blending with various interior styles.
Materials and Tools Needed
The beauty of Elsie’s Dream DIY light fixture lies in its simplicity and accessibility. The project requires a limited set of materials and tools, making it an achievable undertaking for both beginners and experienced DIYers.
- Glass Jars or Vases:The foundation of the light fixture, offering a variety of shapes and sizes to suit your design preferences.
- Light Bulbs:Choose LED bulbs for energy efficiency and longevity, and select a warm white or soft white color temperature for a cozy ambiance.
- Electrical Wire:Ensure the wire is rated for the wattage of your chosen light bulbs.
- Electrical Connectors:These are essential for safely connecting the electrical components.
- Wire Strippers:Used for stripping the insulation off the electrical wire.
- Pliers:Useful for twisting and securing wire connections.
- Screwdriver:Required for assembling the electrical components and attaching the fixture to the ceiling.
- Hot Glue Gun:Used for securing decorative elements and providing a clean finish.
- Decorative Elements:Unleash your creativity and choose elements that reflect your style, such as twine, beads, feathers, or dried flowers.
Step-by-Step Guide to Building Elsie’s Dream DIY Light Fixture
Building Elsie’s Dream DIY light fixture is a fun and rewarding project that allows you to express your creativity and add a unique touch to your home décor. This step-by-step guide will walk you through the entire process, from gathering materials to assembling the final fixture.
Gathering the Materials
Before you begin, it’s essential to gather all the necessary materials. This ensures a smooth and efficient construction process.
- Light fixture kit:Choose a kit that includes the base, wiring, and socket for your desired bulb type. Consider the style and size of the kit to match your vision for the fixture.
- Glass or ceramic beads:These will be the main decorative element of your fixture. Select beads in various sizes, shapes, and colors to create a visually appealing design.
- Wire cutters:For safely cutting the wire to the appropriate length.
- Wire strippers:To remove the insulation from the wire ends for secure connections.
- Electrical tape:To insulate the wire connections and prevent short circuits.
- Screwdriver:To assemble the fixture and tighten the screws.
- Pliers:For holding and manipulating the beads and wire.
Preparing the Beads
Once you have your beads, it’s time to prepare them for attachment to the fixture.
- Cleaning the Beads:Before attaching the beads, it’s essential to clean them thoroughly to remove any dust or debris. This will enhance their appearance and ensure a clean and professional finish. A simple solution of warm water and mild soap will do the trick.
Allow them to air dry completely.
- Stringing the Beads:You can string the beads onto a wire or fishing line. This will allow you to create a continuous flow of beads around the fixture. Be sure to use a wire or line that is strong enough to support the weight of the beads.
- Creating the Design:Experiment with different bead combinations and arrangements to create a unique and eye-catching design. You can use beads of various sizes, shapes, and colors to add depth and dimension to your fixture.
Assembling the Fixture
With your materials ready and the beads strung, it’s time to assemble the fixture.
- Attaching the Beads:Carefully attach the bead string to the light fixture base. This can be done using wire, fishing line, or a combination of both. Be sure to secure the bead string firmly to prevent it from slipping or falling.
- Connecting the Wiring:Connect the wiring from the light fixture kit to the socket. Follow the instructions provided with the kit carefully. Ensure that the connections are secure and properly insulated.
- Testing the Fixture:Before mounting the fixture, it’s essential to test the wiring to ensure it is working correctly. Connect the fixture to a power source and turn on the light. Check for any issues, such as flickering or a lack of light.
Elsie’s Dream DIY light fixture is all about creating something unique and personal, and that extends to the art prints you choose to display around it. If you’re looking to add a touch of handmade charm, why not try your hand at making your own prints?
There are 3 easy ways to make your own art prints that you can find online, and once you’ve mastered the basics, you can create prints that perfectly complement the vintage vibes of Elsie’s Dream DIY light fixture.
If everything seems to be working, you’re ready to mount the fixture.
Mounting the Fixture
The final step is to mount the fixture to your desired location.
- Choosing the Location:Select a location that is suitable for the size and weight of the fixture. Ensure that the chosen location has access to an electrical outlet.
- Mounting the Fixture:Use the mounting hardware provided with the light fixture kit to securely attach the fixture to the ceiling or wall. Be sure to follow the manufacturer’s instructions carefully.
- Final Touches:Once the fixture is mounted, you can add any final touches, such as adjusting the bead arrangement or adding additional decorative elements.
Tips and Tricks
- Use a variety of bead sizes and shapes:This will create a more visually interesting fixture.
- Experiment with different colors:You can use beads in a single color or mix and match colors to create a unique design.
- Use a light bulb that is compatible with the fixture:Be sure to choose a bulb that is the correct wattage and type for your fixture.
- Be careful when working with electricity:Always disconnect the power source before working on the fixture.
- Clean the fixture regularly:This will help to keep it looking its best.
Customization and Personalization Options: Elsies Dream Diy Light Fixture
The beauty of Elsie’s Dream DIY light fixture lies in its versatility. It’s a blank canvas waiting for your personal touch. This section explores different ways to personalize the light fixture, suggesting alternative materials and finishes to achieve unique styles.
Material Alternatives
Choosing the right materials can dramatically change the look and feel of your light fixture.
I’m finally tackling Elsie’s Dream DIY light fixture! It’s going to be a statement piece for the living room, and I’m planning to use vintage glass bottles for a unique touch. While I’m browsing for inspiration online, I stumbled across a fantastic deal on Dunnes Stores Oxford shirts by Paul Costelloe for men – perfect for my husband! They’re so stylish, and the quality is excellent.
Now back to the light fixture – I’m going to need some sturdy wire and a good pair of pliers for this project!
- Wood:Instead of the standard pine, consider using reclaimed wood for a rustic charm or exotic hardwoods like walnut or cherry for a luxurious touch. The wood’s grain patterns can add unique character.
- Metal:For a more industrial vibe, use metal pipes, rods, or sheets. Copper, brass, and iron offer different aesthetic qualities and can be aged or painted for a distressed look.
- Acrylic:Transparent acrylic can create a modern, minimalist aesthetic. It allows light to pass through beautifully, adding a touch of elegance.
Finishes and Treatments
Finishes and treatments can transform the appearance of your light fixture.
- Paint:A coat of paint can instantly change the fixture’s color and style. Consider using metallic paints, chalkboard paint, or even textured finishes.
- Staining:Staining wood allows the natural grain to shine through while adding depth and color. You can use various stains to achieve different shades and effects.
- Distressing:Distressing techniques can create a vintage or rustic look. This can be achieved by sanding, chipping, or using paint techniques like layering and cracking.
Creative Variations and Modifications, Elsies dream diy light fixture
Elsie’s Dream DIY light fixture can be adapted to fit different spaces and styles.
- Shapes and Sizes:Experiment with different shapes, such as circles, squares, or even geometric patterns. You can also adjust the size of the fixture to suit your space.
- Light Source:Instead of using traditional light bulbs, consider using LED strips for a modern and energy-efficient option. LED strips can also be customized with different colors and patterns.
- Accessories:Add decorative elements like crystals, beads, or fabric scraps to personalize your fixture further. You can also incorporate natural elements like dried flowers or leaves.
Examples of Unique Light Fixtures
To inspire your creativity, here are some examples of unique light fixtures that showcase the possibilities of customization:
- Industrial Chic:A light fixture made from reclaimed metal pipes with exposed bulbs, creating a raw and edgy aesthetic.
- Rustic Farmhouse:A light fixture made from reclaimed wood with a distressed finish, featuring a combination of Edison bulbs and fairy lights.
- Modern Minimalist:A light fixture made from acrylic panels with integrated LED strips, creating a sleek and sophisticated look.
Lighting Considerations and Techniques

Choosing the right light bulbs for your Elsie’s Dream DIY Light Fixture is crucial to achieving the desired ambiance and functionality. The type of light bulb you select will significantly impact the overall look and feel of your fixture.
Types of Light Bulbs
The type of light bulb you choose will depend on the desired look and functionality. Here are some popular options:
- Incandescent Bulbs:These traditional bulbs emit a warm, yellowish light and are known for their affordability. However, they are less energy-efficient and have a shorter lifespan compared to other options.
- Halogen Bulbs:Similar to incandescent bulbs, halogen bulbs provide a warm, white light but offer better energy efficiency and a longer lifespan. They are also known for their brighter light output.
- LED Bulbs:LED bulbs are the most energy-efficient option, offering a long lifespan and a wide range of color temperatures. They also produce less heat than traditional bulbs, making them safer for use in enclosed fixtures.
- Fluorescent Bulbs:Fluorescent bulbs offer good energy efficiency and a longer lifespan than incandescent bulbs. They come in various color temperatures, from cool white to warm white.
Wattage and Color Temperature
- Wattage:The wattage of a light bulb determines its brightness. A higher wattage indicates a brighter light. For a fixture like Elsie’s Dream, you’ll want to choose a wattage that provides adequate illumination without being too harsh. A good starting point is around 40-60 watts, but you can adjust this based on your preference and the size of the room.
- Color Temperature:Color temperature is measured in Kelvin (K) and indicates the warmth or coolness of the light. Lower Kelvin temperatures (2700K-3000K) produce a warm, yellowish light, while higher Kelvin temperatures (4000K-6500K) produce a cooler, bluish-white light. For a cozy and inviting atmosphere, consider a warm white (2700K-3000K) or soft white (3000K-3500K) bulb.
If you want a brighter and more energetic feel, opt for a cool white (4000K-4500K) or daylight (5000K-6500K) bulb.
Creating Optimal Lighting Effects
- Dimmers:Dimmers allow you to control the brightness of your light fixture, providing a more versatile lighting experience. A dimmer switch can create a range of moods, from bright and cheerful to soft and intimate.
- Multiple Light Sources:Using multiple light bulbs with different color temperatures or wattages can create interesting lighting effects. For example, you could use a warm white bulb for the main light source and a cool white bulb for accent lighting.
- Reflective Surfaces:Using reflective surfaces like mirrors or metallic accents can amplify the light output of your fixture, creating a brighter and more spacious feel.
Safety Precautions and Electrical Wiring
Building your own light fixture is a fun and rewarding project, but it’s essential to prioritize safety when working with electricity. This section will guide you through the crucial safety precautions and wiring techniques to ensure a safe and functional light fixture.
Safety Precautions for Handling Electrical Components
Working with electrical components requires utmost caution. Here are some vital safety precautions to follow:
- Always disconnect power to the circuit before working on any electrical wiring.
- Use insulated tools and wear appropriate safety gear, including gloves and eye protection.
- Never work on electrical components when wet or in damp conditions.
- Be mindful of the voltage and amperage of the electrical components you are using. Ensure they are compatible with the circuit and the light bulb.
- If you are unsure about any aspect of the wiring or electrical components, consult a qualified electrician.
Proper Wiring Techniques
Proper wiring is crucial for a safe and functional light fixture. Follow these steps for correct wiring:
- Identify the wires:Typically, electrical wires are color-coded for easy identification. The black wire is usually the “hot” wire, the white wire is the “neutral” wire, and the green or bare wire is the “ground” wire.
- Connect the wires:Connect the wires according to the fixture’s wiring diagram. Use wire nuts to securely connect the wires. Ensure the wire connections are tight and free of loose strands.
- Ground the fixture:Connect the ground wire to the fixture’s grounding terminal. This helps to prevent electrical shocks.
- Test the wiring:After completing the wiring, test the fixture using a non-contact voltage tester to ensure there are no live wires.
Resources for Learning About Electrical Safety
There are many resources available to learn about electrical safety. Here are some reputable organizations that provide valuable information:
- National Electrical Code (NEC):The NEC is a widely adopted standard for electrical installations in the United States. It provides detailed information on electrical safety and wiring practices.
- Underwriters Laboratories (UL):UL is a safety science company that tests and certifies electrical products for safety. You can find information about UL-listed products on their website.
- Electrical Safety Foundation International (ESFI):ESFI is a non-profit organization that promotes electrical safety. They offer educational materials, resources, and tips on electrical safety.
Troubleshooting and Common Issues

While building Elsie’s Dream DIY Light Fixture is a fun and rewarding project, there are a few potential issues that could arise during the construction process. Don’t worry, these are usually easy to fix with a little knowledge and patience.
Here’s a breakdown of some common problems and their solutions, along with tips to prevent them in the first place.
Incorrect Wire Connections
Incorrectly connecting the wires can lead to electrical hazards or a malfunctioning light fixture. It’s crucial to ensure the wires are connected correctly to the electrical box and the fixture itself. Here are some tips to prevent this issue:
- Always double-check the wire connections before turning on the power.
- Use a wire stripper to remove the insulation from the wires properly.
- Refer to the wiring diagram provided with your light fixture or electrical box.
- Use wire connectors or wire nuts to secure the connections.
- If you’re unsure about any aspect of the wiring, consult a qualified electrician.
Uneven or Unstable Fixture
An uneven or unstable fixture can be a safety hazard and may not look aesthetically pleasing. Here are some solutions:
- Ensure the mounting plate is securely attached to the electrical box.
- Use a level to make sure the fixture is straight and even before tightening the screws.
- If the fixture is heavy, consider using additional support, such as a mounting bracket or a chain.
- For pendant lights, make sure the chain is the right length and the hanging point is secure.
Overheating Light Bulbs
Using the wrong type of light bulb or a bulb that’s too powerful can lead to overheating and potential fire hazards. Here’s how to prevent this:
- Always use the type of light bulb recommended for your fixture.
- Check the wattage rating of the fixture and the bulb.
- Use LED bulbs, which generate less heat than traditional incandescent bulbs.
- Avoid using bulbs that are too close to flammable materials.
Inspiration and Ideas for Elsie’s Dream DIY Light Fixture
Elsie’s Dream DIY Light Fixture offers a blank canvas for your creative vision. It’s not just about building a light fixture; it’s about bringing your unique style and personality to life through illumination. To spark your imagination, let’s explore some inspiring examples and ideas for integrating this fixture into your home decor.
Examples of Inspiring DIY Light Fixtures
To showcase the boundless possibilities of DIY light fixtures, here are a few inspiring examples:
- Industrial Chic:A salvaged pipe fixture with exposed bulbs, creating a raw and modern look. Imagine using repurposed metal pipes, vintage Edison bulbs, and a rustic finish for a truly industrial vibe.
- Rustic Farmhouse:A simple wooden frame with mason jar globes, exuding warmth and charm. Think about using reclaimed wood, antique mason jars, and a warm, natural finish for a cozy farmhouse aesthetic.
- Bohemian Dream:A macrame-wrapped pendant with colorful glass beads, radiating a free-spirited and eclectic ambiance. Consider incorporating macrame cord, vibrant glass beads, and a natural, earthy finish for a bohemian touch.
Integrating the Fixture into Different Room Designs
Elsie’s Dream DIY Light Fixture can seamlessly blend into various room designs, enhancing the overall ambiance. Here’s how:
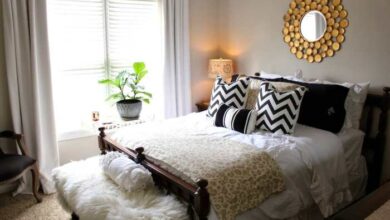
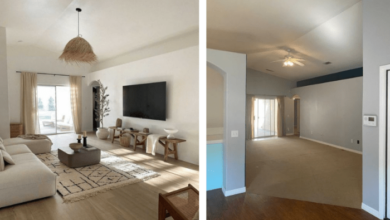
- Living Room:A statement fixture above a coffee table can create a focal point and define the space. For a contemporary living room, consider a sleek, geometric design with a metallic finish. For a more traditional setting, a chandelier with crystal accents could be the perfect choice.
- Bedroom:A soft, ambient light fixture above the bedside table can create a relaxing atmosphere. For a romantic bedroom, a delicate fixture with floral details or a soft, warm glow could be ideal. A modern bedroom might benefit from a minimalist design with a muted finish.
- Dining Room:A dramatic fixture above the dining table can elevate the dining experience. For a formal dining room, a chandelier with intricate details and a luxurious finish could be the perfect statement piece. A casual dining room might benefit from a simple, elegant fixture with a rustic or industrial touch.
Resources and Websites for Inspiration
The internet is a treasure trove of inspiration for DIY projects, including light fixtures. Here are a few resources to ignite your creative spark:
- Pinterest:A visual search engine for inspiration, Pinterest is a goldmine of DIY light fixture ideas. Search for s like “DIY light fixtures,” “repurposed light fixtures,” or “unique light fixtures” to discover a wealth of creative projects.
- Etsy:A marketplace for handmade and vintage goods, Etsy is a great place to find unique and inspiring light fixtures. Search for “DIY light fixture kits,” “upcycled light fixtures,” or “handmade light fixtures” to discover handcrafted creations.
- DIY Blogs and Websites:Numerous DIY blogs and websites offer step-by-step tutorials and inspiration for crafting your own light fixtures. Search for “DIY light fixture tutorials” or “light fixture projects” to find detailed instructions and creative ideas.