Metal file cabinets: those sturdy workhorses of organization. They’ve held our papers, documents, and even the occasional forgotten lunch. But over time, they can start to look a little, well, tired. That’s where a metal file cabinet makeover comes in.
It’s a chance to refresh your workspace, add a touch of personality, and transform a mundane piece of furniture into something truly unique.
Instead of replacing your trusty cabinets, consider giving them a makeover. It’s a cost-effective way to revitalize your space, embrace your creative side, and create a storage solution that reflects your personal style.
Metal File Cabinet Makeover: A Fresh Look for Your Workspace
Metal file cabinets are ubiquitous in offices, homes, and various workspaces, providing a reliable and durable solution for storing important documents and files. While their functionality is undeniable, the aesthetics of these cabinets can often fall short, blending into the background and failing to add any visual interest to the environment.
This is where a makeover comes in, transforming a mundane piece of furniture into a statement piece that complements your workspace and reflects your personal style.
Benefits of a Metal File Cabinet Makeover
A makeover goes beyond simply painting the cabinet. It involves a thoughtful approach to enhancing the cabinet’s appearance and functionality, breathing new life into an otherwise overlooked piece of furniture. The benefits of a makeover extend beyond aesthetics, offering a cost-effective alternative to replacing the cabinet altogether.
- Enhanced Aesthetics:A makeover allows you to personalize your cabinet, aligning it with your workspace’s design theme and creating a more visually appealing environment. This can range from choosing a vibrant color that complements your existing décor to adding decorative elements that enhance the cabinet’s visual appeal.
- Increased Functionality:A makeover can involve adding features that improve the cabinet’s functionality. This could include adding new handles, drawer organizers, or even incorporating a locking mechanism for added security.
- Cost-Effective Solution:Replacing a perfectly functional metal file cabinet can be expensive. A makeover offers a budget-friendly alternative, allowing you to refresh the cabinet’s look and functionality without the significant expense of purchasing a new one.
Preparation
A well-prepared surface is the foundation for a successful makeover. It allows the paint to adhere properly and ensures a smooth, even finish. Before you start painting, you’ll need to clean the surface thoroughly, removing any dirt, grease, or rust that could interfere with the paint’s adhesion.
Cleaning the Surface
Cleaning the surface is crucial for a successful makeover. It ensures that the paint adheres properly and creates a smooth, even finish.
Giving that old metal file cabinet a makeover is a great way to add some personality to your workspace. I love using a fresh coat of paint and some fun hardware to give it a new look, but sometimes it needs a little extra something to really make it feel inviting.
That’s where essential oils come in! I like to create custom diffuser blends to fill the air with a calming scent, like the ones you can find on exploreinsights.net. Once the scent is just right, my little office oasis is complete!
- Remove any loose paint or rust:Use a scraper or wire brush to remove any loose paint or rust from the surface. This will help to create a clean surface for the paint to adhere to.
- Wash the surface with soap and water:Use a mild detergent and warm water to wash the entire surface of the file cabinet. This will remove any dirt, grease, or grime that may be present.
- Rinse the surface thoroughly:Make sure to rinse the surface thoroughly with clean water to remove any soap residue. Allow the surface to dry completely before proceeding to the next step.
- Sand the surface:Use fine-grit sandpaper to smooth out any rough spots or imperfections on the surface. This will help to create a smooth surface for the paint to adhere to.
- Clean the surface with a tack cloth:After sanding, use a tack cloth to remove any dust or debris from the surface. This will help to ensure that the paint adheres properly.
Tools and Materials, Metal file cabinet makeover
- Cleaning supplies:You will need a mild detergent, warm water, a sponge, and a bucket.
- Scraping tools:You will need a scraper or wire brush to remove any loose paint or rust.
- Sandpaper:Use fine-grit sandpaper to smooth out any rough spots or imperfections on the surface.
- Tack cloth:Use a tack cloth to remove any dust or debris from the surface.
- Protective gear:Wear gloves, a mask, and eye protection to protect yourself from dust, fumes, and other hazards.
Decorative Options
Now that you’ve prepped your file cabinet, it’s time to get creative! This is where you can truly personalize your workspace and make your file cabinet a statement piece. There are numerous ways to add personality and flair to your file cabinet, from simple accents to more involved techniques.
Giving a metal file cabinet a makeover can be a fun and budget-friendly way to upgrade your office space. While you’re looking for deals, don’t forget to check out the electrical brands black friday sales for any new power tools or lighting you might need for your project.
Once you’ve got your tools and supplies, you can start sanding, painting, and adding new hardware to create a custom piece that reflects your style.
Decoupage
Decoupage is a fun and versatile technique that involves applying decorative paper, such as napkins, magazine clippings, or even fabric, to a surface using glue and sealant. It’s a great way to add patterns, textures, and colors to your file cabinet.
- Materials:Decoupage glue, sealant, paintbrushes, scissors, decorative paper (napkins, magazine clippings, fabric, etc.)
- Steps:
- Prepare your file cabinet by cleaning and sanding the surface.
- Choose your decorative paper and cut out the desired shapes or patterns.
- Apply decoupage glue to the back of the paper and carefully place it on the file cabinet surface.
- Smooth out any air bubbles and let the glue dry completely.
- Apply a layer of decoupage sealant over the paper to protect it and give it a finished look.
- Examples:You can create a vintage look by using old maps or newspaper clippings, or add a touch of whimsy with colorful patterned napkins.
Stenciling
Stenciling is a great way to add patterns and designs to your file cabinet without the need for freehand painting. It’s relatively easy to learn and offers a wide range of design options.
- Materials:Stencils, paint, paintbrushes, painter’s tape
- Steps:
- Clean and prepare the surface of your file cabinet.
- Choose your stencil and secure it to the file cabinet using painter’s tape.
- Apply paint to the stencil using a brush or sponge.
- Carefully remove the stencil and let the paint dry completely.
- Examples:You can create geometric patterns, floral designs, or even inspirational quotes using stencils.
Adding Hardware
Hardware can add a touch of elegance and functionality to your file cabinet. You can replace existing knobs and pulls with new ones in different styles and finishes, or add additional hardware like drawer pulls, hinges, or even decorative accents.
Revamping a metal file cabinet is a fun project, especially when you add a touch of whimsy. I love the idea of incorporating a miniature garden, and I’m thinking of creating a vintage planter cacti garden right on top! It’s a great way to add a little greenery and a touch of the desert to an otherwise utilitarian piece of furniture.
Plus, with a little paint and some creative touches, that old file cabinet can be transformed into a statement piece.
- Materials:New hardware (knobs, pulls, hinges, etc.), screwdriver
- Steps:
- Choose the hardware you want to add and measure the size and spacing needed.
- Remove the existing hardware and install the new hardware using a screwdriver.
- Examples:You can find hardware in a wide range of styles, from modern to vintage, to match your desired aesthetic.
Vinyl Stickers
Vinyl stickers are a quick and easy way to add a personal touch to your file cabinet. They come in a variety of colors, sizes, and designs, so you can find the perfect ones to match your style.
- Materials:Vinyl stickers
- Steps:
- Choose your vinyl stickers and make sure the surface of your file cabinet is clean and dry.
- Carefully peel the sticker from its backing and apply it to the file cabinet.
- Smooth out any air bubbles and press down firmly to ensure the sticker adheres properly.
- Examples:You can find vinyl stickers with inspirational quotes, funny sayings, or even your favorite band logos.
Contact Paper
Contact paper is a self-adhesive material that can be used to cover the surface of your file cabinet with a variety of patterns and textures. It’s a budget-friendly option that can give your file cabinet a completely new look.
- Materials:Contact paper, scissors, ruler
- Steps:
- Clean and prepare the surface of your file cabinet.
- Measure the surface you want to cover and cut the contact paper to size.
- Carefully peel the backing from the contact paper and apply it to the file cabinet surface.
- Smooth out any air bubbles and press down firmly to ensure the contact paper adheres properly.
- Examples:Contact paper comes in a wide range of patterns, from marble and wood grain to bold geometric designs.
Fabric Upholstery
For a more dramatic transformation, consider upholstering your file cabinet with fabric. This is a great way to add a touch of luxury and comfort to your workspace.
- Materials:Fabric, batting, staple gun, staple remover, scissors, measuring tape
- Steps:
- Measure the surface you want to upholster and cut the fabric to size.
- Attach batting to the surface of the file cabinet using a staple gun.
- Carefully stretch the fabric over the batting and secure it to the file cabinet using a staple gun.
- Trim any excess fabric and smooth out any wrinkles.
- Examples:You can use a variety of fabrics, from velvet to linen to create a unique look for your file cabinet.
Finishing Touches

The final step in your metal file cabinet makeover is sealing the surface. This crucial step protects your hard work and ensures the longevity of your transformed piece. A sealant acts as a protective barrier against scratches, stains, and wear and tear, preserving the beauty of your new finish.
Sealant Options for Metal Surfaces
Choosing the right sealant is essential for achieving the desired level of protection and finish. There are several types of sealants suitable for metal surfaces, each with its own unique properties.
- Polyurethane Sealant:This type of sealant is known for its durability and resistance to water, abrasion, and UV rays. It is ideal for high-traffic areas and provides a hard, glossy finish. It is often used for outdoor furniture and metal fixtures.
- Epoxy Sealant:Epoxy sealants offer exceptional adhesion and chemical resistance. They are ideal for sealing metal surfaces exposed to harsh chemicals or extreme temperatures. Epoxy sealants are often used in industrial applications, but can also be used for furniture and other decorative pieces.
- Acrylic Sealant:Acrylic sealants are water-based and offer good adhesion and durability. They are typically easier to apply than other types of sealants and dry quickly. Acrylic sealants are suitable for both indoor and outdoor applications, providing a semi-gloss or matte finish.
- Wax Sealant:Wax sealants provide a protective layer that enhances the natural beauty of metal surfaces. They are often used for antique furniture and metal objects to create a soft, warm sheen. Wax sealants offer good protection against scratches and minor wear and tear.
Benefits of a Protective Layer
Applying a sealant to your finished metal file cabinet offers several advantages:
- Protection Against Scratches and Wear and Tear:A sealant acts as a barrier, preventing scratches and minor abrasions that can mar the surface. This is especially important for high-use furniture like file cabinets.
- Resistance to Stains and Spills:A sealant creates a non-porous surface, making it easier to clean spills and stains. This helps maintain the appearance of your file cabinet and prevents discoloration over time.
- Enhanced Durability:A sealant strengthens the surface of the metal, making it more resistant to chipping and peeling. This ensures that your makeover will last longer and maintain its aesthetic appeal.
- UV Protection:Some sealants offer UV protection, which is crucial for metal surfaces exposed to sunlight. UV protection prevents fading and discoloration, preserving the vibrancy of your paint or finish.
Inspiration
Inspiration is key when embarking on a metal file cabinet makeover. Seeing what others have done can spark ideas and help you envision the possibilities for your own project.
Examples of Metal File Cabinet Makeovers
Here are some examples of metal file cabinet makeovers to get your creative juices flowing:
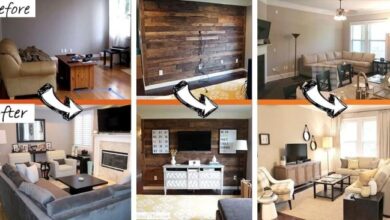
- Vintage Industrial Chic:A file cabinet painted in a deep charcoal gray with distressed accents and hardware. A vintage label maker adds a touch of industrial charm. The overall look is sophisticated and timeless, ideal for a modern office or workspace.
- Bold and Bright:A file cabinet painted in a vibrant turquoise blue, with contrasting black hardware. The bold color makes a statement and adds personality to any room. This makeover is perfect for a playful and energetic workspace.
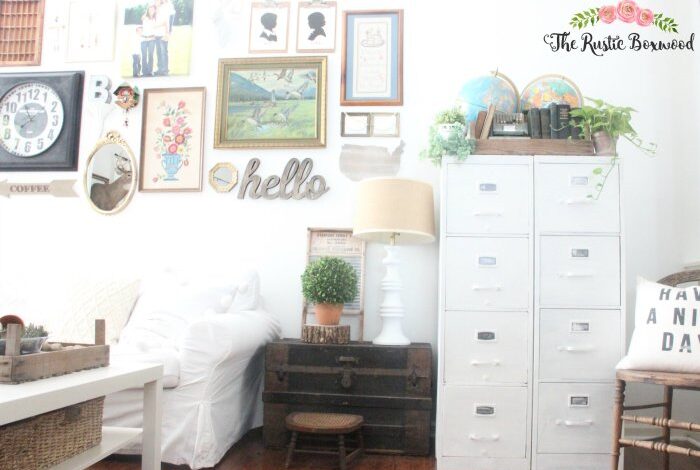
- Rustic Farmhouse Style:A file cabinet painted in a warm cream color with a distressed finish. The cabinet is adorned with farmhouse-inspired accents, such as burlap ribbon and galvanized metal hardware. The result is a charming and welcoming file cabinet that fits perfectly into a rustic farmhouse setting.
- Modern Minimalist:A file cabinet painted in a crisp white with sleek, minimalist hardware. The clean lines and simple design create a modern and sophisticated look. This makeover is perfect for a contemporary office or home office.
Incorporating Personal Style
When choosing a style for your file cabinet makeover, consider your personal preferences and the overall aesthetic of your workspace.
- Color Palette:Choose colors that complement your existing decor or reflect your personal style. Consider using a bold accent color or a neutral palette for a more understated look.
- Hardware:Update the hardware on your file cabinet to match your chosen style. Consider using vintage-inspired hardware for a rustic look, or sleek modern hardware for a contemporary aesthetic.
- Decorative Accents:Add decorative accents to personalize your file cabinet. Consider using stencils, vinyl decals, or even fabric scraps to create a unique design.