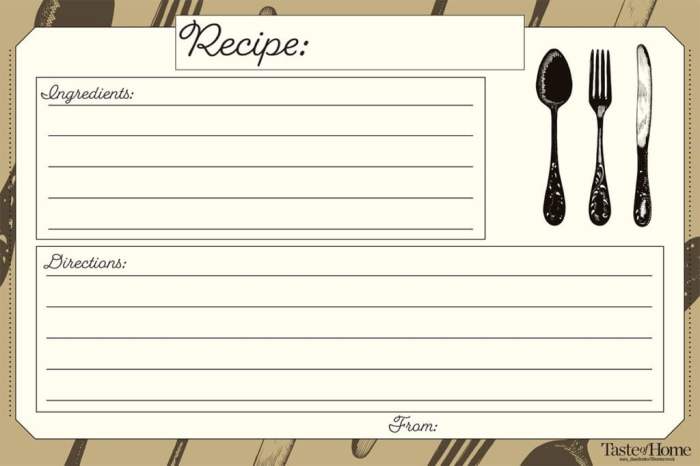
Art & Crafts

Clay Phases of the Moon Garland: A Celestial Craft

Clay phases of the moon garland is a captivating craft that combines the beauty of the lunar cycle with the versatility of clay. This enchanting piece is more than just a decorative element; it’s a tangible representation of our connection to the cosmos, weaving together ancient traditions and modern artistry.

The idea of using clay to depict the moon’s phases is rooted in the ancient practice of celestial observation. Throughout history, cultures have observed and revered the moon, attributing various symbolic meanings to its changing forms. This garland, with its meticulously crafted moon phases, offers a contemporary interpretation of this age-old fascination.

Decorating and Finishing Touches

Clay phases of the moon garland

Now that your moon garland is complete, it’s time to add some finishing touches to make it truly unique and eye-catching. This step is crucial for enhancing the overall aesthetic appeal and giving your project a professional look.

Painting and Glazing Techniques, Clay phases of the moon garland

Adding color to your clay moon garland is a great way to personalize it and create a specific theme. You can use acrylic paints, which are widely available and come in a wide range of colors. For a more durable and glossy finish, consider using acrylic glaze.

  • Acrylic Paints:Acrylic paints are a popular choice for painting clay because they dry quickly, are easy to apply, and come in a wide variety of colors. They are also relatively inexpensive. You can use a brush, sponge, or even your fingers to apply the paint.

    To create a smooth, even finish, apply thin coats of paint, allowing each coat to dry completely before applying the next.

  • Acrylic Glazes:Glazes are a type of paint that provides a glossy, protective finish. They are often used on ceramics and other clay objects to enhance their appearance and make them more durable. Acrylic glazes are water-based and can be applied with a brush or sponge.

    They are available in a variety of colors and finishes, including gloss, matte, and satin.

Adding Embellishments

Embellishments are decorative elements that can add a touch of whimsy and personality to your moon garland.

  • Glitter:Glitter is a popular choice for adding sparkle and shine to clay projects. You can apply glitter using a brush, sponge, or even your fingers. To ensure the glitter adheres well, apply a layer of glue or mod podge to the clay before sprinkling on the glitter.

  • Beads:Beads can be used to add color, texture, and dimension to your moon garland. You can use a variety of beads, including glass beads, wooden beads, and metal beads. To attach the beads, you can use glue, wire, or thread.

  • Other Embellishments:You can also use other embellishments to decorate your moon garland, such as sequins, rhinestones, feathers, and fabric scraps. Get creative and experiment with different materials to create a unique design.

Creating a Cohesive Design

When decorating your moon garland, it’s important to consider the overall design and create a cohesive look.

  • Color Palette:Choose a color palette that complements your home decor or the theme of your project. For example, you could use a neutral color palette for a minimalist look or a bright, bold color palette for a more playful design.

  • Pattern and Texture:You can use different patterns and textures to add visual interest to your moon garland. For example, you could paint the moons with different patterns, or use a variety of textures, such as glitter, beads, or fabric scraps.
  • Placement:The placement of the embellishments can also affect the overall design. Consider the size and shape of the moons and the placement of the embellishments to create a balanced and visually appealing design.

Finishing Touches

Once your moon garland is decorated, it’s time to add some finishing touches to make it look professional.

  • Sealing:Sealing your moon garland with a sealant will help to protect the paint and embellishments from scratches and wear. You can use a water-based sealant or a polyurethane sealant.
  • Hanging Hardware:Attach a piece of ribbon or twine to the top of each moon so that you can hang the garland. You can also use a hook or a nail to hang the garland from a wall or ceiling.
  • Presentation:Once your moon garland is complete, consider how you want to present it. You can display it on a wall, a shelf, or a mantelpiece. You can also use it as a centerpiece for a table or as a decorative element for a party or event.

Display and Care: Clay Phases Of The Moon Garland

Clay phases of the moon garland

Your clay moon garland is a beautiful and unique piece of art, and you’ll want to make sure it’s displayed properly to showcase its beauty and longevity. Here are some tips for displaying and caring for your clay creation.

Displaying the Clay Moon Garland

The beauty of a clay moon garland lies in its versatility. You can choose to display it in various ways to complement your home décor.

  • Above a fireplace mantel:The garland’s soft glow and ethereal charm will enhance the warmth and ambiance of your fireplace area.
  • Over a window or doorway:The garland can be hung above a window or doorway, creating a whimsical and enchanting entrance.
  • On a wall:You can also hang the garland on a wall, creating a focal point in your room. Use hooks or nails to securely attach it to the wall.
  • As a table centerpiece:The garland can be displayed as a table centerpiece, adding a touch of elegance and whimsy to your dining or coffee table.

Caring for Your Clay Creation

Clay is a delicate material, and it’s important to handle it with care.

  • Avoid direct sunlight:Prolonged exposure to direct sunlight can cause the clay to fade and crack. Display the garland in a shaded area or use a UV-resistant coating to protect it.
  • Keep it away from moisture:Clay is porous and can absorb moisture, which can lead to mold and mildew growth. Avoid displaying the garland in humid areas or near sources of water.
  • Handle with care:When handling the garland, be gentle and avoid dropping it. Clay can be fragile and break easily.
  • Dust regularly:Dust the garland regularly with a soft cloth or brush to keep it looking its best. Avoid using harsh chemicals or abrasive cleaners that could damage the clay.

Protecting from Dust and Damage

Dust can accumulate on the garland over time, dulling its beauty.

  • Use a dust cover:A dust cover made of soft fabric, such as cotton or linen, can be used to protect the garland from dust and dirt. Simply place the cover over the garland when not in use.
  • Store in a dry place:When not on display, store the garland in a dry and dust-free environment, such as a closet or storage container.
  • Avoid contact with sharp objects:Keep the garland away from sharp objects, such as furniture corners or sharp edges, to prevent scratches and damage.

I’ve been working on a clay phases of the moon garland for my living room, and I’m so excited about how it’s turning out! I’m thinking of adding a few celestial-themed touches, like tiny stars and planets, to really bring it to life.

Speaking of things that light up the night, don’t miss out on catching the latest West End shows – check out the tickets here ! Back to the garland, I’m thinking of using a mix of metallic and matte clay for a bit of visual interest.

Can’t wait to hang it up and admire it!

My clay phases of the moon garland is almost finished! I’m so excited to hang it up in my living room. It’s a little reminder to look up at the night sky and appreciate its beauty. Speaking of beauty, I was recently inspired by the iconic costumes from classic films like “Braveheart” and “Michael Collins.” You can check out some of these amazing outfits on the website – they’re truly breathtaking! I’m thinking of incorporating some of those design elements into my next clay project, maybe a miniature warrior helmet or a dramatic cape.

I’ve been obsessed with making clay phases of the moon garlands lately. They’re so whimsical and add a touch of celestial magic to any space. I’ve been experimenting with different glazes and textures, and I’m really happy with how they’re turning out.

If you’re looking for some unique and handcrafted jewellery, you need to check out the jewellery brand you need to know. Their pieces are absolutely stunning, and I’m sure they’d inspire you to create your own celestial art, just like my moon garlands.

See also  Elsies Dream DIY Light Fixture: A Step-by-Step Guide

Leave a Reply

Your email address will not be published. Required fields are marked *

Back to top button