Brazils future examining unforeseen challenges emerging from recent tragedies fashinnovation – Brazil’s Future: Examining Unforeseen Challenges emerging from recent tragedies and Fashinnovation sets the stage for this enthralling narrative, offering readers a glimpse into a story that is rich in detail and brimming with originality from the outset. Recent tragedies in Brazil, from devastating natural disasters to social unrest, have left an indelible mark on the nation’s psyche and its future prospects.
These events have exposed vulnerabilities in Brazil’s infrastructure, public safety, and environmental sustainability, leading to unforeseen challenges that threaten to derail the country’s progress.
However, amidst the adversity, a glimmer of hope emerges in the form of “Fashinnovation,” a concept that harnesses the power of fashion and innovation to address the challenges facing Brazil. Fashinnovation has the potential to revitalize the economy, create jobs, and promote sustainable practices, offering a pathway towards a more resilient and prosperous future.
Recent Tragedies and Their Impact on Brazil’s Future
Brazil, a nation renowned for its vibrant culture, vast resources, and resilient spirit, has faced a series of devastating tragedies in recent years. These events have not only claimed countless lives but have also left deep scars on the nation’s social fabric, economic landscape, and political system.
This blog post delves into the most significant recent tragedies in Brazil and examines their profound and enduring impact on the country’s future.
The Brumadinho Dam Collapse
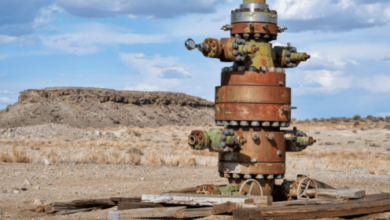
The Brumadinho dam collapse in January 2019 was a catastrophic event that resulted in the loss of over 270 lives and left a trail of environmental devastation. The dam, owned by the mining company Vale, was responsible for the production of iron ore, a key commodity in Brazil’s economy.
The collapse unleashed a torrent of mud and debris, burying entire communities and polluting nearby rivers. This tragedy exposed the systemic failures within the mining industry and highlighted the lack of adequate safety measures, raising serious concerns about the potential for similar disasters in the future.
Brazil’s future is a complex tapestry woven with threads of hope and uncertainty. Recent tragedies, like the devastating floods in Bahia, have brought to light the need for resilient infrastructure and social safety nets. As we navigate these challenges, it’s important to remember the power of creativity and innovation.
For example, the ikea restyle modern hollywood regency credenza is a testament to how resourcefulness can transform everyday objects into stylish pieces. By embracing innovative solutions and fostering a spirit of collaboration, we can build a brighter future for Brazil, one that addresses the challenges of today while embracing the possibilities of tomorrow.
Socio-Economic and Political Ramifications
- The Brumadinho dam collapse had a devastating impact on the local economy, disrupting mining operations and leading to significant job losses. The tragedy also resulted in widespread displacement and the loss of livelihoods for many families.
- The disaster sparked public outrage and intensified calls for greater accountability from the government and mining companies. It led to a series of legal investigations and the imposition of heavy fines on Vale, but many victims and their families continue to struggle for justice and compensation.
Brazil’s future is shrouded in uncertainty, facing unforeseen challenges arising from recent tragedies and the rapid pace of technological innovation. As we navigate this complex landscape, it’s crucial to acknowledge the mental health needs of those on the frontlines, particularly cybersecurity analysts who bear the weight of safeguarding our digital infrastructure.
The pressures of this role are immense, and resources like mental health cybersecurity analysts are essential for fostering resilience and well-being. Only by prioritizing mental health can we ensure a future where Brazil can thrive, adapting to these challenges and embracing the opportunities that lie ahead.
- The tragedy also fueled a national debate on environmental regulations and the need for stricter oversight of the mining industry. It prompted the Brazilian government to review its mining policies and strengthen safety standards.
The COVID-19 Pandemic, Brazils future examining unforeseen challenges emerging from recent tragedies fashinnovation
The COVID-19 pandemic, which began in early 2020, has had a profound and multifaceted impact on Brazil. The country has recorded one of the highest death tolls from the virus globally, with over 680,000 confirmed deaths as of August 2023.
The pandemic has exposed deep inequalities within Brazilian society, disproportionately affecting marginalized communities and exacerbating existing social and economic vulnerabilities.
Socio-Economic and Political Ramifications
- The pandemic has severely impacted Brazil’s economy, leading to widespread job losses, business closures, and a sharp decline in economic activity. The government’s response to the crisis has been criticized for its inconsistency and lack of coordination, further contributing to the economic downturn.
- The pandemic has also exacerbated existing social inequalities in Brazil, with marginalized communities bearing the brunt of the health and economic consequences of the virus. The lack of access to healthcare, adequate housing, and social safety nets has left these communities particularly vulnerable to the pandemic’s devastating effects.
- The pandemic has fueled political polarization and social unrest in Brazil. The government’s handling of the crisis has been met with widespread criticism, and there have been numerous protests against the government’s policies. The pandemic has also intensified the debate over the role of the state in providing social protection and ensuring public health.
The Amazon Rainforest Fires
The Amazon rainforest, often referred to as the “lungs of the Earth,” has been plagued by recurrent wildfires in recent years. These fires, often deliberately set for land clearing and agricultural expansion, have had a devastating impact on the rainforest ecosystem and its biodiversity.
The fires have also contributed to climate change, releasing vast amounts of greenhouse gases into the atmosphere.
Socio-Economic and Political Ramifications
- The Amazon fires have had a significant impact on the livelihoods of indigenous communities and local populations who depend on the rainforest for their survival. The fires have destroyed their homes, livelihoods, and traditional way of life.
- The fires have also had a negative impact on Brazil’s tourism industry, which relies heavily on the Amazon’s natural beauty. The fires have damaged the rainforest’s reputation as a destination for eco-tourism, leading to a decline in tourist arrivals.
- The fires have sparked international condemnation and raised concerns about Brazil’s commitment to environmental protection. The fires have also strained relations between Brazil and other countries, particularly those concerned about climate change.
Vulnerabilities Exposed by Recent Tragedies
The recent tragedies in Brazil have exposed a number of vulnerabilities that contribute to the country’s future challenges. These include:
- Inequality and Social Exclusion: The tragedies have highlighted the deep inequalities that exist within Brazilian society, with marginalized communities bearing the brunt of the negative consequences. This includes unequal access to healthcare, education, and economic opportunities, which makes these communities more vulnerable to disasters and crises.
- Environmental Degradation: The Brumadinho dam collapse and the Amazon fires demonstrate the devastating consequences of environmental degradation and the need for stricter environmental regulations and enforcement. The continued destruction of the Amazon rainforest poses a significant threat to the planet’s climate and biodiversity.
- Corruption and Lack of Accountability: The tragedies have also exposed the pervasiveness of corruption and the lack of accountability within the Brazilian government and private sector. This has eroded public trust in institutions and hampered efforts to address the root causes of these disasters.
- Political Polarization and Social Unrest: The tragedies have exacerbated political polarization and social unrest in Brazil, making it difficult to reach consensus on key policy issues and address the country’s challenges effectively. The lack of political stability and the rise of populism have further complicated efforts to address these issues.
Unforeseen Challenges Emerging from Tragedies
The recent tragedies in Brazil, while heartbreaking, have also brought to light a number of unforeseen challenges that the country must address. These challenges are not limited to immediate consequences but also pose long-term risks to the nation’s stability and progress.
Infrastructure Deficiencies
The tragedies have highlighted the fragility of Brazil’s infrastructure, particularly in areas prone to natural disasters. Inadequate maintenance, outdated systems, and a lack of investment have contributed to the severity of these events. For example, the collapse of a dam in Brumadinho in 2019, which killed hundreds of people, exposed serious flaws in the country’s mining safety regulations and the lack of robust infrastructure to prevent such disasters.
This event also underscored the need for better disaster preparedness and response mechanisms.
Public Safety and Security
The tragedies have also raised concerns about public safety and security. The lack of effective emergency response systems and inadequate resources have hindered rescue efforts and hampered the ability to protect citizens during crises. The absence of comprehensive security measures in public spaces and infrastructure has also made these areas vulnerable to potential threats.
Environmental Sustainability
The tragedies have also emphasized the importance of environmental sustainability. The dam collapse in Brumadinho, for instance, had a devastating impact on the environment, contaminating rivers and harming wildlife. This event underscored the need for stricter regulations and better enforcement of environmental protection laws to prevent similar disasters in the future.
Social Unrest and Political Instability
The tragedies have the potential to exacerbate existing social tensions and lead to increased political instability. The loss of life, displacement, and economic disruption caused by these events can create a sense of frustration and anger among the population, particularly those most affected.
This can lead to protests, social unrest, and a loss of confidence in the government’s ability to address these challenges effectively.
Impact on Vulnerable Populations
The impact of these challenges is disproportionately felt by vulnerable populations, including low-income communities, indigenous groups, and people living in disaster-prone areas. These communities often lack access to essential services, such as healthcare, education, and housing, making them more susceptible to the negative consequences of tragedies.
Fashinnovation and its Role in Brazil’s Future

Fashinnovation, a neologism blending “fashion” and “innovation,” represents a potent force capable of revitalizing Brazil’s economy, society, and environment. It signifies a paradigm shift in the fashion industry, embracing sustainable practices, technological advancements, and social responsibility. This approach holds the potential to address the multifaceted challenges facing Brazil, including economic stagnation, unemployment, and environmental degradation.
Economic Growth and Job Creation
Fashinnovation can play a pivotal role in driving economic growth and generating employment opportunities in Brazil. By integrating technology, design, and sustainable production methods, the fashion industry can create new markets, attract foreign investment, and stimulate innovation.
- E-commerce and Digital Platforms:Fashinnovation can leverage e-commerce platforms and digital marketing strategies to expand market reach, connect with global consumers, and create new avenues for sales and distribution. This can empower small and medium-sized enterprises (SMEs) and entrepreneurs, fostering job creation and economic diversification.
- Circular Economy and Upcycling:Implementing circular economy principles, such as recycling, upcycling, and repurposing materials, can reduce waste, minimize environmental impact, and create new economic opportunities. This can generate jobs in waste management, material processing, and creative design.
- Technology and Automation:Fashinnovation can integrate advanced technologies, such as 3D printing, artificial intelligence, and robotics, to automate production processes, improve efficiency, and reduce costs. This can create new job opportunities in technology, engineering, and data analysis.
Social Development and Empowerment
Fashinnovation can contribute to social development by promoting ethical sourcing, fair labor practices, and inclusive design. This approach can empower marginalized communities, foster social inclusion, and create a more equitable fashion industry.
- Fair Trade and Ethical Sourcing:Fashinnovation emphasizes fair trade practices, ensuring that workers in the supply chain receive fair wages, safe working conditions, and respect for their human rights. This can uplift marginalized communities, particularly in rural areas, and contribute to social development.
- Inclusivity and Diversity:Fashinnovation promotes inclusivity and diversity in fashion design, catering to a wider range of body types, ethnicities, and cultural identities. This can empower individuals from diverse backgrounds and create a more representative and inclusive fashion industry.
- Community Development and Empowerment:Fashinnovation can foster partnerships with local communities, supporting artisanal crafts, traditional techniques, and indigenous knowledge. This can empower communities, preserve cultural heritage, and create economic opportunities for local artisans.
Sustainable Practices and Environmental Impact
Fashinnovation prioritizes sustainable practices, reducing the environmental impact of the fashion industry. This includes minimizing resource consumption, reducing pollution, and promoting responsible disposal of materials.
Brazil’s future, while brimming with potential, faces unforeseen challenges emerging from recent tragedies and the ever-evolving landscape of fashion innovation. As we grapple with these complexities, it’s crucial to understand the power of technology and its potential to shape solutions.
A recent gamesbeat op games profile highlights how the gaming industry is rapidly evolving, showcasing innovative approaches to storytelling and user engagement. These insights offer valuable lessons for Brazil’s future, demonstrating how technology can be harnessed to create positive change and address the challenges we face.
- Sustainable Materials and Production:Fashinnovation encourages the use of sustainable materials, such as organic cotton, recycled fibers, and bio-based textiles. It also promotes sustainable production methods, such as water-efficient dyeing and low-impact manufacturing processes.
- Waste Reduction and Recycling:Fashinnovation emphasizes waste reduction through efficient design, minimizing fabric waste, and promoting circularity. It encourages recycling and upcycling of materials, reducing the reliance on virgin resources.
- Carbon Footprint Reduction:Fashinnovation aims to reduce the carbon footprint of the fashion industry by optimizing transportation, minimizing energy consumption, and investing in renewable energy sources.
Opportunities and Strategies for Addressing Challenges

While the recent tragedies have highlighted Brazil’s vulnerabilities, they also present opportunities for positive change and a more resilient future. By embracing innovation, fostering investment, and prioritizing sustainable development, Brazil can emerge stronger from these challenges.
Promoting Innovation and Investment
Innovation is crucial for Brazil’s economic growth and social development. Investing in research and development, fostering entrepreneurship, and promoting collaboration between academia, government, and the private sector can create a more dynamic and competitive economy.
- Strengthening the Innovation Ecosystem:Brazil needs to create a more supportive environment for innovation by providing incentives for research and development, simplifying regulations, and promoting access to funding for startups and small businesses.
- Developing a Skilled Workforce:Investing in education and training programs that focus on STEM fields, digital skills, and entrepreneurship is essential for equipping the workforce with the skills needed for a rapidly changing economy.
- Promoting Public-Private Partnerships:Collaboration between government and the private sector can leverage resources and expertise to drive innovation, create new industries, and address societal challenges.
Sustainable Development and Environmental Protection
Brazil has a vast natural resource base and a crucial role to play in global efforts to combat climate change. Prioritizing sustainable development practices, protecting biodiversity, and investing in renewable energy sources can create a more resilient and prosperous future.
- Investing in Renewable Energy:Brazil has abundant solar, wind, and hydro power potential. Investing in these renewable energy sources can reduce dependence on fossil fuels, create jobs, and improve energy security.
- Protecting Biodiversity:Brazil’s rich biodiversity is a global asset. Strengthening environmental regulations, promoting sustainable forestry practices, and combating deforestation are crucial for protecting this natural heritage.
- Promoting Sustainable Agriculture:Adopting sustainable farming practices, such as agroforestry and organic agriculture, can improve food security, reduce environmental impact, and enhance rural livelihoods.
Role of Government, Private Sector, and Civil Society
Addressing these challenges requires a concerted effort from all stakeholders. The government plays a vital role in creating a conducive environment for innovation and investment, setting environmental standards, and providing public services. The private sector is responsible for driving economic growth, creating jobs, and adopting sustainable practices.
Civil society plays a critical role in advocating for social justice, environmental protection, and transparency.
- Government:The government needs to prioritize investment in education, research and development, infrastructure, and renewable energy. It should also streamline regulations, promote transparency, and combat corruption.
- Private Sector:Businesses should adopt sustainable practices, invest in innovation, and create opportunities for social impact. They should also engage with civil society and government to address shared challenges.
- Civil Society:Civil society organizations play a vital role in monitoring government actions, advocating for social justice, and promoting citizen participation. They can also contribute to innovation by fostering collaboration and promoting knowledge sharing.
Looking Ahead: Brazils Future Examining Unforeseen Challenges Emerging From Recent Tragedies Fashinnovation
The recent tragedies that have shaken Brazil underscore the urgency of charting a resilient and sustainable path for the future. While the nation grapples with the immediate aftermath of these events, it’s crucial to look beyond the immediate challenges and focus on building a future that is more equitable, inclusive, and prepared for unforeseen circumstances.
The Importance of Long-Term Planning
Effective long-term planning is essential for navigating the complexities of Brazil’s future. This involves anticipating potential risks, allocating resources strategically, and developing comprehensive strategies for addressing societal needs.
“A nation’s future is not built on short-term fixes but on a long-term vision that guides its development.”
[Insert quote from a prominent Brazilian leader or expert on long-term planning]
- Investing in Infrastructure:Brazil needs to prioritize investments in critical infrastructure, such as transportation, energy, and communication networks. This will enhance connectivity, stimulate economic growth, and improve the quality of life for citizens.
- Promoting Education and Innovation:Investing in education, research, and development is crucial for fostering a knowledge-based economy. This will empower Brazilians with the skills needed to compete in a globalized world and drive innovation.
- Sustainable Development:Brazil must prioritize sustainable practices across all sectors, including agriculture, industry, and energy. This will help mitigate climate change, conserve natural resources, and ensure a healthy environment for future generations.
The Role of Responsible Governance
Good governance is a cornerstone of a resilient and prosperous future. This encompasses transparency, accountability, and the rule of law. It also requires effective institutions that are responsive to the needs of the people.
“A strong and transparent government is essential for building trust and confidence among citizens, which is crucial for long-term stability and prosperity.”
[Insert quote from a prominent Brazilian leader or expert on governance]
- Strengthening Institutions:Brazil needs to strengthen its institutions, including the judiciary, legislature, and executive branches, to ensure they operate effectively and impartially.
- Combating Corruption:Corruption undermines trust in government and impedes economic development. Brazil must continue to address corruption through strong legal frameworks and effective enforcement mechanisms.
- Citizen Participation:Engaging citizens in the decision-making process is vital for building a more inclusive and responsive society. This can be achieved through participatory budgeting, public consultations, and other forms of civic engagement.
Fostering Inclusive Growth
Economic growth that benefits all segments of society is essential for achieving lasting stability and reducing inequality. This requires policies that promote job creation, improve access to education and healthcare, and support vulnerable populations.
“Inclusive growth is not just about increasing GDP; it’s about ensuring that everyone has the opportunity to participate in and benefit from economic progress.”
[Insert quote from a prominent Brazilian leader or expert on inclusive growth]
- Promoting Entrepreneurship:Creating a favorable environment for entrepreneurship will stimulate job creation and innovation. This involves providing access to financing, reducing bureaucratic barriers, and fostering a culture of risk-taking.
- Investing in Human Capital:Investing in education, healthcare, and social protection programs is crucial for developing a skilled workforce and improving the well-being of all Brazilians.
- Addressing Inequality:Brazil needs to implement policies that address the root causes of inequality, such as poverty, discrimination, and lack of access to opportunities. This could include progressive taxation, targeted social programs, and affirmative action initiatives.