5 Minute Reusable Swiffer Cover DIY No Sew – Remember that time your Swiffer ran out of cleaning pads in the middle of a cleaning frenzy? Frustrating, right? Reusable Swiffer covers are a game-changer! Not only do they save you money in the long run, but they’re also a fantastic way to reduce waste and be kind to the planet.
This easy DIY project is perfect for anyone looking for a quick and simple solution to their Swiffer woes.
In this post, we’ll walk you through the steps to create your own reusable Swiffer cover using just a few simple materials and a little bit of your time. You’ll learn how to choose the right fabric, cut it to size, and attach it to your Swiffer mop in just a few minutes.
Plus, we’ll share some tips and variations on the design, so you can create a cover that fits your needs and style. Get ready to say goodbye to disposable Swiffer covers and hello to a more sustainable and budget-friendly cleaning routine!
Swiffer Cover DIY: A No-Sew Solution for Saving Money and the Planet
Remember that time you ran out of Swiffer covers right before a big cleaning session? I know the feeling—the frustration of having to stop mid-clean and scramble to find a replacement. It’s not just inconvenient, it’s also a drain on your wallet and the environment.
That’s why I decided to find a more sustainable and budget-friendly solution: reusable Swiffer covers!This DIY project is a game-changer for anyone who wants to reduce waste and save money on cleaning supplies. With just a few simple materials and a little bit of time, you can create your own reusable Swiffer covers that are just as effective as the disposable ones.
Plus, you’ll be doing your part to reduce the amount of plastic ending up in landfills.
Materials Needed for the Project, 5 minute reusable swiffer cover diy no sew
The materials you’ll need for this project are readily available at most craft stores or online retailers. You’ll need:
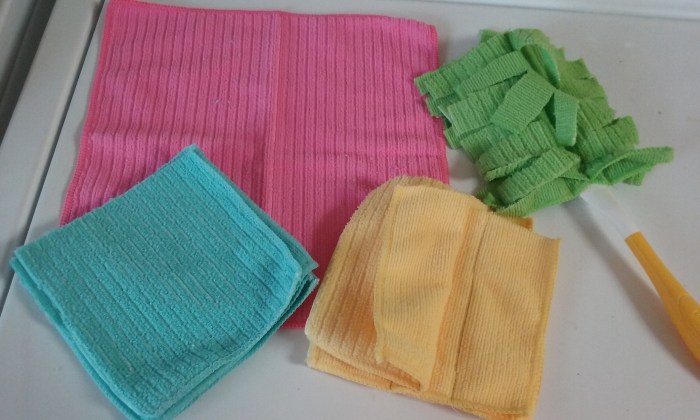
- Fabric:Choose a fabric that’s durable and easy to clean, such as microfiber, cotton, or flannel.
- Scissors:For cutting the fabric to size.
- Elastic:A thin elastic band will help keep the cover secure on your Swiffer.
- Sewing machine or needle and thread:While this project is labeled as no-sew, you can choose to sew the elastic to the fabric if you prefer a more durable finish.
- Measuring tape:To ensure your fabric is the right size for your Swiffer.
Materials
This project requires minimal materials, and most of them are probably already in your home. This is one of the main reasons why this DIY project is so popular, as it’s cost-effective and eco-friendly.
Materials Needed for the Project, 5 minute reusable swiffer cover diy no sew
The following table lists the materials needed for the project, along with their quantities and purposes:
| Material Name | Quantity | Purpose |
|---|---|---|
| Old T-shirt | 1 | Provides the fabric for the reusable Swiffer cover. |
| Scissors | 1 pair | For cutting the fabric to the desired size. |
| Elastic band | 1 | To secure the cover to the Swiffer mop head. |
| Sewing machine or needle and thread | Optional | For sewing the edges of the fabric for a more durable cover. |
Making the Reusable Swiffer Cover
This is the fun part! Let’s get our hands dirty (figuratively, of course, because we’re not sewing). We’ll be transforming our old fabric scraps into a practical and eco-friendly Swiffer cover.
Preparing the Fabric
Before we start cutting and stitching, we need to prepare our fabric. This involves choosing the right fabric, measuring it, and prepping it for our cover.
- Choosing the Fabric:Select a fabric that is durable, absorbent, and easy to wash. Cotton, microfiber, or even old towels work great. Avoid delicate fabrics that might tear easily.
- Measuring the Fabric:Grab your Swiffer mop and measure the width and length of the cleaning pad. Add a few inches to each measurement to allow for seams and a comfortable fit.
- Prepping the Fabric:Wash and dry the fabric to remove any dirt or debris. Ironing it will help make it easier to work with.
Creating the Cover
Now comes the actual crafting. This is where we’ll put our fabric to use and create the cover.
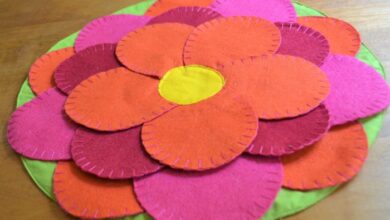
Sometimes, the simplest DIY projects are the most satisfying. Like that 5-minute reusable Swiffer cover you can whip up with an old t-shirt. It’s a quick win, just like making delicious sorbet without an ice cream machine.
Both projects prove that you don’t need fancy equipment or hours of time to create something amazing. So grab your scissors, some fabric scraps, and get ready to tackle those floors with your new, no-sew Swiffer cover!
- Cutting the Fabric:Using scissors or a rotary cutter, cut the fabric into a rectangle based on your measurements. Make sure to cut along the grain of the fabric for better durability.
- Securing the Fabric:There are a few ways to secure the fabric to the Swiffer mop. One method is to use a simple knot or a safety pin to attach the fabric to the mop head. Another method is to sew a narrow hem along the edges of the fabric and then use a rubber band or a drawstring to secure it to the mop head.
Sometimes, the simplest DIY projects are the most satisfying. That’s why I love my 5-minute reusable Swiffer cover hack. It’s quick, easy, and saves me money in the long run. Speaking of creative projects, I’ve been wanting to try the mermaid shell sweatshirt DIY for a while now.
It looks like a fun way to add some sparkle to my wardrobe. And once I’m done with that, I’m definitely making a batch of those reusable Swiffer covers – I can never have too many!
Tips and Variations

Now that you’ve mastered the basics of creating a reusable Swiffer cover, let’s explore some tips and variations to take your DIY skills to the next level. Whether you’re aiming for a professional finish or want to personalize your cleaning routine, these ideas will help you create the perfect Swiffer cover for your needs.
Professional Finish
While the no-sew method is incredibly convenient, you can achieve a polished, professional look with a few extra steps. Here are some tips to elevate your Swiffer cover:
- Fabric Glue:For a secure and neat finish, use fabric glue to reinforce the seams. Apply a thin line of glue along the edges of the fabric before securing it to the Swiffer base. Let it dry completely before using the cover.
Sometimes, the simplest DIY projects can make the biggest difference. A quick 5-minute reusable Swiffer cover is a perfect example, and it reminds me of the amazing transformation Mandi achieved in her dining room – check out her before and after here ! Just like a fresh coat of paint can revitalize a space, those little DIY touches, like a reusable Swiffer cover, can add a touch of personality and practicality to any room.
- Iron-On Adhesive:Another option is to use iron-on adhesive. Cut strips of adhesive to match the seam lines and iron them onto the fabric. This creates a strong bond that prevents fraying and ensures a professional look.
- Clean Edges:After cutting the fabric, use a pair of fabric scissors to trim any uneven edges. This will create a crisp, clean finish that adds to the overall appearance.
Design Variations
The beauty of this DIY project lies in its flexibility. You can personalize your Swiffer cover by experimenting with different fabrics, designs, and embellishments. Here are some ideas to spark your creativity:
- Patterned Fabrics:Embrace your style by using patterned fabrics like floral prints, geometric designs, or even playful animal prints. Choose a pattern that complements your home decor or reflects your personal taste.
- Embroidery:Add a touch of personalization by embroidering your initials, a cute design, or a motivational quote onto the fabric. This adds a unique and handcrafted element to your Swiffer cover.
- Appliqués:Enhance the design by adding fabric appliqués. Choose shapes, letters, or motifs that resonate with you and create a visually appealing and personalized cover.
Adapting for Different Swiffer Mops
The basic principles of creating a reusable Swiffer cover can be adapted for different types of Swiffer mops. Here’s how to adjust the project for various models:
- Swiffer WetJet:The WetJet mop has a rectangular base. Measure the base and cut a piece of fabric slightly larger than the dimensions. Fold the edges inward and secure them with fabric glue or iron-on adhesive. You can also create a separate flap for the sprayer nozzle to ensure a snug fit.
- Swiffer Sweeper:The Sweeper mop has a round base. Cut a circle of fabric slightly larger than the base. Fold the edges inward and secure them with fabric glue or iron-on adhesive. You can also create a small opening at the top for the handle to pass through.
Maintenance and Care: 5 Minute Reusable Swiffer Cover Diy No Sew

Taking good care of your reusable Swiffer cover will ensure it lasts for many cleanings and helps you avoid the hassle of constantly replacing it. A few simple steps can extend the lifespan of your cover and make cleaning a breeze.
Cleaning and Caring for the Reusable Swiffer Cover
Proper cleaning and care are essential for keeping your reusable Swiffer cover in optimal condition. Here are some key steps to follow:
- Regular Cleaning:After each use, remove any large debris or stuck-on dirt from the cover. You can use a damp cloth or a brush to loosen any stubborn particles.
- Machine Washing:Wash the cover in a washing machine on a gentle cycle with cold water. Use a mild detergent, avoiding harsh chemicals that can damage the fabric. Do not use bleach or fabric softeners.
- Drying:Air-drying the cover is the best way to prevent shrinkage or damage. Hang it up to dry completely, avoiding direct sunlight or heat sources.
- Storage:Once dry, store the cover in a clean and dry place, folded or rolled up, to prevent dust or mildew from accumulating.
Washing and Drying Tips for Preventing Damage
Following these washing and drying tips will help prevent damage to your reusable Swiffer cover:
- Washing:Always wash the cover separately from other laundry items, especially those with zippers or sharp edges that could snag the fabric. It is also advisable to turn the cover inside out before washing to protect the surface.
- Drying:Avoid using a dryer for your reusable Swiffer cover. The high heat can shrink or damage the fabric. Air-drying is the most effective and gentle way to dry it.
Extending the Lifespan of the Reusable Swiffer Cover
Here are some tips to help extend the lifespan of your reusable Swiffer cover:
- Avoid Over-Saturating:Do not soak the cover in water. Use a spray bottle to dampen the cover lightly, just enough to moisten it for cleaning.
- Proper Cleaning:Regularly remove any large debris or stuck-on dirt from the cover. This will prevent the dirt from becoming embedded in the fabric and shortening its lifespan.
- Rotate Covers:If you use your Swiffer cover frequently, consider having multiple covers to rotate. This will give each cover time to dry completely and prevent excessive wear and tear.
Environmental Impact

This DIY project is not just about saving money, but also about making a positive impact on the environment. By switching to reusable Swiffer covers, you can significantly reduce your waste and contribute to a greener planet.
Waste Reduction
Reusable Swiffer covers are a simple yet effective way to cut down on waste. Disposable Swiffer covers are a major source of landfill waste, contributing to the growing environmental problem of plastic pollution. By choosing reusable covers, you can dramatically reduce the number of disposable covers you send to landfills.
Imagine the impact of millions of households making this simple switch!
Resource Conservation
The production of disposable Swiffer covers requires significant resources, including energy, water, and raw materials. By using reusable covers, you help conserve these resources. This is especially important considering the finite nature of these resources and the growing demand for them.