Transform Your Space: A Comprehensive Guide to DIY Washi Tape Mirror Frames
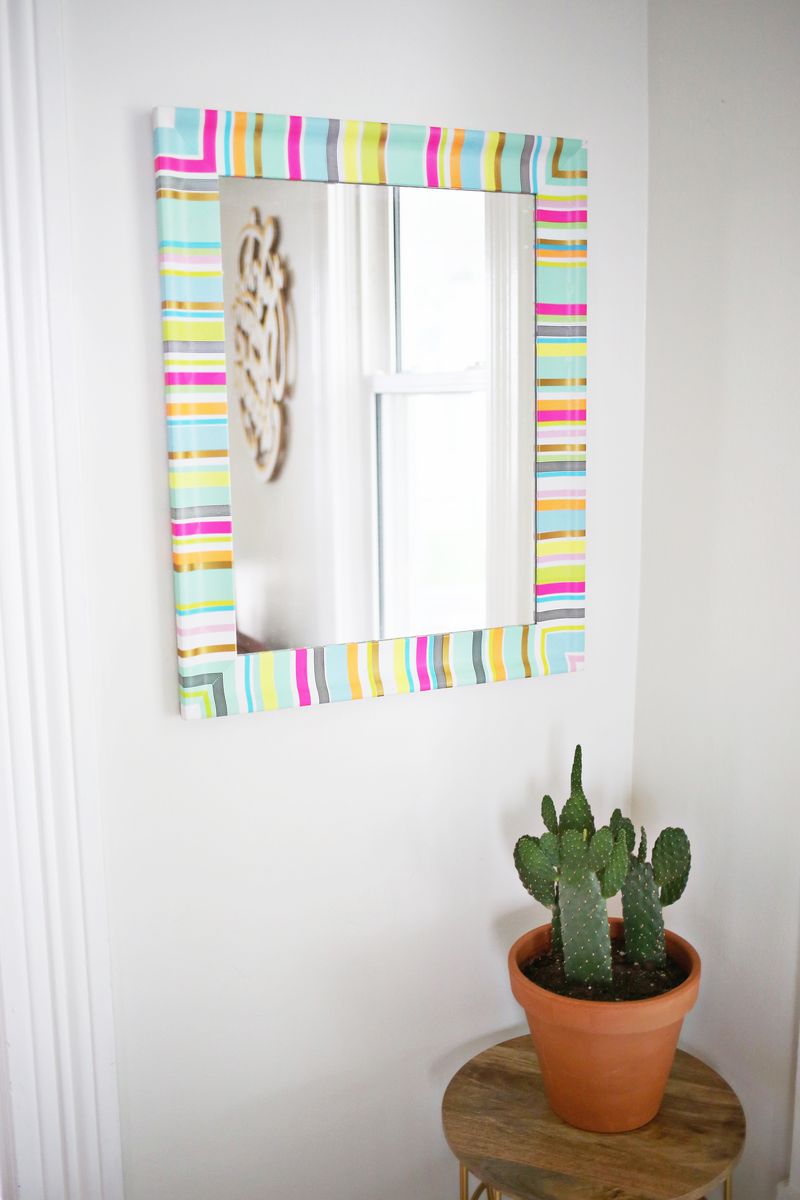
Washi tape, the decorative paper tape originating from Japan, has become an incredibly versatile and accessible craft supply, transforming ordinary objects into personalized statement pieces. Among the most impactful and surprisingly simple DIY projects is the creation of a washi tape mirror frame. This technique offers a budget-friendly, customizable, and remarkably effective way to inject personality, color, and texture into any room. From minimalist chic to vibrant maximalism, a washi tape mirror frame can be tailored to suit any aesthetic, providing a fresh alternative to expensive store-bought options. The beauty of washi tape lies in its semi-translucent nature, its wide array of patterns and colors, and its easy application and repositioning capabilities. This guide will delve deep into the process, covering everything from selecting the right materials to achieving a professional-looking finish, ensuring your DIY mirror frame project is both enjoyable and visually stunning.
Choosing Your Washi Tape and Mirror: The Foundation of Your Design
The success of your washi tape mirror frame hinges on two crucial decisions: the type of washi tape and the mirror itself. For the tape, consider the overall aesthetic you aim to achieve. Are you drawn to bold geometric patterns that make a statement? Perhaps delicate florals or whimsical illustrations? Washi tape comes in an astonishing variety, from solid colors and metallic finishes to intricate designs and even textured options like glitter or fabric tape. Think about the existing color palette of your room and how the tape will complement or contrast with it. For a cohesive look, choose tapes that share a common color thread or a complementary style. Conversely, a more eclectic approach can involve a curated mix of contrasting patterns and colors for a truly unique statement piece. Consider the width of the tape as well; wider tapes can cover larger areas quickly, while narrower tapes are excellent for intricate detailing, creating borders, or layering. For beginners, starting with a few rolls of complementary solid colors or a single striking pattern is often recommended.
The mirror selection is equally important. While you can certainly purchase a new mirror specifically for this project, repurposing an existing one is an excellent way to upcycle and save money. Consider mirrors with plain, unadorned frames that will serve as a clean canvas for your washi tape. Old vanity mirrors, decorative wall mirrors, or even frameless mirrors can all be excellent candidates. If your existing mirror has a bulky or dated frame, you might consider removing it entirely and applying the washi tape directly to the reflective surface’s edge or a thin backing board if you’re creating a standalone piece. The size and shape of the mirror will also influence your design. A large statement mirror might benefit from bold, wide tapes or a complex layered pattern, while a smaller accent mirror could be enhanced with delicate, detailed designs. Always ensure the mirror is clean and free of dust or grease before beginning your application to guarantee optimal adhesion.
Preparation is Key: Setting the Stage for a Flawless Finish
Before you even think about peeling the backing off a roll of washi tape, proper preparation is paramount for a professional and long-lasting finish. Begin by thoroughly cleaning both the mirror and its frame, if applicable. For the mirror surface, a standard glass cleaner will suffice. For the frame, depending on its material (wood, plastic, metal), a damp cloth with a mild detergent is usually effective. Ensure the frame is completely dry before proceeding. If your mirror has a detachable frame, it’s often easier to work on the frame separately. If you’re applying tape directly to the mirror’s edge or a frameless mirror, ensure the edge is smooth and free from any chips or imperfections that could snag the tape.
If you’re working with a mirror that has an existing frame that you intend to cover, consider priming it. While washi tape adheres to most surfaces, a primer can provide a smoother base, especially if the frame has a glossy or uneven finish, and can help prevent any underlying colors or patterns from showing through, particularly if you’re using lighter-colored washi tapes. A matte-finish primer is generally best. Allow the primer to dry completely according to the manufacturer’s instructions. Some DIYers also opt to apply a clear sealant or Mod Podge over the entire frame before applying the washi tape. This creates an even more durable surface and can make the tape easier to clean later on. However, this step is not strictly necessary and depends on your desired level of durability and the type of washi tape used.
The Art of Application: Mastering Washi Tape Techniques
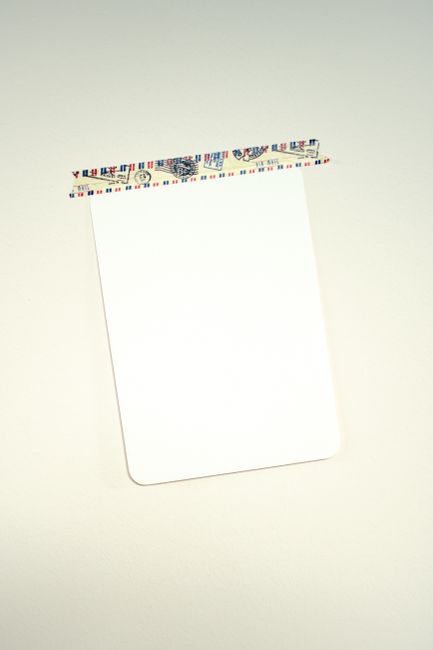
Applying washi tape to a mirror frame is more forgiving than many other craft applications, but a few techniques will elevate your results. The simplest method involves applying strips of tape directly to the frame, overlapping them slightly to ensure complete coverage. Begin at one corner or edge and work your way around, carefully smoothing down each strip as you go to avoid air bubbles or wrinkles. A bone folder, a credit card, or even your fingernail can be used to press the tape firmly into place.
For a more seamless look, consider cutting your tape pieces to size before applying them. Measure the length of each side or section of the frame and cut the tape accordingly. This is especially helpful for achieving neat corners. There are several ways to handle corners. You can miter them, similar to how you would a wood frame, by cutting the tape at a 45-degree angle so that two pieces meet at a point. Alternatively, you can wrap the tape around the corner, ensuring it’s neatly creased and adhered. For particularly tight or intricate corners, you might need to cut small notches into the tape to allow it to lay flat without bunching.
Layering is where the true artistry of washi tape shines. You can overlap different patterns and colors to create unique visual depth and texture. For example, start with a base layer of a solid color tape and then add thinner, patterned tapes on top. This technique can create stunning geometric designs or mimic the look of more complex patterns. Experiment with different widths and orientations of tape. Vertical stripes can elongate a frame, while horizontal stripes can make it appear wider. Diagonal placement adds a dynamic, modern feel.
For frameless mirrors or when applying tape directly to the mirror’s edge, precision is key. Measure carefully and consider using a ruler or cutting mat for accuracy. If you’re applying tape to the mirror’s reflective surface, ensure you’re working on a clean, dust-free environment to avoid trapping any particles. A craft knife can be useful for trimming excess tape or for creating intricate cutouts if you’re feeling particularly adventurous.
Design Inspiration: Unleashing Your Creativity
The possibilities for washi tape mirror frame designs are virtually endless. Let your imagination run wild, or draw inspiration from existing trends and styles.
- Geometric Glamour: Utilize bold geometric patterned tapes or combine solid colors in repeating geometric shapes like chevrons, diamonds, or stripes. Metallic tapes in gold, silver, or rose gold can add a touch of luxury.
- Floral Fantasy: Embrace delicate floral washi tapes for a romantic and whimsical feel. Layer different floral patterns or combine them with solid complementary colors for added depth.
- Minimalist Modern: Opt for solid, muted colors or subtle patterns like thin pinstripes or dots. A single color applied neatly can create a sophisticated and understated frame.
- Bohemian Rhapsody: Mix and match a variety of vibrant patterns and colors. Think tribal prints, paisleys, and bold ethnic-inspired designs.
- Ombre Effect: Create a gradient effect by using tapes that transition from light to dark in a single color family. This can be achieved by carefully overlapping tapes or by using pre-made ombre washi tapes.
- Textural Play: Incorporate textured tapes like glitter, fabric, or even embossed designs for a unique tactile and visual experience.
- Themed Creations: Design your frame around a specific theme – for example, beachy with blues and sandy tones, or celestial with stars and moon patterns.
Don’t be afraid to experiment with different combinations. Sometimes, the most unexpected pairings yield the most striking results. Take photos of your progress and step back to assess the overall look. If something isn’t quite working, washi tape’s forgiving nature means you can often peel it off and reposition or replace it.
Finishing Touches and Durability: Ensuring Longevity
Once your washi tape is meticulously applied, a few finishing touches can enhance both the aesthetic and the durability of your mirror frame. While washi tape is relatively sturdy, it’s not inherently waterproof or highly resistant to scuffing.
For added protection and a more polished look, consider applying a clear sealant over the entire washi taped area. Mod Podge (matte or gloss finish) is a popular choice for this. Apply thin, even coats, allowing each layer to dry completely before applying the next. This will create a protective barrier against moisture and minor abrasions, making your frame easier to clean and extending its lifespan. Be aware that some sealants, especially gloss finishes, can slightly alter the sheen of certain washi tapes, so it’s always a good idea to test on a scrap piece first if possible.
Another option for sealing is a spray sealant, such as a clear acrylic spray. This can provide a more even, mist-like coating and is particularly useful for intricate designs. Again, test on a scrap piece to ensure it doesn’t react negatively with your chosen tapes.
For a truly professional finish, carefully trim any excess tape that extends beyond the frame’s edges. A sharp craft knife and a cutting mat are invaluable tools for achieving clean, precise lines. Pay close attention to corners and any intricate details.
If you’re concerned about the tape adhering well to the mirror’s surface, especially if it’s a frameless mirror or you’re applying tape directly to the edge, you can use a small amount of clear craft glue along the edges of the tape before pressing it down firmly. This is an extra step that can provide added security.
Regular maintenance will also help preserve your washi tape mirror frame. Dust it gently with a soft, dry cloth. For any minor spills or smudges, use a slightly damp cloth, but avoid excessive moisture.
Troubleshooting Common Issues and Tips for Success
Even with careful planning, DIY projects can present challenges. Here are some common issues and how to address them:
- Air Bubbles and Wrinkles: These are most often caused by applying the tape too quickly or not smoothing it down sufficiently. If you notice a bubble, gently lift the edge of the tape and reapply, smoothing as you go. For persistent wrinkles, you might need to carefully peel the tape off and reapply a new piece.
- Tape Not Sticking: Ensure your surface is clean and dry. If the tape is old, its adhesive might have weakened. You can try gently warming the adhesive with a hairdryer on a low setting (be cautious not to overheat and melt the tape) or applying a thin layer of craft glue to the frame before adhering the tape.
- Corners Not Lying Flat: This is a common issue, especially with intricate corners. Cutting small notches into the tape where it needs to bend can help it lay flush. For mitered corners, ensure your cuts are precise and at the correct angle.
- Tape Lifting: This can occur due to moisture or constant handling. Sealing the frame as described above is the best preventative measure. If a section is lifting, carefully reapply glue or replace the section.
- Uneven Coverage: Take your time and overlap your tape strips slightly to ensure no gaps are visible. Use a light source that illuminates the frame well to spot any missed areas.
The SEO Advantage: Keywords and Content Optimization
To ensure this comprehensive guide reaches a wide audience interested in DIY decor and crafting, incorporating relevant SEO keywords is crucial. Strategic placement of terms like "DIY washi tape mirror frame," "washi tape crafts," "easy mirror frame ideas," "budget-friendly decor," "custom mirror design," "home decor projects," and "upcycling furniture" within the headings, subheadings, and body of the article will improve its search engine ranking. Using long-tail keywords such as "how to make a washi tape mirror frame with geometric patterns" or "creative washi tape ideas for frameless mirrors" will attract users with specific search intent. Including descriptive alt text for any accompanying images (e.g., "Close-up of a colorful washi tape mirror frame with layered floral patterns") will further enhance SEO. The aim is to provide valuable, detailed information that directly answers user queries, making the article a go-to resource for anyone looking to embark on this transformative DIY project.
In conclusion, the washi tape mirror frame project offers a delightful blend of creativity, affordability, and personalization. By carefully selecting your materials, mastering application techniques, and embracing design inspiration, you can transform a simple mirror into a captivating piece of art that reflects your unique style and enhances any living space. The accessibility and versatility of washi tape make this a rewarding project for crafters of all skill levels, proving that beautiful and impactful decor can be achieved with a little imagination and a roll of decorative tape.
