Stripes and dots elsies washer dryer makeover – Stripes and Dots: Elsie’s Washer Dryer Makeover is a delightful project that transforms a mundane laundry space into a stylish and functional haven. Elsie, known for her charming and creative design aesthetic, takes on the challenge of revamping a boring washer and dryer with a playful and eye-catching pattern.
By blending stripes and dots in a harmonious way, Elsie demonstrates how to create a cohesive and visually appealing design that reflects her signature style.
This makeover is not just about aesthetics; it’s about enhancing the functionality of the laundry space. Elsie meticulously plans out storage solutions, ensuring that everything has its place and is easily accessible. From clever organizational tricks to decorative touches, Elsie’s makeover elevates the laundry room from a utilitarian space to a delightful and personalized corner of the home.
Stripes and Dots Design Inspiration
Stripes and dots are classic design elements that have been used in home décor for centuries. Their versatility and timeless appeal make them perfect for adding visual interest and personality to any space. In this blog post, we’ll explore the unique charm of stripes and dots and how they can transform your washer and dryer into a stylish focal point in your laundry room.
The Appeal of Stripes and Dots in Home Décor, Stripes and dots elsies washer dryer makeover
Stripes and dots are incredibly versatile design elements that can be used to create a wide range of aesthetics. Stripes, for instance, can create a sense of movement and dynamism, making a space feel more expansive. They can also be used to add a touch of sophistication and elegance.
Horizontal stripes can make a room feel wider, while vertical stripes can create a sense of height.Dots, on the other hand, can add a playful and whimsical touch to a space. They can also be used to create a sense of depth and texture.
Large dots can make a space feel more bold and dramatic, while small dots can create a more subtle and delicate effect.
Examples of Stripes and Dots in a Washer and Dryer Makeover
Stripes and dots can be incorporated into a washer and dryer makeover in numerous ways. Here are a few examples:
- Striped Wallpaper:Striped wallpaper can be used to create a bold and eye-catching backdrop for your washer and dryer. Choose a color scheme that complements the existing décor in your laundry room.
- Dotted Contact Paper:Dotted contact paper is a budget-friendly way to add a touch of personality to your washer and dryer. You can use it to cover the entire appliance or just create a design accent.
- Painted Stripes:Painting stripes directly onto your washer and dryer is a more permanent solution. This option allows for greater customization and creative freedom.
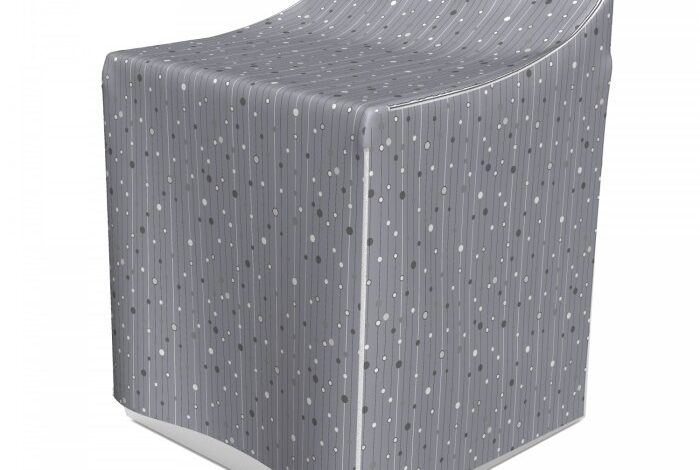
- Dotted Fabric:Fabric can be used to create a cover for your washer and dryer, adding a soft and textured touch to your laundry room. You can use a fabric with a dot pattern or create your own design using fabric paint.
The stripes and dots on Elsie’s washer and dryer makeover are a bold statement, just like the explosive gameplay in super bomberman r online switch. While I’m busy tackling laundry, I can always imagine myself navigating those colorful mazes, dropping bombs, and strategizing to outsmart my opponents.
The vibrant colors and playful patterns on Elsie’s appliances really add a pop of personality to her laundry room, making even mundane chores a little more fun.
Creating a Cohesive Design Using Stripes and Dots
When incorporating stripes and dots into your washer and dryer makeover, it’s important to create a cohesive design that complements the overall aesthetic of your laundry room. Here are some tips for achieving a cohesive look:
- Color Palette:Stick to a limited color palette when choosing stripes and dots. This will help to create a sense of unity and prevent the design from feeling overwhelming.
- Scale and Proportion:Consider the scale and proportion of the stripes and dots you choose. Large stripes and dots can make a space feel more dramatic, while small stripes and dots can create a more subtle and delicate effect.
- Placement:The placement of stripes and dots can also affect the overall look of your design. For example, vertical stripes can create a sense of height, while horizontal stripes can make a room feel wider.
The Impact of Color Choices on the Overall Aesthetic
Color plays a crucial role in creating the desired mood and aesthetic in your laundry room. Here are some color ideas to consider:
- Neutral Colors:Neutral colors like white, gray, and beige can create a calming and serene atmosphere. They also provide a blank canvas for adding pops of color with stripes and dots.
- Bold Colors:Bold colors like red, blue, and green can add energy and excitement to your laundry room. They can also be used to create a focal point for your washer and dryer.
- Pastel Colors:Pastel colors like pink, blue, and yellow can create a soft and whimsical feel. They are perfect for creating a more feminine or playful aesthetic.
Materials and Techniques
Transforming your washer and dryer into a stylish focal point is a fun and achievable project. This section will guide you through the essential materials and techniques needed for a successful makeover.
Choosing the Right Materials
The materials you choose will significantly impact the final look and longevity of your makeover.
- Primer:A good primer is essential for creating a smooth and even surface for the paint to adhere to. Choose a primer specifically designed for appliances, as it will provide better adhesion and durability.
- Paint:Appliance paint is the best choice for this project. It is formulated to withstand the heat and moisture that appliances experience, ensuring a long-lasting finish.
- Stencils:If you’re going for a patterned design, stencils are a great way to achieve clean lines and precise shapes. You can find stencils for various patterns, including stripes and dots, at craft stores or online.
- Brushes:You’ll need a variety of brushes for different tasks. Choose brushes with synthetic bristles for smooth, even paint application.
- Painter’s Tape:Use painter’s tape to create clean lines and protect areas you don’t want to paint. Ensure the tape is specifically designed for painting and is applied properly to avoid paint bleeding.
- Protective Gear:Don’t forget to wear protective gear, including gloves, a mask, and eye protection, when working with paint and other materials.
Painting Techniques for Stripes and Dots
Stripes and dots are classic and versatile patterns that can add a touch of whimsy or sophistication to your washer and dryer.
I’m loving the bold stripes and dots I added to Elsie’s washer and dryer – it’s a fun way to personalize her laundry space! Speaking of bold, I’m also loving the shimmery Valentine’s Day makeup I’ve been using lately – check out my favorite non toxic makeup for a shimmery valentines day look for some inspiration.
Back to the laundry, I’m thinking of adding a little more sparkle to Elsie’s makeover with some metallic accents. Stay tuned!
- Stripes:
- Freehand:This technique requires a steady hand and practice. Use a ruler or tape measure to mark the width and placement of the stripes before painting. You can use a thin brush for fine lines or a wider brush for thicker stripes.
- Stencil:Stencils provide a more precise and uniform look. Secure the stencil to the appliance using painter’s tape and apply paint with a sponge or brush. Ensure you apply even pressure to avoid paint bleeding under the stencil.
- Tape:Use painter’s tape to create the stripes. Apply the tape to the appliance, ensuring it’s straight and smooth. Paint over the tape, and carefully remove it once the paint is dry. You can create varying stripe widths by using different widths of tape.
- Dots:
- Freehand:Use a small brush or a dotting tool to create dots. Dip the brush in paint and gently tap it onto the surface to create dots. Practice on a piece of scrap paper to get the desired size and spacing of the dots.
- Stencil:Stencils with dot patterns can be used to create a consistent and uniform look. Apply the stencil to the appliance and use a sponge or brush to apply paint over the stencil.
Step-by-Step Guide to Applying Stencils
Stencils can be a great way to achieve a clean and precise pattern.
- Prepare the Surface:Clean the appliance thoroughly with a mild detergent and allow it to dry completely. Apply primer to the surface and let it dry according to the manufacturer’s instructions.
- Choose Your Stencil:Select a stencil that fits your desired pattern and size. Ensure the stencil is clean and free of debris.
- Secure the Stencil:Place the stencil on the appliance and secure it with painter’s tape. Ensure the tape is applied evenly and firmly to prevent paint bleeding.
- Apply Paint:Use a sponge or brush to apply paint over the stencil. Apply even pressure and avoid pressing too hard, which could cause paint to bleed under the stencil.
- Remove the Stencil:Carefully peel the stencil away from the appliance once the paint is dry. Ensure the paint is fully dry before removing the stencil to avoid smudging.
Designing a Striped and Dotted Pattern
A simple yet effective striped and dotted pattern can be achieved by using a combination of horizontal and vertical stripes with scattered dots.
- Horizontal Stripes:Create a base of horizontal stripes using a neutral color like white or gray. You can choose to have wider or narrower stripes, depending on your preference.
- Vertical Stripes:Add a few vertical stripes in a contrasting color, creating a bold and dynamic look. You can choose to have fewer vertical stripes for a subtle effect or more for a more pronounced look.
- Dots:Scatter dots of various sizes in a contrasting color over the stripes. You can choose to use one color of dots or multiple colors for a more playful look.
Functionality and Storage
Making a washer and dryer more functional and adding storage solutions can significantly enhance the laundry room’s efficiency and organization. It’s crucial to consider the space’s functionality, storage needs, and ease of access when planning a makeover.
Storage Solutions
Storage solutions are essential for creating an organized and functional laundry room. They help keep supplies tidy, prevent clutter, and make laundry tasks more efficient. Here are some storage solutions to consider:
- Shelves:Shelves provide vertical storage, maximizing space and making it easy to see and access items. Consider open shelves for frequently used items and closed cabinets for less frequently used items.
- Drawers:Drawers are great for storing smaller items like detergent pods, stain removers, and dryer sheets. They keep items hidden and organized.
- Hanging organizers:Hanging organizers are excellent for maximizing wall space and storing items like ironing boards, laundry baskets, and cleaning supplies.
- Bins and baskets:Bins and baskets can be used to categorize and store items, making it easy to find what you need. Use clear bins for easy visibility.
Accessibility and Ease of Use
Accessibility and ease of use are crucial for a functional laundry room. When designing the makeover, consider the following:
- Placement of storage:Place frequently used items within easy reach, like detergent and dryer sheets, on shelves or in drawers that are easy to access.
- Height of shelves:Adjust shelf heights to accommodate your needs and make it easy to reach items.
- Ergonomics:Consider the ergonomics of the laundry room to minimize strain and discomfort. For example, place laundry baskets at a comfortable height for loading and unloading.
- Lighting:Ensure adequate lighting to make it easy to see what you are doing, especially when sorting laundry or folding clothes.
Essential Storage Items
Here’s a list of essential storage items to consider for your laundry room makeover:
- Laundry baskets:Use separate baskets for whites, colors, and delicates to keep laundry organized.
- Detergent dispenser:A detergent dispenser keeps your laundry detergent organized and easily accessible.
- Ironing board:An ironing board can be stored in a cabinet or on a wall-mounted rack.
- Drying rack:A drying rack is useful for delicate items that cannot be machine-dried.
- Cleaning supplies:Store cleaning supplies for your laundry room in a designated area.
Elsie’s Style and Brand: Stripes And Dots Elsies Washer Dryer Makeover
Elsie’s signature style is a delightful blend of vintage charm, modern practicality, and a touch of whimsy. Her designs are known for their cheerful colors, playful patterns, and a focus on creating spaces that are both stylish and functional. This unique aesthetic has earned her a devoted following and established her as a leading voice in the world of home décor.
Key Elements of Elsie’s Style
Elsie’s design aesthetic is characterized by several key elements that contribute to its distinctive charm.
- Color Palettes: Elsie often uses bright, saturated colors in her projects, drawing inspiration from vintage patterns and the natural world. Her color palettes are typically vibrant and playful, incorporating a mix of bold hues and softer tones.
- Patterns: Patterns play a significant role in Elsie’s design aesthetic. She frequently incorporates floral prints, geometric patterns, and stripes, often mixing and matching different patterns to create visually interesting and dynamic spaces.
- Vintage Influences: Elsie’s designs often draw inspiration from vintage aesthetics, incorporating elements like antique furniture, repurposed materials, and vintage textiles. This vintage touch adds a sense of history and character to her projects.
- Whimsical Touches: Elsie’s style is not without a touch of whimsy. She often incorporates playful elements like animal motifs, quirky artwork, and unexpected accents to add a sense of personality and charm to her designs.
Comparing Elsie’s Style with Other Popular Styles
Elsie’s design aesthetic can be compared to other popular styles in the following ways:
- Bohemian: Elsie’s use of bright colors, eclectic patterns, and vintage elements shares similarities with bohemian style. However, her designs tend to be more structured and organized than a typical bohemian aesthetic.
- Farmhouse: Elsie’s style also incorporates elements of farmhouse design, such as natural materials, rustic textures, and a focus on creating a warm and inviting atmosphere. However, her style is more playful and eclectic than a traditional farmhouse aesthetic.
- Mid-Century Modern: Elsie’s use of clean lines, geometric patterns, and a focus on functionality aligns with mid-century modern design principles. However, her style is more whimsical and colorful than a typical mid-century modern aesthetic.
Elsie’s Signature Style Mood Board
- Image 1: A vintage floral wallpaper with a bold, vibrant color palette. This image represents Elsie’s love of vintage patterns and bright colors.
- Image 2: A rustic wooden table with a mismatched set of chairs. This image reflects Elsie’s use of repurposed materials and her ability to create a cohesive look with eclectic pieces.
- Image 3: A playful animal print rug with a geometric pattern. This image represents Elsie’s penchant for incorporating whimsical elements and mixing patterns.
- Image 4: A bright and airy kitchen with a mix of modern and vintage elements. This image showcases Elsie’s ability to create functional and stylish spaces.
The Transformation Process

Transforming a washer and dryer into a stylish statement piece is a rewarding project that involves a few key steps. This process requires careful preparation, meticulous painting, and a touch of creativity to achieve a professional-looking finish.
The stripes and dots on Elsie’s washer dryer makeover were so fun and whimsical, just like the vibe I’m going for at my New Year’s Eve party! I’m setting up a wine bar with chilled wines and DIY ice buckets, inspired by this amazing article I found.
It’s all about creating a festive atmosphere, just like the fresh, new look Elsie gave her laundry room. I can’t wait to see how my guests react to the fun decorations and chilled wine!
Preparing the Appliances for Painting
Before diving into the painting process, it’s essential to properly prepare the appliances. This ensures a smooth and long-lasting finish.
- Clean the surfaces:Start by thoroughly cleaning the washer and dryer with a degreaser to remove any dirt, grease, or grime. This will ensure the paint adheres properly.
- Sand the surfaces:After cleaning, use sandpaper to roughen the surfaces. This creates a better surface for the paint to bond with, leading to a more durable finish.
- Mask off areas:Use painter’s tape to mask off areas that you don’t want to paint, such as the door handles, control panels, and any other delicate features. This ensures clean lines and prevents paint from getting where it shouldn’t.
- Prime the surfaces:Apply a primer specifically designed for appliances. This helps the paint adhere better and provides a smoother base for the final color.
Painting the Appliances
Once the appliances are prepped, it’s time to add a splash of color.
- Choose the right paint:Select an appliance-grade paint that is durable and resistant to scratches and fading. Consider a high-gloss finish for a sleek look or a matte finish for a more subtle appearance.
- Apply thin coats:Apply multiple thin coats of paint instead of one thick coat. This allows the paint to dry evenly and prevents drips or runs.
- Let the paint dry:Allow each coat of paint to dry completely before applying the next. This ensures a smooth and even finish.
- Remove the tape:Once the final coat of paint is dry, carefully remove the painter’s tape. Do this slowly to avoid peeling off any paint.
Achieving a Professional-Looking Finish
To achieve a professional-looking finish, pay attention to detail and follow these tips:
- Use a good quality paintbrush:A good quality paintbrush will help you achieve a smooth and even finish. Look for a brush with soft bristles that are designed for appliance paint.
- Work in sections:Don’t try to paint the entire appliance at once. Instead, work in sections, allowing each section to dry before moving on to the next. This helps prevent drips and runs.
- Use a paint sprayer (optional):For a more even and professional finish, consider using a paint sprayer. This allows for a smooth and consistent application of paint.
Washer and Dryer Makeover Checklist
Here’s a checklist to guide you through the entire makeover process:
- Gather supplies:Assemble all necessary supplies, including paint, primer, brushes, sandpaper, painter’s tape, cleaning supplies, and protective gear.
- Prepare the work area:Clear a workspace and protect the surrounding area from paint splatters using drop cloths or plastic sheeting.
- Clean and prep the appliances:Thoroughly clean the washer and dryer, sand the surfaces, and apply primer.
- Paint the appliances:Apply multiple thin coats of paint, allowing each coat to dry completely.
- Remove the tape:Carefully remove the painter’s tape once the paint is dry.
- Add finishing touches:Consider adding decorative accents like knobs, handles, or stencils to enhance the overall design.
Adding Personality and Charm
Transforming a washer and dryer into a stylish statement piece isn’t just about the colors and patterns. It’s about adding those personal touches that make it truly yours. Infusing personality and charm into your laundry space creates a unique and welcoming environment.
Decorative Elements
Decorative elements can elevate your washer and dryer makeover from ordinary to extraordinary. Think beyond the basics and explore ways to enhance the design with captivating details.
- Wallpaper: A bold floral print or a whimsical geometric pattern can instantly add personality and visual interest to your laundry room.
- Stenciling: Using stencils, you can create intricate designs on the washer and dryer surfaces. Geometric patterns, botanical motifs, or even a personalized monogram can add a touch of elegance.
- Washi Tape: Embrace the versatility of washi tape to create stripes, dots, or even playful patterns on the appliance surfaces. The removable nature of washi tape allows for easy customization and a fun way to experiment with different looks.
- Fabric Panels: Sew fabric panels in your chosen pattern to cover the front of the appliances, adding a soft and tactile element to the design. This approach is particularly effective for creating a cohesive look with other laundry room décor.
Accessories
Accessories play a crucial role in enhancing the overall look of your laundry room makeover. They can add a touch of whimsy, practicality, and functionality.
- Handles: Replace the standard handles with decorative ones that complement your chosen color scheme and design aesthetic. From sleek chrome to vintage brass, the options are endless.
- Knobs: Similar to handles, decorative knobs can add a touch of elegance and charm to the appliances. Choose knobs that match the style and color of your handles or introduce a contrasting element for a more dynamic look.
- Storage Baskets: Woven baskets or fabric bins can be used to organize laundry supplies, creating a visually appealing and functional storage solution. Choose baskets in colors and textures that complement the overall design.
- Mirrors: Adding a mirror to your laundry room can make the space feel larger and brighter. Choose a mirror with a decorative frame that complements the style of your makeover.
- Lighting: Consider upgrading the lighting in your laundry room with a stylish pendant light or a wall sconce. Proper lighting can highlight the details of your makeover and create a more inviting atmosphere.
Before and After Presentation
The transformation of Elsie’s washer and dryer is a testament to the power of a little creativity and elbow grease. The before and after photos clearly demonstrate the dramatic shift from dull and outdated to stylish and functional.
Visual Comparison
The before and after photos reveal a remarkable change. The old washer and dryer, once painted in a generic white, now boast a vibrant striped pattern, adding a touch of personality to the laundry room. The addition of a stylish dot pattern on the dryer door adds a playful touch, while the newly painted handles and knobs complete the transformation.
Key Changes and Improvements
Here’s a table highlighting the key changes and improvements made during the makeover:
| Before | After |
|---|---|
| Plain white washer and dryer | Striped washer and dryer with dot pattern on the dryer door |
| Dated and dull appearance | Modern and stylish design |
| Limited storage space | Improved functionality with added storage solutions |
| No personalized touch | Unique and charming personality |
Transformation Process
The transformation process involved several steps. First, the washer and dryer were thoroughly cleaned and prepped for painting. Then, using painter’s tape, stripes were carefully marked and painted onto the washer. The dryer door was then painted with a dot pattern, adding a fun and playful touch.
Finally, the handles and knobs were painted to match the overall design.
Challenges and Successes
The biggest challenge was achieving a clean and precise stripe pattern on the washer. It required patience and attention to detail. However, the success of the makeover lies in the ability to create a unique and personalized design that complements Elsie’s style and brand.