Tips for family photo displays are essential for turning cherished memories into captivating displays that add warmth and personality to your home. Whether you prefer classic photo albums, modern digital frames, or creative DIY projects, there’s a perfect way to showcase your family’s story.
From choosing the right display to arranging photos for impact, this guide will explore a range of techniques and ideas to help you create beautiful and meaningful displays that reflect your unique style and family history.
Choosing the Right Display
The way you display your family photos is just as important as the photos themselves. The right display can enhance the beauty of your memories and create a warm and inviting atmosphere in your home. Choosing the right display depends on several factors, including the size and style of your photos, the available space, and your personal aesthetic.
Let’s explore some popular options and their unique advantages.
Traditional Photo Albums
Traditional photo albums offer a classic and timeless way to preserve and showcase your family photos. They provide a structured and organized way to store your memories, allowing you to easily flip through pages and reminisce about special moments.
- Pros:
- Provides a safe and organized way to store and protect photos.
- Allows for easy browsing and sharing of photos.
- Offers a variety of styles and designs to match your taste.
- Cons:
- Can be bulky and take up space.
- Not as visually appealing as some other display options.
- May not be ideal for displaying large or panoramic photos.
Examples:
- Leather-bound albums with embossed details are perfect for formal occasions and heirloom photos.
- Scrapbook albums with adhesive pages allow for creative embellishments and personalized designs.
- Pocket albums with plastic sleeves are practical and affordable for everyday photos.
Digital Photo Frames
Digital photo frames provide a modern and convenient way to display your photos, allowing you to showcase a rotating selection of images without the need for physical prints.
- Pros:
- Displays photos in high resolution and vibrant colors.
- Allows for easy updates and customization of photo slideshows.
- Can be connected to the internet for access to online photo libraries.
- Cons:
- Requires power and may not be suitable for all locations.
- Can be distracting with constantly changing images.
- May not offer the same sense of nostalgia as traditional photo albums.
Examples:
- Smart photo frames with touchscreen interfaces allow for easy navigation and customization.
- Wireless photo frames can be connected to smartphones and tablets for convenient photo sharing.
- Digital picture frames with built-in memory cards offer ample storage for a large collection of photos.
Arranging Photos for Impact
Creating a visually appealing photo display goes beyond simply hanging pictures on a wall. Arranging your photos thoughtfully can transform a collection of snapshots into a captivating story. The key is to consider factors like color, size, and subject matter to create a harmonious and impactful display.
Arranging Photos by Color
Color plays a significant role in creating visual interest. You can use color to create a sense of unity or contrast within your display. One approach is to group photos with similar color palettes together. For example, you might cluster photos with warm tones like oranges and yellows in one area, and photos with cool tones like blues and greens in another.
Alternatively, you can use color to create a more dynamic display by strategically placing photos with contrasting colors next to each other. For instance, a bright red photo might be placed next to a cool blue photo to create a striking visual contrast.
Arranging Photos by Size, Tips for family photo displays
The size of your photos can also influence the overall impact of your display. Consider using a variety of sizes to create visual interest. For example, you might use a large photo as a focal point and then surround it with smaller photos.
You can also arrange photos in a grid pattern, alternating between large and small photos.
Arranging Photos by Subject Matter
The subject matter of your photos can also be used to create a cohesive display. You might group photos by theme, such as family vacations, birthdays, or holidays. You can also arrange photos in chronological order, telling the story of your family’s history.
For a more eclectic approach, you might mix and match photos from different themes and time periods, creating a dynamic and engaging display.
Using Negative Space and Framing
Negative space is the empty space surrounding your photos. It can be just as important as the photos themselves in creating a balanced and harmonious display. By strategically using negative space, you can create a sense of calm and order.
You can also use negative space to frame your photos, drawing the viewer’s eye to specific areas of the display.
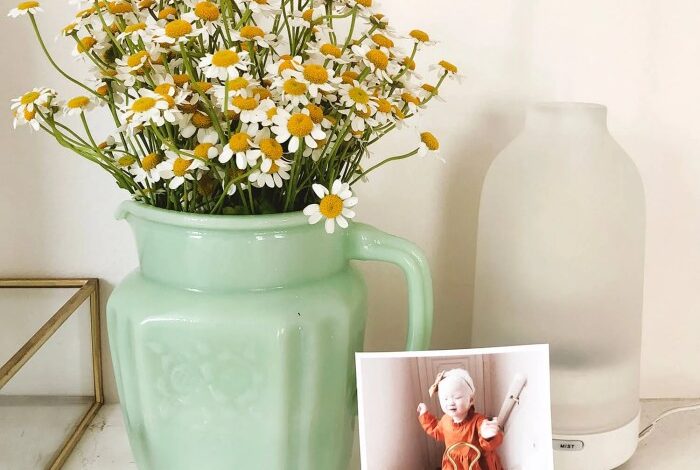
I love finding unique ways to display family photos, and lately I’ve been experimenting with adding a little something extra to my arrangements. For example, I’ve been incorporating beautiful floral ice cubes into my displays, adding a touch of whimsy and color.
To learn how to make your own floral ice cubes, check out this awesome guide: how to make floral ice cubes. The result is a stunning and unexpected element that complements the warmth of family photos perfectly.
“Framing” is a technique used to draw the viewer’s eye to a specific point of interest within a photo or display. It involves using elements like walls, furniture, or other objects to create a border around the photo, highlighting its importance.
Arranging Photos in a Chronological Order
Arranging photos chronologically is a great way to tell the story of your family’s history. You can create a timeline of significant events, from the day your children were born to family vacations and milestones. To make this arrangement even more interesting, you can use different sized frames or mats to create visual interest.
You can also add captions to each photo, providing context and details about the event captured.
Arranging Photos Thematically
Grouping photos by theme is another popular way to create a cohesive display. You might choose to group photos by location, such as family vacations, or by activity, such as sports or hobbies. This approach allows you to showcase your family’s interests and passions in a visually appealing way.
Mixing and Matching
For a more eclectic and dynamic display, you can mix and match photos from different themes and time periods. This approach can create a sense of visual interest and allow you to showcase a variety of aspects of your family’s life.
When arranging family photos, think about the stories behind each picture. A recent article about the food strategy initiative highlighting the goodness of Irish foods reminded me of how much we enjoy sharing meals with loved ones. Maybe include a photo of your family enjoying a delicious Irish stew, capturing a moment of togetherness and deliciousness.
For example, you might include photos of your children playing in the backyard, a family portrait, and a photo of your grandparents from their younger years.
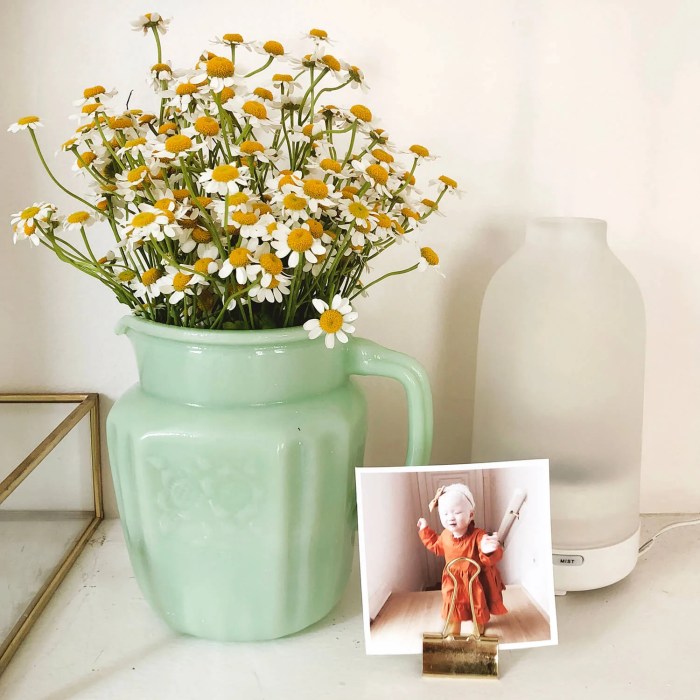
Incorporating Personal Touches

While beautiful photographs are the heart of your family photo display, it’s the personal touches that truly transform it into a cherished heirloom. These additions inject your family’s unique story and personality into the display, creating a captivating and meaningful experience for everyone who sees it.
Adding Mementos and Handwritten Captions
Incorporating mementos and handwritten captions adds a layer of depth and intimacy to your photo display. These elements provide context, evoke memories, and create a more personal connection with the photographs.
- Mementos: Think about items that represent significant moments or family interests. For example, a ticket stub from a family vacation, a child’s drawing, a small piece of pottery made by a family member, or a dried flower from a special occasion.
These mementos serve as visual reminders of cherished experiences and can spark conversations about the past.
- Handwritten Captions: Instead of relying on generic labels, consider writing heartfelt captions that capture the essence of the photograph. A brief anecdote, a funny quote, or a heartfelt message can transform a simple image into a treasure trove of memories. For example, “Our first family trip to the beach,” “Grandma’s famous apple pie,” or “The day we adopted our furry friend.”
Using Vintage Frames and Family Heirlooms
Vintage frames and family heirlooms offer a unique way to infuse your family photo display with character and history. These elements add visual interest and create a sense of continuity between generations.
- Vintage Frames: Vintage frames come in various styles and materials, each with its own unique charm. They can be found at antique shops, flea markets, or online. Consider using frames that complement the theme of your photo display, such as rustic wooden frames for a farmhouse aesthetic or ornate gilded frames for a more traditional look.
- Family Heirlooms: Integrating family heirlooms, such as antique jewelry, vintage china, or old books, adds a sentimental touch to your photo display. These items can be incorporated into the display in various ways, such as placing them on shelves, using them as props in photographs, or incorporating them into shadow boxes.
For example, a vintage locket could hold a small family photo, or an antique teacup could be used to display a small framed photograph.
Telling a Story Through Arrangement
The arrangement of your photos and personal items plays a crucial role in telling a story. By thoughtfully grouping items, you can create a narrative that flows seamlessly and engages viewers.
- Chronological Order: Arrange photos in chronological order to showcase the evolution of your family, from childhood to adulthood. This approach provides a visual timeline of your family’s journey, highlighting milestones and key moments.
- Thematic Grouping: Group photos based on themes, such as vacations, holidays, family gatherings, or hobbies. This approach allows you to focus on specific aspects of your family’s life and create a sense of unity within each theme.
- Creating a Focal Point: Highlight a specific photo or memento by placing it in a prominent position, such as the center of the display or on a shelf at eye level. This draws attention to the chosen item and emphasizes its significance.
Displaying Photos in Different Rooms

Once you’ve curated your collection and chosen your displays, it’s time to consider where these treasured memories will shine brightest. Each room in your home offers a unique opportunity to showcase your family photos, adding warmth and personality to every space.
Family photo displays are a great way to personalize your home, but sometimes it can be hard to find the perfect spot for them. A great idea I recently saw was to use a blank wall in the laundry room, just like the one Elsie transformed in her stripes and dots washer dryer makeover ! It’s a fun and unexpected place to showcase your family photos, and it adds a personal touch to a space that’s often overlooked.
Living Room Displays
The living room is the heart of your home, a place where family and friends gather. Here, you can create a focal point with a large gallery wall, a statement piece above the fireplace, or a collection of framed photos arranged on a console table.
- Gallery Walls:Gallery walls are a popular choice for showcasing a variety of photos in different sizes and frames. You can create a cohesive look by using a consistent color palette, or by grouping photos by theme, such as family vacations or milestones.
- Statement Pieces:A large, framed photograph or a collage of smaller photos can make a dramatic statement above the fireplace or on a large empty wall. Choose a photo that evokes a strong emotion or tells a meaningful story.
- Console Tables:Console tables provide a perfect surface for displaying a curated collection of photos in varying sizes and styles. You can create a visually appealing arrangement by using a combination of framed photos, vintage postcards, and antique mirrors.
Bedroom Displays
The bedroom is a sanctuary, a place to relax and unwind. Here, you can create a more intimate and personal display of family photos, focusing on memories that evoke feelings of love, comfort, and joy.
- Nightstands:Nightstands offer a perfect spot for displaying a few cherished photos, such as a framed portrait of your partner or a collage of childhood memories. Choose photos that inspire feelings of peace and tranquility.
- Above the Bed:The space above the bed is ideal for a large framed photograph or a collection of smaller photos arranged in a grid. Consider a photo of your family vacation or a special moment that holds significance.
- Dresser Tops:Dresser tops provide a surface for displaying a variety of items, including photos. You can create a personalized display by grouping photos with decorative objects, such as candles, flowers, or vintage books.
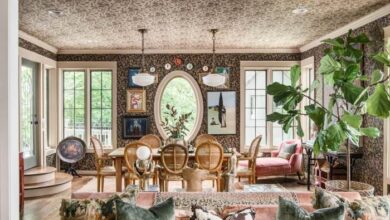
Dining Room Displays
The dining room is a place for family meals and gatherings. Here, you can create a warm and inviting atmosphere by displaying photos that capture the joy of shared moments.
- Buffet Table:A buffet table offers a perfect surface for displaying a collection of family photos, arranged in a symmetrical or asymmetrical pattern. You can create a cohesive look by using a consistent color palette or by grouping photos by theme.
- Above the Hutch:The space above a hutch or china cabinet is ideal for a large framed photograph or a collection of smaller photos arranged in a grid. Consider a photo of your family gathering for a special occasion or a family portrait.
- On the Walls:You can create a gallery wall in the dining room by grouping photos in a specific arrangement. Consider using a mix of sizes and frames to create visual interest.
Entryway Displays
The entryway is the first thing guests see when they enter your home. Here, you can create a welcoming and inviting atmosphere by displaying photos that showcase your family’s personality and style.
- Console Table:A console table in the entryway is a perfect spot for displaying a collection of family photos, arranged in a symmetrical or asymmetrical pattern. You can create a cohesive look by using a consistent color palette or by grouping photos by theme.
- Above the Door:The space above the entryway door is ideal for a large framed photograph or a collection of smaller photos arranged in a grid. Consider a photo of your family vacation or a special moment that holds significance.
- On the Walls:You can create a gallery wall in the entryway by grouping photos in a specific arrangement. Consider using a mix of sizes and frames to create visual interest.
Creating a Family Photo Wall
A family photo wall is a beautiful and personal way to showcase your family’s memories. It can be a focal point in your home, adding warmth and character to any room. Whether you prefer a curated grid or a more free-flowing arrangement, creating a family photo wall is a fun and rewarding project.
Designing a Sample Family Photo Wall Layout
Here’s a sample layout for a family photo wall, demonstrating different photo sizes and arrangement styles. This layout can be adapted to your own photos and space:
This layout uses a grid system with four columns, showcasing a variety of photo sizes and orientations. The large landscape photo in the top left corner serves as a focal point, while the smaller photos create visual interest and balance.
Different Ways to Create a Family Photo Wall
There are various approaches to creating a family photo wall, each with its own unique aesthetic.
- Grid System:A grid system offers a clean and organized look, making it easy to arrange photos of different sizes and orientations. You can use a grid template or create your own, ensuring that photos are evenly spaced and aligned.
- Free-Form Layout:A free-form layout provides more flexibility and allows for a more natural and organic feel. This approach works well for showcasing a mix of photos, including those with different shapes and sizes.
- Combination of Grid and Free-Form:Combining grid and free-form elements can create a dynamic and visually appealing photo wall. You can use a grid system for a portion of the wall and then incorporate a free-form arrangement for the remaining area.
Choosing the Right Size and Shape of Frames
Selecting the right size and shape of frames is crucial for creating a cohesive and visually appealing photo wall.
- Consider the Size of Your Photos:Choose frames that are slightly larger than your photos to create a border and prevent the photos from appearing too small or cramped.
- Select a Consistent Frame Style:Opt for frames with a similar style, such as simple black frames or elegant gold frames, to create a unified look. However, you can also incorporate a few different styles to add visual interest.
- Choose the Right Shape:Rectangular frames are the most common and versatile, but you can also use square or oval frames for a more unique look.
Hanging Frames on the Wall
Properly hanging frames is essential for ensuring that your photo wall looks its best.
- Use a Level:A level is essential for ensuring that frames are hung straight and aligned.
- Plan Your Layout:Before hanging frames, create a plan or use painter’s tape to mark the positions of each frame on the wall.
- Use the Right Hanging Hardware:Choose appropriate hanging hardware based on the weight of the frames and the type of wall.
- Space Frames Evenly:Leave enough space between frames to prevent them from appearing crowded. A general guideline is to leave at least 1-2 inches between frames.
Preserving and Protecting Photos: Tips For Family Photo Displays
Your family photos are precious treasures that capture memories, stories, and moments in time. They’re a tangible connection to your past and a window into your family’s history. It’s crucial to preserve and protect these precious memories to ensure they can be enjoyed by generations to come.
Using Acid-Free Materials and Proper Storage Techniques
The materials used to store and display photos can significantly impact their longevity. Acidic materials, such as those found in some paper, cardboard, and adhesives, can cause discoloration and damage over time. To prevent this, it’s essential to use acid-free materials for storing and displaying your photos.Here are some tips for using acid-free materials and proper storage techniques:
- Store photos in acid-free photo albums or archival boxes.These materials are specifically designed to protect photos from damaging elements.
- Use acid-free mats and frames for displaying photos.These mats and frames will prevent contact with acidic surfaces.
- Avoid using plastic sleeves or bags for long-term storage.These materials can trap moisture and cause condensation, leading to damage.
- Store photos in a cool, dark, and dry place.Extreme temperatures and humidity can cause fading, discoloration, and warping.
Digitizing Photos
Digitizing photos is an excellent way to preserve them and make them accessible to a wider audience. You can digitize photos by scanning them or using a digital camera.
- Scanning:A scanner is a dedicated device that creates a digital copy of a physical photo. This method is ideal for preserving the original photo’s detail and quality.
- Digital Camera:You can also digitize photos by taking pictures of them with a digital camera. This method is convenient for quickly digitizing large collections. However, the quality of the digitized photos may not be as high as with a scanner.
Protecting Photos from Damage
Here are some tips for protecting photos from damage, such as fading, discoloration, or scratches:
- Avoid direct sunlight:Sunlight can cause fading and discoloration. Store photos in a dark or dimly lit area.
- Handle photos with care:Use gloves when handling photos to prevent smudges and fingerprints.
- Store photos flat:Stacking photos can cause scratches and damage.
- Keep photos away from dust and moisture:Dust and moisture can cause discoloration and damage.
- Use archival-quality photo mounting materials:These materials are designed to prevent damage and preserve the photo’s quality.