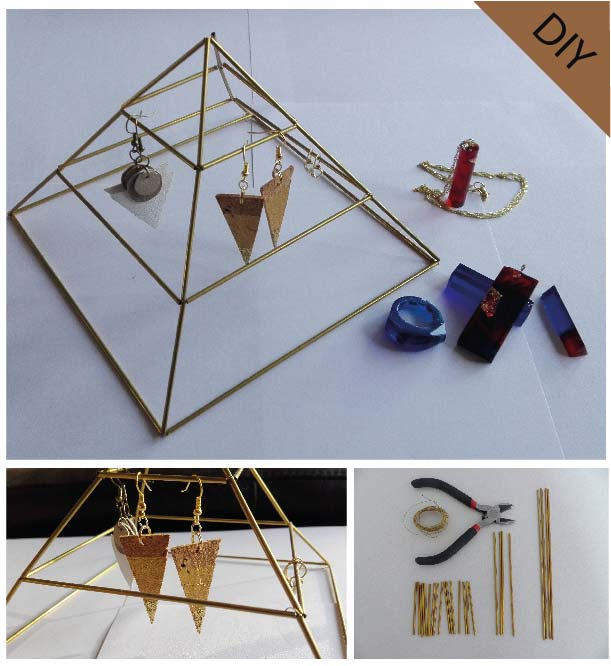

DIY Brass Pyramid Earrings: A Comprehensive Guide to Crafting Your Own Geometric Statement Pieces
Creating your own DIY brass pyramid earrings offers a unique opportunity to express personal style and embrace the satisfaction of handmade adornment. This comprehensive guide will walk you through every step, from selecting materials to the final polishing, ensuring you can craft striking, geometric statement pieces. We’ll delve into the properties of brass, essential tools, various construction techniques, and finishing touches, all while keeping SEO best practices in mind to help enthusiasts discover this rewarding craft. Brass, known for its warm, golden hue and durability, is an ideal medium for jewelry making, and the pyramid shape provides a modern, architectural aesthetic.
Understanding Brass for Jewelry Making:
Brass is an alloy primarily composed of copper and zinc. The specific proportions of these metals determine its color and properties. For jewelry making, common brass alloys include:
- Yellow Brass (65-67% copper, 33-35% zinc): This is the most popular choice for costume jewelry due to its bright, golden color and workability. It’s relatively inexpensive and widely available.
- Red Brass (80-85% copper, 15-20% zinc): With a more reddish-gold tone, this brass is also suitable for jewelry and offers a slightly different aesthetic.
- Nickel Brass (contains nickel): While some "nickel brass" is available, it’s crucial to be aware of potential nickel allergies. For hypoallergenic options, stick to high-copper brass alloys or consider alternative metals if allergies are a concern.
When choosing brass for your pyramid earrings, consider its form. You’ll likely encounter:
- Brass Sheet: This is the most versatile form, allowing you to cut out your pyramid components. Brass sheet is available in various thicknesses, typically measured in gauge (e.g., 24 gauge, 20 gauge). Thicker gauges are more durable but harder to cut and shape.
- Brass Wire: While less common for the core pyramid structure, brass wire can be used for ear hooks, connectors, or decorative elements.
- Brass Tubing: This can be a shortcut for creating hollow pyramid forms, though it requires specific cutting and shaping techniques.
- Pre-made Brass Components: You might find pre-cut brass shapes or even small brass pyramids available from specialized jewelry supply stores. While convenient, using these bypasses some of the core DIY elements.
Essential Tools for Brass Pyramid Earring Creation:
A well-equipped toolkit is crucial for successful brass jewelry making. Here are the essential tools you’ll need:
- Metal Shears/Jewelry Shears: Specifically designed for cutting thin sheet metal. Look for sturdy, sharp shears that provide a clean cut.
- Metal Files: A set of needle files in various shapes (flat, round, half-round) is indispensable for smoothing rough edges and refining the shape of your brass components.
- Ruler/Calipers: For precise measurements of your brass sheet and components.
- Pencil/Fine-tip Permanent Marker: For marking cutting lines on the brass.
- Center Punch/Awl: To create pilot holes for drilling.
- Jewelry Saw (Optional but Recommended): For more intricate cuts and shaping than metal shears can provide. This requires a fine-toothed blade.
- Hammer (Jeweler’s Hammer, Ball Peen Hammer): For shaping, flattening, and texturing the brass. A rawhide or nylon mallet is useful for gentle shaping without marring the surface.
- Bench Block/Anvil: A sturdy, flat surface for hammering and shaping.
- Pliers (Chain-nose, Round-nose, Flat-nose): Essential for bending, shaping, and manipulating brass wire and components.
- Drill Press or Handheld Rotary Tool (Dremel): For drilling holes for ear wires or connecting components. Small drill bits (micro-drill bits) are necessary.
- Solder and Soldering Iron/Torch (for advanced techniques): If you plan to solder your brass components together for a more permanent and robust construction. This requires specialized equipment and safety precautions.
- Sandpaper (various grits): From coarse (e.g., 200 grit) for initial shaping to very fine (e.g., 1000+ grit) for polishing.
- Polishing Compound/Metal Polish: To achieve a brilliant shine on your brass.
- Safety Glasses: Crucial for protecting your eyes from flying metal fragments.
- Gloves: To protect your hands from sharp edges and oils.
- Bench Pin (for sawing): A wooden block with a V-shaped notch to hold metal securely while sawing.
Construction Techniques for Brass Pyramid Earrings:
There are several ways to construct your brass pyramid earrings, each offering different aesthetic and complexity levels.
Method 1: Folded Brass Sheet Pyramid
This method involves cutting and folding a single piece of brass sheet to form the pyramid.
-
Design and Measurement: Decide on the size of your pyramid. For a simple four-sided pyramid, you’ll need to cut a square piece of brass. The size of this square will determine the base dimensions of your pyramid. For example, a 2cm x 2cm square will result in a pyramid with a 2cm base. You’ll also need to account for the height of the pyramid. For a balanced pyramid, the height should ideally be related to the base dimensions (e.g., for a square base, the apex should be directly above the center). Mark your brass sheet with precise measurements.
-
Cutting: Using your metal shears or jewelry saw, carefully cut out the square from the brass sheet. Ensure your cuts are as clean and straight as possible.
-
Scoring and Folding: This is the critical step for creating the pyramid shape.
- Marking the Center: Lightly mark the exact center of your square.
- Scoring the Fold Lines: From each corner of the square, draw a line that meets at the center point. These will be your fold lines. You can use a ruler and a very sharp pencil or a specialized scoring tool. You are essentially dividing the square into four isosceles triangles, with the apex of each triangle meeting at the center.
- Gentle Bending: Place the brass sheet on a hard, flat surface. Using the back of your metal file or a bone folder, gently score along the marked lines. You don’t want to cut through the metal, just create a crease. Once scored, carefully bend the brass along these creases, bringing the four triangular flaps upwards to meet at a point. A pair of pliers can help you refine these folds.
-
Securing the Apex: Once the four flaps are folded upwards, you’ll need to secure the apex.
- Overlapping Flaps: You can gently overlap the edges of the flaps at the apex and use strong jewelry adhesive (like E6000 or a UV resin specifically for metal) to bond them. Clamp or hold them in place until the adhesive cures.
- Soldering (Advanced): For a more professional and durable finish, you can solder the overlapping flaps. This requires flux, solder, and a soldering iron or torch. Practice on scrap brass first if you’re new to soldering.
- Riveting (Advanced): Another option is to create small holes at the apex of each flap and secure them with tiny rivets.
-
Creating the Base: The base of your pyramid will be open. You can leave it as is, or you can cut a separate square piece of brass to fit the base and adhere or solder it in place.
-
Adding the Ear Wire Loop: You’ll need a way to attach the ear wire.
- Drill a Hole: Using a drill press or rotary tool with a small drill bit, carefully drill a tiny hole through one of the folded flaps near the apex. This hole will be for your jump ring.
- Solder a Loop: Alternatively, you can solder a small brass loop or a pre-made jump ring onto the apex of the pyramid.
Method 2: Assembled Brass Sheet Pyramid
This method involves cutting individual brass pieces for each face of the pyramid and assembling them.
-
Designing the Net: To create a four-sided pyramid with a square base, you’ll need five individual brass pieces: four identical triangles for the sides and one square for the base. You can calculate the dimensions based on your desired pyramid height and base width. For example, if you want a base of 2cm and a height of 3cm, you can use geometry to determine the side length of the triangular faces. Alternatively, you can sketch a "net" – a flattened-out representation of the pyramid – on paper and use that as a template.
-
Cutting the Components: Carefully cut out all five brass pieces using your metal shears or jewelry saw. Ensure the edges are clean and precise, as they will need to fit together snugly.
-
Joining the Sides:
- Adhesive: You can use strong jewelry adhesive to bond the edges of the triangular faces together, forming the pyramid’s sides. Hold them in place with tape or clamps until cured.
- Soldering: This is the preferred method for a professional finish. Apply flux to the edges of the triangles where they will meet, then carefully solder them together. Work in small sections, allowing the metal to cool slightly between steps.
-
Attaching the Base: Once the four sides are joined and the pyramid shape is formed, you can attach the square base.
- Adhesive: Apply adhesive to the bottom edges of the pyramid and press the base into place.
- Soldering: For a stronger bond, solder the base to the pyramid’s edges. This might require careful manipulation to ensure a clean seam.
-
Adding the Ear Wire Loop: As in Method 1, drill a hole near the apex or solder a loop for attaching the jump ring and ear wire.
Method 3: Using Brass Tubing (Hollow Pyramid)
This method creates lighter, hollow pyramids, which can be ideal for larger statement earrings.
-
Cutting the Tubing: You’ll need to cut brass tubing into equal lengths to form the edges of your pyramid. For a square-based pyramid, you’ll need 12 equal lengths of tubing. The length of each tube will determine the size of your pyramid.
-
Joining the Tubing: This is the most challenging part of this method and typically requires soldering.
- Creating Corners: You’ll need to figure out how to join the ends of the brass tubes at 90-degree angles to form the edges and corners of the pyramid. This can involve cutting the ends of the tubes at an angle or using specialized brass fittings if available.
- Soldering: Carefully solder the ends of the tubes together to create the skeletal structure of the pyramid. This requires precision and practice with soldering.
-
Adding a Base (Optional): You can leave the bottom open or create a thin brass sheet to fit and solder it into place.
-
Adding the Ear Wire Loop: Solder a small brass loop or jump ring onto one of the apex corners.
Finishing and Polishing Your Brass Pyramid Earrings:
Once your brass pyramid structure is complete, the finishing touches are crucial for a professional and beautiful result.
-
Filing and Smoothing: Use your needle files to carefully smooth out any rough edges, burrs, or uneven surfaces. Pay close attention to the corners and the area where you attached the ear wire loop.
-
Sanding: Begin with a coarser grit sandpaper (e.g., 200-300 grit) to remove any deeper scratches or imperfections. Gradually move to finer grits (e.g., 400, 600, 800, 1000, and even higher if you have them). Sand in one direction for each grit, then switch to a perpendicular direction for the next grit to ensure all previous scratches are removed.
-
Cleaning: After sanding, thoroughly clean your brass components to remove all dust and debris. You can use isopropyl alcohol and a soft cloth or a jewelry cleaning solution.
-
Polishing:
- Metal Polish: Apply a small amount of brass or metal polish to a soft cloth and rub the brass in a circular motion. Buff until you achieve the desired shine.
- Polishing Compound: For a high-gloss finish, consider using a jeweler’s polishing compound with a buffing wheel attached to your rotary tool. Be cautious not to overheat the brass.
- Tumbler (Advanced): A vibratory tumbler with stainless steel shot and a polishing solution can achieve a consistent, brilliant shine, especially for multiple pairs.
-
Oxidation/Antiquing (Optional): If you prefer an antique or darkened brass look, you can use liver of sulfur or other metal darkening solutions. Follow the product instructions carefully and wear protective gear. You can then lightly buff certain areas to reveal the brighter brass underneath, creating a two-tone effect.
-
Applying a Sealant (Optional but Recommended): Brass can tarnish over time. To protect your earrings and maintain their shine, consider applying a clear jewelry sealant or a clear spray lacquer. Apply thin, even coats and allow them to dry completely.
Assembling the Earring:
- Jump Rings: Use sturdy brass or gold-plated jump rings to connect the ear wire to the loop on your brass pyramid.
- Ear Wires: Choose from a variety of ear wire styles:
- French Hooks: The most common and easy to use.
- Leverbacks: Offer a more secure closure.
- Stud Posts: If you want to create stud earrings.
- Assembly: Open one end of your jump ring using two pairs of pliers (this prevents bending the ring out of shape). Attach the ear wire and the loop on your pyramid to the jump ring. Close the jump ring securely. Repeat for the second earring.
SEO Keywords and Considerations:
To make this article discoverable by those searching for DIY jewelry projects, incorporate the following keywords naturally throughout the text:
- DIY brass pyramid earrings
- Make your own brass earrings
- Brass jewelry tutorial
- Geometric earring DIY
- Handmade brass jewelry
- Pyramid earring tutorial
- Craft brass earrings
- Jewelry making for beginners
- Brass metalworking
- DIY statement earrings
- How to make brass jewelry
- Easy brass earring DIY
- Modern geometric jewelry
- Brass cutting and shaping
- Brass polishing techniques
Troubleshooting and Tips:
- Brass is Soft: Remember that brass is a relatively soft metal. Be gentle when hammering and shaping to avoid deforming it unintentionally.
- Practice Makes Perfect: If you’re new to metalworking, don’t be discouraged if your first few attempts aren’t perfect. Practice your cutting, filing, and soldering techniques on scrap pieces.
- Cleanliness is Key: Keep your workspace and tools clean. Oils and dirt from your hands can affect the finish and adhesion of adhesives.
- Ventilation: If you’re using adhesives or soldering, ensure you work in a well-ventilated area.
- Measure Twice, Cut Once: Precision is crucial in jewelry making. Double-check all your measurements before cutting.
- Experiment with Textures: Beyond polishing, you can experiment with texturing the brass using hammers with different head shapes, stamps, or even sandpaper for a brushed effect.
By following this comprehensive guide, you’ll be well-equipped to create your own stunning DIY brass pyramid earrings. The process is not only rewarding but also allows for endless customization, making each pair a unique reflection of your personal style.
