DIY House Shaped Shelves: Crafting Charming and Functional Storage Solutions
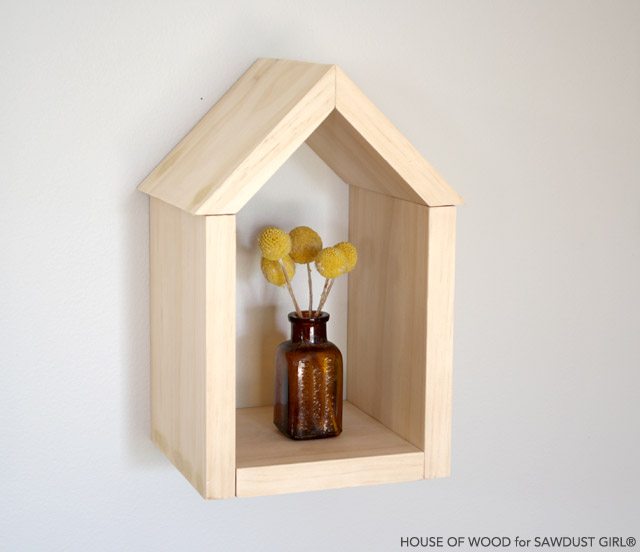
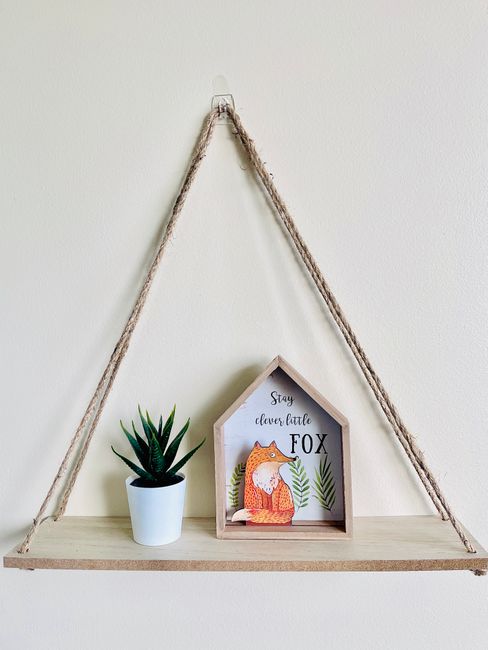
The DIY house shaped shelf has emerged as a popular and versatile decorative and storage element for homes. These charming creations blend whimsy with practicality, offering a unique way to display books, trinkets, plants, and more. Their adaptability makes them suitable for various rooms, from children’s bedrooms to living areas and even kitchens. This comprehensive guide delves into the world of DIY house shaped shelves, covering design considerations, material selection, step-by-step construction, finishing techniques, and creative styling ideas, all geared towards helping you craft a beautiful and functional piece for your home.
The appeal of the house shaped shelf lies in its inherent charm and its ability to evoke a sense of playfulness and coziness. Unlike traditional shelving units, the distinct silhouette of a house brings an architectural element to your decor. This design inherently lends itself to creative interpretations, from simple, minimalist structures to more elaborate, multi-level "houses" with various compartments. The DIY aspect further enhances its appeal, allowing for complete customization in terms of size, material, color, and finish to perfectly complement your existing interior design scheme. Whether you’re aiming for a rustic, modern, farmhouse, or Scandinavian aesthetic, a DIY house shaped shelf can be tailored to fit seamlessly.
Design Considerations and Planning
Before embarking on your DIY house shaped shelf project, careful planning is crucial. The first step involves defining the purpose and placement of your shelf. Will it be a large statement piece for a living room, or a smaller, functional unit for a child’s room? The intended use will dictate the overall size, depth, and load-bearing capacity. Consider the dimensions of the items you intend to display. For instance, if you plan to store larger books, you’ll need deeper shelves and a sturdier construction.
Sketching out your design is highly recommended. This initial drawing doesn’t need to be an architectural masterpiece, but it should outline the basic shape, the number of "rooms" or compartments, and the overall proportions. Consider the roof angle – a steeper pitch might look more traditional, while a shallower angle could lend a more modern feel. The base of the house can be a solid piece, or it can be designed as open space, allowing for additional display or storage.
Material selection plays a significant role in both the aesthetic and structural integrity of your house shaped shelf. Plywood is an excellent choice for DIY projects due to its affordability, availability, and ease of working with. ¾-inch thick plywood offers good strength and stability for most applications. For a more rustic or natural look, solid wood like pine, cedar, or even reclaimed wood can be used. Each wood type will require different finishing techniques.
Hardware is another aspect to consider during the planning phase. You’ll need screws, wood glue, and potentially brackets or nails for assembly. The type and size of screws will depend on the thickness of your wood. For a cleaner finish, consider using wood dowels or pocket hole joinery, though these methods require additional tools and a bit more skill.
Essential Tools and Materials
To successfully build your DIY house shaped shelf, you’ll need a selection of basic woodworking tools and materials.
Tools:
- Measuring Tape: For accurate measurements.
- Pencil: For marking cut lines and pilot holes.
- Saw: A handsaw, jigsaw, or circular saw will be necessary for cutting wood. A jigsaw offers the most versatility for intricate shapes.
- Screwdriver or Drill: For driving screws. A drill will also be useful for creating pilot holes.
- Clamps: To hold pieces together while glue dries or while screwing.
- Sandpaper: Various grits (e.g., 80, 120, 220) for smoothing surfaces and edges.
- Orbital Sander (Optional but recommended): For faster and more efficient sanding.
- Safety Glasses: Essential for protecting your eyes when cutting and sanding.
- Dust Mask: To protect your lungs from sawdust.
- Wood Glue: A strong adhesive for reinforcing joints.
- Paintbrushes or Rollers: For applying paint or stain.
- Ruler or Straight Edge: For drawing straight lines.
- Square: For ensuring right angles.
Materials:
- Plywood or Solid Wood Boards: The thickness will depend on your design and desired sturdiness (¾-inch is a common choice).
- Wood Screws: Appropriate length and gauge for your wood thickness.
- Wood Filler: To fill any gaps or imperfections.
- Primer (if painting): To ensure even paint coverage.
- Paint or Stain: Your chosen color and finish.
- Sealer or Varnish (optional): To protect the finish and add durability.
- Hanging Hardware (if wall-mounting): D-rings, picture hanging wire, or keyhole hangers.
Step-by-Step Construction Guide
Let’s break down the construction process into manageable steps. This guide assumes a basic house shape with a front, back, two sides, and a roof.
Step 1: Measure and Cut Your Pieces
Based on your sketched design, accurately measure and mark your wood. You’ll need:
- Front Panel: This will typically be the widest piece, often with a peaked top for the roof.
- Back Panel: Similar to the front, or it can be a solid rectangle if the back of the house will be against a wall.
- Side Panels (x2): These will connect the front and back, and their height will determine the depth of your shelves.
- Roof Panels (x2): These will meet at the peak and overhang the sides slightly for a finished look.
- Shelves: The number and dimensions of shelves will depend on your design. Measure the internal dimensions of your house structure to ensure a snug fit.
Use your chosen saw to carefully cut along your marked lines. For the peaked tops of the front and back panels, you’ll need to mark and cut angles. Ensure all cuts are as straight and precise as possible.
Step 2: Assemble the Main Structure
Begin by attaching the side panels to the front panel. Apply wood glue to the edges that will join. Use clamps to hold them in place while you pre-drill pilot holes. Pilot holes prevent the wood from splitting when you drive the screws. Drive screws through the side panels into the front panel. Repeat this process to attach the other side panel to the front.
Next, attach the back panel to the side panels, again using wood glue and screws. You should now have a basic box-like structure with a peaked top.
Step 3: Install the Shelves
Decide on the placement of your shelves within the "house" structure. You can create simple shelves that rest on the bottom of the house, or you can install them at various levels.
For internal shelves, measure the internal width and depth of your house structure. Cut your shelf pieces to fit. You can simply rest these shelves in place if the fit is snug enough, or for added stability, you can attach them. One method is to create small wooden cleats or supports that you screw into the side panels at the desired shelf heights. Then, the shelves can rest on these cleats. Alternatively, you can use screws from the outside of the house into the edges of the shelves, though this will require filling and sanding the screw holes.
Another popular approach for house shaped shelves is to have them as open compartments. In this case, you would simply cut the dividing pieces for each "room" and attach them within the main structure.
Step 4: Attach the Roof
Apply wood glue to the top edges of the front, back, and side panels where the roof will attach. Position the two roof panels so they meet at the peak and overhang slightly. Clamp them in place. Pre-drill and screw the roof panels to the main structure. You can also screw the two roof panels together at the peak for added strength.
Step 5: Sanding and Finishing
This is a crucial step for achieving a professional and polished look. Start with a coarser grit sandpaper (e.g., 80 or 120) to smooth out any rough edges, splinters, or imperfections. Gradually move to finer grits (e.g., 180 and 220) to achieve a silky smooth finish. Pay close attention to all edges and corners.
If you plan to paint your house shaped shelf, apply a coat of primer first. This will help your paint adhere better and provide a more even color. Once the primer is dry, apply your chosen paint. You may need two or more coats for full coverage. For a stained finish, apply the stain according to the manufacturer’s instructions, and then follow up with a clear coat of polyurethane or varnish for protection and durability.
If you’ve used wood filler to cover screw holes or minor gaps, ensure it’s completely dry before sanding.
Step 6: Add Hanging Hardware (if applicable)
If your house shaped shelf is designed to be wall-mounted, now is the time to attach the appropriate hardware. D-rings are a common and sturdy option for larger shelves. Ensure they are securely screwed into the back of the shelf, spaced evenly. For lighter shelves, keyhole hangers or robust picture hanging wire can be used.
Creative Styling and Customization
The beauty of a DIY house shaped shelf lies in its potential for creative expression. Beyond the basic construction and finishing, consider these ideas to make your shelf truly unique:
- Multiple Levels and Compartments: Design a more complex "house" with multiple floors and distinct "rooms" separated by internal walls. This can create a visually interesting display for a variety of items.
- Window and Door Details: Use small pieces of thin wood or even painted-on details to mimic windows and doors on your house. This adds a charming, architectural touch.
- Color Blocking and Ombre Effects: Instead of a solid color, experiment with color blocking on different sections of the house, or create a gradient effect with ombre painting.
- Distressed or Shabby Chic Finish: For a vintage feel, distress the paint by lightly sanding over areas after painting to reveal the wood underneath.
- Natural Wood Finish: Embrace the natural beauty of wood by applying a clear sealant or a light stain to highlight the grain.
- Themed Shelves: For a child’s room, you can paint the shelf to resemble a specific character’s house, like a gingerbread house or a fairytale cottage.
- Adding a Chimney: A small, decorative chimney can add an extra layer of realism and charm to your house shaped shelf.
- Incorporating Drawer or Cabinet Elements: For more advanced DIYers, consider adding small drawers or cabinet doors to specific "rooms" for hidden storage.
- Lighting: Small LED fairy lights can be incorporated around the edges or within the compartments to create a magical ambiance.
SEO Considerations for Your DIY Project
To ensure your DIY house shaped shelf content ranks well in search engines, consider these SEO best practices:
- Keyword Integration: Naturally weave relevant keywords throughout your article. Primary keywords include "DIY house shaped shelf," "house shelf tutorial," "wooden house shelf," "crafting house shelves." Secondary keywords might include "storage solutions," "home decor," "children’s room decor," "easy woodworking projects," "custom shelving."
- Descriptive Titles and Headings: Use clear and descriptive titles and headings (H1, H2, H3) that incorporate your keywords. For example, your main title should be your primary keyword. Subheadings like "Designing Your House Shaped Shelf," "Step-by-Step Construction," and "Creative House Shelf Ideas" are effective.
- Image Optimization: If you include images of your project, ensure they are high-quality and have descriptive alt text that includes relevant keywords. For example,
alt="DIY house shaped shelf with books"oralt="step-by-step guide to building a wooden house shelf". - Internal and External Linking: Link to other relevant content on your website (internal linking) and to authoritative external resources (external linking) where appropriate. For instance, you might link to a general guide on choosing wood or a tutorial on painting techniques.
- Readability and User Experience: Write in a clear, concise, and easy-to-understand manner. Use bullet points, numbered lists, and short paragraphs to improve readability. Ensure your content is mobile-friendly.
- Long-Tail Keywords: Target long-tail keywords, which are more specific phrases that users search for. Examples include "how to make a wooden house shelf for a nursery" or "easy DIY house shaped shelf plans for beginners."
- Schema Markup: Consider using schema markup for DIY projects or tutorials to provide search engines with structured data about your content, which can lead to rich snippets in search results.
Conclusion
Crafting a DIY house shaped shelf is a rewarding project that allows for immense creativity and personalization. From selecting the right materials and mastering basic woodworking techniques to adding the final artistic touches, each step contributes to a unique and functional piece of decor. The charm and versatility of these shelves make them a welcome addition to any home, offering a delightful way to organize and display your treasured belongings while adding a touch of whimsy to your living space. By following this comprehensive guide, you’re well-equipped to embark on your own house shaped shelf adventure and create a piece that is both beautiful and imbued with your personal touch.

