
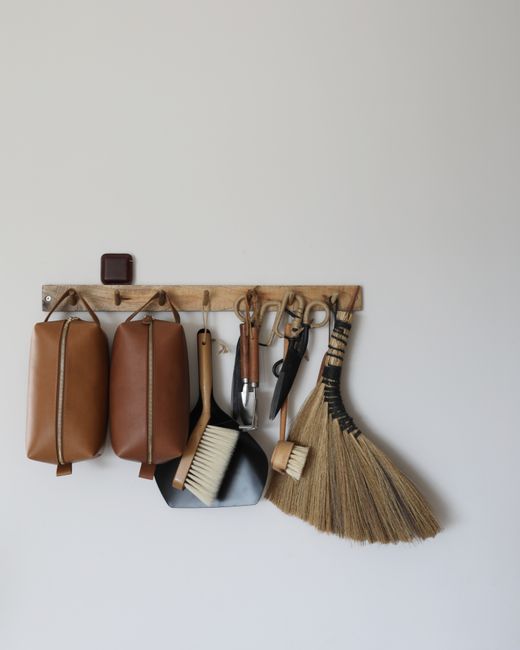
DIY Leather Wall Hanging: A Comprehensive Guide for Creating Simple, Stylish Decor
Creating a leather wall hanging is an accessible and rewarding DIY project that adds a touch of rustic elegance and personalized style to any interior space. This guide provides a detailed, step-by-step approach to crafting a simple yet impactful leather wall hanging, suitable for beginners. We’ll cover material selection, necessary tools, cutting techniques, embellishment options, and assembly, ensuring you have all the knowledge to produce a professional-looking piece. The inherent durability and natural beauty of leather make it an ideal medium for a long-lasting and attractive wall accent. Unlike many textile-based crafts, leather requires specific tools and techniques, but the payoff in terms of aesthetic appeal and uniqueness is significant. Whether you’re looking to add a focal point to a minimalist living room, a touch of warmth to a bohemian bedroom, or a unique statement piece to an office, a handmade leather wall hanging offers unparalleled versatility and a sense of accomplishment. This project is particularly well-suited for those who appreciate natural materials and desire to infuse their living spaces with handcrafted elements that tell a story. The process, while straightforward, allows for immense creative freedom, enabling you to customize the size, shape, color, and decorative elements to perfectly complement your existing décor.
Choosing the Right Leather for Your Wall Hanging:
The foundation of any successful leather project lies in selecting the appropriate leather. For wall hangings, the ideal choice is generally a vegetable-tanned leather. This type of leather is processed using natural tannins derived from plants, resulting in a firm, durable, and smooth material that holds its shape well. Vegetable-tanned leather also ages beautifully, developing a rich patina over time. Look for medium to heavy weight leather, typically ranging from 4-6 oz (1.6-2.4 mm) in thickness. This weight provides sufficient body to prevent the hanging from becoming limp or easily creased, while still being manageable for cutting and tooling. Avoid garment-grade or very thin upholstery leathers, as they might be too pliable and lack the structural integrity needed for a hanging that will be displayed on a wall. Consider the finished aesthetic you desire. Natural, undyed vegetable-tanned leather offers a blank canvas for dyeing, stamping, or burning, and will darken to a warm caramel or saddle brown with exposure to light and air. Pre-dyed leathers are also readily available in a wide spectrum of colors, from deep blacks and rich burgundies to vibrant blues and earthy greens. When selecting pre-dyed leather, ensure the dye is consistent and there are no scuffs or imperfections that would be difficult to disguise. For a more rustic or distressed look, consider distressed or pull-up leathers, which develop unique markings and color variations with bending and stretching. The grain pattern of the leather is also a consideration. Full-grain leather, which retains the natural surface of the hide, is the highest quality and most aesthetically pleasing, showcasing the subtle variations and imperfections that give each piece its unique character. Top-grain leather has had the outermost layer buffed off, resulting in a smoother surface, and is also a good option. Avoid genuine leather or bonded leather, which are lower in quality and may not hold up as well over time. When purchasing, inspect the leather for any significant flaws, such as deep scars, holes, or inconsistent thickness, as these can compromise the integrity and appearance of your finished piece.
Essential Tools and Materials:
To embark on your leather wall hanging project, a few essential tools are necessary. These are investments that will serve you well for future leatherworking endeavors.
- Leather: As discussed, choose appropriate weight and type. You’ll likely need a piece large enough for your desired design. Consider purchasing leather by the square foot or in pre-cut panels depending on availability and your project size.
- Cutting Tool: A sharp craft knife, rotary cutter, or a dedicated leather cutting knife is crucial. For precise straight cuts, a metal ruler or straight edge is indispensable.
- Hole Punch: A rotary punch is highly recommended as it offers various punch sizes for different applications (hanging holes, lacing holes). Alternatively, individual punch sizes or a specialized leather punch can be used.
- Awl: A pointed tool used to mark cutting lines, pre-punch holes for stitching or lacing, and to guide stitching.
- Mallet or Hammer: A rawhide, rubber, or poly mallet is used to strike stamps and punches. A standard hammer is generally too hard and can damage the leather.
- Work Surface: A self-healing cutting mat or a sturdy, flat surface that you don’t mind potentially marking is essential for cutting.
- Measuring Tool: A metal ruler or tape measure for accurate measurements.
- Marking Tool: A silver pen, chalk pencil, or a specialized leather marking pen for transferring designs.
- Embellishment Tools (Optional): If you plan to add decorative elements like stamping or tooling, you’ll need leather stamps, a stamping mat, and potentially a swivel knife and modeling tools.
- Hanging Hardware: Eyelets, grommets, or D-rings, along with their corresponding setting tools, will be needed to create attachment points for hanging. Alternatively, you can simply punch holes for string or cord.
- String/Cord/Rod: For hanging the piece. This could be leather cord, paracord, twine, a dowel rod, or a decorative metal rod.
- Adhesive (Optional): Leather glue can be useful for securing edges or attaching decorative elements if not using traditional stitching.
- Burnisher (Optional): For smoothing and polishing the edges of the leather.
- Leather Finish/Conditioner (Optional): To protect and enhance the leather’s appearance.
Designing Your Leather Wall Hanging:
The design phase is where your creativity takes center stage. For a simple wall hanging, consider basic geometric shapes like rectangles, squares, circles, or even organic, freeform shapes. You can create a single large piece or a series of smaller connected panels. Sketch your design on paper first, considering the overall dimensions and how it will fit within your intended space. Think about negative space as much as the filled areas.
- Shape: A classic rectangular or square piece offers a clean, modern aesthetic. A circular or oval shape can provide a softer, more organic feel. Irregular, freehand shapes can add an artisanal, unique touch.
- Size: Measure the wall space where the hanging will be displayed. Consider the scale relative to other furniture and décor. A large statement piece can anchor a room, while a smaller series can add subtle texture.
- Layout: Will the leather be a single piece, or will multiple pieces be joined? If joining, how will they be connected?
- Embellishments: Plan any decorative elements at this stage. This could include:
- Stamping: Using pre-made leather stamps to create patterns, symbols, or text.
- Tooling: More advanced techniques involving carving and shaping the leather.
- Burning/Pyrography: Using a heated tool to create permanent designs.
- Painting/Dyeing: Applying colors to the leather.
- Lacing/Stitching: Joining pieces or adding decorative borders.
- Fringing: Cutting the bottom edge into strips for a bohemian look.
- Hanging Mechanism: Decide how the wall hanging will be attached to the wall. This will influence where you place your hanging holes or hardware. Common methods include:
- Holes for String/Cord: Simple punched holes at the top corners or along a reinforced edge.
- Eyelets/Grommets: More durable and aesthetically pleasing than simple holes, these metal rings are set into the leather.
- D-rings/Screw Eyes: Attached to the back of the leather, allowing for hanging from nails or hooks.
- Rod Pocket: A channel sewn or glued along the top edge to slide a dowel or rod through.
For a beginner-friendly approach, focus on a single piece with minimal embellishments, perhaps a simple geometric shape or a pattern created with a few basic stamps.
Cutting Your Leather:
Precision is key when cutting leather. Always cut on a firm, protected surface like a self-healing mat. Use a sharp blade and a metal ruler for straight lines.
- Transfer Your Design: Lay your leather flat. Using your chosen marking tool and a ruler or template, carefully transfer the outline of your desired shape onto the leather. If you have a complex design, consider creating a paper template first and tracing around it.
- Secure the Leather: Ensure the leather is lying flat and doesn’t shift during cutting. You can use weights or clamps on the edges if necessary, but be careful not to distort the shape.
- Make the Cut:
- Straight Lines: Place your metal ruler firmly along the marked line. Hold the ruler steady with one hand, applying firm pressure. With the other hand, draw your craft knife or rotary cutter along the ruler’s edge. It’s often best to make multiple light passes rather than trying to cut through the entire thickness in one go. This ensures a cleaner, more controlled cut.
- Curved Lines: For curves, you’ll rely more on the freehand control of your knife. Work slowly and deliberately, following your marked line. A rotary cutter can also be used for curves, but requires a steady hand.
- Finishing the Edges: Once cut, inspect the edges. If they are rough or uneven, you can use fine-grit sandpaper to smooth them. For a professional, burnished edge, use a burnishing tool and a bit of water or gum tragacanth to rub the edge until it becomes smooth and slightly glossy.
Adding Decorative Elements (Optional):
This is where you can truly personalize your leather wall hanging.
- Stamping:
- Practice: It’s always a good idea to practice stamping on a scrap piece of leather.
- Positioning: Place the leather on a stamping mat or a firm, flat surface.
- Strike: Position the stamp on the leather where you want the impression. Strike the top of the stamp firmly and evenly with your mallet. The force and angle of the strike will determine the depth and clarity of the impression.
- Patterns: Create repeating patterns, borders, or scattered designs. Experiment with different stamp combinations.
- Dyeing/Coloring:
- Preparation: Ensure your leather is clean and free of oils or dirt.
- Application: Apply leather dye or stain with a wool dauber, sponge, or brush. Work in thin, even coats, allowing each layer to dry completely before applying the next.
- Coloring: You can use a single color or blend multiple colors for an ombre effect.
- Antiquing: For a more vintage look, apply an antiquing solution over a base color to highlight stamped or tooled areas.
- Fringing:
- Marking: Measure and mark the desired length of your fringe along the bottom edge of the leather.
- Cutting: Using your sharp knife and ruler, make parallel cuts from the bottom edge up to your marked line. The width of the fringe strips is a matter of preference.
- Styling: You can leave the fringe as is, twist it, or even add beads to the ends.
Creating Hanging Points:
The method you choose for hanging will dictate how you create the attachment points.
- Simple Holes:
- Marking: Measure and mark the positions for your holes, typically near the top corners, ensuring they are equidistant.
- Punching: Use your awl to create a starting point, then use your rotary punch or individual punch size to create the holes. Ensure the holes are large enough for your chosen string or cord.
- Eyelets/Grommets:
- Marking: Mark the hole locations as you would for simple holes.
- Punching: Use your rotary punch or a hole punch designed for eyelets to create the hole, ensuring it’s the correct size for your eyelet.
- Setting: Place one half of the eyelet through the hole from the front. Place the other half of the eyelet on the back. Use the appropriate eyelet setting tool and your mallet to firmly press the two halves together, securing the eyelet to the leather.
- D-rings/Screw Eyes:
- Attachment: These are typically attached to the back of the leather.
- Securing: For D-rings, you might punch two holes and thread a strong leather lace or rivets through them to secure the ring. Screw eyes can sometimes be screwed directly into thicker leather, or you might need to pre-drill a small pilot hole.
Assembling and Hanging Your Wall Hanging:
Once all your decorative elements are in place and your hanging points are created, it’s time to assemble and hang your masterpiece.
- Attach Hanging Hardware (if applicable): If using D-rings or screw eyes, ensure they are securely attached to the back of the leather.
- Thread Hanging Material:
- String/Cord: Thread your chosen string, cord, or twine through the punched holes or eyelets. Tie secure knots at each end. You can create a single hanging loop or two separate loops for balance.
- Rod: If you created a rod pocket, slide your dowel or decorative rod through the pocket.
- Choose Hanging Location: Select the desired spot on your wall.
- Install Wall Fasteners: Depending on the weight of your wall hanging and your wall type, you’ll need appropriate wall anchors, hooks, or nails. For heavier pieces, use robust anchors.
- Hang Your Creation: Carefully hang your leather wall hanging onto the wall fasteners. Ensure it is level and secure.
Tips for Success and SEO Optimization:
- Keywords: Integrate keywords naturally throughout the article. Relevant terms include "DIY leather wall hanging," "handmade leather decor," "leather craft project," "easy leather crafts," "how to make a leather hanging," "leather wall art," "vegetable-tanned leather," "leatherworking for beginners," and specific embellishment terms like "leather stamping," "leather dyeing," and "leather fringe."
- Headings and Subheadings: Use clear, descriptive headings and subheadings (H2, H3) to break up the text and make it scannable. This improves user experience and SEO.
- Image Alt Text: If you were to include images, ensure they have descriptive alt text that includes relevant keywords.
- Internal/External Linking: Link to other relevant DIY guides or resources on your site. Link to reputable leather suppliers or tool manufacturers externally.
- User Intent: Focus on providing comprehensive, actionable advice that directly addresses what a user searching for "how to make a leather wall hanging" would want to know.
- Long-Tail Keywords: Incorporate more specific phrases like "simple leather wall hanging for beginners" or "how to add fringe to leather wall art."
- Clarity and Conciseness: While aiming for word count, ensure the language is clear, concise, and easy to understand. Avoid jargon where possible, or explain it clearly.
- Call to Action (Implicit): The entire article serves as an implicit call to action to try the project. You could also subtly encourage sharing or commenting on their creations.
By following these steps and incorporating SEO best practices, you can create a beautiful, personalized leather wall hanging and ensure your guide is easily discoverable by those seeking inspiration for unique home décor. The process is rewarding, and the end result is a piece of art that adds character and warmth to any living space. Experiment with different designs, colors, and embellishments to create a truly one-of-a-kind piece that reflects your personal style.

