DIY Fall Floral Garland: A Comprehensive Guide to Crafting Autumn Ambiance
Creating a DIY fall floral garland is an achievable and rewarding project that instantly imbues your home with the warm, inviting spirit of the season. Unlike pre-made decorations, a homemade garland offers unparalleled customization, allowing you to tailor colors, textures, and the overall aesthetic to perfectly complement your existing décor. This guide provides a comprehensive, SEO-friendly approach to crafting your own stunning fall floral garland, covering everything from material selection and tool essentials to step-by-step construction and advanced styling tips. By focusing on organic elements and thoughtful arrangement, you can achieve a professional-looking result that rivals any store-bought option.
The foundation of any successful DIY fall floral garland lies in the judicious selection of materials. For an authentic autumnal feel, prioritize natural elements that evoke the rich palette of the season. Think beyond just flowers; consider incorporating a variety of foliage, berries, seed pods, and even small gourds or pinecones. For a lush and full garland, a combination of textures is key. Incorporate softer, pliable greenery like eucalyptus (silver dollar, seeded, or baby blue), or faux varieties that mimic their shape and drape. This provides a flexible base upon which to build. Accents of dried or faux flowers in warm hues are essential. Look for dried hydrangeas in shades of rust and burgundy, or faux sunflowers, chrysanthemums, and dahlias in deep oranges, yellows, and reds. Don’t underestimate the power of filler elements. Small sprigs of dried baby’s breath, wheat stalks, or even delicate faux berries add visual interest and depth. For a touch of rustic charm, consider adding faux or real mini pumpkins, artichokes, or pinecones. When selecting faux flowers and foliage, invest in items that appear as realistic as possible. Pay attention to the texture of the petals and leaves, and opt for muted, natural colors rather than overly bright or artificial-looking shades. The goal is to create a garland that feels organic and authentically autumnal, even if some elements are artificial.
Essential tools are paramount for a smooth and efficient DIY floral garland creation process. Begin with a sturdy base. This can be floral wire (22-gauge or 24-gauge is ideal for flexibility and strength), a flexible wire frame, or even a length of thick twine or rope if you’re aiming for a more rustic, less structured look. Wire cutters are non-negotiable for cleanly snipping floral wire and stems. Floral tape, typically green or brown, is crucial for securing stems together and creating a cohesive base. This tape adheres to itself and provides a natural, finished look. Wire cutters are another indispensable tool, allowing for precise cutting of floral wire. A hot glue gun and glue sticks are invaluable for attaching heavier elements like mini pumpkins or pinecones that might not stay securely with wire alone. Floral shears or sharp pruning shears are beneficial for trimming thicker stems of natural foliage if you’re using fresh materials. For a polished finish, consider having a spool of ribbon or twine on hand for hanging and additional decorative accents. Tweezers can be surprisingly useful for positioning small filler elements or adjusting delicate petals. Finally, a workspace that is well-lit and spacious will make the process much more enjoyable and organized. Lay out all your materials and tools before you begin to avoid interruptions.
The construction of your DIY fall floral garland involves a methodical approach, building from the base up. Start by creating a flexible base using floral wire. Cut lengths of wire, approximately 18-24 inches long, and twist them together to form a continuous, pliable strand. Alternatively, if using a pre-made wire frame, proceed to the next step. Begin by attaching your primary greenery to this base. Wrap stems of eucalyptus or other pliable foliage around the wire, securing them with floral tape. Overlap the stems slightly to create a full, continuous look. As you work, consider the desired drape and thickness of your garland. For a fuller garland, use more greenery and overlap generously. Once your base is covered with greenery, begin incorporating your focal flowers. Trim the stems of your chosen faux or dried flowers to a manageable length, typically 3-4 inches. Insert the stems into the greenery and floral tape, twisting them gently to secure. Position these larger blooms strategically, varying their placement to create visual interest. Don’t be afraid to let some flowers extend outwards or hang slightly lower for a more organic feel.
After the focal flowers are in place, it’s time to introduce your accent elements. This includes berries, smaller floral clusters, and textural elements. Trim their stems and tuck them in amongst the greenery and larger flowers, using floral tape or a dab of hot glue to secure them. Think about filling any gaps and adding layers of visual depth. If you’re incorporating heavier items like mini pumpkins or pinecones, use your hot glue gun to attach them securely to the wire base or to thicker stems of greenery. For a more natural look, position these heavier elements so they appear to be growing out of the foliage. Continue to step back and assess your garland as you work, ensuring a balanced distribution of color and texture. Rotate the garland to view it from all angles and make adjustments as needed. The key is to build in layers, gradually adding complexity and detail until you achieve your desired aesthetic.
The finishing touches are what elevate a good DIY fall floral garland to an exceptional one. Once your garland is fully assembled, take a step back and critically evaluate its appearance. Look for any sparse areas that need filling, or any elements that appear out of place. Use additional filler flowers, berries, or greenery to address these areas. Consider the overall flow and balance of the garland. Does it have a pleasing symmetry or a natural, asymmetrical charm? Adjust individual elements to enhance the desired effect. If you’ve used a wire base, you can gently bend and shape it to create gentle curves or more dramatic swoops, depending on where you intend to display the garland. For an added touch of rustic elegance, consider tying small bundles of twine or ribbon to the ends of the garland, allowing them to hang freely. This also provides convenient attachment points for hanging. If you’ve used any natural elements that are delicate, such as dried leaves, ensure they are securely attached and won’t easily fall off. A light misting of floral sealant can help preserve the freshness of any natural elements and prevent shedding. When considering where to hang your garland, visualize its final placement. If it will be viewed from a distance, ensure larger elements are prominent. If it will be viewed up close, the finer details and textures will be more appreciated.
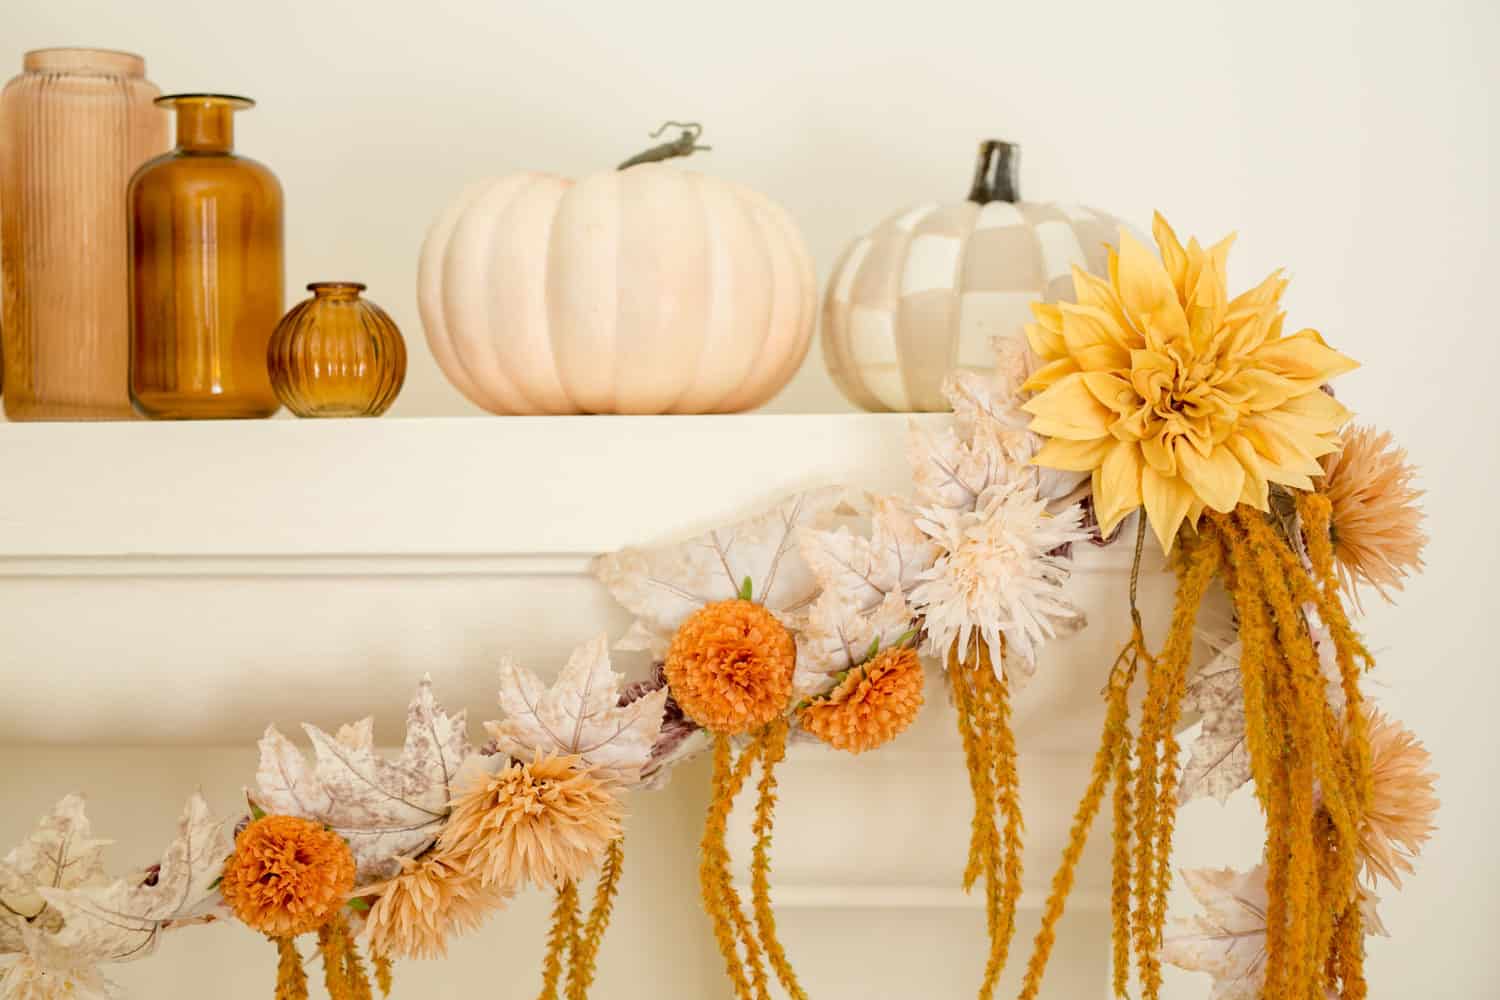
Styling and placement are critical for showcasing your DIY fall floral garland effectively. Consider the architectural features of your home or the specific area you wish to adorn. Mantels are classic and elegant choices for displaying fall garlands. Drape the garland casually across the mantelpiece, allowing it to cascade slightly on either side. For a more dramatic effect, weave it around picture frames or decorative objects already on the mantel. Doorways are another prime location. Drape the garland over the top of a doorway, allowing it to frame the entrance with autumnal beauty. For a grander statement, consider draping it along the top of an exterior door frame, welcoming guests with seasonal cheer. Stair railings offer a wonderful opportunity for a flowing, dynamic display. Wrap the garland loosely around the banister, ensuring it doesn’t obstruct foot traffic. The gentle curves can accentuate the architectural lines of the staircase. Over a mirror, a garland can create a stunning focal point, reflecting the warm colors and textures. For a more intimate setting, place a shorter garland on a bookshelf, interspersing it with books and decorative objects. When considering placement, think about the overall color scheme of the room. If your décor is more muted, opt for a garland with bolder pops of color. Conversely, if your décor is already vibrant, choose a garland with more natural, earthy tones. The scale of the garland should also be proportional to the space. A large, sprawling garland might overwhelm a small entryway, while a delicate arrangement might be lost on a grand fireplace.
To enhance the SEO of your DIY fall floral garland content, strategic keyword integration is essential. Naturally weave terms like "fall floral garland DIY," "autumn garland tutorial," "DIY autumn decorations," "fall craft ideas," "homemade fall garland," "how to make a fall garland," "faux fall flowers," "dried floral garland," and "seasonal home décor" throughout the article. Employ descriptive language that resonates with users searching for these terms, such as "rustic fall garland," "elegant autumn wreath," "natural fall centerpiece," and "fall harvest décor." Utilize headings and subheadings (like "Material Selection for Your Autumn Garland," "Essential Tools for Garland Crafting," "Step-by-Step Fall Garland Assembly," "Finishing Touches for a Professional Look," and "Styling Your DIY Fall Garland") to break up the text and improve readability for both users and search engines. Incorporating long-tail keywords, such as "easy DIY fall floral garland for beginners" or "how to make a long fall floral garland for a mantelpiece," can attract highly specific search traffic. Ensure your image alt text is descriptive and includes relevant keywords. For instance, if you have an image of a finished garland, the alt text could be "DIY fall floral garland with sunflowers and eucalyptus."
For those seeking more advanced techniques, consider incorporating elements like artificial berries on wired stems, which can be bent and manipulated to create clusters. Dried wheat or corn husks can add unique texture and a distinctly harvest-themed feel. For a touch of luxury, consider weaving in small, artificial velvet pumpkins or gilded leaves. When using faux flowers, consider layering different types of foliage for a more complex and naturalistic base; for example, combining eucalyptus with faux ferns or ivy. If you are working with a very long garland, consider breaking it down into smaller sections during the construction process and then wiring them together at the end to make assembly more manageable. This also allows for easier storage and reusability. Another advanced technique involves creating "florets" from smaller floral components and wiring them together before attaching them to the main garland. This creates more intricate clusters of color and texture. For an even more organic look, consider using natural elements like real dried leaves or seed pods, though be mindful of their fragility and potential for shedding. A light application of a spray adhesive designed for floral arrangements can help secure delicate natural elements. When considering the overall design, think about creating a focal point within the garland itself, perhaps a cluster of larger flowers or a particularly striking accent piece. This adds dynamism and prevents the garland from appearing too uniform.
The longevity and care of your DIY fall floral garland are important considerations, especially if you’ve incorporated natural elements. If your garland is exclusively made of faux materials, it will be highly durable and can be stored and reused for many seasons. Store it carefully, ideally in a box or container that prevents it from being crushed or tangled. Avoid direct sunlight for extended periods, as this can cause some artificial materials to fade over time. If you’ve used dried natural elements like hydrangeas, seed pods, or wheat, these are also relatively durable but can be more fragile. Store them in a cool, dry place away from humidity, which can cause them to disintegrate or mold. If any dried elements appear to be shedding, a light misting of floral sealant can help hold them together. For garlands that include fresh elements, these are temporary decorations and will need to be replaced as they wilt. If you are aiming for a longer-lasting garland with some fresh elements, consider using a floral preservative spray on the fresh stems before incorporating them, though this will only extend their lifespan by a limited amount. When storing a garland with a mix of faux and natural elements, it’s often best to separate the natural elements before storing to prolong their life and prevent moisture transfer to the faux components. Regularly inspect your garland for any signs of wear or damage between seasons and make any necessary repairs before displaying it again. Proper care will ensure your beautiful, handcrafted fall floral garland remains a cherished decoration for years to come.
