:max_bytes(150000):strip_icc()/6a00d8358081ff69e201a3fc5193a2970b-800wi-56a262a95f9b58b7d0c9906f.jpg)
DIY Studded Tree Stump Side Table: A Rustic and Rebellious Accent Piece
Transforming a natural element like a tree stump into a functional and stylish piece of furniture is a rewarding DIY endeavor. This guide provides a comprehensive, step-by-step process for creating a DIY studded tree stump side table, a unique accent piece that blends rustic charm with a touch of edgy rebellion. The raw beauty of the wood, enhanced by the metallic glint of studs, makes this table a statement piece for any living room, bedroom, or even an outdoor patio. This project is ideal for those looking to add a personal touch to their décor while repurposing a readily available material.
Gathering Your Materials: The Foundation of Your Studded Stump Table
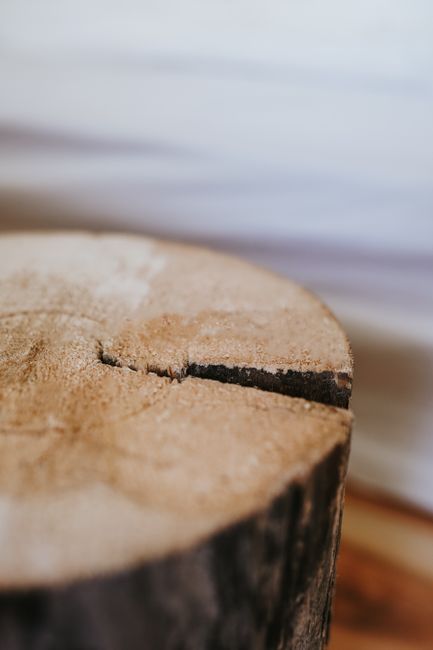
Successful completion of this DIY project hinges on having the right materials readily accessible. Begin by sourcing a suitable tree stump. Ideally, it should be a section of a fallen tree, measuring roughly 18-24 inches in height and 12-18 inches in diameter. Ensure the stump is dry and has been cut as level as possible on both the top and bottom. If you are cutting your own stump, use a chainsaw and aim for a clean, flat cut. Look for stumps with interesting bark textures or grain patterns, as these will add to the visual appeal of your finished table. The dryness of the stump is crucial; a freshly cut stump will likely warp and crack as it dries, ruining your hard work. Allow it to air dry for several weeks, or even months, in a well-ventilated area, away from direct sunlight and moisture.
Next, acquire your studs. The type and style of studs are critical to achieving your desired aesthetic. For a more rugged, industrial look, consider using large, antique-brass or iron studs with sharp points. For a more refined, bohemian vibe, opt for smaller, more decorative studs in silver, copper, or even iridescent finishes. You can find a wide variety of studs at craft stores, upholstery supply shops, or online retailers. The quantity needed will depend on the size of your stump and the density of stud placement. It’s always a good idea to purchase a few extra to account for any mistakes or to add extra flair.
Essential tools include a heavy-duty hammer, a tape measure, safety glasses, work gloves, and sandpaper (both coarse-grit for initial shaping and fine-grit for smoothing). You will also need wood sealant or polyurethane to protect the stump and enhance its natural beauty. For attaching any legs or leveling feet, you might need a drill and appropriate drill bits, as well as screws. Finally, consider a stencil or chalk for marking your stud placement, especially if you plan on creating a specific pattern.
Preparing the Stump: Cleaning, Sanding, and Stabilizing
The preparatory phase is paramount for a durable and aesthetically pleasing studded stump table. Begin by thoroughly cleaning the stump. Remove any loose dirt, debris, moss, or insect nests. A stiff brush and water can work well for this. If the bark is loose and peeling, gently remove it, but be mindful of preserving any interesting textures that contribute to the rustic charm.
Once clean, it’s time to sand the stump. Start with a coarse-grit sandpaper (around 80-grit) to smooth out any rough edges, splinters, or uneven surfaces. Work your way up to finer grits (120-grit, then 220-grit) to achieve a smooth finish. Pay particular attention to the top surface where the table will be used, ensuring it’s flat and smooth enough to hold drinks or decorative items. Sanding the bark can be more challenging. You may need to use sanding sponges or hand-sanding techniques to conform to the contours of the bark. Don’t aim for a perfectly smooth bark finish; some roughness will enhance its natural appeal.
If the stump feels unstable or has a tendency to wobble, consider adding leveling feet or a more substantial base. For a simple solution, screw adjustable leveling feet into the bottom of the stump. This will allow you to compensate for uneven floors and prevent the table from tipping. For a more robust base, you could attach a wooden disc or even a small piece of plywood to the bottom, ensuring it’s securely fastened.
Sealing the Wood: Protecting Your Natural Masterpiece
Applying a wood sealant is a critical step in protecting your DIY studded tree stump side table from moisture, dust, and general wear and tear. It also helps to enhance the natural grain and color of the wood, giving it a richer, more finished appearance. Choose a sealant that complements your desired aesthetic. A clear polyurethane will provide excellent protection while maintaining the natural look of the wood. For a slightly darker, richer tone, a satin or matte finish polyurethane can be used. If you want to emphasize the wood’s natural tones, consider a wood stain before applying the sealant. Ensure the stain is compatible with your chosen sealant.
Apply the sealant in thin, even coats using a paintbrush or a foam applicator. Allow each coat to dry completely according to the manufacturer’s instructions before applying the next. Typically, 2-3 coats are recommended for adequate protection. Sand lightly with fine-grit sandpaper (320-grit or higher) between coats to ensure a smooth, professional finish. Pay close attention to sealing any cracks or crevices in the wood, as these can be points of moisture ingress. Once the final coat of sealant has dried and cured (this can take up to 24-48 hours), your stump will be ready for the next exciting step: studding.
Designing Your Stud Pattern: From Simple to Sophisticated
The studs are where your personality and style truly shine through in this DIY project. Before you start hammering, take time to plan your stud design. This is an opportunity to express your creativity and tailor the table to your specific décor.
For a minimalist approach, consider placing a single, bold stud at each corner of the table’s top surface or spaced evenly around the perimeter of the top or base. This subtle addition can create a sophisticated, understated focal point.
A more classic pattern involves running rows of studs along the top edge of the stump, creating a decorative border. You can space them uniformly for a clean, geometric look or vary the spacing for a more organic feel.
For a bolder, more rebellious statement, consider covering larger sections of the stump with studs. You could create a staggered pattern, a checkerboard effect, or even an abstract design. Think about how the studs will interact with the natural contours of the wood; they can highlight the bark’s texture or create intriguing visual lines.
If you’re aiming for a specific theme, such as a gothic or medieval aesthetic, you might opt for larger, more ornate studs and arrange them in intricate patterns, perhaps mimicking wrought iron scrollwork. Conversely, for a more modern, edgy look, consider metallic studs in a cool silver or gunmetal finish, placed in sharp, angular formations.
Use chalk or a washable marker to lightly sketch your desired pattern onto the stump. This allows you to visualize the design and make adjustments before committing with the studs. Measure and mark your stud placement carefully to ensure symmetry and balance, especially if you’re aiming for a geometric pattern. Remember to account for the thickness of the stud’s prong when determining spacing.
The Art of Studding: Precision, Patience, and Persistence
This is the most visually impactful stage of creating your DIY studded tree stump side table. Work in a well-lit area and wear your safety glasses and gloves throughout this process.
Begin by selecting your starting point. If you’re working on a patterned border, it’s often easiest to start at a corner or a prominent visual line. Place the stud where you want it to go. Then, using your hammer, strike the stud firmly and squarely. The goal is to drive the prongs through the wood without bending them. Start with gentle taps to set the stud in place, then increase the force of your hammer blows.
If you encounter resistance, don’t force it. You might need to reposition the stud slightly or use a smaller hammer to get into tighter areas. For particularly tough wood or stubborn studs, you can pre-drill a very small pilot hole to help guide the prongs. Be careful not to make the hole too large, as this can weaken the stud’s hold.
Maintain consistent spacing between your studs. Use your tape measure to ensure accuracy, especially if you’re working on a symmetrical pattern. If a stud isn’t sitting flush with the surface, gently tap it down with the hammer. If a prong bends, you can try to gently straighten it with pliers.
When working on curved surfaces, it can be more challenging to get the studs to sit perfectly flush. Don’t be afraid to use pliers to carefully bend the prongs around the natural contours of the wood. The slight imperfections can often add to the handmade charm of the piece.
If you are using a stencil, remove it carefully once you’ve started placing studs in that section. Continue to work methodically, following your pre-marked pattern. Take breaks as needed to avoid fatigue, which can lead to mistakes. Patience is key; rushing this process will result in a less polished final product.
Adding a Base or Legs (Optional): Stability and Style
While a raw tree stump can stand on its own, adding a base or legs can enhance both the stability and the aesthetic of your DIY studded tree stump side table. This step is optional but highly recommended for a more polished and functional piece of furniture.
For a rustic and robust look, consider attaching furniture legs made from wrought iron, cast metal, or even chunky wooden legs. Ensure the legs you choose complement the style of your studs and the overall character of the stump.
Before attaching legs, determine their placement. Ideally, they should be positioned to provide maximum stability and distribute the weight evenly. Measure the distance from the edges of the stump to ensure they are set back appropriately and won’t be a tripping hazard.
If you are attaching screw-in legs with mounting plates, you will need to pre-drill pilot holes for the screws. Ensure the pilot holes are slightly smaller than the screw diameter to create a secure hold. If you are attaching legs directly, you may need to use longer, more robust screws, potentially with washers to prevent them from sinking too deeply into the wood.
For a more minimalist or modern aesthetic, consider attaching a simple wooden disc or a circular metal base. This can provide a clean, geometric contrast to the organic shape of the stump. Ensure the base is slightly wider than the stump to offer good support.
If your stump has a slightly uneven bottom, adding a base can be a great way to achieve a perfectly level table. You can also incorporate adjustable leveling feet into the base for added stability on uneven surfaces. Always test the stability of your table after attaching any legs or a base.
Final Touches and Maintenance: Preserving Your Creation
Once all the studs are in place and any legs or a base are securely attached, take a step back and admire your handiwork. Before putting your studded stump table into regular use, consider applying a final protective topcoat. A clear, durable varnish or a wax finish can further protect the wood and the studs from scratches and wear. Apply this in a well-ventilated area and allow it to cure fully.
Regular maintenance for your studded stump table is relatively simple. Dust it regularly with a soft, dry cloth. For deeper cleaning, use a slightly damp cloth, but avoid excessive moisture, as this can still damage the wood over time. If you notice any loose studs, gently tap them back into place with a hammer. Avoid placing extremely hot or wet items directly on the surface without protection, as this can lead to water rings or heat damage, even with a sealant.
Consider the placement of your table. While it can be used outdoors, it’s best to protect it from prolonged exposure to harsh weather elements like direct sun, heavy rain, or snow. Bringing it indoors during inclement weather will significantly extend its lifespan and preserve its aesthetic appeal.
The beauty of a DIY studded tree stump side table lies in its unique character. Each stump is different, and the placement of each stud is a personal choice. Embrace any minor imperfections; they are part of what makes your piece one-of-a-kind. This table is more than just a piece of furniture; it’s a conversation starter, a testament to your creativity, and a beautiful fusion of nature and design. Enjoy the rustic, rebellious charm it brings to your space.

:max_bytes(150000):strip_icc()/6a00d8358081ff69e201a3fc5193a2970b-800wi-56a262a95f9b58b7d0c9906f.jpg&description=Diy%20Studded%20Tree%20Stump%20Side%20Table)