.png)
DIY Wedding Bouquet: Craft Your Dream Flowers on a Budget
Creating your own wedding bouquet is a deeply personal and incredibly rewarding endeavor, allowing for unparalleled customization while offering significant cost savings compared to professional florist arrangements. This comprehensive guide breaks down the entire process of making a DIY wedding bouquet, from initial planning and sourcing materials to floral selection, construction, and preservation. Whether you envision a wild, bohemian cascade or a classic, romantic posy, mastering the art of DIY floral design empowers you to translate your aesthetic vision into a tangible, beautiful centerpiece for your special day. The initial investment in tools and supplies is modest, and the techniques are accessible to beginners with a little patience and a willingness to learn. Ultimately, a DIY bouquet carries sentimental value far beyond its monetary cost, becoming a cherished memento of your wedding.
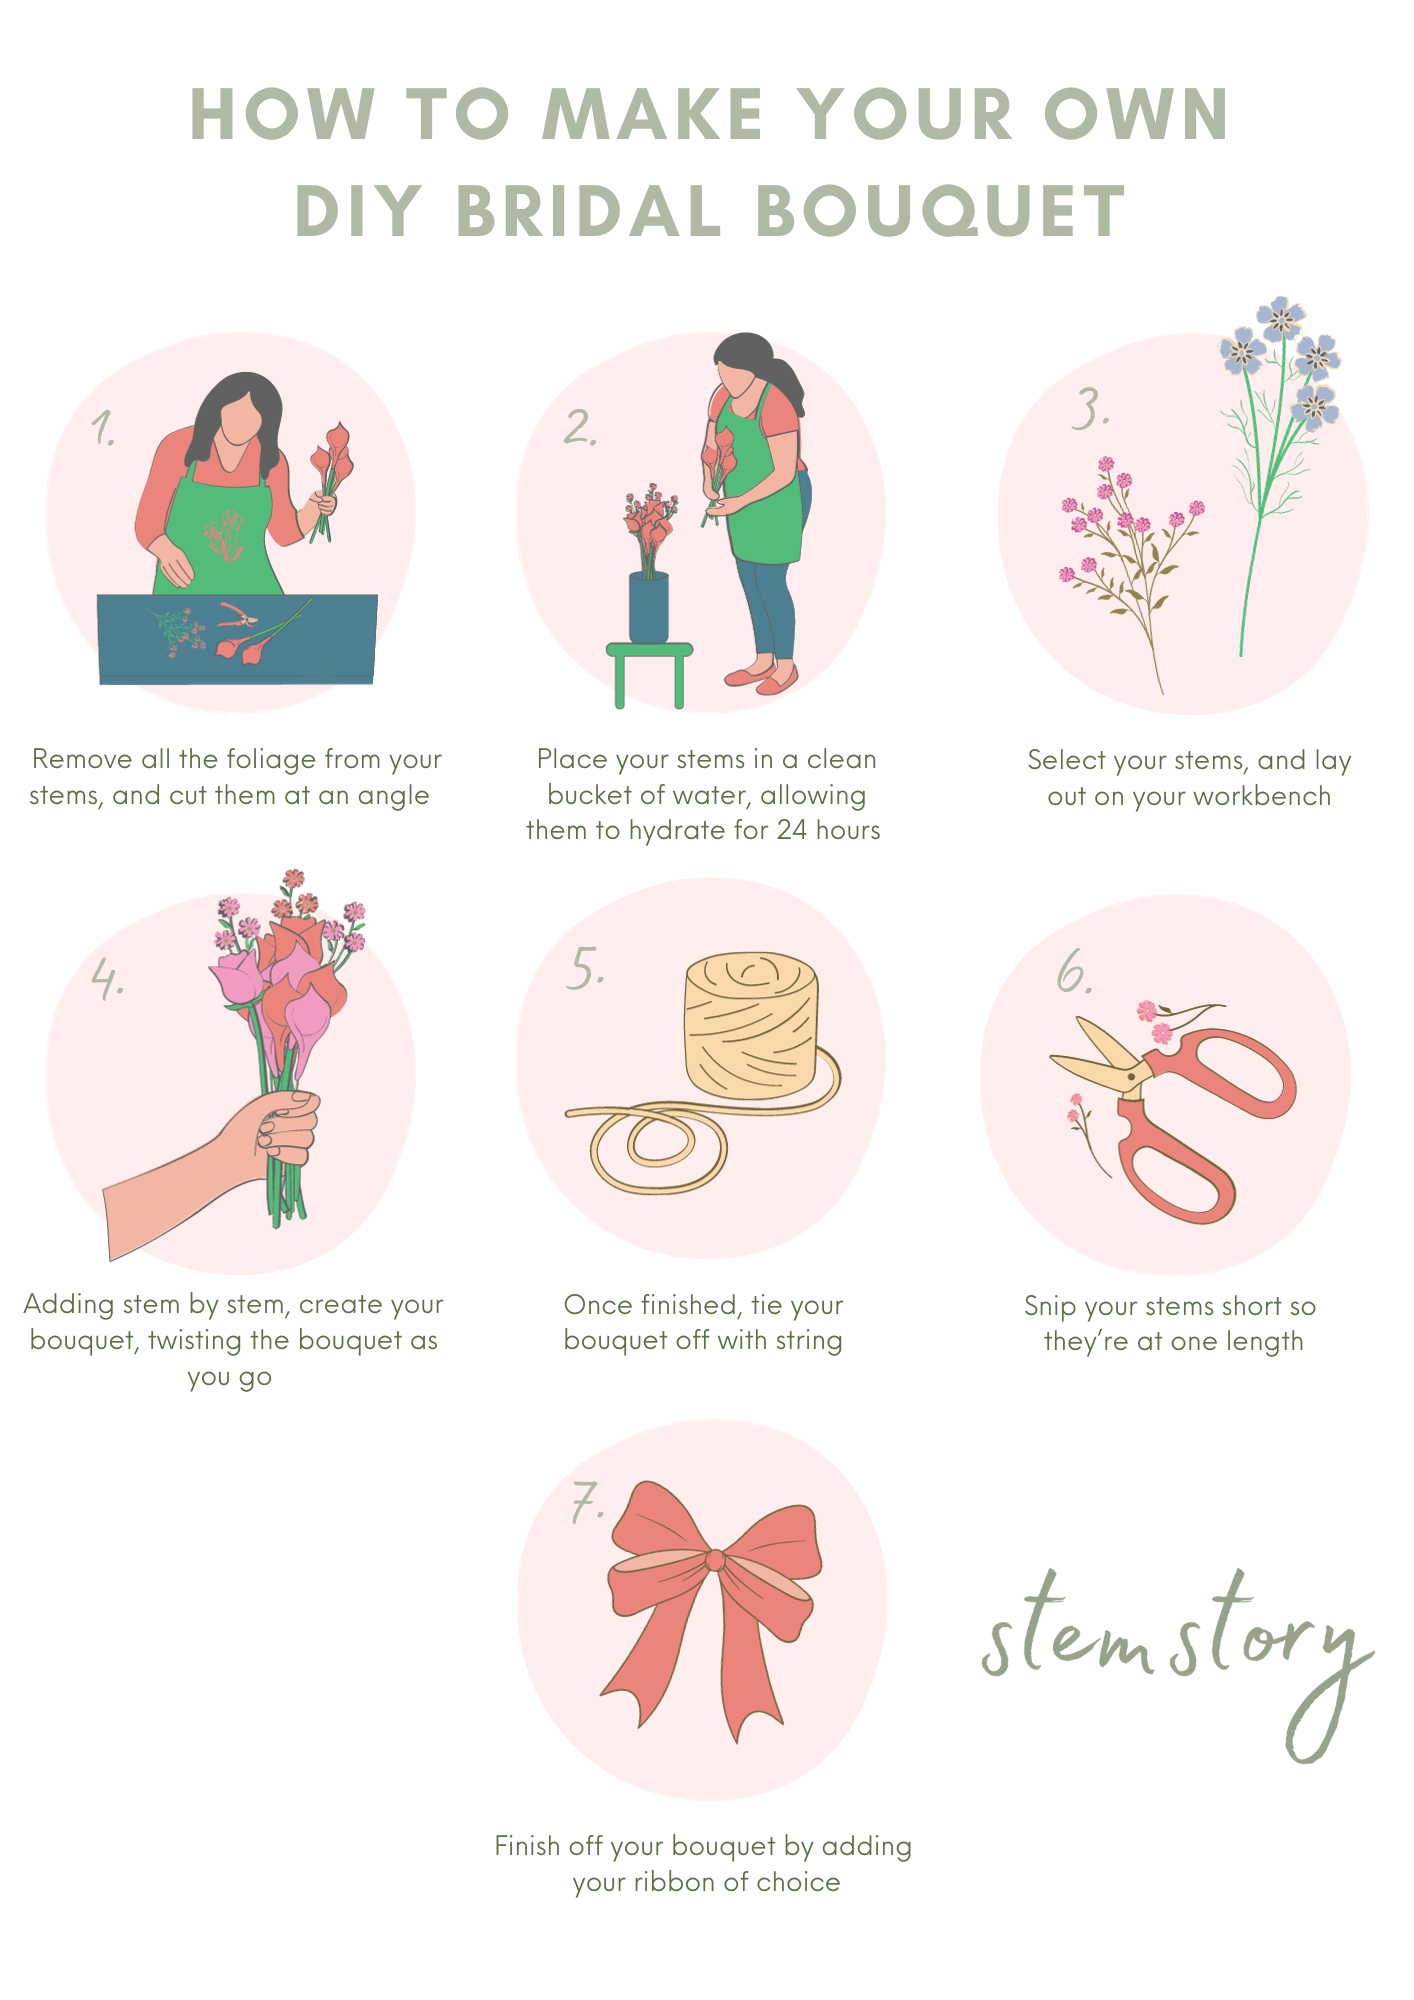
The foundational step in crafting your DIY wedding bouquet is meticulous planning. This begins with defining your wedding’s overall theme, color palette, and desired style. Are you aiming for rustic charm, modern elegance, vintage romance, or something entirely unique? Your bouquet should harmonize with your venue, attire, and other floral decorations. Collect inspiration from Pinterest, wedding magazines, and nature. Create a dedicated mood board or scrapbook to visually consolidate your ideas. Consider the season of your wedding, as this will significantly influence the availability and cost of certain flowers. Research flowers that are in season during your wedding month; they will be fresher, more abundant, and generally less expensive. Next, determine the size and shape of your bouquet. A hand-tied bouquet, often called a cascade or teardrop, offers a more organic, flowing look. A posy or round bouquet is classic and compact. A smaller bouquet might be suitable for a civil ceremony, while a larger, more elaborate arrangement could be desired for a grander affair. Think about how the bouquet will complement your wedding dress – a voluminous gown might pair well with a dramatic cascade, while a sleek sheath dress could be enhanced by a delicate posy. Consider the weight and ease of handling. You’ll be holding this bouquet for a significant portion of your wedding day, so comfort is paramount.
Sourcing your flowers is a critical decision that impacts both cost and freshness. Several avenues exist for acquiring DIY wedding flowers. Flower markets, often found in larger cities, offer a wholesale experience where you can purchase flowers in bulk directly from growers or distributors. This is typically the most budget-friendly option if you have access to one and are comfortable selecting your own stems. Farmers’ markets are another excellent source, particularly for seasonal and locally grown blooms. You’ll often find unique varieties and have the opportunity to speak directly with the farmers. Online wholesale flower retailers provide convenience and a vast selection, often delivering directly to your door. Reputable online suppliers have strict shipping protocols to ensure flower freshness upon arrival. Ordering a few days in advance is crucial. For couples with very tight budgets or a desire for hyper-local and unique elements, foraging responsibly from your own garden or seeking permission from friends and family with abundant gardens can be a viable, albeit time-consuming, option. Be mindful of local regulations and ethical foraging practices. When purchasing, err on the side of buying more flowers than you think you’ll need. It’s better to have a few extra stems than to run out of a key element. Purchase at least 20-30% more than your estimated requirement.
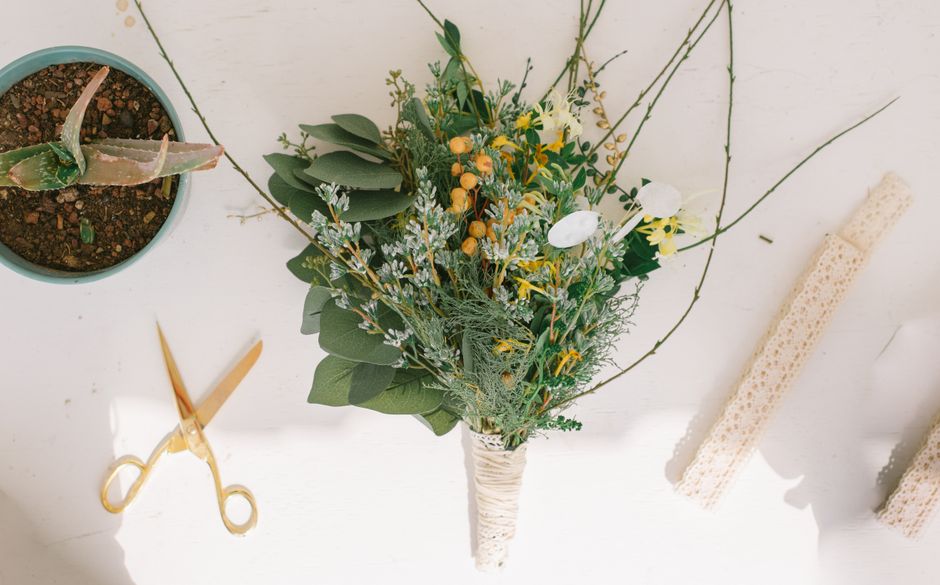
Selecting your flowers is where your aesthetic vision truly comes to life. A well-balanced bouquet typically incorporates a mix of focal flowers, filler flowers, and greenery. Focal flowers are the stars of your arrangement, usually larger and more prominent blooms that draw immediate attention. Examples include roses, peonies, dahlias, hydrangeas, and ranunculus. Filler flowers are smaller, more delicate blooms that add texture, volume, and support to the arrangement. Think baby’s breath (gypsophila), wax flower, statice, or astilbe. Greenery provides structure, fills gaps, and adds a natural, earthy element. Popular choices include eucalyptus, ruscus, ferns, and pittosporum. When selecting your flowers, consider their longevity and durability. Some delicate blooms may not hold up well out of water for extended periods. Research the vase life of your chosen varieties. Also, consider the scent of the flowers. Some strong fragrances can be overpowering or even trigger allergies. Think about color saturation and texture. A variety of textures, from smooth petals to rough leaves, adds visual interest. Aim for a harmonious color blend, incorporating your wedding palette.
The practical aspect of flower preparation is crucial for longevity and ease of arrangement. Upon receiving your flowers, unpack them immediately. Remove any excess foliage that will fall below the water line in your buckets. This prevents bacterial growth, which can contaminate the water and shorten the lifespan of your blooms. Re-cut the stems at a 45-degree angle using sharp floral shears or a knife. This increases the surface area for water absorption. Immediately plunge the cut stems into buckets of clean, cool water treated with floral preservative. Floral preservative contains a sugar source for energy, an acidifier to help water uptake, and a biocide to inhibit bacterial growth. Allow your flowers to hydrate in a cool, dark place for at least 4-6 hours, or preferably overnight, before you begin arranging. This "conditioning" process is essential for ensuring your flowers are firm and fully hydrated for your wedding day. If you are using flowers that wilt easily, consider dipping the cut ends of their stems in hot water (not boiling) for a few seconds before placing them in cool, preservative-treated water. This can sometimes help revive them.
Gathering the necessary tools and supplies is the next logical step. Essential tools include sharp floral shears for cutting stems, floral tape (green or brown) for binding stems together, ribbon for wrapping the handle of your bouquet, pins for securing ribbon, and floral preservative. You might also want a sharp knife for trimming tough stems, scissors for cutting ribbon, and potentially a bouquet holder if you are opting for a structured design. For a hand-tied bouquet, you’ll primarily be working with the stems directly. If you’re making a cascade or a more complex arrangement, a bouquet holder can provide a sturdy foam base to insert stems into. Consider having a clean workspace, such as a large table, and several clean buckets for holding your conditioned flowers. Having a trash can nearby for discarded leaves and stems will keep your workspace tidy. You may also want a spray bottle filled with water and a touch of floral preservative to lightly mist your bouquet as you work and throughout the day to keep it fresh. Some brides opt for a boutonnière for the groom made from leftover flowers from their bouquet, so you might need extra pins for that as well.
The construction of your DIY wedding bouquet requires a systematic approach, starting with the foundation. For a hand-tied bouquet, begin by selecting your greenery. Create a base of foliage by holding a few stems in your hand, arranging them in a way that suggests the desired shape of your bouquet. Then, begin adding your focal flowers, one by one, weaving them in and around the greenery. Rotate the bouquet as you add flowers to ensure a balanced and aesthetically pleasing arrangement from all angles. Gradually incorporate your filler flowers, tucking them in to fill gaps and add texture. The key is to build your bouquet gradually, constantly stepping back and observing its form. Aim for a natural, organic feel. Use your non-dominant hand to hold the growing bouquet while your dominant hand adds stems. As you add stems, gently spiral them in the same direction. This creates a sturdy structure and a pleasing spiral effect on the bouquet handle. Once you are satisfied with the arrangement and size, begin to secure the stems tightly with floral tape. Wrap the tape firmly around the stems, starting from where the blooms begin and working your way down the desired length of the handle. Overlap the tape as you wrap to ensure a secure hold.
Finishing touches elevate your DIY bouquet from simply assembled flowers to a polished piece of art. Once the stems are securely taped, you can begin wrapping the handle with ribbon. Choose a ribbon that complements your wedding colors and style. Satin, silk, lace, or grosgrain are all popular choices. Start at the top of the taped stem area and wrap the ribbon downwards, overlapping slightly to cover the tape completely. Secure the end of the ribbon with pins. You can use decorative pearl-tipped pins for an added touch of elegance. Experiment with different ribbon-wrapping techniques, such as a simple wrap, a criss-cross pattern, or a bow. Consider adding embellishments such as lace trim, a vintage brooch, or charms that hold personal significance. Trim any excess stem length below the ribbon to create a clean finish. If you have any delicate blooms that might get bruised, consider covering the taped stems with a layer of greenery before adding the ribbon. This provides a softer base. You can also tie a trailing ribbon from the base of the bouquet for a romantic, flowing effect.
Preserving your DIY wedding bouquet is a wonderful way to keep a tangible reminder of your special day. Several methods exist for preserving fresh flowers. Air drying is the simplest and most common technique. Hang your bouquet upside down in a cool, dark, well-ventilated area for 2-3 weeks. The darkness helps prevent color fading. Silica gel is another effective method that preserves the flowers’ shape and color more vividly than air drying. Submerge your flowers in silica gel crystals for several days to a week, then gently remove them. Freeze-drying is a professional process that removes moisture using a vacuum and cold temperatures, resulting in a remarkably preserved bouquet, though it is the most expensive option. Epoxy resin casting can be used to preserve individual flowers or smaller arrangements, encasing them in a clear resin. For a more sentimental preservation, you can press individual blooms from your bouquet. This involves placing flowers between absorbent paper inside heavy books for several weeks. Once dried, these pressed flowers can be framed or incorporated into other keepsakes. Regardless of the method chosen, ensure the bouquet is completely dry before attempting preservation to prevent mold.
The financial advantages of a DIY wedding bouquet are substantial and a primary motivator for many couples. Professional wedding bouquets can range from a few hundred to over a thousand dollars, depending on the flower types, complexity, and florist’s reputation. By undertaking the project yourself, you can significantly reduce this cost, often by 50-75% or even more. The main expenses will be the cost of the flowers themselves, which can be managed through bulk purchases and seasonal selections, and the cost of basic floral tools and supplies, which are a one-time investment. While the monetary savings are undeniable, the true value lies in the emotional and sentimental investment. A DIY bouquet is a labor of love, a creation born from your personal touch and effort. It becomes a symbol of your commitment and the care you put into every detail of your wedding. This handmade piece carries a unique story and a deeper connection to your wedding day, making it a far more cherished keepsake than a store-bought arrangement. The satisfaction of having designed and created something so integral to your wedding is immense.
Troubleshooting common DIY bouquet challenges is an inevitable part of the process. Flower wilting can occur if flowers are not properly conditioned or if they are exposed to heat or dehydration. Ensure adequate hydration and keep your bouquet in a cool place before the ceremony. If some blooms don’t look their best on the day, have a few spare stems on hand to discreetly replace them. Broken stems or delicate petals can be carefully repaired using floral tape or glue, though it’s often best to have replacements ready. Achieving the desired shape can be tricky, especially for beginners. Practice with a few trial bouquets beforehand to refine your technique and gain confidence. Don’t be afraid to experiment and make adjustments as you go. If your bouquet feels too heavy, lighten the stem density or opt for less bulky flowers. Conversely, if it feels too sparse, add more filler flowers and greenery. Remember that perfection is not the goal; authenticity and personal expression are. Embrace any minor imperfections as part of the unique charm of your handmade creation.
Incorporating personal touches and sentimentality elevates a DIY bouquet from merely beautiful to profoundly meaningful. Consider adding a locket with a photo of a loved one, a piece of heirloom jewelry, or a charm that signifies a shared memory or inside joke. You can also weave in flowers that hold special meaning for you and your partner, such as flowers from your first date location or a bloom associated with a significant anniversary. Another idea is to use ribbons or fabric scraps from family heirlooms, such as a piece of your grandmother’s wedding veil. If you’re a nature lover, consider incorporating unique natural elements like dried berries, seed pods, or even ethically sourced feathers. Some couples choose to incorporate non-floral elements like sprigs of herbs that represent good luck or love. The possibilities are endless and are limited only by your imagination and the stories you wish to tell through your bouquet. These personal additions transform your bouquet into a deeply symbolic representation of your journey as a couple.
For couples with a larger wedding party or a desire for cohesive floral arrangements, extending the DIY approach to other floral elements is a natural progression. Boutonnieres for the groom and groomsmen can be fashioned from leftover flowers and greenery. Corsages for mothers and grandmothers can be created using similar techniques. Simple centerpieces can be assembled using mason jars or other inexpensive vases and seasonal blooms. Flower crowns for bridesmaids or flower girls are also relatively straightforward to construct. Creating these complementary pieces allows for a consistent aesthetic throughout your wedding décor and further amplifies the cost savings. It also provides an opportunity to involve friends and family in the wedding preparations, turning floral assembly into a fun pre-wedding activity. Consider dedicating a "flower bar" at a pre-wedding gathering where guests can help assemble boutonnieres or small arrangements. This fosters a sense of community and shared celebration.
Finally, practice and patience are the most valuable tools in your DIY bouquet arsenal. Don’t expect your first attempt to be perfect. Dedicate time to practice arranging flowers a few weeks before your wedding. Experiment with different flower combinations and techniques. Watch online tutorials and read floral design books for inspiration and guidance. Embrace the learning process and enjoy the journey of creating something beautiful with your own hands. A DIY wedding bouquet is more than just an arrangement of flowers; it’s a testament to your love, your creativity, and your commitment to crafting a wedding day that is uniquely yours. The effort and love poured into its creation will shine through, making it a cherished memento for years to come. Remember to enjoy the process and have fun – after all, it’s a celebration!

.png&description=Diy%20How%20I%20Made%20My%20Own%20Wedding%20Bouquet)