
DIY Oversized Fabric Garland Chandelier: A Budget-Friendly Statement Piece
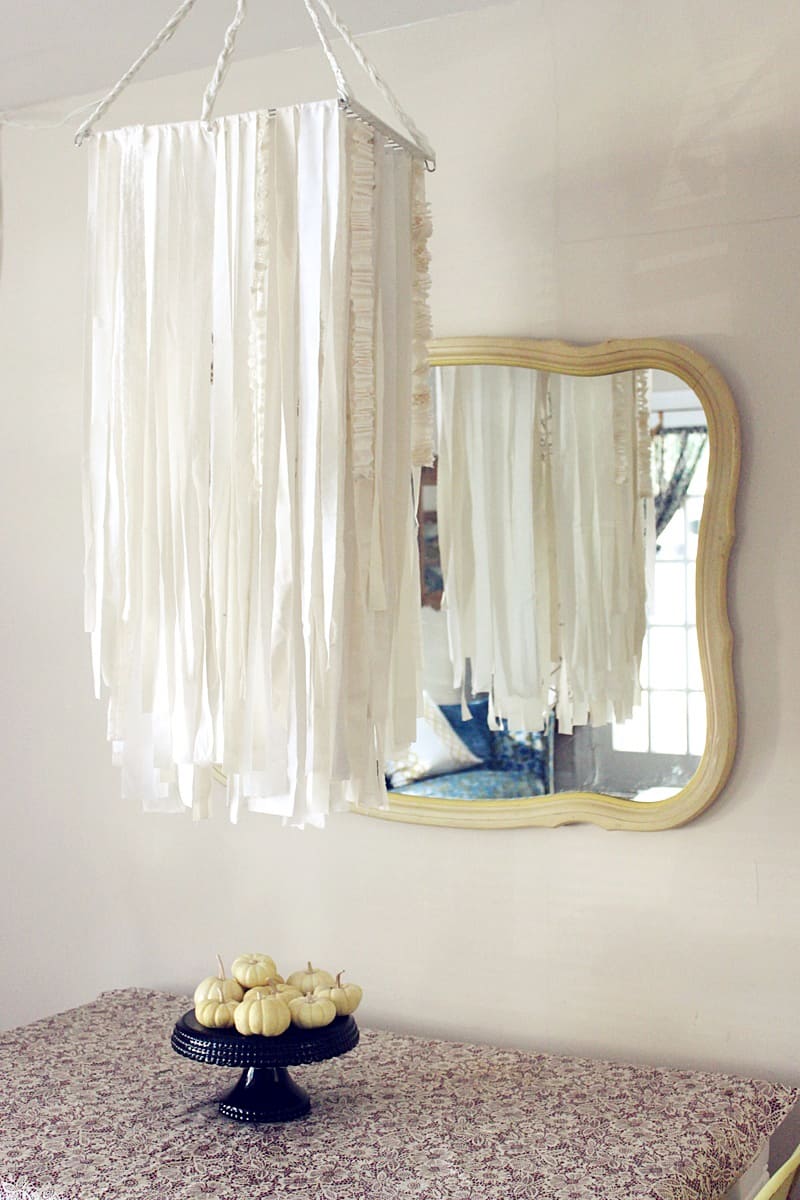
Crafting a DIY oversized fabric garland chandelier is a rewarding project that can transform any space with a touch of bohemian charm and personalized style. This statement piece is surprisingly achievable, even for beginners, and offers immense flexibility in terms of fabric choices, color palettes, and overall aesthetic. The key to its success lies in the strategic layering and draping of fabric strips to create a voluminous, chandelier-like effect. This guide will walk you through every step, from material selection to the final assembly, ensuring you can create a unique and eye-catching focal point for your home or event.
Materials and Tools: Gathering Your Fabric Chandelier Supplies
The foundation of your DIY oversized fabric garland chandelier lies in careful material selection. The beauty of this project is its adaptability; you can tailor it to your existing décor or a specific theme.
- Fabric: This is your most crucial element. For an oversized chandelier, you’ll need a substantial amount of fabric. Consider fabric types based on the desired drape and texture.
- Lightweight fabrics like cotton voile, chiffon, sheer linen, or silk blends will create a softer, more ethereal look with gentle movement. They are ideal for achieving a voluminous drape without appearing too heavy.
- Medium-weight fabrics such as quilting cotton, lighter linen, or even some knits can offer more structure and body. These are good if you want a more defined shape or a bolder statement.
- Heavier fabrics like velvet or thicker linens are best reserved for accent pieces or if you desire a very dramatic, almost sculptural effect, though they can make the chandelier quite heavy.
- Consider texture: Lace, burlap, or fabrics with interesting weaves can add visual interest and depth.
- Color and pattern: Choose a cohesive color palette or mix and match complementary hues. Solids, subtle patterns, or even ombre fabrics can work beautifully. For a unified look, stick to variations of a few colors. For a more eclectic feel, embrace a wider range of patterns and colors.
- Quantity: You will need a lot of fabric. It’s better to overestimate than to run out mid-project. For a standard-sized chandelier (roughly 2-3 feet in diameter), plan for at least 5-10 yards of fabric, depending on its width and how densely you plan to layer it. For a truly oversized chandelier, you might need 15-25 yards or even more.
- Base Structure: You need something to hang your fabric from.
- Embroidery Hoop: A large, sturdy embroidery hoop (12-24 inches in diameter) is an excellent and readily available option. Metal hoops are generally more durable than wooden ones.
- Wire Frame: You can purchase pre-made wire wreath forms or create your own from thick gauge craft wire. This offers more flexibility in shape and size.
- Metal Ring: A large metal ring, like those used for macrame or dreamcatchers, can also serve as a base.
- Recycled Items: Get creative! A sturdy metal colander, the rim of a large plastic container (painted), or even a repurposed bicycle wheel rim could be adapted. Ensure it’s strong enough to support the weight of the fabric.
- Hanging Mechanism:
- Strong Rope or Twine: For suspending the chandelier from the ceiling.
- Chain: Metal chain can add a more industrial or vintage feel.
- S-Hooks or Carabiner: To connect the rope/chain to your base structure.
- Tools:
- Scissors or Rotary Cutter and Mat: For cutting fabric strips. A rotary cutter offers cleaner, more precise cuts, especially for long strips.
- Measuring Tape: For consistent strip lengths and overall diameter.
- Pliers: If working with wire or needing to bend metal components.
- Hot Glue Gun and Glue Sticks: For securing fabric ends and adding embellishments.
- Optional: Sewing machine (if you plan to hem edges or create more structured elements), fabric scissors, pins, iron and ironing board.
Preparing Your Fabric: Cutting the Garland Strips
The most labor-intensive part of this project is cutting the fabric into strips. Consistency in width and length is key for a polished look, though slight variations can add to the handmade charm.
- Determine Strip Width: The width of your fabric strips will directly influence the fullness and texture of your chandelier. Standard strip widths range from 1 to 3 inches. Wider strips create a bolder, more textured look, while narrower strips offer a more delicate drape. For an oversized chandelier, consider varying strip widths for added dimension. For example, you might use a combination of 1.5-inch and 2.5-inch strips.
- Cut Fabric into Lengths: The length of your strips will determine how far the fabric hangs down from your base. Measure the desired length from your base to the bottom of your chandelier. For an oversized chandelier, you’ll want varied lengths to create a cascading effect. Some strips can be shorter, hitting just below the base, while others can be significantly longer, creating dramatic tails. A good starting point is to cut strips that are 1.5 to 2 times the desired finished length to account for knotting and draping.
- Cutting Method:
- No-Sew Frayed Edges: This is the most popular and easiest method. Simply cut your fabric into straight strips. The raw edges will naturally fray over time, adding to the bohemian aesthetic.
- Hemmed Edges: If you prefer a cleaner, more finished look, you can hem the long edges of your fabric strips before cutting them to length. This is more time-consuming but offers a different visual.
- Rotary Cutter Method: Lay your fabric flat. Use a self-healing mat and a rotary cutter with a ruler to make precise, straight cuts. This is highly recommended for achieving consistent widths.
- Cutting the Bulk: Once you have your width determined, cut your fabric into long strips of that width. Then, cut these long strips into your desired lengths. Work systematically, cutting one dimension across the entire piece of fabric before moving to the next. If you’re using multiple colors or fabric types, cut them in batches to ensure you have enough of each.
Assembling the Fabric Garland Chandelier: Layering and Draping Techniques
This is where your vision comes to life. The key is to layer and drape the fabric strips onto your base structure, creating a full and flowing effect.
- Prepare Your Base: If using an embroidery hoop, ensure it’s clean and assembled. If using a wire frame, make sure it’s sturdy and free of sharp edges.
- Begin Attaching Fabric Strips:
- Knotting: The most common and secure method is to fold each fabric strip in half and tie it to the base structure using a simple knot. This allows for some adjustment and creates a beautiful knot detail.
- Tying Method: Fold a fabric strip in half. Loop the folded end over your base structure. Pull the two loose ends of the fabric strip through the loop and tighten the knot.
- Placement: Start attaching your fabric strips around the entire circumference of your base. Overlap the strips generously to ensure no gaps. Vary the lengths of the strips as you go, placing longer ones strategically to create a cascading effect.
- Density: The more fabric strips you use, the fuller and more voluminous your chandelier will be. Don’t be afraid to pack them in! For an oversized chandelier, you’ll want a significant amount of fabric.
- Layering for Depth: As you progress, start layering strips over previous ones. This creates depth and dimension. Mix different textures, colors, and lengths within each layer for a more dynamic look.
- Inner Layers: You can start with shorter strips on the inner layers and gradually add longer strips as you move outwards.
- Alternating Textures: If you’re using a mix of textures (e.g., cotton, lace, chiffon), alternate them to create visual interest.
- Strategic Placement of Longer Strips: Identify where you want dramatic trailing elements and attach your longest strips there. You can even group a few longer strips together for a focal point.
- Securing with Hot Glue (Optional but Recommended): Once you’re happy with the placement and density of your fabric strips, use a hot glue gun to secure the knots or the ends of the fabric to the base. This adds an extra layer of security, preventing the strips from shifting or unraveling, especially on a heavier chandelier. Apply a small dot of hot glue to the knot itself or to the fabric where it meets the base.
- Creating a "Chandelier" Shape:
- Top Layers: Ensure the fabric around the top of your base is dense and full to create the illusion of a chandelier’s upper structure.
- Trailing Layers: Allow longer strips to hang freely, creating the "garland" effect. You can gently twist or drape these longer strips to create more visual interest.
- Trimming (Optional): Once the chandelier is fully assembled, you can trim any stray threads or uneven ends for a slightly neater appearance, if desired. However, a slightly imperfect, organic look is often part of its charm.
Adding Embellishments and Finishing Touches
While the fabric itself is the star, a few well-placed embellishments can elevate your DIY oversized fabric garland chandelier to a true statement piece.
- Ribbons and Lace: Weave additional ribbons, lace trims, or even strands of beads through the fabric strips. This adds another layer of texture and detail.
- Flowers (Fabric or Faux): Attach fabric flowers, silk flowers, or even dried botanicals to the base or intersperse them throughout the fabric. This is perfect for a wedding or a more romantic aesthetic.
- Pom-Poms or Tassels: Create your own yarn pom-poms or fabric tassels and attach them to the bottom of some of the longer strips for added whimsy.
- Bows: Tie small bows with coordinating ribbons at various points along the fabric strips.
- Fairy Lights: For a magical glow, weave battery-operated fairy lights through the fabric. This is particularly stunning for evening events or to add a soft ambiance. Secure the battery pack discreetly within the fabric.
- Feathers: For a bohemian or whimsical touch, strategically add feathers.
Hanging Your Oversized Fabric Garland Chandelier
The final step is to hang your creation. Ensure it’s securely attached and placed where it will have the most impact.
- Attach Hanging Mechanism:
- Embroidery Hoop: You can tie a few lengths of rope or chain to the hoop at equal intervals (e.g., three or four points) and then gather them together at the top to create a single hanging point.
- Wire Frame/Metal Ring: Similarly, attach your rope or chain at multiple points around the frame and bring them together at the top.
- Test the Strength: Before fully hanging your chandelier, test the strength of your hanging mechanism and the base structure by gently pulling on it. Fabric chandeliers can become surprisingly heavy when assembled.
- Secure to Ceiling: Use a sturdy ceiling hook, eye bolt, or hook that is appropriate for the weight of your chandelier and the type of ceiling you have. If you are unsure, consult a handyman or use a heavy-duty drywall anchor.
- Adjust and Admire: Once hung, take a step back and adjust the fabric as needed. Ensure it hangs evenly and has the desired drape.
SEO Considerations for Your DIY Project
To ensure your DIY oversized fabric garland chandelier article is discoverable by those seeking inspiration and instructions, incorporate relevant SEO keywords naturally throughout the text. Consider terms like:
- DIY chandelier
- Fabric garland
- Oversized decor
- Bohemian decor
- Wedding decor DIY
- Party chandelier
- Statement piece
- Craft project
- Home decor DIY
- Fabric craft
- Garland tutorial
- Budget decor
- Handmade chandelier
- Upcycled decor (if applicable)
- Easy DIY decor
By using these keywords in headings, subheadings, and within the body of your article, you’ll increase its visibility in search engine results. Focus on providing clear, comprehensive instructions that answer user queries effectively, which is the core of good SEO.
Conclusion
Creating a DIY oversized fabric garland chandelier is a fantastic way to inject personality and style into your living space or event décor without a significant financial outlay. The process is adaptable, allowing for endless customization to match any aesthetic. From the careful selection of fabrics to the artful layering and draping, each step contributes to a unique and captivating final product. With a little patience and creativity, you can craft a breathtaking statement piece that will be admired by all.
