
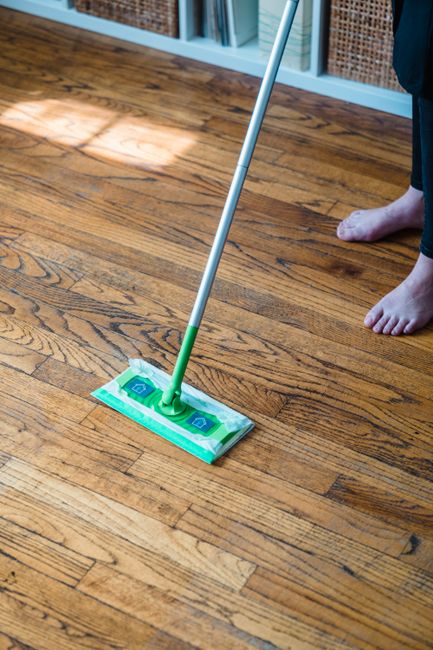
5-Minute Reusable Swiffer Covers DIY: No-Sew & Eco-Friendly Cleaning Hacks
Creating your own reusable Swiffer covers is an incredibly practical and environmentally conscious decision. Traditional Swiffer pads, while convenient, contribute to landfill waste and can be costly over time. This guide provides a straightforward, no-sew DIY project designed to be completed in approximately five minutes, allowing you to craft durable, effective, and eco-friendly alternatives to disposable Swiffer pads. The focus here is on simplicity, accessibility, and immediate applicability, empowering you to reduce waste and save money with minimal effort. This method leverages common household materials, making it an ideal solution for anyone looking to adopt more sustainable cleaning practices without requiring specialized sewing skills or equipment. The process is designed for speed and efficiency, ensuring that you can transition to reusable Swiffer pads quickly and effortlessly.
The core concept behind this 5-minute reusable Swiffer cover DIY relies on the inherent absorbency and durability of certain readily available fabrics. The key is to select materials that can effectively trap dust, dirt, and pet hair, much like their disposable counterparts, while being washable and reusable for countless cleaning cycles. This eliminates the need for constant repurchasing and significantly reduces your household’s environmental footprint. The beauty of this no-sew approach lies in its minimal material requirements and its reliance on simple cutting and folding techniques. You won’t need a sewing machine, needles, thread, or any intricate stitching. The fabric itself, when cut and folded correctly, will maintain its shape and functionality. This makes the project accessible to individuals of all skill levels, from complete beginners to experienced crafters looking for a quick and easy solution. The emphasis on a "5-minute" timeframe is not an exaggeration; with a little practice, you can genuinely create these covers in under five minutes per cover.
To begin your 5-minute reusable Swiffer covers DIY, gather your materials. The primary material needed is an old towel. Specifically, a bath towel that you no longer use or one that is perhaps a little worn out is perfect. The terry cloth loops on the underside of a towel are excellent for trapping dust and debris, while the smoother top side provides a surface for the Swiffer to glide across. Alternatively, you can use thick, absorbent microfiber cloths. These are often found in multi-packs and are already sized for easy adaptation. If you opt for microfiber, ensure it’s a thicker, higher-quality version, as thinner ones might not offer enough absorbency or durability. Another excellent option, if you have them readily available, are old flannel shirts or cotton t-shirts. While these might require a slightly different cutting approach depending on their size and thickness, they can still be very effective. The goal is to utilize materials that are already in your home, promoting upcycling and waste reduction.
Once you have your chosen fabric – let’s assume you’re starting with an old bath towel for this example – the next step in the 5-minute reusable Swiffer covers DIY is to cut it to the appropriate size. Most standard Swiffer dusters have a cleaning head that is roughly 10 inches wide and 4 inches deep. To create a cover that fits snugly and effectively, you’ll want to cut strips from your towel that are approximately 11 inches wide and 6 inches long. The extra inch in width allows for a slight overlap around the edges of the Swiffer head, ensuring it doesn’t slip off during use. The extra two inches in length (6 inches total) provide enough fabric to fold over and secure the cover to the Swiffer. You can easily measure this out using a ruler or simply eyeball it if you’re in a real hurry. The key is to create a rectangular piece that is slightly larger than the Swiffer head itself in both dimensions. If you are using a microfiber cloth that is already rectangular, you might be able to adjust your cutting to fit its existing dimensions, but aiming for roughly 10-11 inches wide by 5-6 inches long is a good general guideline.
The crucial step in the 5-minute reusable Swiffer covers DIY, and the one that requires no sewing, is securing the fabric to the Swiffer head. Lay your cut fabric rectangle flat on a surface. Take your Swiffer dry mop or duster and place it face down on top of the fabric, aligning it centrally. Now, fold the longer edges of the fabric (the 11-inch sides) upwards and over the top of the Swiffer head. The goal is to create a snug fit. You want the fabric to be taut around the Swiffer head. You should have about an inch or so of fabric extending beyond the Swiffer’s top edge on each of the longer sides. Once you’ve folded these two longer sides over the top, the shorter sides (the 6-inch sides) will naturally create a bit of bulk at either end of the Swiffer. Tuck these ends neatly underneath the Swiffer head. The friction and the design of the Swiffer head itself will help to hold the fabric in place. You can adjust the tension by pulling the fabric slightly tighter before tucking. This friction-based securing method is what makes the no-sew aspect of this 5-minute reusable Swiffer covers DIY so effective and quick.
To maximize the effectiveness and lifespan of your 5-minute reusable Swiffer covers DIY, consider adding a second layer of fabric. While a single layer of terry cloth or thick microfiber can be sufficient for light dusting, a double layer offers enhanced absorbency and better dust-trapping capabilities, especially for more demanding cleaning tasks. This is still a no-sew process and can be integrated into the 5-minute timeframe. After you’ve cut your first rectangular piece for the bottom layer (e.g., 11 inches by 6 inches), cut a second, slightly smaller rectangle from your chosen fabric. This second piece should be approximately 9 inches wide by 4 inches long. This smaller piece will act as the top layer, directly interacting with the dust and debris.
With your two fabric pieces ready, the layering for the 5-minute reusable Swiffer covers DIY is straightforward. Lay the larger piece (11 inches by 6 inches) flat. Place the smaller piece (9 inches by 4 inches) centrally on top of it. Now, when you bring your Swiffer head to this layered fabric, you’ll treat it as a single unit. Fold the longer edges of the larger piece upwards and over the Swiffer head, as you did before. These will be the primary securing points. Then, tuck the ends of the larger piece underneath. The smaller, top piece will naturally lie flat and secure itself beneath the folds of the larger piece, held in place by the tension and the Swiffer head. This double-layer approach ensures that both sides of your Swiffer cover are absorbent and effective. The bottom layer provides bulk and a secure base, while the top layer offers a more textured surface for picking up finer particles. This doubling up is a simple yet impactful enhancement to your DIY project.
The washing and maintenance of your 5-minute reusable Swiffer covers DIY are as simple as their creation. Once you’ve finished cleaning, remove the fabric cover from your Swiffer head. For optimal hygiene and to prevent odors, it’s best to wash them regularly. You can toss them directly into your washing machine along with your regular laundry. It’s advisable to wash them with similar colored items to avoid any color bleeding. Avoid using fabric softener, as it can reduce the absorbency of the terry cloth or microfiber material over time. A mild detergent is perfectly sufficient. After washing, you have a few options for drying. For the quickest turnaround, you can tumble dry them on a low heat setting. Alternatively, for a more eco-friendly approach and to further preserve the fabric’s integrity, you can air dry them by hanging them on a clothesline or a drying rack. Once dry, they are ready to be used again. The durability of well-chosen fabrics like terry cloth and microfiber means these covers can withstand numerous wash cycles, making them a truly sustainable and cost-effective cleaning solution.
To further enhance the functionality of your 5-minute reusable Swiffer covers DIY, consider a slight variation for different cleaning needs. For areas prone to heavier dirt or pet hair, you can create covers with a more aggressive cleaning surface. This involves incorporating a piece of burlap or a stiffer, textured fabric as the top layer. Cut the burlap to the same size as your smaller top fabric piece (around 9 inches by 4 inches). Layer it on top of the main towel piece and then proceed with the folding and tucking as described previously. The rough texture of burlap can act as a micro-scrubber, lifting stubborn grime and pet hair more effectively. Remember, the key is to ensure the burlap is not so stiff that it scratches your floors. Test a small corner of your floor in an inconspicuous area if you are concerned. This variation still adheres to the 5-minute timeframe and no-sew principle, offering increased versatility for your DIY Swiffer covers.
Another helpful tip for your 5-minute reusable Swiffer covers DIY is to label or color-code your covers. If you use different fabrics or create variations for different purposes (e.g., one set for general dusting, another for bathrooms), it can be helpful to distinguish them. You could use a permanent fabric marker to write a small symbol or letter on the underside of the cover, or if you are using entirely different colored fabrics, this can serve as your visual cue. This simple organizational step ensures you grab the right cover for the job, optimizing your cleaning efficiency and preventing any accidental misuse of a more aggressive cleaning surface on delicate flooring. This adds a layer of practicality to your DIY project without adding any significant time or complexity.
The environmental impact of switching to reusable Swiffer covers cannot be overstated. Disposable Swiffer pads contribute to significant plastic and fiber waste. Every time you throw away a disposable pad, you are adding to the burden on landfills. By opting for this 5-minute reusable Swiffer covers DIY, you are actively diverting waste from landfills and reducing your household’s carbon footprint. Furthermore, the production of disposable cleaning products often involves energy-intensive manufacturing processes and the use of chemicals. By reusing materials you already own, you are minimizing the demand for new products, which in turn reduces the environmental impact associated with their production and transportation. This is a tangible way to contribute to a more sustainable lifestyle, and the ease of this DIY project makes it accessible to everyone.
Financially, the benefits of the 5-minute reusable Swiffer covers DIY are also considerable. While the initial purchase of a Swiffer mop might seem like an investment, the ongoing cost of disposable pads can add up quickly. Depending on your cleaning frequency and the price of replacement pads, you could be spending a significant amount of money each year. By making your own reusable covers, you eliminate this recurring expense entirely. The initial cost is virtually zero, as you are using materials you already have. Even if you need to purchase a cheap bath towel or microfiber cloths for this purpose, the investment will be recouped very quickly through the savings on disposable pads. This makes it an economically smart choice for any household.
The versatility of the 5-minute reusable Swiffer covers DIY extends beyond just dusting. With the right fabric choices, you can adapt them for wet mopping as well. For instance, if you have old, absorbent cotton t-shirts, these can be excellent for wet mopping. Cut them to the same dimensions as your dusting covers. When you’re ready to wet mop, simply dampen the fabric cover with your preferred cleaning solution and attach it to the Swiffer. The cotton will absorb the liquid and distribute it evenly across your floors, while still being washable and reusable. This allows you to replace disposable wet Swiffer pads with a sustainable, cost-effective, and equally effective alternative. The key is to ensure the fabric you choose for wet mopping is highly absorbent and can withstand being saturated with cleaning solutions.
For those concerned about hygiene, especially in bathrooms or kitchens, consider creating a separate set of reusable Swiffer covers specifically for these areas. You can use brighter colored fabrics for these to easily differentiate them. After each use in a high-traffic or potentially germ-prone area, simply toss them into the washing machine on a hot cycle. The terry cloth or microfiber fabric will hold up to frequent hot washes, ensuring a hygienic cleaning surface. This targeted approach to hygiene, combined with the reusability of the covers, offers a superior cleaning solution compared to disposable pads, which often just push dirt around.
The longevity of these DIY reusable Swiffer covers is a testament to the quality of materials you can use. By selecting durable fabrics like thick terry cloth from an old bath towel or high-quality microfiber, your creations can last for months, if not years, with proper care. Regularly inspecting your covers for signs of excessive wear and tear is a good practice. If a cover starts to fray significantly or loses its absorbency, it’s time to replace it. However, even then, the old fabric can often be repurposed for other cleaning rags or craft projects. The cyclical nature of this DIY approach – from old towel to reusable cleaner to rags – embodies a true commitment to sustainability.
In summary, the 5-minute reusable Swiffer covers DIY no-sew project is a game-changer for sustainable and economical cleaning. It’s a quick, easy, and effective way to reduce waste, save money, and maintain clean floors. By utilizing readily available materials like old towels or microfiber cloths, anyone can create functional and durable Swiffer covers in mere minutes without any sewing expertise. The simple folding and tucking method ensures a secure fit, and the washability of the materials makes for effortless maintenance. This DIY project empowers individuals to take a proactive stance against disposable product waste and embrace a more eco-friendly approach to household chores. The benefits are multi-faceted: environmental responsibility, financial savings, and the satisfaction of creating a practical solution with your own hands. The adaptability of the method to different fabric types and cleaning needs further solidifies its value, making it a cornerstone of any eco-conscious cleaning routine.

