Adventures with peel stick subway tile are taking the home renovation world by storm, offering a modern approach to backsplash design that’s both stylish and surprisingly easy. Forget the messy grout and complicated installation processes of traditional tile – peel and stick subway tile is here to simplify your DIY dreams.
Whether you’re dreaming of a chic kitchen backsplash, a spa-like bathroom oasis, or adding a touch of elegance to any room, peel and stick subway tile provides a versatile and budget-friendly solution. With its wide range of colors, finishes, and installation options, peel and stick subway tile allows you to unleash your creativity and transform your home into a personalized haven.
Peel and Stick Subway Tile: Adventures With Peel Stick Subway Tile

When it comes to backsplash design, peel and stick subway tile has emerged as a modern and versatile solution. Its ease of installation and affordability make it an attractive option for homeowners looking to refresh their kitchens and bathrooms without the hassle and expense of traditional tile.
My peel-and-stick subway tile adventure started with a kitchen backsplash, but now I’m thinking about using it to create a statement wall in my living room. I’m inspired by the bold color choices I saw at the Tate Members’ Time of Year exhibit, where they used color to create dramatic effects.
Maybe I’ll try a deep teal or a vibrant emerald green for my living room wall – it’s going to be fun to see how it all comes together!
Versatility of Peel and Stick Subway Tile
Peel and stick subway tile offers a wide range of design possibilities, seamlessly blending into various kitchen and bathroom styles. Whether you’re aiming for a sleek contemporary look, a classic farmhouse aesthetic, or a modern industrial vibe, peel and stick subway tile provides the flexibility to achieve your desired aesthetic.
Selecting the Right Color and Finish
Choosing the right color and finish for your peel and stick subway tile is crucial to complementing your existing décor and enhancing the overall ambiance of your space.
My peel-and-stick subway tile adventures have taken me from kitchen backsplashes to crafting projects, and I recently discovered a new way to use them: building a miniature world! I found an awesome tutorial for a a frame dollhouse diy that uses the tiles to create a stunning modern aesthetic.
Now I’m brainstorming ways to use the tiles for the dollhouse’s interior, maybe even a tiny, peel-and-stick subway tile backsplash for the dollhouse kitchen!
- Consider the lighting in your space. If your kitchen or bathroom has natural light, you can opt for lighter colors and glossy finishes, which will reflect light and create a brighter, more spacious feel. For spaces with limited natural light, darker colors and matte finishes can help create a cozy and inviting atmosphere.
- Take into account the existing color scheme and materials in your space. For example, if your kitchen features warm wood tones, you might choose a peel and stick subway tile in a similar warm shade, such as beige or cream.
Conversely, if your bathroom has a cool, minimalist design, you might opt for a gray or white peel and stick subway tile to maintain a cohesive look.
- Experiment with different finishes to find the one that best suits your style and needs. Glossy finishes are more reflective and can make a space appear larger, while matte finishes provide a more subtle and sophisticated look.
Benefits of Peel and Stick Subway Tile
Peel and stick subway tile offers several advantages over traditional tile, making it an increasingly popular choice for homeowners.
- Ease of installation: Peel and stick subway tile is incredibly easy to install, requiring no grout or mortar. This eliminates the need for specialized tools and skills, making it a DIY-friendly project. Simply peel and stick the tiles onto a clean and smooth surface, and you’re good to go.
- Affordability: Compared to traditional tile, peel and stick subway tile is significantly more affordable. This makes it an excellent option for homeowners on a budget who want to upgrade their kitchen or bathroom without breaking the bank.
- Versatility: Peel and stick subway tile can be used on a variety of surfaces, including walls, backsplashes, and even furniture. This versatility allows homeowners to get creative and personalize their spaces with ease.
- Removable and reusable: Peel and stick subway tile is also removable and reusable, making it an ideal solution for renters or homeowners who want to change their décor without causing permanent damage to their walls.
DIY Backsplash Installation

Transforming your kitchen or bathroom with a stunning backsplash is now within reach, thanks to the convenience and affordability of peel and stick subway tile. This guide will walk you through the process of installing a peel and stick backsplash, ensuring a seamless and professional-looking result.
Surface Preparation
Before applying the tiles, it is crucial to prepare the surface for optimal adhesion. This involves cleaning the surface, removing any imperfections, and ensuring it is smooth and even.
- Clean the surface: Begin by thoroughly cleaning the surface with a degreaser or soap and water. This removes any dirt, grease, or residue that may hinder adhesion.
- Remove imperfections: Fill any cracks, holes, or uneven areas with spackle or patching compound. Allow the spackle to dry completely before sanding it smooth.
- Ensure smoothness: Sand the surface to create a smooth and even finish. This ensures that the tiles will adhere properly and prevent any bumps or unevenness.
Tile Application
With the surface prepped, it’s time to apply the peel and stick tiles. This process involves careful measurement, cutting, and adhering the tiles to the prepared surface.
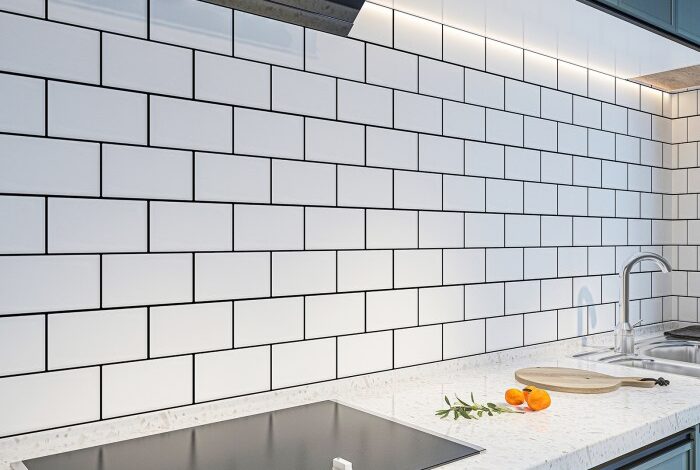
My peel-and-stick subway tile adventure is going swimmingly! I love the clean, modern look it gives my kitchen, and it was so much easier than I expected. I’m thinking about adding a backsplash to my bathroom next, but first, I need to find the perfect dessert to celebrate my kitchen makeover.
Maybe something decadent like basil cheesecake with chocolate sauce ? After all, a little indulgence is always a good thing after a DIY project! Back to the tile… I’m thinking a light gray this time.
- Measure and cut: Measure the area where you want to install the backsplash and cut the tiles to size using a utility knife or tile cutter.
- Peel and stick: Peel back the protective film from the tile and press it firmly onto the prepared surface. Use a ruler or level to ensure the tiles are aligned and straight.
- Apply pressure: After applying the tile, use a roller or your hand to apply pressure to ensure it adheres securely. This helps to create a strong bond and prevent air bubbles.
Grout Application
Grouting is the final step in completing your peel and stick backsplash installation. It fills the gaps between the tiles, providing a polished and finished look.
- Choose the right grout: Select a grout color that complements your tile and overall kitchen or bathroom design.
- Apply the grout: Use a grout float to apply the grout to the spaces between the tiles. Work the grout into the gaps and remove any excess.
- Clean the grout: Once the grout has set, use a damp sponge to clean the excess grout from the tiles. Be sure to wipe the tiles in a consistent direction to prevent streaks.
Creative Backsplash Ideas with Peel and Stick Subway Tile
Peel and stick subway tile offers a budget-friendly and easy way to transform your kitchen or bathroom backsplash. With its versatility and ease of installation, you can create a wide range of stunning backsplash designs. Let’s explore some inspiring ideas to elevate your space.
Backsplash Layouts and Patterns
The classic subway tile layout is a timeless choice, but there are many other creative patterns you can explore.
- Herringbone Pattern:This pattern creates a visually dynamic and sophisticated look. It involves arranging the tiles in a staggered, zig-zag pattern, reminiscent of fish scales.
- Vertical Stack:For a modern and clean aesthetic, consider stacking the tiles vertically, creating a continuous, uninterrupted line.
- Diagonal Pattern:Add a touch of drama and visual interest by installing the tiles diagonally, creating a dynamic and eye-catching effect.
- Brick Pattern:This pattern, often used in traditional kitchens, creates a rustic and charming look. It involves offsetting each row of tiles by half the tile width, mimicking the look of traditional brickwork.
- Basketweave Pattern:This intricate pattern features interweaving tiles, creating a complex and visually engaging backsplash. It can add a touch of elegance and sophistication to your space.
Creating Accent Walls with Peel and Stick Subway Tile
Peel and stick subway tile can be used to create stunning accent walls that add depth and personality to your space.
- Color Blocking:Use different colors of peel and stick subway tile to create bold geometric patterns on your backsplash. For example, you could use a combination of white, black, and gray tiles to create a modern and minimalist look.
- Texture Play:Incorporate different textures of peel and stick subway tile to add dimension and visual interest to your backsplash. You can use a combination of smooth and textured tiles to create a dynamic and tactile experience.
- Geometric Patterns:Use peel and stick subway tile to create geometric patterns on your backsplash, such as stripes, chevrons, or even abstract designs. This can add a touch of modern flair to your space.
Incorporating Peel and Stick Subway Tile with Other Materials
Peel and stick subway tile can be seamlessly integrated with other materials to create unique and visually appealing backsplashes.
- Wood:Pair peel and stick subway tile with wood accents to create a warm and inviting backsplash. For example, you could use a combination of white subway tile and reclaimed wood to create a rustic and charming look.
- Metal:Incorporate metal accents, such as stainless steel or copper, to add a touch of industrial chic to your backsplash. You could use a combination of gray subway tile and brushed stainless steel to create a modern and sleek look.
- Stone:Combine peel and stick subway tile with natural stone, such as granite or marble, to create a sophisticated and luxurious backsplash. You could use a combination of white subway tile and black granite to create a dramatic and elegant look.
Peel and Stick Subway Tile: Adventures With Peel Stick Subway Tile
Peel and stick subway tile has become a popular choice for homeowners looking to upgrade their kitchens and bathrooms. Its ease of installation and affordability make it an attractive alternative to traditional tile. However, the versatility of peel and stick subway tile extends far beyond backsplashes.
Alternative Applications for Peel and Stick Subway Tile, Adventures with peel stick subway tile
Peel and stick subway tile can be used to create stunning and unique designs in various areas of the home. It can be used as an accent wall, a decorative element on furniture, or even as a unique backsplash for a small kitchen island.
- Accent Walls:Peel and stick subway tile can be used to create a striking accent wall in any room. It can be used to add visual interest to a plain wall or to highlight a specific area.
- Furniture Makeovers:Peel and stick subway tile can be used to give old furniture a fresh new look.
It can be applied to the surface of tables, dressers, nightstands, and even headboards.
- Decorative Accents:Peel and stick subway tile can be used to create decorative accents in various areas of the home. It can be used to create a unique backsplash for a small kitchen island, a decorative accent wall in a bathroom, or a stylish accent wall in a living room.
Examples of Innovative Uses of Peel and Stick Subway Tile
Here are some innovative ways peel and stick subway tile can be used in home décor:
- Kitchen Island Backsplash:A small kitchen island can be transformed with a peel and stick subway tile backsplash. Choose a contrasting color or pattern to create a visual focal point in the kitchen.
- Bathroom Shower Wall:Create a stylish and modern shower wall with peel and stick subway tile.
The waterproof material makes it an ideal choice for this high-moisture area.
- Accent Wall in a Dining Room:Add visual interest to a dining room by using peel and stick subway tile to create an accent wall behind a buffet or a dining table.
Potential for Creating Unique and Stylish Designs
The beauty of peel and stick subway tile lies in its ability to be used in a variety of ways to create unique and stylish designs. It can be used to create a traditional look, a modern look, or a rustic look.
The different colors, patterns, and finishes available allow for endless possibilities.
Maintenance and Care for Peel and Stick Subway Tile
While peel and stick subway tile offers a convenient and affordable way to upgrade your kitchen or bathroom, proper maintenance is essential to ensure its longevity and appearance. Just like any other tile, peel and stick tiles require regular cleaning and care to prevent damage and maintain their shine.
Cleaning and Maintaining Peel and Stick Subway Tile
Regular cleaning is key to keeping your peel and stick subway tile looking its best. Here are some tips for cleaning and maintaining your tile:
- Use a mild cleaning solution:Avoid harsh chemicals, abrasive cleaners, and scouring pads, as these can damage the adhesive and the tile surface. Opt for a mild soap solution or a tile-specific cleaner.
- Wipe down the tile regularly:Clean the tile after each use, especially in areas prone to spills and splatters. This prevents dirt and grime from accumulating and becoming difficult to remove.
- Use a soft cloth or sponge:Avoid using rough materials like steel wool or scouring pads that can scratch the tile surface.
- Rinse thoroughly:Ensure all soap residue is removed to prevent buildup and dullness.
- Dry the tile completely:Leaving water droplets on the tile can lead to watermarks and mildew growth. Dry the tile thoroughly after cleaning.
Dealing with Spills, Stains, and Scratches
While peel and stick tile is generally durable, it’s important to know how to handle spills, stains, and scratches.
- Spills:Clean up spills immediately to prevent staining. Blot up spills with a clean cloth and avoid scrubbing, which can damage the tile surface.
- Stains:For stubborn stains, use a mild bleach solution or a stain remover specifically designed for tile. Apply the solution to the stain and let it sit for a few minutes before wiping it off. Always test the cleaner on an inconspicuous area first to ensure it doesn’t damage the tile.
- Scratches:While peel and stick tile is relatively scratch-resistant, avoid using abrasive cleaners or tools that can cause scratches. If a scratch does occur, it may be possible to polish it out using a fine-grit sandpaper. However, be careful not to damage the adhesive layer.
Durability and Lifespan of Peel and Stick Subway Tile
Peel and stick tile is generally less durable than traditional tile, especially when exposed to extreme temperatures or moisture.
- Heat and Moisture:While peel and stick tile is designed to withstand moderate heat and moisture, prolonged exposure to extreme conditions can affect its adhesive and cause it to peel or warp.
- Lifespan:The lifespan of peel and stick tile varies depending on the quality of the product, the installation method, and the environment. However, it generally lasts for several years, making it a suitable option for temporary or budget-friendly projects.