
The Iconic Björk Swan Dress Costume Tutorial: A Comprehensive Guide for Cosplayers and Fashion Enthusiasts
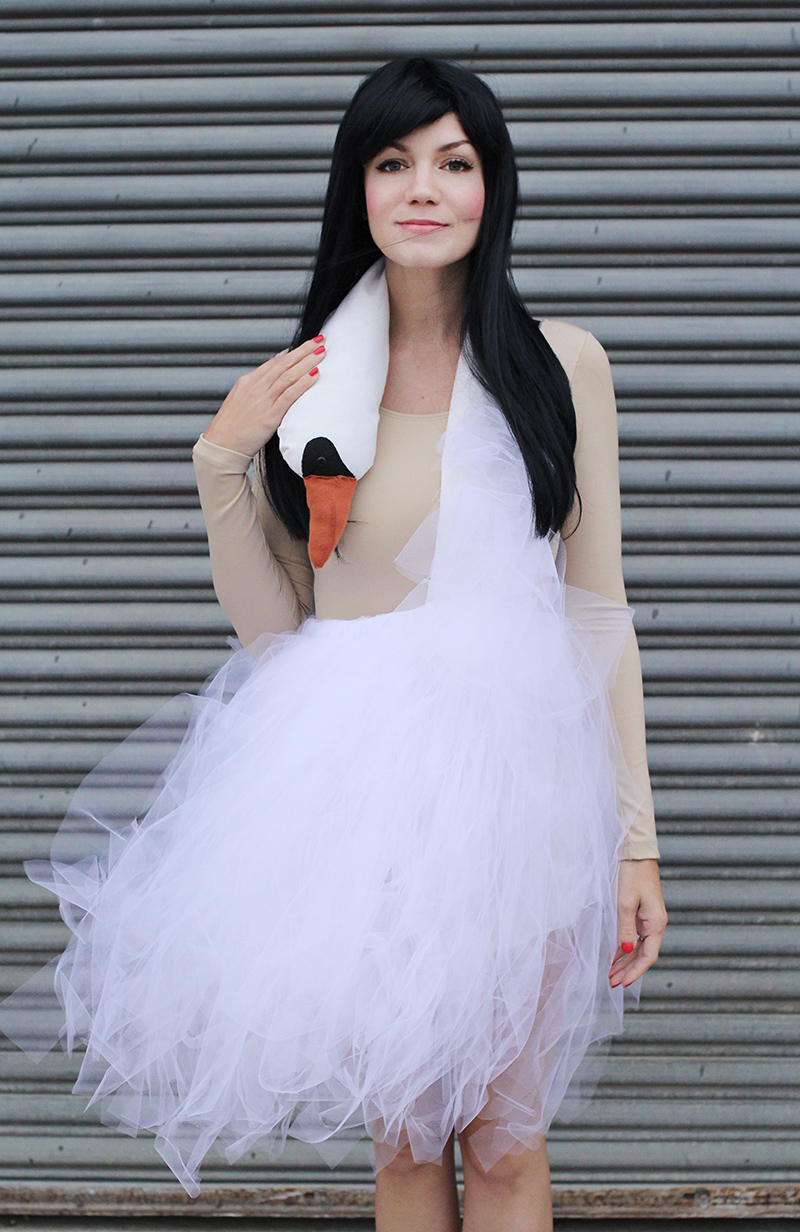
The Björk swan dress, a creation by Marjan Pejoski, has transcended its initial fifteen minutes of fame at the 2001 Academy Awards to become an enduring symbol of avant-garde fashion and audacious artistic expression. For cosplayers, Halloween enthusiasts, and dedicated Björk fans, recreating this unforgettable garment presents a thrilling challenge. This tutorial aims to provide a comprehensive, step-by-step guide to constructing a faithful replica of the Björk swan dress, covering material selection, pattern creation, construction techniques, and finishing touches, all while keeping SEO best practices in mind to ensure discoverability for those searching for "Björk swan dress tutorial," "DIY swan costume," "iconic red carpet dresses," "cosplay tutorial," or "fashion history costume replica."
I. Understanding the Björk Swan Dress: Anatomy and Key Features
Before embarking on the construction process, a thorough understanding of the original dress’s design elements is paramount. The Björk swan dress is characterized by its:
- Silhouette: A flowing, floor-length gown with a draped, unstructured bodice and a voluminous, cascading skirt.
- Material: Primarily a plush, felt-like wool or a similar opaque, opaque fabric that holds its shape well. The "swan" element is achieved through strategically placed, plush fabric "feathers."
- Neckline: A cowl-like, draped neckline that enhances the illusion of a swan’s neck.
- Sleeve: Long, flowing sleeves that contribute to the overall ethereal and otherworldly aesthetic.
- The Swan Head: A distinct, stuffed "swan’s head" attached to the top of the bodice, often featuring appliqué eyes and a beak.
- The Swan’s Tail/Body: The voluminous skirt mimics the swan’s body and tail, with the fabric manipulated to suggest feathers and movement.
- Color Palette: Predominantly white, often with subtle variations in shade to add depth and texture.
II. Essential Materials and Tools for Your Björk Swan Dress Project
Sourcing the right materials is crucial for achieving an authentic look and feel. Consider the following:
- Main Fabric: For the gown itself, opt for a heavy-weight, opaque fabric with a good drape. Options include:
- Felted Wool: This is the closest in texture and opacity to the original. Look for high-quality, thick felt.
- Heavy Crepe or Gabardine: These fabrics can offer a similar weight and drape if felt is not accessible or desired.
- Thick Knit: A substantial, non-stretchy knit could also work, though it might alter the drape slightly.
- Considerations: Yardage will depend on your chosen pattern and desired fullness. Aim for at least 8-10 yards for a generous drape.
- "Feather" Fabric: For the swan’s embellishments. This needs to be plush and somewhat stiff to create the illusion of feathers.
- Felt: Multiple shades of white or off-white felt are ideal. You can also use a slightly different texture of felt for contrast.
- Plush Fabric: Short-pile faux fur or a thick, fuzzy chenille could also be used, but felt offers more control for shaping.
- Lining Fabric: A smooth, comfortable fabric for the interior of the dress. Silk charmeuse, satin, or a high-quality polyester lining fabric are good choices.
- Swan Head Stuffing: Polyester fiberfill (polyfill) is the standard choice for achieving a plump, natural-looking head.
- Pattern Paper/Muslin: For drafting and testing your pattern.
- Sewing Machine: A reliable sewing machine capable of handling thick fabrics.
- Serger/Overlocker (Optional but Recommended): For professional-looking seam finishes, especially on heavier fabrics.
- Fabric Scissors: Sharp, dedicated fabric shears are essential.
- Rotary Cutter and Mat (Optional): For precise cutting of felt and other materials.
- Pins and Clips: A variety of pins and fabric clips to hold pieces together securely.
- Measuring Tape: For accurate measurements.
- Tailor’s Chalk or Fabric Markers: For marking patterns and adjustments.
- Hand Sewing Needles: For intricate detailing and attaching the swan head.
- Iron and Ironing Board: For pressing seams and shaping fabric.
- Fabric Glue (Optional): For securing smaller feather details or creating layered effects.
- Wire (Optional): For shaping the swan’s neck or beak if more rigidity is desired.
- Embellishments for Eyes and Beak: Black fabric scraps, embroidery thread, or small black beads for the eyes, and a contrasting color of felt (e.g., yellow or orange) for the beak.
III. Pattern Creation: Adapting for the Swan Silhouette
The Björk swan dress does not rely on a traditional, fitted pattern. Instead, it utilizes draping and volume. You will need to create a custom pattern or adapt existing ones.
-
Bodice Foundation: Start with a basic bodice pattern. This can be a simple T-shirt dress pattern or a loose-fitting A-line dress pattern. You will be significantly altering this to create the cowl neckline and accommodate the swan’s neck.
- Cowl Neckline: This is a key element. You’ll need to create excess fabric at the neckline that can be draped and gathered. Consider extending the shoulder seams and the front/back necklines outwards to create a generous amount of fabric for draping. Mock-up extensively on a dress form or yourself to achieve the desired effect.
- Sleeves: The sleeves are wide and flowing. You can adapt a bell-sleeve pattern or simply cut wide, rectangular pieces of fabric and attach them. The length should be floor-grazing.
-
Skirt Construction: The skirt is the most voluminous part.
- A-Line or Circle Skirt Base: A very full A-line skirt or a full circle skirt will provide the necessary volume. You will likely need to construct the skirt in panels to manage the fabric.
- Draping and Gathering: The "feather" effect of the skirt is achieved through strategic draping and gathering of the main fabric. This is less about a precise pattern and more about how you manipulate the fabric during construction.
-
Swan Head Pattern: This requires a separate pattern.
- Basic Shape: Think of a slightly flattened oval or teardrop shape for the main head.
- Neck/Neckline Attachment: A curved piece that will attach to the bodice.
- Beak: A simple triangular or slightly curved beak shape.
- Drafting: Sketch the swan head from different angles. Use existing stuffed animal patterns as inspiration if needed. Create a paper pattern and then test it with muslin.
IV. Construction: Bringing the Swan to Life
This is where the magic happens. Work systematically, testing each step and making adjustments as needed.
-
Bodice Construction:
- Cut Main Fabric: Cut out your bodice pieces according to your adapted pattern.
- Sew Darts/Seams: Sew any necessary darts or side seams to create the basic bodice shape.
- Attach Sleeves: Attach the wide, flowing sleeves to the bodice armholes.
- Create the Cowl Neckline: This is the most challenging part. Experiment with draping the excess fabric at the neckline. You may need to gather or pleat it at the shoulder seams or back neck to create a beautiful drape. Pin and baste extensively before permanent stitching.
- Lining: Cut and sew a lining for the bodice, leaving an opening for turning. Insert the lining into the main bodice and finish the neckline and armholes.
-
Skirt Construction:
- Cut Skirt Panels: Cut your skirt panels, accounting for the desired fullness and length.
- Sew Skirt Panels: Sew the skirt panels together, creating a large, flowing circle or A-line shape.
- Attach Skirt to Bodice: Carefully attach the waistband of the skirt to the bottom edge of the bodice. This will likely involve gathering or pleating the skirt edge to fit the bodice.
-
Creating the "Feathers": This is where the dress truly transforms into the swan.
- Cut Feather Shapes: Cut numerous feather shapes from your chosen "feather" fabric (felt is recommended). Vary the sizes and shapes slightly for a more natural look.
- Applique Technique: The original dress features fabric that appears to be layered and stitched down. You can achieve this by:
- Direct Applique: Pin and stitch each feather shape onto the main fabric of the dress, starting from the hem and working upwards. Overlap the feathers generously.
- Layered Effect: For a more dimensional look, you can layer smaller feathers on top of larger ones, or create "ruffled" feather effects by gathering the edges of some feather pieces before attaching.
- Placement Strategy:
- Skirt: Focus on creating volume and a sense of cascading feathers. Start with larger feathers at the hem and gradually use smaller ones as you move up.
- Bodice: Use smaller, more refined feather shapes around the neckline and sleeves.
- Swan’s Body Illusion: Manipulate the fabric and feather placement to create the illusion of the swan’s rounded body and the curve of its wings.
-
Constructing the Swan Head:
- Sew Head Pieces: Sew your swan head pattern pieces together, leaving an opening for stuffing.
- Turn and Stuff: Turn the head right side out and generously stuff it with polyester fiberfill until it achieves a plump, natural shape.
- Attach Beak: Sew the beak onto the front of the head. You can add wire here for a more rigid beak if desired.
- Add Eyes: Sew on black fabric circles or embroider eyes onto the head.
- Attach Head to Bodice: This is a critical step for structural integrity. You may need to reinforce the attachment point on the bodice. Sew the neck portion of the swan head securely to the top of the bodice, ensuring it stands upright and forward. Consider using strong interfacing on the inside of the bodice where the head attaches for added support.
V. Finishing Touches and Refinements
The details elevate a good replica to a great one.
- Hemline: Ensure the hemline is even and flows beautifully. You may need to trim excess fabric or add a facing.
- Seam Finishes: If you didn’t use a serger, consider French seams or bias binding for a clean interior finish.
- Draping Adjustments: Stand back and assess the drape of the dress. Make any minor adjustments to gathers, pleats, or feather placement to enhance the swan-like appearance.
- Internal Structure (Optional): For a more structured swan body, you could consider adding a lightweight crinoline or hoop skirt underneath, but this might detract from the original’s organic flow.
- Final Pressing: Carefully press all seams and fabric. Be mindful of the felt and avoid excessive heat which can damage it.
VI. Styling and Presentation for Your Björk Swan Dress
To truly embody Björk’s iconic look, consider the styling:
- Makeup: Bold, artistic makeup that complements the dress. Think dramatic eyes and lips.
- Hair: Björk’s hair is often styled in an avant-garde manner. Consider a sleek updo or a more sculptural hairstyle.
- Attitude: Channel Björk’s unique stage presence – a blend of vulnerability, power, and undeniable artistic vision.
VII. SEO Keywords and Considerations for Visibility
To ensure this tutorial is found by those searching for it, strategically incorporate the following keywords throughout the text, naturally and contextually:
- Björk swan dress tutorial
- DIY swan costume
- Iconic red carpet dresses
- Cosplay tutorial
- Fashion history costume replica
- Björk costume
- Halloween costume tutorial
- Avant-garde dress tutorial
- Marjan Pejoski swan dress
- How to make a swan dress
- Felt costume tutorial
- Upcycled costume ideas
- Unique costume tutorial
- Costume design tutorial
By focusing on detailed instructions, material guidance, and aesthetic considerations, this comprehensive tutorial provides a roadmap for anyone aspiring to recreate the unforgettable Björk swan dress. The key lies in understanding the original’s organic flow, meticulous craftsmanship, and bold artistic vision.
