DIY glitter photo frames are a fantastic way to add a touch of sparkle and personality to your home decor. These projects are not only fun and rewarding but also allow you to express your creativity and create unique pieces that reflect your style.
The beauty of DIY glitter photo frames lies in their versatility. You can transform simple, plain frames into eye-catching statement pieces with a little glitter, adhesive, and imagination. Whether you prefer a full-coverage glitter look, delicate accents, or intricate patterns, the possibilities are endless.
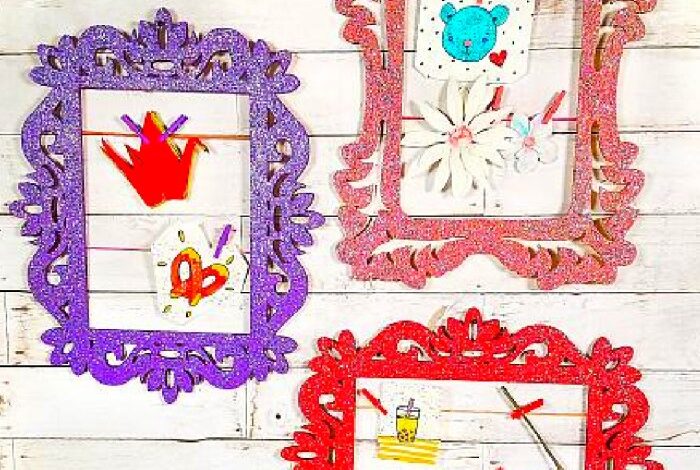
DIY Glitter Photo Frames: A Sparkly Way to Personalize Your Home Decor

There’s something truly satisfying about creating something beautiful with your own hands. DIY projects allow you to express your creativity and add a personal touch to your home decor. Glitter crafts have always been a popular choice for adding a touch of sparkle and whimsy to any project, and photo frames are a perfect canvas for this dazzling embellishment.
DIY glitter photo frames are such a fun and easy craft project, perfect for adding a little sparkle to your home decor. I’ve been wanting to make some for my family photos, and they’d make great gifts too! I’m also thinking about some other crafty gifts for everyone on my list, so check out my Christmas wishlist for the whole family for some inspiration.
After all, who doesn’t love a personalized, handmade gift? And I can’t wait to get started on those glitter photo frames!
Types of Photo Frames for Glitter Embellishment
Glitter can be incorporated into various types of photo frames, enhancing their visual appeal and creating unique statement pieces. Here are some examples:
- Wooden Frames:The natural texture of wood provides a great base for glitter adhesion. You can choose from various wood types and finishes to complement your decor.
- Metal Frames:Glitter adds a touch of glamour to metal frames, particularly those with a sleek, modern design.
- Plastic Frames:Glitter can be applied to plastic frames to give them a more sophisticated look, transforming them from basic to stylish.
- Canvas Frames:Glitter can be incorporated into canvas frames for a textured, dimensional effect. This is especially popular for creating unique and personalized artwork.
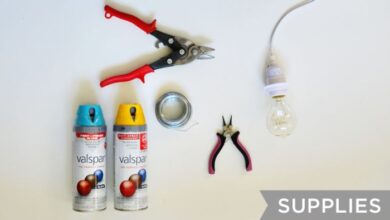
Materials and Tools
Crafting your own glitter photo frames requires a few essential materials and tools. These will allow you to create a dazzling and personalized frame that reflects your style. The selection of materials is crucial for achieving a stunning and long-lasting glitter photo frame.
Glitter Selection
Choosing the right glitter is essential for your project. The size, color, and texture of the glitter can significantly impact the final look of your frame.
- Size:Fine glitter provides a subtle sparkle, while chunky glitter creates a bold and dramatic effect. Consider the size of the frame and the desired level of sparkle when selecting your glitter.
- Color:Glitter comes in an array of colors, from classic gold and silver to vibrant hues and iridescent options. Choose a color that complements the photo you plan to display or matches your home decor.
- Texture:Glitter can have different textures, including holographic, iridescent, and even chunky glitter with unique shapes. Experiment with different textures to create unique and interesting effects.
Adhesives, Diy glitter photo frames
A strong adhesive is crucial for ensuring the glitter stays securely attached to the frame and prevents it from falling off over time.
I’ve been wanting to try out some DIY glitter photo frames for a while now, and I finally got around to it this weekend! I’m thinking of making a few to display some of my favorite photos from my recent trip to Portugal, where I saw some incredible waves at Nazaré.
The magicseaweed last two days at dramatic nazare report was totally insane, and I’m so glad I got to witness it firsthand. I think the glitter frames will really complement the vibrant colors of the photos, and they’ll be a fun way to add a little sparkle to my home decor.
- Mod Podge:This versatile adhesive is a popular choice for glitter projects. It dries clear and creates a durable finish.
- Craft Glue:Craft glue is a good option for smaller projects, but it may not be as durable as Mod Podge.
- Epoxy Resin:For a more durable and water-resistant finish, consider using epoxy resin. However, this option requires more time and effort.
Paints and Other Materials
In addition to glitter and adhesive, you’ll need a few other materials to complete your project.
- Paint:Choose a paint that complements your glitter and desired style. You can use acrylic paint, spray paint, or even metallic paint.
- Photo Frame:Select a photo frame that fits your needs. Wooden frames are a good option, as they can be easily customized.
- Paintbrush:Use a paintbrush to apply paint and adhesive to the frame.
- Scissors:Use scissors to cut the glitter and other materials.
- Protective Gloves:Wear gloves to protect your hands from glitter and adhesive.
- Newspaper or Drop Cloth:Protect your work surface from glitter and paint splatters.
Design Ideas and Techniques
The beauty of DIY glitter photo frames lies in the endless possibilities for customization. You can create a unique frame that perfectly reflects your style and complements your home decor. From simple glitter accents to intricate patterns, the options are limited only by your imagination.
Glitter Application Techniques
The method you choose for applying glitter will greatly influence the final look of your photo frame. Here’s a table showcasing various techniques:
| Technique | Description | Example |
|---|---|---|
| Full Coverage | Covering the entire frame with glitter. | A frame completely dipped in glitter, creating a shimmering, uniform surface. |
| Partial Coverage | Applying glitter to specific areas of the frame, such as the edges or corners. | A simple wooden frame with glitter accents along the edges, adding a touch of sparkle without overwhelming the design. |
| Patterned Glitter | Creating patterns or designs using different glitter colors or textures. | A frame with geometric shapes Artikeld in glitter, or a design featuring a gradient of glitter colors. |
Popular Glitter Photo Frame Designs
Here are some popular glitter photo frame designs that inspire creativity:
- Geometric Shapes: Using stencils, you can create geometric shapes like squares, triangles, or circles with glitter. This adds a modern and stylish touch to your frame. For example, you could use a stencil to create a series of concentric circles on the frame, each filled with a different color of glitter, creating a mesmerizing optical effect.
- Ombre Effects: Create a seamless transition of colors by gradually blending different shades of glitter. This technique creates a sophisticated and visually appealing effect. Imagine a frame with a gradual transition from a deep navy blue glitter to a light silver glitter, evoking a sense of depth and movement.
Diy glitter photo frames are a fun and affordable way to add a touch of sparkle to your home decor. While I was working on my latest project, I stumbled upon an article about Boehringer Ingelheim expanding its cancer research at its Vienna site , which reminded me that even in the midst of creativity, it’s important to stay informed about advancements in healthcare.
I’m excited to see what breakthroughs are coming from this research, and I’m sure that those discoveries will inspire even more creative projects in the future.
- Layered Glitter Applications: Build up layers of different glitter colors or textures to create a unique and dimensional effect. You could start with a base layer of fine glitter, then add a layer of chunky glitter on top, creating a textured and eye-catching look.
Using Stencils
Stencils are invaluable tools for creating intricate designs on your glitter photo frames. They allow you to achieve precise patterns and shapes that would be difficult to freehand.
“Stencils can be made from various materials, including cardboard, plastic, or even adhesive vinyl. You can purchase pre-made stencils or create your own using a craft knife and cutting mat.”
- Applying Glitter with a Stencil: Place your stencil over the frame and use a brush or sponge to apply glitter over the open areas. Once the glitter is dry, carefully remove the stencil to reveal your design.
- Multiple Stencils for Complex Designs: For more intricate designs, you can use multiple stencils in combination. This allows you to create layered patterns and even incorporate different glitter colors. For example, you could use a stencil to create a floral design on the frame, then use a smaller stencil to add intricate details like leaves or petals.
Step-by-Step Guide: Diy Glitter Photo Frames
This step-by-step guide will walk you through the process of creating a stunning glitter photo frame using a simple wooden frame, glue, and your choice of glitter. It’s a fun and easy project that allows you to personalize your home decor with a touch of sparkle.
Preparing the Frame
Before you start applying glitter, you need to prepare your frame. This involves cleaning the surface and applying a primer to ensure a smooth and even finish.
- Clean the Frame:Start by wiping down your frame with a damp cloth to remove any dust or debris. Ensure the frame is completely dry before proceeding.
- Apply Primer:A primer creates a smooth, even surface for the glue and glitter to adhere to. Choose a primer that is compatible with your frame material (wood, metal, etc.). Apply a thin, even coat of primer to the entire frame using a brush or roller.
Allow the primer to dry completely before moving on to the next step.
Applying Adhesive
Once the primer is dry, it’s time to apply adhesive to the frame. This will act as a base for the glitter to stick to.
- Choose Adhesive:For a strong bond, use a high-quality craft glue or mod podge. These adhesives are specifically designed for adhering glitter and other decorative materials.
- Apply Evenly:Using a brush or sponge, apply a thin, even layer of adhesive to the areas you want to cover with glitter. Be sure to avoid getting adhesive on the glass portion of the frame.
Sprinkling Glitter
Now comes the fun partsprinkling the glitter! To achieve a smooth and even glitter finish, it’s important to use a light hand and work in sections.
- Work in Sections:Instead of trying to cover the entire frame at once, focus on smaller sections at a time. This allows you to control the amount of glitter applied and prevents any clumping.
- Sprinkle Evenly:Hold the glitter container a few inches above the frame and gently sprinkle the glitter over the adhesive. Use a light hand and avoid dumping too much glitter in one spot.
- Tap Excess Glitter:Once you’ve applied glitter to a section, gently tap the frame to remove any excess glitter. This will prevent the glitter from clumping and creating an uneven finish.
Tips for Achieving a Smooth and Even Glitter Finish
To achieve a smooth and even glitter finish, here are some additional tips:
- Use Fine Glitter:Fine glitter creates a more polished and smooth finish compared to coarse glitter. For a truly dazzling effect, you can experiment with different sizes and colors of glitter.
- Avoid Overlapping:When applying glitter, avoid overlapping sections. This can lead to clumping and an uneven finish. Instead, work in smooth, continuous strokes.
- Let It Dry Completely:Once you’ve applied glitter to the entire frame, allow it to dry completely before handling. This will ensure that the glitter is securely attached to the adhesive.
Finishing Touches
Now that your glitter photo frame is complete, it’s time to add those final touches that will truly make it unique and stand out. This is where your creativity can shine! You can personalize your frame with embellishments, ribbons, or other decorative elements, creating a truly one-of-a-kind piece.
Sealing the Glitter
Sealing the glitter is crucial for ensuring your photo frame’s durability and preventing glitter shedding. Without a sealant, the glitter can easily come loose, making your frame messy and less appealing. A good sealant will also protect the glitter from fading or being scratched.
Sealant Options
Here are some popular sealant options and their application methods:
- Mod Podge:This versatile sealant comes in both matte and gloss finishes and is easy to apply with a brush. Apply a thin, even coat of Mod Podge over the glitter, allowing it to dry completely before adding any embellishments.
- Acrylic Varnish:Acrylic varnish is another excellent choice for sealing glitter, offering a durable and clear finish. It’s available in both spray and brush-on forms, allowing for easy application.
- Epoxy Resin:For a more durable and water-resistant finish, consider using epoxy resin. It creates a hard, clear coating that will protect your glitter from damage. Follow the manufacturer’s instructions carefully for mixing and application.
Variations and Ideas
The beauty of DIY projects lies in their endless possibilities for customization. With glitter photo frames, you can explore a multitude of variations to personalize your home decor and express your unique style.
Exploring Different Materials
Beyond traditional photo frames, you can experiment with various materials to create unique and eye-catching glitter frames. For instance, you can use:
- Wooden planks: Cut and assemble wooden planks into a frame shape, creating a rustic and textured base for your glitter. You can further enhance the look by sanding the wood or adding a distressed finish.
- Cardboard: Cardboard provides a lightweight and affordable option. You can create intricate designs by layering cardboard pieces or using a craft knife to create unique cutouts.
- Metal: Metal frames, such as those made from aluminum or tin, offer a modern and sleek aesthetic. You can paint the metal frame before applying glitter for a bolder look.
Incorporating Mixed Media
Adding different textures and materials to your glitter photo frame creates a multi-dimensional and visually interesting piece. Consider incorporating elements like:
- Fabric: Wrap fabric around the frame, creating a soft and tactile backdrop for your glitter. You can use fabrics like burlap, velvet, or even lace for a more delicate look.
- Beads and Sequins: Adhere beads and sequins to the frame, creating a shimmering and playful accent. You can choose beads in various colors and sizes to complement your glitter design.
- Natural Elements: Incorporate natural elements like dried flowers, leaves, or twigs into your frame design for a touch of nature.
Creating Themed Frames
Themed glitter photo frames allow you to showcase your passions and interests. Here are some inspirational ideas:
- Seasonal Themes: Create frames that celebrate different seasons. For example, use warm, earthy colors like gold and brown for fall, cool blues and greens for winter, and vibrant pinks and yellows for spring.
- Holiday Themes: Embrace festive occasions with themed glitter frames. For Christmas, you can use red, green, and silver glitter, while for Halloween, you can use black, orange, and purple.
- Personal Interests: Create frames that reflect your hobbies or passions. For example, if you love travel, you can incorporate travel-themed elements like maps, stamps, or airplane silhouettes.
Glitter in Other Crafting Projects
The versatility of glitter extends far beyond photo frames. You can incorporate its sparkle into various crafting projects:
- Jewelry: Add a touch of glamour to necklaces, earrings, and bracelets by using glitter glue or resin to create shimmering embellishments.
- Home Decor: Decorate vases, candles, and other home decor items with glitter. You can also use glitter to create decorative accents on furniture or walls.
- Scrapbooking: Add sparkle to your scrapbooking pages by using glitter glue, glitter pens, or even glitter paper. You can create intricate designs or simply add a touch of sparkle to embellishments.