Quick easy wooden hanger frames take center stage, offering a simple and stylish way to add a touch of rustic charm to your home decor while maximizing organization. Whether you’re looking to create a personalized gallery wall, showcase your favorite accessories, or simply tidy up your closet, these frames provide a versatile solution that’s both functional and aesthetically pleasing.
The beauty of these frames lies in their simplicity. They can be crafted from readily available materials and require minimal tools, making them an ideal project for beginners. The possibilities are endless, with variations in wood types, finishes, and design elements allowing you to create frames that perfectly complement your personal style.
Introduction to Wooden Hanger Frames

Wooden hanger frames are a popular choice for displaying artwork, photographs, and other decorative items. They are known for their durability, versatility, and aesthetic appeal. These frames are made from various types of wood, offering a range of finishes and styles to complement any décor.Wooden hanger frames offer several advantages over other materials like plastic or metal.
Their natural warmth and texture add a touch of elegance and sophistication to any space. Additionally, wood is a sustainable and renewable resource, making it an environmentally friendly choice.
Quick and easy wooden hanger frames are a great way to add a touch of rustic charm to your home. They’re also super versatile, and you can use them to display everything from photos and artwork to scarves and jewelry.
If you’re looking for a more luxurious touch, why not try adding a faux fur footstool to your decor? You can find a great tutorial on how to make your own faux fur footstool online. Once you’ve got your footstool finished, you can even use a hanger frame to display it, adding a touch of whimsy and style to your space.
Types of Wooden Hanger Frames
Wooden hanger frames come in various styles and designs to suit different tastes and preferences. Here are some of the common types:
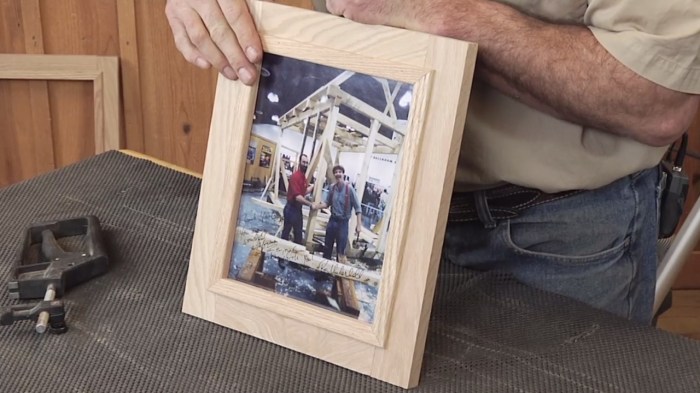
- Simple Wooden Hanger Frames: These frames are characterized by their minimalist design and often feature a plain, unadorned wood finish. They are ideal for showcasing artwork or photographs without distracting from the subject matter.
- Decorative Wooden Hanger Frames: These frames are embellished with intricate carvings, moldings, or other decorative elements. They can add a touch of elegance and personality to any space and are perfect for displaying special pieces of artwork or photographs.
- Custom Wooden Hanger Frames: For those seeking a truly unique frame, custom-made wooden hanger frames are an excellent option. These frames can be tailored to specific dimensions, finishes, and designs to perfectly complement the artwork or photograph being displayed.
Materials and Tools

Building a wooden hanger frame is a rewarding DIY project that can add a touch of personal style to your home. You’ll need a few essential materials and tools to get started.
Sometimes, all it takes to refresh a space is a few quick and easy DIY projects. Wooden hanger frames are a great way to add some personality and functionality to a room. If you’re looking for a more substantial makeover, consider reconfiguring existing cabinets for a fresh look.
This can completely transform the look of your kitchen or bathroom, and it’s often a more budget-friendly option than replacing them entirely. No matter your project, remember to have fun and let your creativity shine!
Common Materials
The type of wood you choose will depend on your desired aesthetic and budget. Here are some popular options:
- Pine: This softwood is affordable, lightweight, and easy to work with, making it a good choice for beginners.
- Oak: A durable hardwood that offers a classic look and excellent strength, making it suitable for heavier hangers.
- Walnut: Known for its rich color and beautiful grain patterns, walnut is a luxurious choice for a high-end hanger frame.
Essential Tools
To build a wooden hanger frame, you’ll need a few basic tools:
- Saw: A handsaw or a power saw for cutting the wood to size.
- Drill: For creating pilot holes and attaching hardware.
- Sander: A handheld sander or a power sander for smoothing the wood and removing imperfections.
- Glue: Wood glue is essential for joining the pieces of the frame.
- Screws: To secure the frame together and attach the hanger hardware.
- Measuring tape: For accurate measurements and cutting.
- Level: To ensure the frame is straight and even.
- Clamps: To hold the pieces of the frame together while the glue dries.
Preparing the Materials
Once you have your materials and tools, you can begin preparing them for construction.
Quick and easy wooden hanger frames are a great way to add a touch of rustic charm to your home. They’re also surprisingly versatile, perfect for displaying everything from artwork to family photos. Of course, with all the digital photos we take these days, it’s important to make sure you’re protecting your data, which is where a service like netskope data loss prevention comes in.
Once you’ve got your digital photos secured, you can focus on building those beautiful wooden frames and showcasing your memories.
- Cutting: Use your saw to cut the wood to the desired dimensions for your hanger frame.
- Sanding: Sand the edges of the wood to smooth them and remove any rough spots. You can start with a coarser grit sandpaper and gradually move to a finer grit for a smooth finish.
- Finishing: If desired, you can apply a stain or paint to the wood to enhance its appearance or protect it from moisture.
Construction Techniques
When crafting wooden hanger frames, the choice of construction technique significantly impacts the strength, durability, and aesthetic appeal of the final product. Various techniques offer distinct advantages and disadvantages, allowing you to select the best option based on your desired outcome and skill level.
Miter Joints
Miter joints are a popular choice for framing projects, including hanger frames. They involve cutting two pieces of wood at an angle, typically 45 degrees, and joining them to form a corner.
- Advantages:Miter joints offer a visually appealing, clean, and seamless corner. They are relatively easy to create using a miter saw or a hand saw with a miter box. This technique is suitable for both simple and intricate frame designs.
- Disadvantages:While miter joints are visually appealing, they can be prone to weakness, especially when exposed to stress or weight. The joint relies on the glue and the surface area of the cut to hold the pieces together. For added strength, you can reinforce miter joints with dowels, biscuits, or corner blocks.
Dado Joints, Quick easy wooden hanger frames
Dado joints create a strong and durable connection by creating a groove or recess in one piece of wood that precisely fits a corresponding projection on the other piece.
- Advantages:Dado joints are incredibly strong and stable, ideal for hanger frames that will bear weight or experience significant stress. They distribute the weight evenly across the joint, reducing the risk of failure.
- Disadvantages:Dado joints require more precision and specialized tools, such as a dado blade or a router. They can be more time-consuming to create than miter joints. This technique may not be suitable for all frame designs, especially those with intricate or complex shapes.
Mortise and Tenon Joints
Mortise and tenon joints are considered one of the strongest and most traditional woodworking joints. They involve creating a rectangular hole (mortise) in one piece of wood and a corresponding projection (tenon) on the other. The tenon fits snugly into the mortise, creating a strong and secure connection.
- Advantages:Mortise and tenon joints offer exceptional strength and stability. They are resistant to twisting and bending, making them ideal for supporting heavy loads. This technique creates a visually appealing and robust joint that adds character to the frame.
- Disadvantages:Mortise and tenon joints require specialized tools and a high level of precision. They can be more time-consuming to create than other techniques, especially for beginners. This technique is typically reserved for more complex and demanding frame projects.
Finishing Touches: Quick Easy Wooden Hanger Frames

Once your hanger frame is constructed, it’s time to give it a final touch of elegance and protection. This involves applying a finish that enhances the wood’s natural beauty, protects it from wear and tear, and adds a touch of personality to your creation.
Staining
Staining is a popular choice for bringing out the natural grain patterns and color variations in wood. It allows the wood’s texture to shine through while adding a rich, warm hue. There are two main types of stains: oil-based and water-based.
- Oil-based stainspenetrate deeper into the wood, providing a richer color and a more durable finish. However, they take longer to dry and can be more difficult to clean up.
- Water-based stainsare easier to apply and clean up, and they dry faster. They also tend to raise the grain of the wood, which may require additional sanding.
To achieve a professional-looking stain finish, proper preparation is crucial.
- Sanding:Before applying stain, sand the wood with progressively finer grit sandpaper (starting with 120 grit and working up to 220 grit) to create a smooth surface and ensure even stain absorption.
- Applying Stain:Apply the stain evenly using a brush, cloth, or sponge. Work in the direction of the wood grain for a natural look. Let the stain dry completely before applying a topcoat.
Painting
Painting allows you to create a bold statement with your hanger frame, covering the wood’s natural color with a vibrant hue of your choice.
- Latex paintis a water-based option that dries quickly, cleans up easily, and is relatively odorless. It’s a good choice for beginners.
- Oil-based paintoffers a more durable and harder finish, making it suitable for high-traffic areas. However, it takes longer to dry and requires mineral spirits for cleanup.
Painting techniques are similar to staining.
- Sanding:Sand the wood surface to create a smooth finish that will allow the paint to adhere properly.
- Priming:Applying a primer before painting helps the paint adhere better and provides a more even finish.
- Applying Paint:Apply the paint in thin, even coats, allowing each coat to dry completely before applying the next.
Varnishing
Varnishing provides a protective layer that shields the wood from scratches, moisture, and UV damage. It also enhances the wood’s natural beauty and gives it a glossy or satin finish.
- Polyurethane varnishis a durable and water-resistant option that offers excellent protection. It’s available in gloss, semi-gloss, satin, and matte finishes.
- Lacquer varnishdries quickly and produces a hard, durable finish. It’s often used for furniture and other high-quality finishes.
- Oil-based varnishprovides a rich, warm finish and is known for its durability. However, it takes longer to dry and can be more difficult to clean up.
To achieve a professional-looking varnish finish:
- Sanding:Sand the wood surface with fine-grit sandpaper (220 grit or higher) to create a smooth finish before applying the varnish.
- Applying Varnish:Apply the varnish in thin, even coats, allowing each coat to dry completely before applying the next. Use a brush, roller, or spray gun for application.