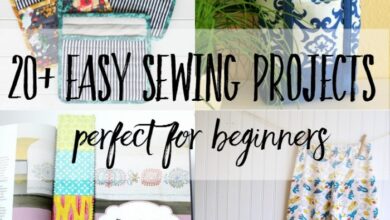
Sewing patterns and getting started can feel like a daunting task, but it’s a journey filled with creativity and self-expression. Whether you’re a complete beginner or have some sewing experience, there’s a world of possibilities waiting to be explored. From understanding the different types of patterns to gathering the essential supplies, this guide will walk you through the basics of sewing and inspire you to create your own unique pieces.
This guide will cover everything you need to know to get started with sewing, from choosing your first project to mastering basic techniques. We’ll also discuss troubleshooting common sewing issues and provide inspiration for creative projects. So, grab your fabric and let’s get sewing!
Understanding Sewing Patterns
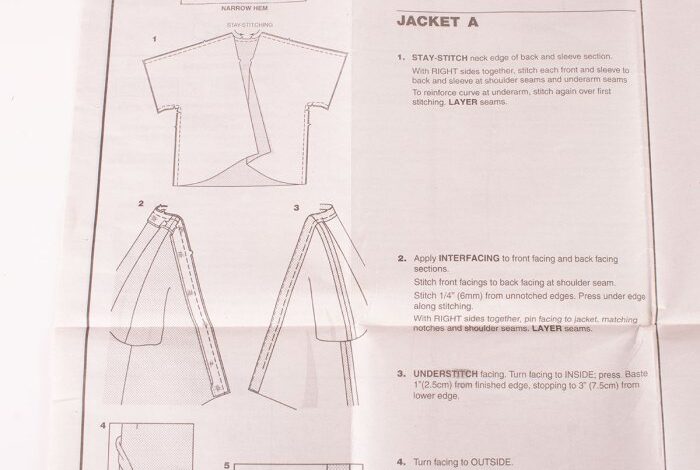
Sewing patterns are the blueprints for creating your own garments. They provide detailed instructions and diagrams that guide you through the process of cutting and assembling fabric into a finished piece. Whether you’re a seasoned seamstress or a beginner, understanding sewing patterns is essential for success.
Types of Sewing Patterns
Sewing patterns are categorized by skill level, making it easier to find projects that match your abilities.
Sewing patterns can be a great way to get started with crafting, offering clear instructions and a framework for your project. If you’re looking for a fun and practical project, why not stitch your own suspenders ? They’re a great way to add a touch of personality to your wardrobe and can be customized to your own style.
Once you’ve mastered suspenders, you can explore other patterns and expand your sewing skills further!
- Beginner Patterns:These patterns are designed for those new to sewing. They typically feature simple designs, straightforward instructions, and a limited number of pieces.
- Intermediate Patterns:Intermediate patterns offer a greater challenge, often incorporating more complex techniques, such as darts, pleats, and zippers.
- Advanced Patterns:Advanced patterns are for experienced sewers who are comfortable with intricate designs, multiple fabric layers, and specialized techniques.
Information Included on Sewing Patterns
Sewing patterns contain a wealth of information to help you create your garment.
Sewing patterns can be a bit intimidating for beginners, but don’t worry! There are tons of resources out there to help you get started. One thing I love to do to unwind after a long day of sewing is to work on some fun DIY projects, like creating these amazing diy faux stained glass bottles.
It’s a great way to get creative and add some personality to your home décor. Once I’m feeling refreshed, I’m ready to tackle those sewing patterns again!
- Size Chart:The size chart helps you determine the correct pattern size based on your body measurements.
- Fabric Recommendations:Pattern instructions typically recommend specific fabric types suitable for the design.
- Cutting Layout:The cutting layout shows how to cut the fabric pieces from the pattern.
- Sewing Instructions:Step-by-step instructions guide you through the construction process.
- Notions List:This list includes all the necessary supplies, such as buttons, zippers, thread, and interfacing.
Reputable Pattern Companies
Many reputable pattern companies offer a wide variety of designs and skill levels.
- Simplicity:Simplicity is a popular choice known for its wide range of patterns, including clothing, home decor, and crafts. They offer patterns for all skill levels and styles.
- McCall’s:McCall’s patterns are known for their classic designs and detailed instructions. They cater to a broad range of sewing interests, from everyday wear to special occasion garments.
- BurdaStyle:BurdaStyle offers modern and trendy patterns, with a focus on European style and fit. Their patterns often feature innovative designs and cutting-edge techniques.
Essential Sewing Supplies
Sewing can be a rewarding hobby, but it’s important to have the right tools and supplies to get started. This guide will provide a comprehensive list of essential sewing supplies for beginners, categorized for ease of understanding.
Tools
Tools are the backbone of any sewing project. They help you manipulate fabric, create precise stitches, and ensure a professional finish.
Sewing patterns can be a great way to get started with a new craft project, and there are so many different styles and designs to choose from. If you’re looking for inspiration, check out some gifting ideas for gardening enthusiasts farrar and tanner to see how they incorporate nature-inspired patterns into their projects.
You might find a pattern that speaks to your own creativity and helps you get started with your own sewing journey.
- Sewing Machine:The heart of your sewing setup. A sewing machine simplifies stitching, offering various stitch types and adjustable settings for different fabrics and projects.
- Scissors:Essential for cutting fabric accurately. Invest in a pair of sharp fabric scissors, dedicated solely to fabric to maintain sharpness.
- Measuring Tape:Crucial for accurate fabric measurements. Choose a flexible tape measure that is at least 60 inches long.
- Pins:Used to temporarily hold fabric pieces together before stitching. Choose sharp pins with a smooth finish to avoid snagging fabric.
- Seam Ripper:A handy tool for removing unwanted stitches or fixing mistakes. A seam ripper features a sharp blade for carefully cutting stitches.
- Iron:An essential tool for pressing seams, removing wrinkles, and achieving a professional finish. Choose an iron with adjustable temperature settings for different fabrics.
- Ironing Board:Provides a stable and padded surface for ironing. Choose a board with a heat-resistant cover and a sturdy base.
- Hand Sewing Needles:Useful for hand stitching, finishing edges, and mending. Choose a variety of sizes and types based on your project needs.
- Thimble:Protects your finger while hand sewing. Choose a thimble that fits comfortably and securely on your finger.
Fabrics
Fabric is the foundation of any sewing project. The type of fabric you choose depends on the project’s purpose, style, and desired look.
- Cotton:A versatile fabric known for its breathability, durability, and easy care. It’s suitable for various projects, from clothing to home decor.
- Linen:A natural fiber known for its strength, durability, and unique texture. Linen is often used for summer clothing, tablecloths, and upholstery.
- Silk:A luxurious fabric known for its smooth, lustrous surface and delicate drape. Silk is ideal for formal wear, scarves, and accessories.
- Wool:A warm and durable fabric known for its natural insulation properties. Wool is suitable for outerwear, blankets, and sweaters.
- Polyester:A synthetic fabric known for its wrinkle resistance, durability, and easy care. Polyester is commonly used for sportswear, curtains, and upholstery.
Notions, Sewing patterns and getting started
Notions are small but essential items that complete your sewing projects.
- Thread:The thread you use should match the fabric’s color and weight. Choose a high-quality thread for durability and a smooth finish.
- Zippers:Used for closures on garments, bags, and other projects. Choose zippers that match the project’s style and size.
- Buttons:Used for closures on garments, shirts, and other projects. Choose buttons that match the project’s style and size.
- Interfacing:A stiffening fabric used to add structure and support to garments. Choose interfacing that matches the fabric’s weight and drape.
- Elastic:Used for waistbands, sleeves, and other areas requiring stretch. Choose elastic that matches the project’s size and stretch requirements.
Equipment
Equipment provides additional support and functionality for your sewing endeavors.
- Sewing Machine Needles:Different needle sizes and types are required for various fabrics and projects. Choose needles based on the fabric’s weight and thickness.
- Bobbins:Small spools that hold thread for the bobbin case of your sewing machine. Choose bobbins that are compatible with your machine.
- Sewing Machine Foot:Different sewing machine feet are designed for specific tasks, such as zippers, buttons, or decorative stitching. Choose feet that suit your project needs.
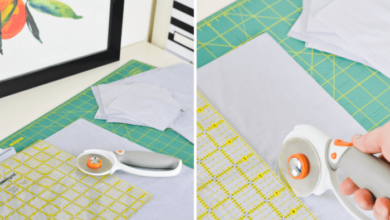
- Rotary Cutter:A tool for cutting fabric quickly and accurately. Choose a rotary cutter with a sharp blade and a comfortable handle.
- Cutting Mat:A self-healing mat that protects your work surface while cutting fabric. Choose a mat with a grid pattern for accurate measurements.
Choosing Your First Project

Choosing your first sewing project can be exciting but also a bit daunting. You want to pick something that’s manageable but also allows you to learn and have fun.
Factors to Consider
When selecting your first sewing project, consider the following factors:
- Complexity:Start with a simple project that doesn’t require too many steps or intricate techniques. Avoid projects with multiple pattern pieces, complicated seams, or extensive embellishments.
- Time Commitment:Choose a project that fits your available time. A quick project like a simple tote bag or pillowcase is a good starting point. Avoid projects that require extensive time or multiple sessions.
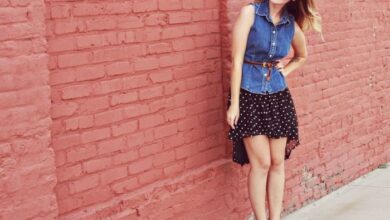
- Personal Interests:Select a project that appeals to your personal style and interests. If you love colorful fabrics, consider a simple dress or a tote bag with a fun design. If you’re drawn to more functional items, a pillowcase or a basic tote bag might be a good choice.
Popular Beginner Sewing Projects
Here are some popular beginner sewing projects that are easy to make and provide a great learning experience:
- Tote Bag:A simple tote bag is a great beginner project because it requires minimal pattern pieces and can be customized with different fabrics and designs. A simple tote bag typically involves a rectangular shape with handles, allowing you to practice basic sewing techniques like straight stitching and attaching handles.
- Pillowcase:A pillowcase is another simple project that requires minimal sewing experience. You can choose a basic rectangular shape or get creative with a fun design or appliqué. A pillowcase provides a good opportunity to practice basic sewing techniques like straight stitching and turning fabric right-side out.
- Simple Dress:A simple, straight-cut dress is a good project for beginners who want to try something more challenging. You can choose a basic pattern with minimal seams and embellishments. A simple dress allows you to practice basic sewing techniques like straight stitching, attaching a zipper, and finishing seams.
Basic Sewing Techniques
Mastering fundamental sewing techniques is essential for any aspiring sewist. These techniques form the foundation for creating beautiful and well-constructed garments. Let’s explore some of the key techniques that will help you get started on your sewing journey.
Threading a Sewing Machine
Threading a sewing machine correctly ensures smooth and efficient stitching.
- Locate the Spool Pin:The spool pin is typically located at the top of the sewing machine. Place the spool of thread onto the pin.
- Thread the Thread Guide:The thread guide directs the thread from the spool to the take-up lever. Follow the path indicated by the thread guide arrows.
- Engage the Take-up Lever:The take-up lever helps control the thread tension. As you thread the machine, lift the take-up lever to its highest position.
- Thread the Needle:Pass the thread through the needle from front to back, following the needle’s groove.
- Check for Smooth Thread Flow:Gently pull on the thread tail to ensure it runs smoothly through the machine.
Using a Seam Ripper
A seam ripper is a handy tool for removing stitches when mistakes happen or adjustments are needed.
- Identify the Seam Ripper Parts:The seam ripper has a sharp hook and a blunt end.
- Locate the Seam:Carefully place the hook under the stitches you want to remove.
- Gently Pull the Hook:Slide the hook along the seam, lifting the stitches from the fabric.
- Use the Blunt End for Fabric Separation:The blunt end can be used to separate fabric layers if needed.
Stitching Straight Seams
Stitching straight seams is a fundamental technique for creating well-constructed garments.
- Prepare the Fabric:Align the fabric edges and pin them together.
- Set the Stitch Length:Select an appropriate stitch length for the fabric type.
- Start Sewing:Begin sewing from the fabric edge, keeping the needle in the down position.
- Guide the Fabric:Slowly guide the fabric through the machine, keeping the needle in the center of the seam allowance.
- Maintain Consistent Speed:Sew at a consistent speed to ensure even stitches.
- Backstitch at the Beginning and End:Backstitch at the beginning and end of the seam to secure the stitches.
Handling Fabric
Handling fabric correctly is crucial for achieving neat and professional results.
- Pre-Wash Fabrics:Pre-wash fabrics before cutting and sewing to prevent shrinkage after the garment is completed.
- Iron Fabric:Ironing fabric before cutting and sewing helps create a smooth surface for accurate cutting and reduces wrinkles.
- Avoid Stretching:Handle delicate fabrics gently to prevent stretching.
- Use Fabric Scissors:Use sharp fabric scissors to ensure clean and precise cuts.
Cutting Patterns
Accurate pattern cutting is essential for a well-fitting garment.
- Lay Out Patterns:Lay out pattern pieces on the fabric according to the pattern instructions.
- Secure Patterns:Use weights or pins to secure the patterns to the fabric.
- Cut Carefully:Cut along the pattern lines with sharp fabric scissors.
- Mark Seam Allowances:Mark seam allowances on the fabric pieces as indicated on the pattern.
Pinning Fabric Pieces
Pinning fabric pieces together helps to hold them in place while sewing.
- Use Pins Perpendicular to the Seam:Insert pins perpendicular to the seam line to prevent them from interfering with the sewing machine needle.
- Pin Close to the Seam:Pin close to the seam line to ensure accurate stitching.
- Remove Pins Before Sewing:Remove pins as you sew to avoid breaking the needle.
Achieving Neat and Professional Stitches
- Practice Consistent Speed:Sew at a consistent speed to ensure even stitches.
- Maintain Even Tension:Adjust the thread tension as needed to prevent puckering or loose stitches.
- Use a Seam Gauge:A seam gauge helps maintain consistent seam allowances.
- Press Seams:Press seams open or to one side to create a smooth and professional finish.
Mastering Sewing Techniques: Sewing Patterns And Getting Started
Sewing techniques are the building blocks of any sewing project. Whether you’re a beginner or a seasoned sewist, understanding and mastering these techniques will elevate your sewing skills and allow you to create beautiful and well-crafted garments.
Common Sewing Techniques
Understanding the fundamentals of sewing techniques is crucial for beginners. Here’s a breakdown of common techniques and their applications:
| Technique | Description | Applications |
|---|---|---|
| Straight Stitching | The most basic stitch, used to join two pieces of fabric together in a straight line. | Hemming, seams, attaching fabric pieces. |
| Backstitch | A strengthening stitch used to secure the beginning and end of a seam. | Reinforcing seams, attaching buttons, creating durable closures. |
| Zigzag Stitch | A stitch that creates a zig-zag pattern, used to prevent fraying and finish edges. | Finishing raw edges, creating decorative details, securing seams. |
| Overcast Stitch | A hand stitch used to finish raw edges and prevent fraying. | Finishing seams, creating decorative edges, preventing fabric unraveling. |
| Slip Stitch | A nearly invisible stitch used to attach two pieces of fabric together, often used for hems. | Invisible hems, attaching facings, creating neat and tidy finishes. |
Advanced Sewing Techniques
Advanced sewing techniques require more practice and skill but offer a wider range of creative possibilities. Let’s explore some of these techniques:
Gathering
Gathering is a technique used to create fullness or ruffles in fabric. It involves pulling threads to create a series of small gathers, which can be used to create a variety of designs. Gathering can be done by hand or with a sewing machine.
To gather fabric by hand, use a running stitch along the edge of the fabric, then pull the thread to create gathers. For machine gathering, use a long stitch length and then pull the bobbin thread to create gathers.
Gathering is often used in projects like:* Blouses and dresses with ruffled sleeves or necklines.
- Skirts with gathered tiers.
- Curtains and other home decor items.
Pleating
Pleating is a technique used to create folds or creases in fabric, adding structure and dimension to garments. Pleats can be pressed into fabric or sewn in place. There are various types of pleats, each with its unique appearance and purpose.
Some common types of pleats include box pleats, knife pleats, and inverted pleats.
Pleating is often used in projects like:* Skirts and trousers with tailored pleats.
- Dresses with structured pleats.
- Curtains and other home decor items.
Inserting Zippers
Inserting zippers is a crucial technique for creating functional closures in garments. It involves carefully sewing a zipper into a seam, ensuring a smooth and even finish. There are various zipper types, including invisible zippers, center-front zippers, and lapped zippers.
For successful zipper insertion, use a zipper foot on your sewing machine and follow the specific instructions for the type of zipper you’re using.
Zipper insertion is essential for projects like:* Dresses and skirts with back zippers.
- Jackets and coats with front zippers.
- Bags and purses with zipper closures.
Resources for Learning More Complex Sewing Techniques
There are numerous resources available for learning more complex sewing techniques:* Online tutorials:Websites like YouTube and Craftsy offer a wide range of free and paid tutorials on advanced sewing techniques.
Sewing books
Many books cover advanced sewing techniques in detail, providing step-by-step instructions and illustrations.
Sewing classes
Local sewing stores and community centers often offer classes on advanced sewing techniques, providing hands-on learning and expert guidance.
Troubleshooting Sewing Issues
Sewing can be a rewarding hobby, but it can also be frustrating when things don’t go as planned. Don’t worry, though! Even the most experienced sewers encounter problems from time to time. This section will help you identify and solve common sewing issues.
Identifying Common Sewing Problems
Common sewing problems can arise from various factors, including improper fabric selection, inadequate preparation, and incorrect sewing techniques. It’s essential to understand these issues to find effective solutions.
- Fabric Puckering:This happens when the fabric gathers or wrinkles due to uneven tension or improper stitching.
- Uneven Seam Allowances:Inconsistent seam allowances can lead to uneven seams and a less professional finish.
- Skipped Stitches:This occurs when the sewing machine needle doesn’t pick up the fabric, resulting in gaps in the stitching.
- Fabric Fraying:Loose threads can unravel, especially on woven fabrics.
- Machine Jams:These can be caused by various factors, such as thread tangles, needle breakage, or improper bobbin winding.
Fabric Selection and Preparation
Choosing the right fabric is crucial for a successful sewing project. Different fabrics have unique properties that affect their sewability. Proper preparation involves pre-washing, pressing, and cutting fabric accurately.
- Pre-Washing:Pre-washing helps prevent shrinkage and color bleeding.
- Pressing:Ironing the fabric removes wrinkles and ensures smooth stitching.
- Accurate Cutting:Precise cutting is essential for accurate garment construction.
Fixing Sewing Mistakes
Everyone makes mistakes, but it’s important to learn from them and develop strategies to correct them. Here are some tips for fixing common sewing errors:
- Unpicking Seams:Use a seam ripper to carefully remove unwanted stitches.
- Patching Holes:Small holes can be repaired with fabric scraps or iron-on patches.
- Re-Sewing Seams:For larger mistakes, re-sew the seam carefully, ensuring accurate alignment.
Preventing Common Sewing Errors
By following these tips, you can minimize the chances of encountering common sewing problems:
- Use the Right Needle:Choose a needle size appropriate for the fabric type.
- Adjust Tension:Proper tension ensures even stitching and prevents puckering.
- Check Your Bobbin:Ensure the bobbin is properly wound and inserted.
- Test Your Stitches:Before starting a project, test your stitching on a scrap of fabric.