
DIY Puff Quilted Pillow Cover: A Comprehensive Guide to Creating Textured, Luxurious Home Decor
Creating a puff quilted pillow cover is a rewarding DIY project that adds a distinct textural element and a touch of luxury to any home décor. This technique, often referred to as “pouf” quilting or “biscuit” quilting, involves creating raised, dimensional stitches that form soft, pillow-like mounds across the fabric. Unlike traditional quilting which focuses on layering batting between two fabric pieces for warmth and loft, puff quilting primarily emphasizes visual and tactile texture. This guide will walk you through every step, from selecting materials to the final finishing touches, ensuring a beautiful and professional-looking result.
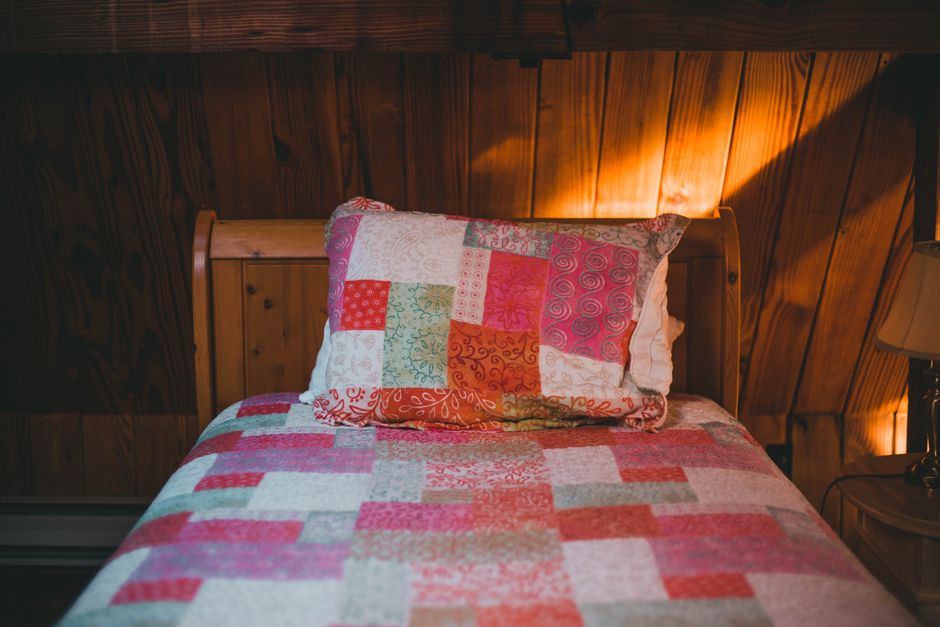
The foundation of any puff quilted pillow cover is the fabric. For the front panel, consider materials that have a slight weight to them, as very lightweight fabrics might distort or not hold the puff shape as effectively. Cotton sateen, linen blends, or even a stable polyester blend can work well. Lighter colors tend to showcase the puff effect more prominently, as the shadows and highlights created by the raised stitches are more pronounced. For the backing of the pillow cover, a complementary fabric is ideal. This could be a solid color that matches one of the tones in your puff quilting design, or a coordinating print. A standard quilting cotton is perfectly suitable for the backing. The size of your pillow will dictate the fabric dimensions. As a general rule, cut your front and back panels slightly larger than your intended finished pillow size to allow for seam allowances and any potential shrinkage during washing. For a standard 18×18 inch pillow, you might cut your fabric panels at 20×20 inches.
Batting is crucial for achieving the signature puff effect. Polyester batting is generally preferred for puff quilting due to its loft and resilience. It holds its shape well and provides a good amount of volume without being too heavy. Cotton batting can also be used, but it tends to compress more over time and might not create as pronounced a puff. The thickness of the batting is a key factor in determining the size and plumpness of your puffs. A medium-loft polyester batting, typically around 3-4 ounces per square yard, is a good starting point. If you desire larger, more dramatic puffs, you can opt for a thicker batting, but be mindful that this can make sewing through multiple layers more challenging. You’ll need enough batting to cover the entire front panel of your pillow cover.
Thread choice is another important consideration for puff quilting. High-quality polyester thread or cotton quilting thread is recommended. The thread will be visible on the surface of your puffs, so consider its color. Contrasting thread can highlight the quilted pattern, while matching thread will create a more subtle, tonal effect. For beginners, starting with a matching thread can be forgiving as any minor imperfections in stitch tension will be less noticeable. Ensure your thread is strong enough to withstand the tension of the quilting process. Using a longer stitch length on your sewing machine will also help prevent thread breakage and allow the fabric to gather more effectively around the stitches.
The design of your puff quilting is where creativity truly shines. Simple, geometric patterns are excellent for beginners. Consider a grid of evenly spaced dots, squares, or diamond shapes. For a more advanced approach, you can create swirling patterns or more intricate floral motifs. The spacing between your quilting lines will directly impact the size of your puffs. Closer spacing will result in smaller, more numerous puffs, while wider spacing will create larger, more voluminous mounds. A general guideline for puff quilting spacing is anywhere from 1.5 to 3 inches between quilting lines, depending on the desired effect and the thickness of your batting.
To achieve precise and evenly spaced quilting lines, marking your fabric is essential. A water-soluble fabric marker, chalk pencil, or even a vanishing ink pen can be used. For a simple grid pattern, use a quilting ruler and your marking tool to draw straight lines across the entire fabric panel. Ensure your lines are perpendicular to each other. For curved designs, freehand drawing or using stencils can be helpful. It’s important to mark the center of each puff where the stitch will go, or the lines that will define the boundaries of the puff. If you’re aiming for a uniform look, using a quilting hoop or frame can help keep your fabric taut and prevent distortion as you mark.
Once your front fabric panel is marked, it’s time to prepare it for quilting. Lay your fabric right side up on a flat surface. Next, lay a piece of batting that is slightly larger than your fabric panel on top of it. Gently smooth out both layers to eliminate any wrinkles or creases. If you are hand-quilting, you can secure the layers with safety pins or a basting stitch. However, for machine quilting, using spray baste is a more efficient method. Follow the manufacturer’s instructions for the spray baste, applying a thin, even layer to the batting and then carefully laying the fabric panel onto it. This will hold the layers together securely during the quilting process and prevent shifting.
The quilting process itself is the core of the puff pillow cover creation. Using a walking foot on your sewing machine is highly recommended for puff quilting. A walking foot feeds both the top and bottom layers of fabric evenly, preventing puckering and ensuring smooth, consistent stitches, especially when working with multiple layers. If hand-quilting, a quilting needle and thimble will be necessary. Begin by stitching along your marked lines. As you sew, you will notice the fabric beginning to gather around your stitch line, creating the puff effect. Don’t pull or push the fabric; let the walking foot or your hand guide it naturally.
For a classic puff quilt look, you will stitch along each marked line, effectively creating a grid. After completing one set of parallel lines, you will stitch the perpendicular set, forming squares or diamonds. The stitch length on your sewing machine should be set to a medium to long stitch, around 3.0-4.0mm. This allows the fabric to gather and create a fuller puff. If your machine allows for it, consider using a slightly looser stitch tension. As you stitch, watch how the fabric gathers. You want a consistent gathering effect along each line. If you notice any pleating or bunching that is too severe, you might need to adjust your tension or walking foot pressure.
After quilting the entire front panel, you will be able to see the distinct puffs forming. The areas where you stitched will appear as indented lines, and the fabric between these lines will be raised, creating the dimensional mounds. Trim any excess batting from the edges of your quilted panel, bringing it back to the original dimensions you cut for your pillow front.
Now it’s time to prepare the pillow back. You have a couple of options for the back closure. An envelope closure is the most common and easiest for DIY pillow covers. To create an envelope closure, cut two pieces for your pillow back. One piece should be the full width of your pillow front and its desired finished length. The second piece should be the same width but cut to a shorter length, typically about two-thirds of the desired finished length. On the cut edge of this shorter piece, fold the fabric over about ½ inch towards the wrong side and press. Then, fold it over another ½ inch and press again. Stitch this hem along the folded edge.
To assemble the pillow back with an envelope closure, lay your quilted front panel right side up. Place the longer back piece on top, right side down, aligning the raw edges. Then, place the shorter back piece on top of that, right side down, also aligning the raw edges. The hemmed edge of the shorter piece should overlap with the longer piece, creating the envelope opening. Pin all layers securely in place around all four edges.
Sewing the pillow cover together involves joining the quilted front and the assembled back. Using a ½ inch seam allowance, stitch all the way around the perimeter of the pinned layers. Make sure to catch all layers of fabric. It’s advisable to backstitch at the beginning and end of your stitching to reinforce the seams. Once sewn, trim the corners diagonally, being careful not to cut into your stitching. This will help create sharper corners when you turn the pillow cover right side out.
Turning the pillow cover right side out is a satisfying moment. Carefully push out the corners from the inside. A point turner or the blunt end of a chopstick can be helpful for achieving crisp corners. Once turned, press the entire pillow cover, paying attention to the seams. Gently push the fabric into the envelope opening to ensure the back panels lie flat and the opening is neatly aligned.
For a more polished finish, you can topstitch around the entire perimeter of the pillow cover, about ¼ inch from the edge. This will further secure the seams and give the pillow a professional, ready-made appearance. This step is optional but highly recommended.
If you’ve chosen to add a zipper closure for a more finished look or for easier washing, this requires a slightly different construction method. After quilting the front panel and cutting your back panels to the desired size (without the envelope hem), you would place one back panel right side down along one edge of the quilted front, right sides together. Baste or sew this edge. Then, place the other back panel right side down along the opposite edge of the quilted front and baste or sew. You would then insert a zipper into these seams according to standard zipper insertion techniques, ensuring it’s centered and functional. This method typically involves sewing the side and bottom seams after the zipper is in place.
Washing and care for your puff quilted pillow cover are important to maintain its texture and appearance. It is generally recommended to wash on a gentle cycle with cold water and a mild detergent. Avoid using fabric softener, as it can reduce the loft of the batting and flatten the puffs over time. Tumble dry on a low heat setting or air dry completely. If machine drying, remove the pillow cover while it is still slightly damp to prevent excessive wrinkling and to help the puffs retain their shape.
For any minor wrinkles that may appear after washing, a low-heat iron can be used, but it’s best to iron from the wrong side of the fabric to avoid flattening the puffs. You can also place a thin towel over the puffed areas and iron on a low setting.
Troubleshooting common issues is part of any DIY project. If your puffs are not as prominent as you’d like, consider using thicker batting or closer quilting lines in your next project. If your stitches are breaking, ensure your needle is sharp and appropriate for the fabric and batting thickness. Adjusting your machine’s tension and using a longer stitch length can also help. Puckering along the quilting lines can often be resolved by using a walking foot and ensuring your fabric isn’t being stretched or pulled as you sew.
Experiment with different fabric combinations and colors to create unique pillow covers. Consider using a textured fabric for the backing to add another layer of interest. For a more advanced puff quilting technique, you can use pre-cut fabric circles or squares instead of stitching lines to create your puffs, resulting in a more uniform, scattered dot effect. These circles are typically hand-stitched and pulled to form a gathered puff.
The versatility of puff quilting extends beyond pillow covers. This technique can be applied to blankets, throws, wall hangings, and even incorporated into garment construction. Understanding the principles of puff quilting opens up a world of creative possibilities for adding dimension and texture to your fabric creations. The satisfaction of transforming simple fabric into a tactile and visually appealing piece of home décor is immense, and the puff quilted pillow cover is an excellent entry point into this rewarding craft.
