DIY Wooden Height Chart: A Timeless Keepsake for Growing Memories
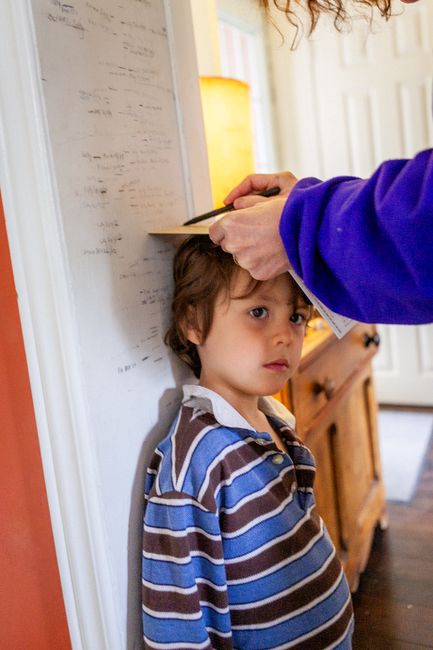
Creating a DIY wooden height chart is a rewarding project that results in a charming and functional keepsake. This isn’t just about tracking growth; it’s about crafting a piece of home decor that will be cherished for years, a tangible representation of childhood milestones. Unlike flimsy paper charts that get lost or damaged, a wooden chart offers durability and a natural aesthetic that complements any interior design. The process itself can be a wonderful family activity, allowing for personalization and shared memories. From selecting the perfect wood to the final coat of sealant, each step contributes to a unique and meaningful heirloom. This comprehensive guide will walk you through the entire DIY process, from choosing materials to adding personalized touches, ensuring you create a beautiful and lasting wooden height chart.
Choosing Your Wood: The Foundation of Your Height Chart
The selection of wood is paramount to the success and aesthetic of your DIY wooden height chart. Consider durability, grain pattern, and ease of working. Pine is a popular and cost-effective choice, readily available and easy to cut and sand. Its lighter color makes it an excellent canvas for paint or stains, allowing for vibrant designs. However, pine can be softer and more prone to dents. Maple, on the other hand, offers a harder, more durable surface with a beautiful, tight grain. It takes finishes exceptionally well, providing a smooth and elegant look. Cherry wood is another premium option, known for its rich color and ability to darken beautifully with age. Its fine grain lends itself to intricate detailing. Oak is a classic choice for its strength and distinctive grain, offering a rustic yet refined appeal. For a more budget-friendly yet sturdy option, poplar is a good alternative to pine, with a slightly denser grain. The thickness of the wood is also a consideration. Aim for a board that is at least 1/2 inch thick to prevent warping and provide a substantial feel. A common width for height charts is 4 to 6 inches, providing ample space for markings and decorations. You can purchase pre-cut lumber from your local hardware store or lumberyard. If you’re opting for a salvaged or reclaimed wood look, ensure the wood is dry, free from excessive rot, and has been properly treated for any potential pests. Sanding is crucial regardless of the wood type. Start with a coarse grit sandpaper (around 80-100 grit) to remove any rough edges or imperfections, then gradually move to finer grits (150-220 grit) for a smooth finish. Proper sanding ensures paint and stain adhere evenly and creates a pleasant tactile experience.
Designing Your Wooden Height Chart: Personalization and Functionality
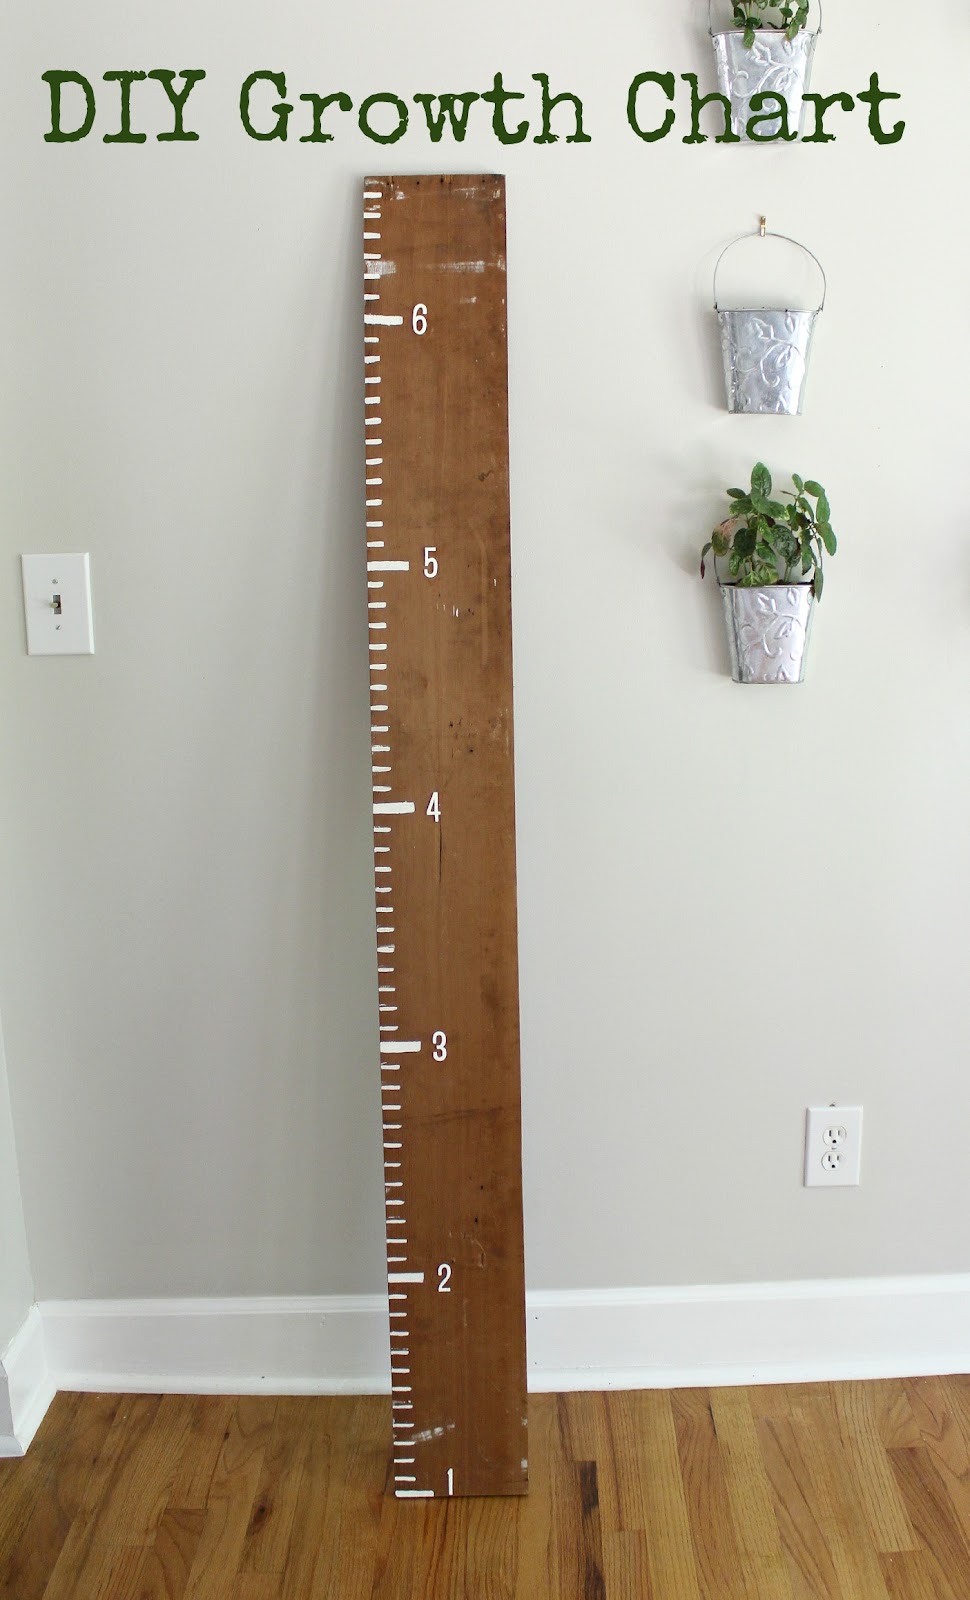
Before you pick up a saw or brush, envision the final look of your wooden height chart. This is where creativity and personal style come into play. Consider the age of the child it’s for and the overall decor of your home. A simple, minimalist design might feature clean lines and subtle markings, while a more whimsical chart could incorporate playful illustrations or themed elements. The height range is a critical design element. Most charts start at 0 inches (or the floor) and extend to 5 or 6 feet. Decide if you want to mark every inch, every half-inch, or just every foot and year milestone. The scale is crucial for accuracy. Common measurement units are inches and centimeters. You can opt for a chart that displays both. Think about the placement of your markings. Will they be painted directly onto the wood, etched, or created with small wooden pegs? Consider the font for any numbers or text. Legible and aesthetically pleasing fonts are key. Some popular font styles include sans-serif for a modern look, serif for a classic feel, or even handwritten-style fonts for a more personal touch. Incorporating a name or birthdate adds a deeply personal element. This can be painted, stenciled, or even wood-burned. Beyond simple lines and numbers, consider adding decorative elements. These could include painted stars, clouds, animals, cars, or even a favorite character. Stencils are excellent for achieving consistent and professional-looking designs. Alternatively, freehand painting can add a unique, artistic flair. If you’re feeling adventurous, wood burning offers a permanent and rustic aesthetic for your markings and designs. Remember to factor in the width of your wood when planning your design. Too many intricate details on a narrow board might look cluttered. Conversely, a wide board can accommodate more elaborate designs. Sketching out your design on paper first is highly recommended. This allows you to experiment with different layouts, fonts, and elements before committing to the wood.
Gathering Your Materials and Tools: Essential Supplies for Your Project
To embark on your DIY wooden height chart journey, having the right tools and materials at your disposal will ensure a smooth and successful creation process. A detailed list will prevent mid-project scrambles.
Essential Woodworking Tools:
- Saw: A handsaw, jigsaw, or miter saw will be necessary for cutting your wood to the desired length. A miter saw offers the most precision for straight cuts.
- Measuring Tape: Accurate measurements are paramount for a functional height chart.
- Pencil: For marking cutting lines and design elements.
- Sander or Sandpaper: Essential for smoothing the wood. You’ll need various grits, from coarse (80-100) for initial shaping to fine (150-220) for a smooth finish. A power sander (orbital or belt) will significantly speed up this process.
- Clamps: Useful for holding the wood steady while cutting or painting.
- Drill (optional): If you plan to add hanging hardware or decorative elements that require drilling.
- Wood Glue (optional): If you’re joining multiple pieces of wood.
- Paintbrushes: A variety of sizes will be needed for applying paint, stencils, and fine details. Foam brushes are also great for even coverage.
- Rulers and Straightedge: For ensuring straight lines when marking measurements.
- Level: To ensure your chart is hung straight on the wall.
Key Materials:
- Wooden Board: As discussed in the "Choosing Your Wood" section, select your preferred wood type and dimensions.
- Primer (optional but recommended): Especially if you’re using darker paints or a less absorbent wood. It helps paint adhere better and provides a uniform base.
- Paint or Stain: Choose colors that complement your decor. Acrylic paints are excellent for crafting and offer a wide color palette. Wood stains can enhance the natural grain of the wood.
- Sealant or Varnish: A clear protective coat is crucial to protect your height chart from wear and tear, moisture, and UV damage. Polyurethane or a clear acrylic sealer are good options.
- Stencils (optional): For creating consistent numbers and designs.
- Wood Stain Pens or Permanent Markers (optional): For detailed markings.
- Hanging Hardware: D-rings, sawtooth hangers, or even pre-drilled holes with screws, depending on how you plan to mount the chart.
- Wood Filler (optional): To fill any knots or imperfections in the wood before painting.
- Safety Gear: Safety glasses and a dust mask are essential when working with power tools and sanding.
The Step-by-Step DIY Process: From Raw Wood to Cherished Heirloom
This section details the construction and decoration of your wooden height chart, guiding you through each stage of the process.
Step 1: Prepare Your Wood
- Cut to Size: Measure and cut your wooden board to your desired length. Ensure the cuts are straight and precise. If you’re using a handsaw, use a miter box for accuracy.
- Sand Thoroughly: Begin with a coarse-grit sandpaper (80-100) to smooth out any rough edges, splinters, or imperfections. Progress to medium (120-150) and then fine-grit (180-220) sandpaper for a silky-smooth finish. This step is crucial for paint adhesion and a professional look.
- Clean the Dust: Thoroughly wipe down the board with a tack cloth or a damp cloth to remove all sanding dust. Any remaining dust will result in a bumpy paint finish.
- Fill Imperfections (Optional): If your wood has any significant knots or small cracks, use wood filler to smooth them out. Allow the filler to dry completely before proceeding.
Step 2: Design and Mark Your Measurements
- Measure and Mark Your Zero Point: Decide where your height chart will begin. Typically, it starts at 0 inches or centimeters from the bottom edge. Use your measuring tape and pencil to mark this point accurately.
- Establish Your Scale: Decide on your desired interval for markings – every inch, half-inch, or foot. Use your measuring tape and a straightedge to draw clear, consistent lines for your measurements.
- Mark Milestones: Clearly mark foot markers (e.g., 1′, 2′, 3′) and potentially year markers for added personalization.
- Add Your Design Elements: If you’re using stencils, position them carefully and secure them with painter’s tape. If you’re freehanding, sketch your design lightly with a pencil.
Step 3: Prime and Paint Your Base Coat
- Apply Primer (Optional but Recommended): Apply a thin, even coat of primer to the entire surface of the wood. This creates a uniform base, improves paint adhesion, and prevents the wood grain from showing through lighter colors. Allow it to dry completely according to the manufacturer’s instructions.
- Apply Base Paint Color: Apply your chosen base paint color. Use even strokes, working from top to bottom. For best results, apply two thin coats rather than one thick one, allowing each coat to dry thoroughly in between.
Step 4: Add Your Markings and Decorations
- Paint or Stain Markings:
- Painting: If painting your markings, use a fine-tipped brush or a stencil brush for precision. For foot markers, you might want a slightly thicker line.
- Stenciling: Carefully apply paint to your stencils, using a dabbing motion to avoid bleed-through.
- Wood Burning: If using a wood-burning tool, practice your lines and lettering on scrap wood first. This is a permanent and visually striking option.
- Wood Stain Pens/Markers: For a more rustic look, wood stain pens or permanent markers can be used to draw measurement lines and numbers.
- Add Decorative Elements: Paint or stencil any chosen decorative elements like stars, clouds, or animals.
- Personalize with Name/Birthdate: Paint, stencil, or wood-burn the child’s name and birthdate onto the chart. Consider placement that doesn’t interfere with measurement lines.
Step 5: Seal and Protect Your Creation
- Apply Sealant: Once all paint and decorations are completely dry, apply a clear sealant or varnish. This is a crucial step to protect your height chart from moisture, dirt, and everyday wear and tear. Apply 2-3 thin coats, allowing each coat to dry thoroughly before applying the next. A matte finish will offer a more natural look, while a satin or gloss finish will provide more shine and durability.
- Ensure Complete Drying: Allow the sealant to cure fully before handling the chart extensively or hanging it. This can take 24-72 hours depending on the product and humidity.
Step 6: Install Hanging Hardware
- Attach Hangers: Depending on the weight of your chart and your wall type, attach appropriate hanging hardware to the back of the board. D-rings or sawtooth hangers are common choices. Ensure they are securely fastened.
Step 7: Hang Your Height Chart
- Choose the Right Location: Select a wall space where the chart will be visible and where children can easily reach it to be measured. Avoid areas with direct sunlight, which can fade the paint over time.
- Level Installation: Use a level to ensure your height chart is hung straight. This is essential for accurate measurements.
Advanced Techniques and Customization: Elevating Your Height Chart
Beyond the basic steps, several advanced techniques can elevate your DIY wooden height chart from a simple tracker to a true work of art.
- Wood Burning (Pyrography): For a rustic and permanent aesthetic, consider wood burning your markings and designs. This technique involves using a heated tool to scorch designs into the wood, creating beautiful, natural-looking lines and shading. Practice on scrap wood first to master different tip techniques and pressure control.
- Stenciling with Multiple Colors: Layering stencils allows for more intricate designs. For example, you could stencil a base shape in one color and then add details in a contrasting color on top.
- Distressing and Antiquing: To achieve a vintage or farmhouse look, you can distress the paint. After applying your base coat and allowing it to dry, gently sand certain areas to reveal the wood underneath, creating an aged appearance. Antiquing glaze can be applied over the paint to add depth and a softened, aged look.
- Decoupage: Incorporate images from fabric, paper, or photographs by using decoupage techniques. Seal the images onto the wood with Mod Podge or a similar adhesive and then seal over them.
- Chalkboard Paint Section: Dedicate a section of your height chart to chalkboard paint. This allows for temporary notes, drawing, or even the child’s current height to be written in chalk, adding an interactive element.
- 3D Elements: Attach small wooden cutouts, buttons, or other decorative items to create a dimensional effect. Ensure these are securely glued and sealed.
- Engraving: If you have access to an engraving tool or a CNC machine, you can engrave intricate designs or detailed measurements directly into the wood for a truly professional finish.
- Incorporating Photos: Small photo frames can be attached to the chart, allowing you to place photos of the child at different ages alongside their height markings.
- Themed Designs: Tailor your design to a specific theme that the child loves, such as outer space, a fairy tale, a favorite animal, or a superhero. This makes the chart even more engaging and personal.
- Modular Design: Consider a modular design where individual wood pieces are assembled to create the chart. This can allow for easier customization or even the ability to add new sections as the child grows taller.
SEO Optimization Strategies for Your DIY Wooden Height Chart Article
To ensure your comprehensive guide to creating a DIY wooden height chart reaches the widest audience, implementing effective SEO strategies is crucial. The following tactics will help your content rank higher in search engine results.
- Keyword Research: Identify relevant keywords that people are searching for. Primary keywords include "DIY wooden height chart," "how to make a height chart," "wooden growth chart," and "personalized height chart." Secondary keywords could include "easy woodworking projects," "kids’ room decor," "handmade gifts," and "baby shower gift ideas."
- Title Tag Optimization: The title tag is the first thing users see in search results. Your current title, "DIY Wooden Height Chart: A Timeless Keepsake for Growing Memories," is excellent. It’s descriptive, includes primary keywords, and highlights a key benefit.
- Meta Description: Craft a compelling meta description (around 150-160 characters) that accurately summarizes your article and encourages clicks. For example: "Create a beautiful DIY wooden height chart! Our step-by-step guide covers wood selection, design, painting, sealing, and personalization. A timeless keepsake for your growing family."
- Header Tags (H1, H2, H3): Use header tags to structure your content logically and make it easily scannable for both users and search engines. The main title is your H1. Subheadings like "Choosing Your Wood," "Designing Your Wooden Height Chart," "Gathering Your Materials and Tools," and "The Step-by-Step DIY Process" should be H2s. Further breakdown of steps or techniques within those sections can utilize H3 tags.
- Keyword Integration: Naturally weave your primary and secondary keywords throughout the article. Avoid keyword stuffing. Focus on providing valuable and informative content where keywords fit contextually.
- Image Optimization: Use high-quality images of your DIY wooden height chart throughout the article.
- Descriptive Filenames: Name your image files with relevant keywords (e.g., "diy-wooden-height-chart-design.jpg," "painted-growth-chart-markings.png").
- Alt Text: Provide descriptive alt text for each image. This helps search engines understand the image content and improves accessibility. For example, "A finished DIY wooden height chart with painted numbers and a personalized name."
- Internal Linking: Link to other relevant articles on your website (if applicable), such as "DIY Kids’ Room Decor Ideas" or "Beginner Woodworking Tips." This keeps users on your site longer and helps search engines discover more of your content.
- External Linking: Link to reputable external sources for additional information or product recommendations (e.g., a link to a trusted woodworking supply store or a guide on wood types). This adds credibility to your content.
- Content Depth and Value: Aim for a comprehensive and in-depth article that answers all potential user questions. A minimum of 1200 words, as requested, demonstrates thoroughness.
- Readability: Use clear, concise language. Break up long paragraphs with shorter ones, bullet points, and numbered lists to improve readability.
- User Experience (UX): Ensure your website is mobile-friendly, loads quickly, and has a clean, easy-to-navigate layout.
- Schema Markup: Consider implementing schema markup (e.g., for DIY projects) to help search engines better understand your content and potentially display rich snippets in search results.
- Social Sharing Buttons: Encourage readers to share your article on social media platforms. This can drive traffic and increase visibility.
- Regular Updates: Periodically review and update your content to ensure it remains fresh, accurate, and relevant. Add new tips, techniques, or updated product recommendations.
By consistently applying these SEO strategies, you will significantly increase the chances of your valuable DIY wooden height chart tutorial being discovered by individuals seeking to create this cherished keepsake.
