3 Natural DIY Shower Products sets the stage for this enthralling narrative, offering readers a glimpse into a story that is rich in detail with personal blog style and brimming with originality from the outset. Are you tired of harsh chemicals and artificial fragrances in your shower products?
Do you crave a more natural and sustainable approach to your self-care routine? If so, you’re in the right place! In this post, we’ll delve into the world of DIY shower products, exploring how to create your own shampoo, conditioner, body wash, and even a soothing shower steam using simple, natural ingredients.
Making your own shower products not only allows you to control the ingredients but also offers a chance to personalize your experience with scents and textures you love. From the nourishing benefits of coconut oil to the calming properties of lavender, we’ll uncover the secrets to crafting a truly luxurious and healthy shower routine.
Introduction to Natural DIY Shower Products

Stepping into the shower shouldn’t mean exposing yourself to a cocktail of chemicals. The shift towards natural living has extended to personal care, with many seeking gentle, eco-friendly alternatives to conventional shower products. DIY shower products using natural ingredients offer a refreshing approach to cleansing and pampering your skin, while minimizing environmental impact.
The allure of DIY shower products lies in the ability to control what goes onto your skin. You can tailor your recipes to suit your specific skin type and needs, avoiding harsh chemicals and artificial fragrances that can irritate sensitive skin.
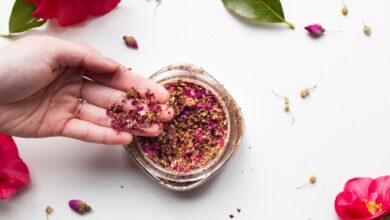
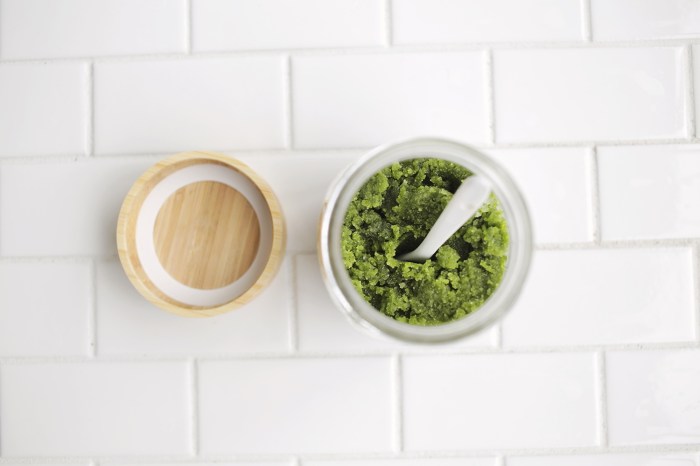
Making your own shower products with natural ingredients is a great way to pamper yourself and avoid harsh chemicals. I love using a blend of coconut oil, honey, and oatmeal for a luxurious scrub, or a simple mix of baking soda and water for a gentle cleanser.
If you’re looking for a little extra inspiration for your DIY beauty routine, check out this a twist on the classic three strand braid – it’s a fun way to add a little flair to your look! And remember, even simple DIY products can make a big difference in your daily routine.
Furthermore, creating your own products often leads to cost savings, particularly in the long run. The satisfaction of crafting your own personal care products adds an element of self-sufficiency and creativity to your daily routine.
Common Natural Ingredients Used in Shower Products
The beauty of natural ingredients lies in their versatility and abundance. From nourishing oils to soothing herbs, nature provides a treasure trove of options for crafting effective and gentle shower products. Here are some commonly used natural ingredients:
- Oils:Coconut oil, olive oil, jojoba oil, and argan oil are excellent moisturizers and can be used as bases for shower products. They are rich in fatty acids that nourish and protect the skin.
- Butters:Shea butter, cocoa butter, and mango butter are deeply hydrating and have anti-inflammatory properties, making them ideal for dry or sensitive skin.
- Herbs:Lavender, chamomile, calendula, and rosemary have calming and soothing properties. They can be added to shower products for their therapeutic benefits.
- Clays:Bentonite clay and kaolin clay are excellent cleansing agents that gently remove impurities and excess oil. They can be incorporated into DIY face masks or body washes.
DIY Shampoo Recipe: 3 Natural Diy Shower Products
Creating your own shampoo using natural ingredients is a fantastic way to pamper your hair while minimizing the use of harsh chemicals. This recipe combines the nourishing properties of coconut oil, the gentle cleansing power of castile soap, and the invigorating scents of essential oils.
Ingredients and Ratios
This recipe Artikels the essential ingredients and their proportions for a basic DIY shampoo. You can adjust the quantities based on your hair length and desired consistency.
- Coconut Oil: 1/4 cup (60 ml)
- Castile Soap: 1/4 cup (60 ml)
- Water: 1/2 cup (120 ml)
- Essential Oils (optional): 10-15 drops (your choice of scents)
Step-by-Step Guide
This guide provides a clear and easy-to-follow process for creating your homemade shampoo.
- Melt the Coconut Oil:In a heat-safe container, gently melt the coconut oil over low heat or in a warm water bath. Avoid overheating, as it can degrade the oil’s properties.
- Combine with Castile Soap:Once melted, add the castile soap to the coconut oil and stir until well combined. You should achieve a smooth and consistent mixture.
- Add Water:Gradually add the water to the mixture, stirring continuously to prevent clumping. The consistency should resemble a thin cream.
- Incorporate Essential Oils:If using essential oils, add your preferred blend to the mixture at this stage. Remember to choose oils that are suitable for your hair type and preferences.
- Store and Use:Transfer the shampoo into a clean container with a lid. Store it in a cool, dry place. To use, apply a small amount to wet hair, lather, and rinse thoroughly.
Important Considerations
- Consistency:The consistency of the shampoo can be adjusted by adding more or less water. For a thicker shampoo, use less water. For a thinner consistency, add more water.
- Storage:Homemade shampoos generally have a shorter shelf life compared to commercially available products. Store them in a cool, dry place and use within a few weeks for optimal freshness.
- Hair Type:Consider your hair type when choosing essential oils. For example, tea tree oil is known for its cleansing and antibacterial properties, while lavender oil is known for its calming and soothing effects.
DIY Conditioner Recipe
Looking for a natural and effective way to condition your hair? Look no further than your kitchen! This DIY conditioner recipe uses simple, readily available ingredients to nourish and soften your locks.
Ingredients and Benefits, 3 natural diy shower products
This conditioner recipe combines the power of apple cider vinegar, avocado oil, and honey, each offering unique benefits for your hair:
- Apple Cider Vinegar:Apple cider vinegar acts as a natural detangler and helps to restore the pH balance of your scalp, promoting healthy hair growth. It also adds shine and reduces frizz.
- Avocado Oil:Rich in vitamins A, D, and E, avocado oil deeply moisturizes and nourishes your hair, leaving it soft and manageable. It also helps to strengthen hair strands and prevent breakage.
- Honey:Honey is a natural humectant, meaning it attracts and retains moisture. This helps to hydrate your hair and scalp, leaving your hair soft and shiny. Honey also has antibacterial properties, which can help to soothe an irritated scalp.
Recipe Instructions
Here’s how to make your own natural conditioner:
Ingredients:
- 1/4 cup apple cider vinegar
- 1/4 cup avocado oil
- 2 tablespoons honey
Instructions:
- Combine all ingredients in a glass jar or bowl.
- Mix well until the ingredients are thoroughly combined.
- Apply the conditioner to your hair, focusing on the ends.
- Leave the conditioner on for 15-20 minutes, or longer if desired.
- Rinse thoroughly with cool water.
Application and Duration
This DIY conditioner can be used 1-2 times per week, depending on your hair type and needs. For best results, apply the conditioner to damp hair after shampooing. Leave the conditioner on for at least 15 minutes, but you can leave it on for longer if you desire.
Making your own shower products with natural ingredients is a great way to pamper yourself and avoid harsh chemicals. I recently tried a DIY body scrub with coffee grounds and coconut oil, and it left my skin feeling so smooth! I even used my trusty my great northern popcorn machine to roast the coffee beans for the scrub – it’s so versatile! Now, I’m looking forward to experimenting with other DIY shower products, like a peppermint shampoo or a lavender conditioner.
Rinse thoroughly with cool water to remove any residue.
DIY Body Wash Recipe
Looking for a gentle and natural way to cleanse your skin? Ditch the harsh chemicals and create your own DIY body wash using simple, nourishing ingredients. This recipe features aloe vera gel, jojoba oil, and essential oils, each providing unique benefits for your skin.
Ingredients and Their Benefits
The ingredients used in this DIY body wash are carefully selected for their skin-loving properties. Each component plays a crucial role in creating a luxurious and effective cleansing experience.
- Aloe vera gel:Known for its soothing and hydrating properties, aloe vera gel is a natural remedy for various skin conditions, including dryness, irritation, and acne. It helps to calm inflammation, promote healing, and keep the skin moisturized.
- Jojoba oil:Jojoba oil is a unique oil that closely resembles the skin’s natural sebum. This makes it an excellent moisturizer, as it can easily penetrate the skin without clogging pores. Jojoba oil also has antibacterial and anti-inflammatory properties, making it beneficial for acne-prone skin.
Making your own shower products is a great way to reduce waste and control the ingredients you’re using on your skin. A trip to the major new exhibition now open at the Kings Gallery London inspired me to try using some natural botanicals like chamomile and lavender in my DIY shower gels and scrubs.
Maybe I’ll even try making some botanical-infused soap next!
- Essential oils:Essential oils add a delightful fragrance to the body wash and offer various therapeutic benefits. The choice of essential oils depends on personal preference and desired effects. For example, lavender oil is known for its calming properties, while tea tree oil is renowned for its antimicrobial effects.
Making the DIY Body Wash
Creating your own body wash is a simple process that involves combining the ingredients in the right proportions. This recipe yields a gentle and effective body wash that leaves your skin feeling clean, soft, and refreshed.
Ingredients:
- 1/2 cup aloe vera gel
- 2 tablespoons jojoba oil
- 10-15 drops of your favorite essential oil (or a blend)
Instructions:
- In a clean container, combine the aloe vera gel, jojoba oil, and essential oils.
- Mix well until all ingredients are thoroughly blended.
- Transfer the body wash to a pump bottle or a container of your choice.
- Use as needed in the shower or bath.
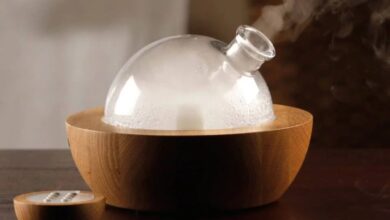
DIY Shower Steam Recipe

Transform your shower into a calming oasis with this simple DIY shower steam recipe. Combining the power of natural ingredients like eucalyptus leaves, rosemary, and lavender, this steam can help to open up your airways, ease stress, and leave you feeling refreshed.
Benefits of Ingredients
The ingredients used in this DIY shower steam recipe offer a range of benefits for respiratory health and stress relief.
- Eucalyptus leavesare known for their decongestant properties. They can help to open up airways, making breathing easier, especially during times of congestion or colds. The refreshing scent of eucalyptus can also help to clear the mind and promote feelings of alertness.
- Rosemaryis a powerful herb with a stimulating aroma. It can help to improve focus and memory, while also promoting relaxation and reducing stress. Rosemary is also believed to have antimicrobial properties, which can help to purify the air in your shower.
- Lavenderis renowned for its calming and relaxing properties. Its soothing scent can help to ease anxiety and promote restful sleep. Lavender can also help to reduce inflammation and promote skin health.
Using Shower Steam Effectively
To use this DIY shower steam effectively, follow these simple steps:
- Gather your ingredients:You will need a handful of fresh or dried eucalyptus leaves, a few sprigs of rosemary, and a small bunch of lavender flowers.
- Create your steam bundle:Place the herbs in a small muslin cloth or cheesecloth and tie it securely with a string or ribbon. This will create a bundle that can be easily hung in your shower.
- Hang the bundle:As the hot water starts to fill your shower, hang the herb bundle near the showerhead. The steam from the shower will release the essential oils and aromas from the herbs.
- Enjoy the benefits:Relax and breathe in the calming and refreshing aromas of the steam. You can also use this time to practice deep breathing exercises or simply enjoy a moment of peace and tranquility.
Storage and Shelf Life

Storing your DIY shower products properly is crucial to ensure their freshness, effectiveness, and safety. This is because natural ingredients can degrade over time, potentially losing their potency or even becoming harmful.
Storage Recommendations
Storing your homemade shower products correctly is essential for maintaining their quality and extending their shelf life.
- Airtight Containers:Store your DIY shower products in airtight containers, such as glass jars or bottles with lids. This helps prevent air and moisture from entering, which can oxidize ingredients and cause spoilage.
- Cool, Dark Place:Keep your DIY shower products in a cool, dark place, away from direct sunlight and heat. Excessive heat can degrade the ingredients and compromise their effectiveness.
- Avoid Moisture:Ensure that the containers are completely dry before storing them. Moisture can encourage the growth of mold and bacteria.
- Labeling:Label your containers with the product name, date of creation, and any specific storage instructions.
Shelf Life of DIY Shower Products
The shelf life of homemade shower products can vary depending on the ingredients used and the storage conditions.
- General Guidelines:Most DIY shower products have a shelf life of 2-4 weeks when stored properly. However, products with a higher concentration of perishable ingredients, such as fresh herbs or fruits, may have a shorter shelf life.
- Visual Inspection:Always visually inspect your DIY shower products before use. If you notice any signs of spoilage, such as mold, discoloration, or an off odor, discard the product immediately.
Extending Shelf Life
There are a few strategies you can use to extend the shelf life of your DIY shower products.
- Preservatives:Consider adding a natural preservative, such as grapefruit seed extract or vitamin E oil, to your DIY shower products. These ingredients can help inhibit the growth of bacteria and mold.
- Smaller Batches:Make smaller batches of your DIY shower products to reduce the risk of spoilage. This allows you to use the products before they have a chance to go bad.
- Refrigeration:Some DIY shower products, particularly those with perishable ingredients, may benefit from refrigeration. This can help slow down the degradation process.