
3 Ways to Add Lettering to Sugar Cookies – Want to add a personal touch to your sugar cookies? Lettering is a great way to make them extra special, and there are a few different techniques you can use to achieve the perfect look.
From the classic royal icing to the modern convenience of edible markers, we’ll explore three popular methods for adding lettering to your sugar cookies.
Each technique offers unique advantages and considerations, so let’s dive into the world of sugar cookie lettering and discover which method best suits your needs and creative vision.
Royal Icing Lettering
Royal icing is a popular choice for decorating sugar cookies because it dries hard and creates a smooth, glossy finish. It’s also incredibly versatile and can be used to create a wide range of lettering styles.This technique is a favorite for its precision and ability to create stunning, detailed designs.
From royal icing to edible markers, there are so many ways to personalize sugar cookies. But sometimes, I find myself craving something a little more substantial. That’s when I head to my cozy breakfast nook, where I can enjoy a cup of coffee and a delicious breakfast.
If you’re looking for inspiration for your own breakfast space, I highly recommend checking out built-in breakfast nooks. They’re the perfect place to relax and recharge, and they can be customized to fit your personal style. Once I’m fueled up, I’m ready to tackle any cookie decorating challenge!
Preparing Royal Icing
Royal icing is made with powdered sugar, egg whites, and a small amount of lemon juice or meringue powder. The consistency of the icing can be adjusted by adding more powdered sugar or water. Here are the steps for preparing royal icing:
- In a large bowl, whisk together powdered sugar and meringue powder.
- Gradually add egg whites, whisking constantly until the icing is smooth and glossy.
- Add a few drops of lemon juice or vanilla extract for flavor.
- Divide the icing into separate bowls and tint each bowl with different food colors.
- Store the icing in airtight containers at room temperature for up to 2 weeks.
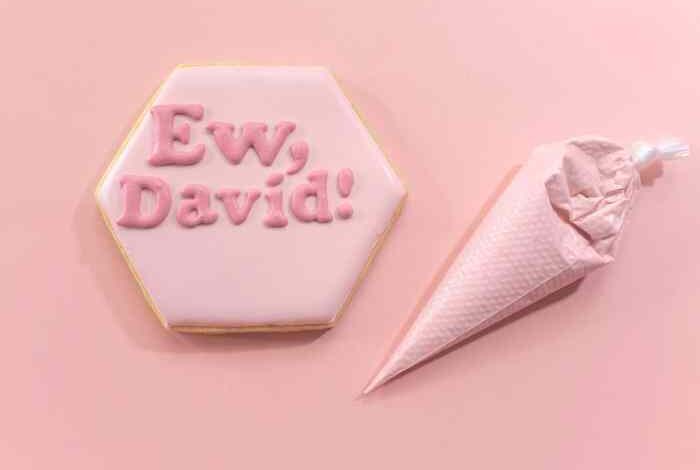
Piping Letters with Royal Icing
Piping royal icing requires a steady hand and some practice. Here’s a step-by-step guide to piping letters:
- Fill a piping bag with royal icing, using a round tip.
- Hold the piping bag at a 45-degree angle to the cookie.
- Start by piping a thin line of icing for the base of the letter.
- Gently squeeze the piping bag and lift the tip slightly as you pipe the letter.
- To create curves, gently rotate the cookie as you pipe.
- Use a toothpick to smooth out any imperfections in the icing.
Piping Techniques for Different Lettering Styles
There are many different piping techniques that can be used to create a variety of lettering styles.
From royal icing to edible markers, there are so many ways to personalize your sugar cookies! Adding lettering is a fun way to create festive treats for the holidays, and I’m always looking for new ideas. Speaking of festive, the Newbridge Silverware Christmas Fair ends this weekend , so if you’re looking for some unique gifts, you’ll want to head over there before it’s too late.
Back to cookies, I’m also experimenting with stencils to create intricate designs on my sugar cookies. The possibilities are endless!
- Script Lettering:For script lettering, use a small, round tip and a light touch. Start with a thin line and gently curve the icing as you pipe.
- Block Lettering:For block lettering, use a larger, round tip and a steady hand. Pipe straight lines and sharp corners.
- Artikeld Lettering:For Artikeld lettering, pipe the Artikel of the letter first, then fill it in with icing.
- Embossed Lettering:For embossed lettering, pipe a thin line of icing for the base of the letter, then use a toothpick to create raised lines.
Tips for Achieving Clean, Crisp Lettering
- Use a piping bag with a strong coupler to prevent the icing from leaking.
- Practice piping letters on a piece of parchment paper before piping on the cookies.
- Allow the icing to dry completely before handling the cookies.
- Use a toothpick to smooth out any imperfections in the icing.
- If the icing is too thick, add a few drops of water to thin it out.
- If the icing is too thin, add a little powdered sugar to thicken it up.
Edible Marker Lettering: 3 Ways To Add Lettering To Sugar Cookies
Edible markers are a fun and easy way to add lettering to sugar cookies. They are a great option for beginners because they are less intimidating than royal icing. Edible markers are also very versatile, allowing you to create a wide range of lettering styles.
Benefits and Drawbacks of Edible Markers
Edible markers offer several benefits, including their ease of use and versatility. However, they also have some drawbacks.
- Benefits:
- Easy to use: Edible markers are simple to handle and require minimal practice.
- Versatile: They allow for various lettering styles, from simple to intricate.
- Quick drying: Edible markers dry quickly, minimizing the risk of smudging.
- No mess: Unlike royal icing, edible markers don’t require any special tools or clean-up.
- Drawbacks:
- Limited color options: Edible markers are typically available in a smaller range of colors compared to royal icing.
- Less precise: Achieving fine details or intricate designs might be challenging with edible markers.
- Cost: Edible markers can be more expensive than royal icing.
Using Edible Markers for Lettering
To use edible markers for lettering on sugar cookies, follow these steps:
- Prepare the Cookies:Ensure your cookies are completely cooled and dry before applying the marker.
- Choose Your Marker:Select an edible marker with a tip suitable for the desired lettering size. For fine lettering, use a thin tip marker, and for bolder lettering, opt for a thicker tip marker.
- Practice:Before applying the marker to the cookies, practice your lettering on a piece of parchment paper. This will help you get a feel for the marker’s flow and pressure.
- Apply the Lettering:Carefully apply the marker to the cookie, using light pressure and smooth strokes. If you make a mistake, use a damp cotton swab to gently erase the error.
- Let Dry:Allow the lettering to dry completely before handling the cookies.
Tips for Achieving Smooth Lines and Avoiding Smudging
To achieve smooth lines and avoid smudging, follow these tips:
- Use a steady hand:Hold the marker firmly and use a steady hand when applying it to the cookies.
- Apply light pressure:Avoid pressing too hard on the marker, as this can cause the ink to bleed or smudge.
- Use smooth strokes:Apply the marker in smooth, continuous strokes to create clean lines.
- Let dry completely:Ensure the lettering is fully dry before stacking or storing the cookies.
Types of Edible Markers
Edible markers are available in a variety of types, each with its own unique properties and uses.
- Water-based Markers:These markers are generally the most popular type for lettering on sugar cookies. They are easy to use and blend well, offering a smooth finish. However, they may require a longer drying time compared to other types.
- Oil-based Markers:Oil-based markers provide a more vibrant and opaque finish, making them suitable for creating bold lettering or intricate designs. However, they can be slightly more difficult to control and may take longer to dry.
- Gel Markers:Gel markers offer a unique texture and vibrant colors. They are often used for adding a touch of dimension or shine to lettering.
Stencil Lettering

Stencil lettering is a fun and easy way to add personalized designs to your sugar cookies. This method allows you to create precise, professional-looking lettering with minimal effort. You can create intricate designs, logos, or messages with stencils, making your cookies even more unique.
Stencil Materials
Stencil materials are crucial for achieving crisp, clean lettering. Here’s a breakdown of common materials and their suitability:
- Plastic Stencils:These are readily available and offer a balance of durability and flexibility. They are suitable for both simple and intricate designs.
- Vinyl Stencils:Vinyl stencils are highly durable and reusable, making them a great option for frequent use. They are ideal for intricate designs with fine details.
- Laser-Cut Stencils:These stencils are precision-cut, offering exceptional detail and accuracy. They are commonly used for professional applications and intricate designs.
- Reusable Mylar Stencils:Mylar stencils are known for their flexibility and durability, making them suitable for various designs and applications. They can be washed and reused multiple times.
Applying Icing Through Stencils, 3 ways to add lettering to sugar cookies
To achieve clean and sharp lettering with stencils, follow these steps:
- Prepare the Cookie:Ensure your cookie is completely cooled and dry before applying the stencil.
- Secure the Stencil:Place the stencil firmly onto the cookie, ensuring it’s centered and aligned. Use a rolling pin or a clean, flat object to gently press the stencil onto the cookie surface.
- Apply Icing:Use a piping bag fitted with a round tip to carefully apply icing through the stencil openings. Work in small sections to avoid flooding the stencil.
- Remove the Stencil:Gently lift the stencil away from the cookie once the icing has set slightly. Avoid lifting the stencil too early, as this could smudge the icing.
- Clean the Stencil:After use, clean the stencil with warm, soapy water and allow it to dry completely before storing.
Creating Custom Stencils
- Hand-Cut Stencils:Use a craft knife and a cutting mat to create your own stencils from materials like acetate or vinyl. This allows for complete design freedom and personalization.
- Digital Stencil Design:Design your stencils digitally using software like Adobe Illustrator or Inkscape. You can then print your designs onto stencil material or send them to a professional cutter for precise laser-cutting.
- Using a Cricut Machine:A Cricut machine can be used to cut stencils from a variety of materials, offering precision and convenience.
From royal icing to edible markers, there are so many fun ways to add lettering to sugar cookies! But sometimes, it’s nice to take a break from the baking and try a different kind of crafting, like learning how to upcycle a lip balm into an ornament.
Once you’re back to the cookies, you can experiment with using stencils for a clean look, or freehanding for a more whimsical touch.