
DIY Star Trim Closet Door: Enhance Your Interior Design with a Classic Touch
The star trim closet door, a timeless design element, offers a sophisticated yet approachable DIY project to elevate any room’s aesthetic. This guide details the process of crafting and installing a star trim closet door, focusing on materials, techniques, and optimization for online visibility. Understanding the principles behind this design, its benefits, and the practical steps involved is crucial for successful execution and achieving a polished, professional finish. The inherent charm of the star motif, often associated with mid-century modern and other retro styles, provides a unique visual anchor that can significantly impact a room’s overall feel. This project is not merely about a functional door but about introducing a piece of architectural detail that speaks to a discerning design sensibility.
Understanding the Star Trim Design and Its Appeal
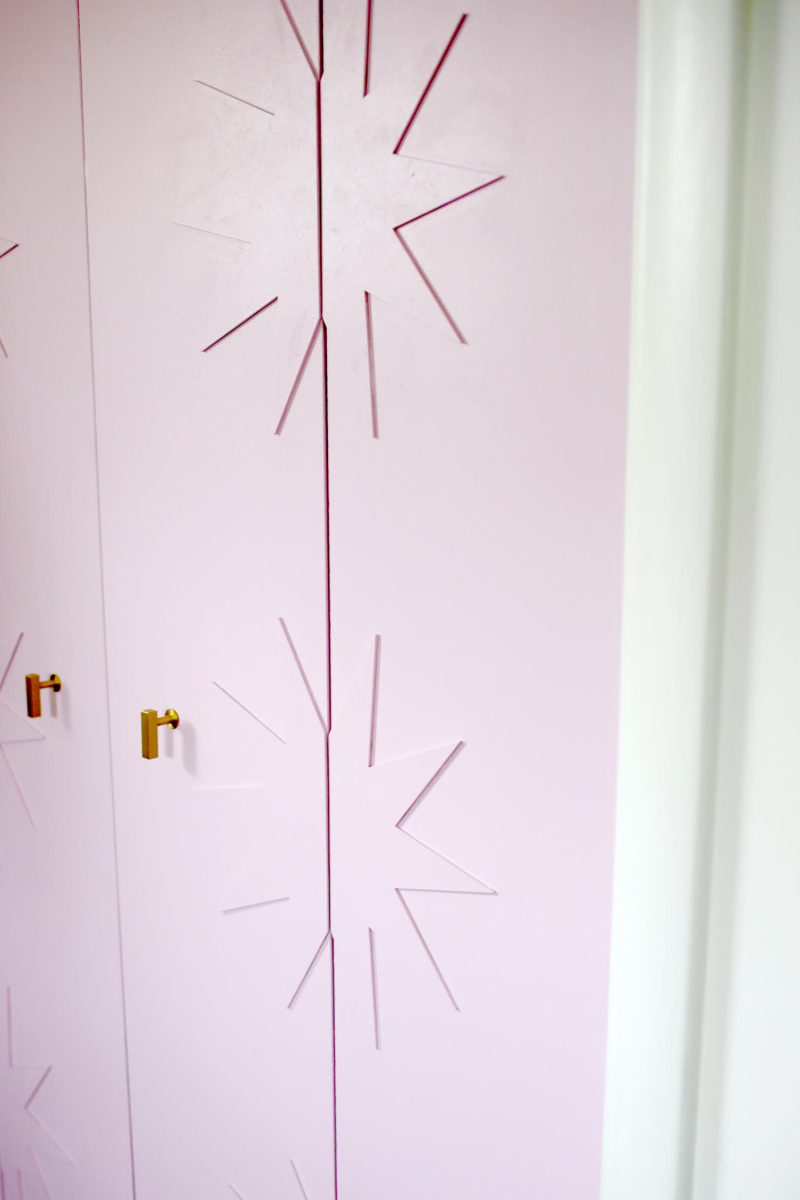
The star trim, in the context of closet doors, typically refers to decorative molding or inserts applied to the door’s surface, often in a repeating star pattern. This pattern can range from simple geometric stars to more ornate, stylized interpretations. The appeal lies in its ability to add visual interest and a touch of personality to an otherwise utilitarian element. Historically, star motifs have been used in various architectural styles, symbolizing celestial observation, guidance, and sometimes, a sense of wonder. For DIY enthusiasts, the star trim closet door represents an opportunity to infuse a personalized touch into their living spaces, transforming a standard door into a statement piece. The clean lines and symmetrical nature of many star designs also lend themselves well to modern and minimalist interiors, providing a subtle yet impactful detail. Furthermore, the DIY aspect allows for complete control over materials, colors, and the density of the star pattern, catering to individual design preferences and budget constraints.
Materials and Tools Required for Your DIY Star Trim Closet Door Project
To embark on your DIY star trim closet door project, a curated selection of materials and tools is essential. For the door itself, consider a solid core or hollow core flush door, depending on your budget and desired sound insulation. High-quality MDF or wood molding will be necessary for the star trim. The width and thickness of the molding will dictate the visual prominence of the stars. For adhesive, a strong wood glue or construction adhesive is recommended. Sandpaper in various grits (e.g., 120, 220) is crucial for preparing surfaces and smoothing edges. Primer and paint will allow you to match the door and trim to your existing décor. For tools, a miter saw or a precise hand saw with a miter box is vital for cutting accurate angles for the star points. A measuring tape and pencil are fundamental for layout and marking. A nail gun or a hammer and finishing nails will secure the trim. A putty knife and wood filler will address any imperfections, and a level will ensure a plumb and straight installation. Safety equipment, including safety glasses and gloves, should always be worn. For precise application of trim, a router with a decorative bit can be used to create more intricate star shapes if desired, though this requires advanced woodworking skills. If opting for simpler, cut-out stars, a jigsaw might be a more appropriate tool.
Step-by-Step Guide to Creating Your Star Trim Closet Door
The creation of a star trim closet door involves several distinct stages, each requiring careful attention to detail.
1. Design and Template Creation:
Begin by deciding on the style and density of your star pattern. You can find numerous free templates online or design your own. For a classic look, a repeating pattern of equilateral stars is popular. Print your chosen star design to scale. You will then transfer this design onto a thin material like cardboard or MDF to create a reusable template. For accurate placement, it’s beneficial to sketch a grid on the door where the stars will be positioned, ensuring consistent spacing.
2. Preparing the Door:
Ensure the door surface is clean, smooth, and free of any existing hardware. If repainting an existing door, sand it down to create a good surface for adhesion. Fill any dents or imperfections with wood filler and sand smooth once dry. For a professional finish, apply a coat of primer and allow it to dry completely.
3. Cutting the Trim:
This is a critical step. Using your template and miter saw (or hand saw and miter box), cut the molding into the desired lengths to form the star shapes. For a standard five-pointed star, you’ll be cutting multiple angled pieces. Precision is paramount here to ensure the points of the stars meet seamlessly. Measure and mark each piece carefully before cutting. It’s often advisable to cut a few extra pieces in case of mistakes.
4. Assembling and Attaching the Trim:
Apply wood glue to the back of each trim piece. Carefully position the trim onto the door according to your planned layout, using your grid lines as a guide. Secure the trim with finishing nails, being careful not to split the wood. A nail gun will provide a more consistent and less intrusive finish. For larger or heavier trim pieces, consider using construction adhesive in addition to nails for extra durability. Once all the trim is attached, use wood filler to cover nail heads and fill any gaps between trim pieces. Sand smooth once dry.
5. Finishing Touches:
After the wood filler has dried and been sanded smooth, apply a second coat of primer if needed, followed by your chosen paint color. Multiple thin coats of paint are preferable to one thick coat for a smoother, more durable finish. Allow each coat to dry thoroughly before applying the next. Consider a topcoat or sealant for added protection, especially in high-traffic areas.
Installing the Star Trim Closet Door
Once your star trim door is fully constructed and painted, the installation process is similar to any standard closet door.
1. Removing the Old Door:
Carefully remove the existing closet door. This usually involves unscrewing the hinges from the door frame and the door itself. Keep the hinges and any hardware, as you may be able to reuse them.
2. Preparing the Frame:
Inspect the door frame for any damage or rot. Make any necessary repairs. Ensure the frame is plumb and level.
3. Hanging the New Door:
Attach the hinges to your new star trim door. With assistance, align the door in the frame and attach the hinges to the frame, ensuring the door swings freely and closes properly. Adjust the hinges as needed to achieve a perfect fit. Install any new hardware, such as doorknobs or pulls.
SEO Optimization Strategies for Your DIY Star Trim Closet Door Project
To ensure your DIY star trim closet door project gains visibility online, incorporating specific SEO strategies is essential.
- Keyword Research: Identify relevant keywords that potential DIYers would use when searching for this type of project. Examples include "DIY star trim closet door," "how to make a decorative closet door," "easy woodworking projects for doors," "unique closet door ideas," and "custom closet door designs." Integrate these keywords naturally throughout your content, including the title, headings, and body text.
- Compelling Title and Headings: Craft a title that is descriptive and includes primary keywords. Use H2 and H3 tags to structure your article logically and incorporate secondary keywords into these headings. For instance, "Materials and Tools for Your DIY Star Trim Closet Door" as an H2.
- High-Quality Content: Provide comprehensive, accurate, and actionable information. The detailed step-by-step guide is a prime example. Aim for content that answers users’ questions thoroughly and offers practical advice.
- Image Optimization: Use high-quality images and videos of your star trim closet door project at various stages. Optimize these images by using descriptive file names (e.g.,
diy-star-trim-closet-door-assembly.jpg) and adding alt text that includes relevant keywords (e.g., "Assembling star trim on a DIY closet door"). - Internal and External Linking: Link to other relevant DIY projects on your website or to reputable external resources for materials or inspiration. This can improve user engagement and search engine understanding of your content’s context.
- Readability and User Experience: Ensure your article is easy to read with clear paragraphs, concise sentences, and appropriate formatting. A well-organized and visually appealing article keeps users on your page longer, signaling to search engines that your content is valuable.
- Meta Description: Write a compelling meta description that summarizes your article and includes primary keywords. This snippet appears in search results and entices users to click.
- Encourage Engagement: Include calls to action, such as asking readers to share their own projects or ask questions in the comments section. This can boost user interaction and signal content freshness to search engines.
- Structured Data Markup: Consider using schema markup for DIY projects to help search engines better understand the content. This can lead to rich snippets in search results, increasing click-through rates.
Variations and Customization Options for Your Star Trim Closet Door
The beauty of a DIY project lies in its inherent adaptability. The star trim closet door is no exception, offering numerous avenues for personalization. Beyond the classic five-pointed star, consider exploring different star geometries like octagrams or even abstract starburst designs. The scale of the stars is another significant customization point. Opt for a dense, all-over pattern for a dramatic statement, or a sparser arrangement of larger stars for a more minimalist, contemporary feel. The material of the trim itself can be varied. While wood or MDF is common, acrylic or even metallic trims can offer a unique modern twist. For a more rustic or bohemian aesthetic, consider using reclaimed wood for the trim.
The finishing of the door and trim presents another vast landscape for creativity. Instead of a solid paint color, explore techniques like distressing, faux finishing, or even a two-tone effect where the trim is a contrasting color to the door panel. Staining the wood trim and leaving the door a painted color, or vice versa, can also create a striking contrast. For a playful and child-friendly touch, consider vibrant, unexpected color combinations. If you are working with unpainted wood, the grain pattern itself can become a design element, especially when paired with a clear or lightly tinted sealant.
The placement of the trim is also flexible. While a centered pattern is traditional, consider an asymmetrical arrangement or a design that follows the natural lines of the door. You could even create a border of stars around the perimeter of the door for a subtle yet impactful framing effect. For a truly unique approach, integrate LED strip lighting behind the trim for a backlit, ethereal glow, transforming the closet door into a luminous feature. This would require careful planning for wiring and power sources but offers a high-impact, modern update.
Troubleshooting Common Issues in DIY Star Trim Projects
Even with careful planning, DIY projects can encounter snags. For the star trim closet door, common issues often revolve around the precision of the trim cuts and adhesion.
- Gaps in Trim Joints: If you notice small gaps where trim pieces meet, particularly at the star points, this can usually be rectified with wood filler. Apply a small amount with a putty knife, allow it to dry completely, and then sand it smooth before painting. For larger gaps, you might need to re-cut a piece for a tighter fit.
- Splitting Wood: This often occurs when nailing too close to the edge of the wood or using nails that are too large. If a piece splits, you may need to replace it. To prevent this, pre-drill pilot holes for your nails, especially when working with thinner molding. Use finishing nails and a hammer with a controlled strike, or better yet, a brad nailer set to the correct pressure.
- Trim Not Adhering: If the trim starts to peel or detach, it’s likely due to insufficient adhesive or an improperly prepared surface. Ensure you are using a strong wood glue or construction adhesive and that both the door surface and the back of the trim are clean and free of dust. If the problem is minor, you can try re-gluing and clamping the trim. For more significant adhesion issues, you may need to remove the trim, clean both surfaces thoroughly, and reapply the adhesive before re-securing.
- Uneven Spacing or Alignment: This is where accurate measuring and templating from the outset are crucial. If you find a star is noticeably out of place, it might be possible to carefully pry it off (being cautious not to damage the door), fill the holes, and reapply it in the correct position. For minor deviations, creative painting or the addition of other decorative elements can sometimes camouflage slight imperfections.
- Sanding Challenges: Achieving a perfectly smooth finish, especially around intricate trim, can be challenging. Use sanding sponges or fine-grit sandpaper wrapped around a dowel to reach tight areas. Always sand in the direction of the wood grain. For painted surfaces, a smooth finish is paramount, so don’t rush the sanding process.
By anticipating these potential problems and having solutions ready, your DIY star trim closet door project will be a much smoother and more rewarding experience.
Conclusion: The Enduring Appeal of a DIY Star Trim Closet Door
The DIY star trim closet door is more than just a woodworking project; it’s an investment in personalized style and enhanced home décor. The enduring appeal of the star motif, combined with the satisfaction of a handcrafted addition, makes this a project well worth undertaking. By meticulously following the steps, utilizing the right materials, and embracing creative customization, you can transform a standard closet door into a focal point that reflects your unique taste. The SEO considerations woven throughout this guide are designed to not only help you find inspiration and tutorials but also to share your own successful creation with a wider audience, fostering a community of DIY enthusiasts and inspiring further creative endeavors. The star trim closet door stands as a testament to the power of thoughtful design and the rewarding nature of DIY craftsmanship, adding a touch of timeless elegance and individuality to any interior space.
