Mastering the Art: A Comprehensive Guide to At-Home Fabric Dyeing
Achieving vibrant, consistent, and long-lasting color on fabric at home is an achievable and rewarding endeavor. This comprehensive guide delves into the essential techniques, material considerations, and troubleshooting tips necessary for successful at-home fabric dyeing, catering to both beginners and those looking to refine their skills. Understanding the fundamental principles of fiber reactivity, dye types, and application methods is paramount to achieving professional-looking results. The success of your dyeing project hinges on meticulous preparation, careful execution, and a thorough understanding of the materials involved.
The choice of fabric dye is dictated by the fiber content of the material being dyed. Fiber-reactive dyes, such as Procion MX, are the most versatile and are ideal for cellulose fibers like cotton, linen, rayon, and hemp. These dyes form a permanent covalent bond with the fiber, resulting in exceptional colorfastness to washing and light. For protein fibers, including wool, silk, and nylon, acid dyes are the preferred choice. These dyes require an acidic environment to bond with the fiber. All-purpose dyes, while convenient, often lack the vibrant hues and washfastness of specialized dyes and should be approached with caution for projects demanding durability. Always consult the dye manufacturer’s instructions regarding fiber compatibility and recommended application methods. Misinterpreting fiber content can lead to uneven dyeing, faded colors, or complete dye failure. Prior to dyeing, meticulously identify the fiber composition of your fabric. Natural fibers accept dye more readily and predictably than synthetic fibers. Blends can be dyed, but the resulting color will be a composite, influenced by the dyeing properties of each fiber.
Preparation of the fabric is a critical, often overlooked, step that significantly impacts the final outcome. All fabrics, even new ones, often have finishes, sizing agents, or oils that can repel dye, leading to uneven coloration. Thoroughly wash the fabric using a pH-neutral detergent in hot water to remove any such impurities. Avoid fabric softeners during this pre-wash, as they can create a barrier to dye absorption. For natural fibers, a pre-soak in a soda ash solution (for fiber-reactive dyes) or a mild acid solution (for acid dyes) can further enhance dye uptake and bonding. Soda ash acts as an alkali, raising the pH and enabling fiber-reactive dyes to form their chemical bond. For acid dyes, a small amount of white vinegar or citric acid can create the necessary acidic environment for protein fibers. Rinse the fabric thoroughly after any pre-soaking treatment to remove residual chemicals that could interfere with the dyeing process. Ensure the fabric remains wet throughout the dyeing process; dry spots will result in lighter, uneven patches of color.
The dyeing environment requires careful consideration for both safety and optimal results. Work in a well-ventilated area, preferably outdoors or near an open window, to minimize exposure to dye fumes. Protect your workspace with plastic sheeting or old newspapers to prevent staining. Wear old clothing and protective gear, including gloves and a mask, to safeguard yourself from accidental spills and airborne dye particles. Tools and containers used for dyeing should be dedicated solely to this purpose and not used for food preparation. Stainless steel or heat-resistant plastic containers are recommended. Avoid aluminum or iron as they can react with certain dyes and alter the color. Maintaining a consistent temperature throughout the dyeing process is crucial. For fiber-reactive dyes, warmer temperatures (typically 80-90°F or 27-32°C) promote faster dye uptake. Acid dyes often require higher temperatures, sometimes simmering or even boiling, depending on the specific dye and fiber.
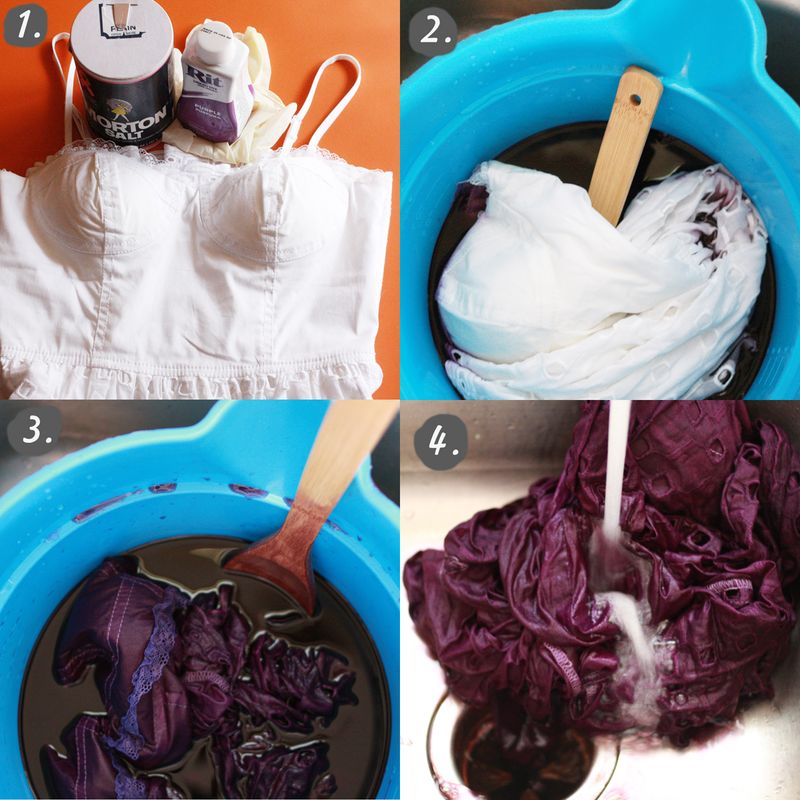
When it comes to dye application techniques, several methods offer distinct aesthetic results. The immersion dyeing method is the most common and provides a uniform color. This involves submerging the prepared fabric in a dye bath. The ratio of dye to fabric is crucial for achieving the desired depth of color. Manufacturers typically provide guidelines, but a common starting point is 1-2% dye by weight of the fabric (WOF) for pale shades, increasing to 8-10% WOF for deep, saturated colors. Always dissolve dye powders thoroughly in a small amount of hot water before adding them to the main dye bath to prevent clumping and uneven dyeing. Stir the dye bath and fabric frequently to ensure even exposure to the dye. For immersion dyeing with fiber-reactive dyes, allowing the fabric to cure in a warm, humid environment for several hours (or even overnight) after removal from the dye bath significantly enhances colorfastness.
Tie-dyeing, shibori, and ice dyeing are popular techniques that leverage controlled application to create patterned effects. Tie-dyeing involves tightly binding sections of the fabric with rubber bands or string to resist dye penetration, creating white or lighter-colored patterns. Shibori is a Japanese resist-dyeing technique that utilizes a variety of methods, including binding, stitching, folding, and clamping, to create intricate patterns. Ice dyeing involves placing fabric over ice, then sprinkling dye powder onto the melting ice. As the ice melts, the dye disperses unevenly, creating beautiful, unpredictable watercolor-like effects. Each of these techniques requires specific folding, tying, or placement strategies to achieve desired outcomes. Experimentation with different resists and binding methods is key to unlocking unique patterns.
Discharge dyeing offers a contrasting approach, removing color from pre-dyed fabric to create patterns or lighter areas. This typically involves using a discharge agent, such as sodium hydrosulfite, which chemically breaks down certain types of dyes. Discharge dyeing is most effective on fabrics dyed with fiber-reactive or vat dyes. The process involves applying the discharge paste to the fabric, allowing it to develop, and then rinsing thoroughly. Safety precautions are paramount when working with discharge agents, as they can be strong chemicals and require good ventilation.
After the dyeing process is complete, the rinsing and washing stages are vital for removing excess dye and setting the color. Begin by rinsing the fabric in cool water until the water runs clear. This helps to wash away any unfixed dye particles. Subsequently, wash the fabric in warm water with a pH-neutral detergent. For fiber-reactive dyes, a final rinse in a salt solution (non-iodized salt) can help to further fix the dye and improve washfastness. For acid dyes, a final rinse with a mild acid, like vinegar, can help to neutralize the bath and set the color. Avoid harsh detergents or bleach, which can strip the color. Ironing the fabric after it has completely dried can further help to set the dye.
Troubleshooting common issues is an integral part of mastering at-home fabric dyeing. Uneven dyeing, or splotchiness, can result from insufficient agitation, insufficient dye bath volume, dry spots on the fabric, or the presence of residual finishing agents. Ensure you are using enough dye bath for the amount of fabric and that the fabric is fully submerged and moves freely. For fiber-reactive dyes, insufficient curing time or temperature can lead to fading or pale colors. Always adhere to the recommended curing times and temperatures. Color inconsistencies between batches can arise from variations in water temperature, dye concentration, or water quality. If you are using tap water, consider testing its pH and mineral content, as these can influence dye behavior. For future dyeing, strive for consistency in your process. Fading can also occur if the fabric was not adequately prepared or if the dye type is not colorfast for the intended use. Always research the lightfastness and washfastness of your chosen dyes, especially for items that will be exposed to sunlight or laundered frequently.
White spots or streaks, often referred to as "dye ghosts," can appear when dye fails to penetrate certain areas. This is frequently due to the presence of invisible contaminants on the fabric, such as oils or fabric softener residue from previous washes. A thorough pre-wash with a strong detergent, or even a fabric scavenger treatment designed to remove such residues, can often resolve this. Another cause can be tightly bound fibers, particularly in loosely woven fabrics, where dye cannot reach the core. Gentle manipulation and adequate dye bath volume can help mitigate this.
When experimenting with colors, understanding color theory and how dyes interact is essential. Mixing primary colors (yellow, blue, red) will create secondary colors (orange, green, violet). However, due to the unique properties of fabric dyes, achieving precise secondary colors can be challenging. It’s often more effective to use pre-mixed secondary or tertiary colors, or to gradually build up shades by adding small amounts of dye. Keep a record of your dye mixtures and their results, creating swatches to refer to for future projects. This detailed record-keeping is invaluable for reproducibility.
For specific effects, such as ombre or gradient dyeing, the process involves gradually diluting the dye bath. Start with a concentrated dye bath and gradually add more water to create lighter shades. Dip the fabric incrementally, allowing each section to soak for a specific amount of time to achieve a smooth transition of color. This technique requires patience and careful observation.
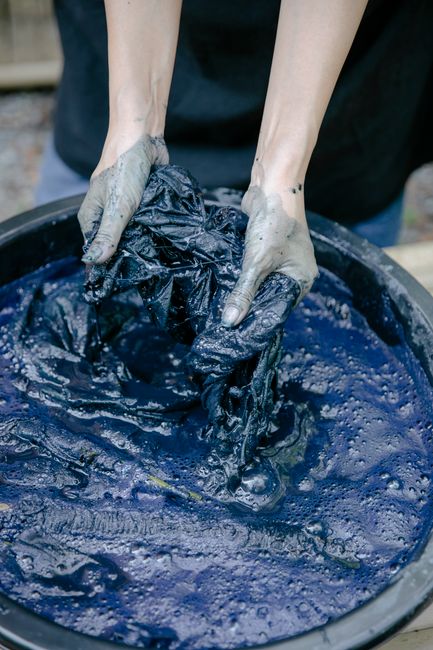
The environmental impact of fabric dyeing is a growing concern. Opting for natural dyes derived from plants, minerals, or insects can be a more sustainable choice, though their colorfastness and vibrancy can vary significantly and often require mordants (fixatives) to bind to the fiber. Researching the mordants used is crucial, as some can be toxic. When using synthetic dyes, select reputable brands that offer environmentally conscious options or take-back programs. Proper disposal of dye baths and rinse water is also important; never pour concentrated dye solutions directly into drains or waterways. Dilute dye baths thoroughly with plenty of water before disposal, and consider using a wastewater treatment system if available, especially for larger-scale operations.
Safety cannot be overemphasized. Always read and follow the safety data sheets (SDS) provided by dye manufacturers. Ensure proper ventilation, wear appropriate personal protective equipment (PPE), and keep dyes and chemicals out of reach of children and pets. Familiarize yourself with first-aid procedures for chemical exposure.
In conclusion, successful at-home fabric dyeing is a multifaceted process that rewards careful planning and execution. By understanding fiber types, selecting appropriate dyes, meticulously preparing fabrics, employing effective application techniques, and addressing common issues, you can unlock a world of creative possibilities and transform plain textiles into vibrant works of art. The journey of mastering at-home fabric dyeing is one of continuous learning, experimentation, and the satisfaction of bringing color to life.
