
DIY Porch Swing: Build Your Own Comfortable Haven
Embarking on a DIY porch swing project is a rewarding endeavor that allows you to customize a beautiful and functional piece of outdoor furniture tailored to your personal style and available space. Beyond the aesthetic appeal, a porch swing offers a unique way to relax, connect with nature, and enhance your home’s curb appeal. This comprehensive guide will walk you through the entire process, from selecting the right materials and design to the final installation and finishing touches. You’ll discover that with careful planning, basic woodworking skills, and the right tools, building a sturdy and comfortable porch swing is entirely achievable, even for those new to DIY.
Understanding Porch Swing Designs and Styles
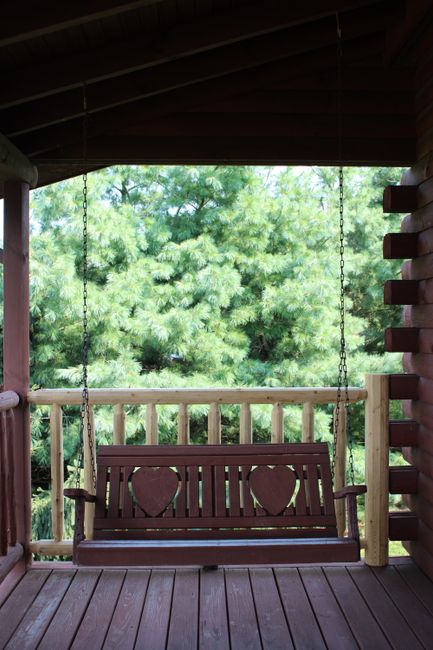
Before picking up a saw, it’s crucial to consider the various porch swing designs available and how they might suit your needs. The most common type is the classic wooden porch swing, which offers a timeless appeal and can be adapted to numerous decorative styles. These typically feature a plank seat, a slightly reclined back, and armrests. Variations include A-frame swings, which are freestanding and don’t require mounting to a porch ceiling, and glider swings, which offer a gentle back-and-forth motion. For those with limited space or a desire for a more modern look, a bench swing, which is essentially a wider, stationary swing that can accommodate multiple people, is an excellent option. Consider the size of your porch, the intended use (e.g., solo relaxation versus family gatherings), and your aesthetic preferences when making this decision. Do you envision a rustic, farmhouse-style swing adorned with distressed wood and simple lines, or a more contemporary design with clean angles and a sleek finish? The available structural support of your porch is also a critical factor; a robust, load-bearing porch ceiling or strong overhead beams are essential for securely hanging a traditional swing.
Material Selection: Durability, Aesthetics, and Budget
The choice of materials significantly impacts the longevity, appearance, and cost of your DIY porch swing. For the main structure, hardwoods like cedar, redwood, or teak are highly recommended due to their natural resistance to rot, insects, and weathering. Cedar and redwood are more budget-friendly than teak but still offer excellent durability. Pine is a more economical option but requires thorough sealing and regular maintenance to protect it from the elements. If you opt for treated lumber, ensure it’s rated for outdoor use and consider its environmental impact. For the hanging hardware, opt for galvanized or stainless steel to prevent rust. This includes eye bolts, swing hangers, S-hooks, and chain or rope. The type of chain or rope you choose will also affect the swing’s look and feel. Metal chain offers durability and a classic industrial aesthetic, while thick, weather-resistant rope can lend a more natural, bohemian vibe. Consider the weight capacity of your chosen hardware; it’s always better to err on the side of caution and select hardware rated for more than you anticipate needing. For comfort, consider cushions made from outdoor-grade fabrics that are UV-resistant and water-repellent.
Essential Tools and Safety Precautions
A successful DIY porch swing project relies on having the right tools and adhering to safety practices. Essential tools include a measuring tape, a pencil, a saw (hand saw, circular saw, or miter saw depending on your preference and skill level), a drill with various drill bits, a screwdriver, a level, sandpaper (various grits), safety glasses, work gloves, and a sturdy ladder. If you’re working with metal hardware, you might also need a wrench or pliers. Always wear safety glasses to protect your eyes from sawdust and debris. Work gloves will protect your hands from splinters and rough surfaces. Ensure your work area is well-lit and free of clutter to prevent trips and falls. When working at heights, such as during the installation phase, use a stable ladder and have a second person to spot you if possible. Familiarize yourself with the operation of all power tools before use. Never rush through a project; take your time, double-check measurements, and prioritize safety at every step.
Step-by-Step Construction Guide: The Classic Wooden Swing
This guide focuses on building a classic wooden porch swing, a versatile design that can be adapted to various porch styles.
1. Planning and Cutting Your Lumber:
Begin by sketching out your swing’s dimensions. A common size for a two-seater swing is approximately 48 inches wide, 18 inches deep for the seat, and a back height of around 20-24 inches. The armrests typically extend about 6-8 inches forward from the back. Based on your design, carefully measure and mark your lumber. For a standard design, you’ll need:
- Seat Slats: Typically 4-5 pieces, 48 inches long, 1.5 inches thick, and 3.5 inches wide.
- Back Slats: Similar to seat slats, but cut to match the desired back height, accounting for any angle. You might need 5-7 pieces.
- Side Supports/Legs (for the seat frame): Two pieces, approximately 18 inches long, often with a slight angle cut at the top to match the back.
- Front and Back Seat Rails: Two pieces, cut to the width of the swing (48 inches).
- Armrests: Two pieces, the length of which will depend on your design, typically around 24-30 inches.
- Back Support Rails: Two pieces, cut to connect the back slats.
Ensure all cuts are straight and precise. A miter saw is ideal for making accurate angled cuts for the seat and back supports. If using a circular saw, invest in a guide to ensure straight lines. Sand all cut edges smooth to remove splinters and prepare the wood for assembly.
2. Assembling the Seat Frame:
Start by constructing the basic seat frame. Attach the front and back seat rails to the two side support pieces. Use wood glue and 2.5-3 inch exterior-grade wood screws. Pre-drill pilot holes to prevent the wood from splitting, especially near the ends. Ensure the frame is square by measuring diagonally across the corners; the measurements should be equal. Once the frame is secure and square, attach the seat slats across the top of the frame, spacing them evenly. Again, use wood glue and screws, pre-drilling pilot holes. Aim for a small gap (about 1/4 inch) between each slat to allow for drainage and expansion.
3. Constructing the Backrest:
The backrest assembly will likely involve attaching back slats to two angled back support rails. The angle of the backrest is crucial for comfort. This angle can be achieved by cutting the top of the side seat supports at an angle or by building a separate angled frame for the back. If building a separate frame, cut two pieces that will attach to the back seat rail and extend upwards at an angle. Then, attach the back slats to these support rails, ensuring they are evenly spaced and flush with the edges. Use wood glue and screws, pre-drilling pilot holes.
4. Attaching the Armrests:
Position the armrests on top of the side supports and extending forward. Secure them from underneath with wood glue and long wood screws that go through the side supports and into the armrests. You can also add a decorative edge or a slight overhang to the armrests for a more finished look.
5. Sanding and Finishing:
Once the swing is fully assembled, give it a thorough sanding. Start with a coarser grit sandpaper (e.g., 80-grit) to smooth out any rough spots or imperfections, then move to finer grits (e.g., 120-grit, then 220-grit) for a smooth, touchable finish. Wipe down the entire swing with a tack cloth or a slightly damp cloth to remove all sawdust. For finishing, apply multiple coats of an exterior-grade sealant, stain, or paint. If you’re using a wood like cedar or redwood, a clear sealant will preserve its natural color and protect it from the elements. If you desire a specific color, use a high-quality exterior paint or stain. Allow each coat to dry completely according to the manufacturer’s instructions before applying the next. Pay extra attention to end grains, as they absorb more moisture.
Installation: Hanging Your Porch Swing Securely
Proper installation is paramount for the safety and enjoyment of your DIY porch swing.
1. Locating Support Points:
Identify the joists or beams in your porch ceiling that can support the weight of the swing and its occupants. If your porch ceiling doesn’t have readily accessible structural beams, you may need to install additional support framing. Use a stud finder to locate these joists. Mark the desired hanging points, ensuring they are spaced appropriately for your swing’s width. For a standard 48-inch swing, aim for hanging points roughly 30-40 inches apart.
2. Installing Eye Bolts or Swing Hangers:
For wooden ceilings, drill pilot holes at your marked locations and screw in heavy-duty eye bolts designed for load-bearing applications. Ensure they are screwed in at least halfway into the solid wood joist. If you’re using specialized swing hangers, follow the manufacturer’s instructions for installation. For concrete or brick porches, you’ll need to use appropriate masonry anchors and hardware.
3. Attaching Chains or Ropes:
Cut your chain or rope to the desired length. The length will depend on the height of your porch ceiling, the desired height of the swing from the ground, and the angle of the backrest. You want the swing to hang at a comfortable height for sitting and getting up, typically around 18-24 inches from the ground. Use S-hooks or carabiners to attach the chain or rope to the eye bolts or swing hangers. Ensure the hooks are securely closed.
4. Connecting to the Swing:
Attach the other end of the chains or ropes to the designated points on your swing. This is usually on the top corners of the side supports or through pre-drilled holes. If drilling holes into your swing, ensure they are reinforced to prevent tearing. Use a level to ensure the swing hangs evenly and is at the correct height. Adjust the chain lengths as needed.
5. Testing and Final Adjustments:
Once everything is connected, gently apply weight to the swing to test its stability. Sit on it carefully, and have someone push it gently to check for any wobbling or creaking. Make any necessary adjustments to the chain lengths or connections.
Enhancing Comfort and Style with Accessories
Once your DIY porch swing is safely installed, it’s time to add the finishing touches that will make it your own. Outdoor cushions are essential for comfort. Look for cushions made from weather-resistant fabrics like Sunbrella or acrylic. You can find pre-made cushions that fit standard porch swing dimensions, or you can opt for custom-made cushions for a perfect fit and unique style. Consider adding throw pillows in coordinating colors or patterns to enhance the visual appeal and provide extra comfort. A small side table is also a practical addition for holding drinks, books, or decorative items. For ambient lighting, consider string lights or a battery-operated lantern hung nearby to create a cozy atmosphere in the evening. Personalize your swing with decorative elements like wind chimes, hanging plants, or even a small outdoor rug underneath to define the space.
Maintenance for Longevity
To ensure your DIY porch swing remains a beautiful and functional piece for years to come, regular maintenance is crucial. Periodically inspect the hardware for any signs of rust or wear. Tighten any loose screws or bolts. Clean the swing regularly with mild soap and water to remove dirt and grime. If you live in an area with harsh weather, consider covering your swing during the off-season or when not in use to protect it from the elements. Reapply sealant or paint as needed, typically every 1-2 years, depending on the type of finish and your climate. For wooden swings, inspect for any signs of rot or insect damage and address them promptly.
Troubleshooting Common DIY Porch Swing Issues
Even with careful planning, you might encounter a few common issues. If your swing squeaks, the culprit is usually friction between the chain links or where the chain connects to the swing. Lubricating these points with a silicone-based lubricant can often resolve this. If your swing hangs unevenly, re-check the chain lengths and adjust them until it’s level. If the wood shows signs of cracking, it might be due to insufficient pre-drilling or the wood drying out too quickly. Addressing this might involve filling small cracks with wood filler and reapplying sealant. If you notice excessive movement or instability, re-examine your hanging hardware and ensure it’s securely attached to solid structural elements.
Conclusion: Enjoy Your Handcrafted Oasis
Building your own porch swing is an achievable and deeply satisfying project. It’s an opportunity to infuse your personality into your outdoor living space, creating a comfortable and inviting spot to relax and unwind. From selecting the perfect lumber to the final decorative touches, each step contributes to a unique piece of furniture that you can proudly say you made yourself. With this comprehensive guide, you’re well-equipped to tackle your DIY porch swing project and create a cherished haven for years to come.
