DIY Gold Stud Manicure: Elevate Your Nail Art Game
Achieving a chic gold stud manicure at home is entirely within reach, offering a sophisticated and glamorous aesthetic that can transform an ordinary look into something extraordinary. This detailed guide provides a comprehensive, step-by-step approach to creating professional-looking gold stud nails using readily available materials, focusing on techniques that ensure durability, precision, and a salon-quality finish. We will delve into the essential tools and products required, proper nail preparation, the application of base and top coats, the strategic placement of gold studs, and effective finishing touches to maximize the longevity and visual impact of your DIY gold stud manicure. This article is optimized for search engines by incorporating relevant keywords and providing in-depth information that addresses common user queries related to achieving this popular nail art trend.
Essential Tools and Materials for Your Gold Stud Manicure
To successfully execute a stunning gold stud manicure at home, acquiring the right tools and materials is paramount. The foundation of any excellent manicure lies in proper preparation and the quality of the products used. For a gold stud design, you will need a selection of high-quality nail polishes, including your desired base color, a reliable top coat, and importantly, a clear or gold-toned polish for adhering the studs. The gold studs themselves are the star of the show; they come in various sizes, shapes (round, square, geometric), and finishes, allowing for extensive customization. It is advisable to purchase a mixed-size pack to experiment with different placements and visual textures. Beyond the polishes and embellishments, essential application tools include a fine-tipped brush or a dotting tool, a pair of precision tweezers for picking up and placing the tiny studs, and a nail file and buffer for shaping and smoothing the nail surface. For an even more professional and long-lasting finish, consider investing in a nail glue or a gel top coat if you are working with gel polish, as these provide superior adhesion for embellishments. Lastly, ensure you have nail polish remover and cotton pads on hand for any necessary corrections or for cleaning up stray polish. The selection of these items will directly influence the ease of application, the aesthetic outcome, and the overall durability of your gold stud manicure.
Nail Preparation: The Crucial First Step
Prior to applying any polish or embellishments, meticulous nail preparation is the bedrock of a long-lasting and flawless manicure. Begin by removing any existing nail polish using a good quality nail polish remover. It’s important to ensure all traces of old polish are gone to prevent chipping and uneven application of new products. Next, address the cuticle area. Gently push back your cuticles using a cuticle pusher or an orange stick. Avoid cutting your cuticles unless absolutely necessary and you are proficient in doing so, as improper cuticle cutting can lead to infection. Healthy, well-maintained cuticles contribute significantly to the overall polished appearance of your nails. Following cuticle care, it’s time to shape your nails. Use a fine-grit nail file to gently shape your nails to your desired length and form. Filing in one direction, rather than a sawing motion, helps prevent splitting and weakening of the nail. Once shaped, use a nail buffer to gently buff the surface of your nails. This step smooths out any ridges or imperfections and creates a slightly roughened surface, which enhances the adhesion of your base coat and subsequent polish layers. Finally, wash your hands thoroughly with soap and water to remove any dust or oil residue from filing and buffing. Ensure your nails are completely dry before proceeding to the next step. Skipping or rushing this preparation phase can lead to premature chipping, peeling, and a less than ideal finish for your gold stud manicure.
Applying Base Coat: Foundation for Longevity
The application of a base coat is a non-negotiable step in any manicure, and it is particularly crucial for a gold stud design. A quality base coat serves multiple purposes: it protects your natural nails from staining, especially when using dark or vibrant polish colors, and it creates a smooth, even surface for your nail polish to adhere to. This improved adhesion is vital for preventing chipping and extending the wear time of your manicure. Apply a thin, even layer of your chosen base coat across the entire nail plate, ensuring complete coverage from cuticle to free edge. Avoid flooding the cuticle area, as excess product can seep underneath the polish and cause lifting. Allow the base coat to dry completely. The drying time will vary depending on the type of base coat you are using, but typically it takes a minute or two. Rushing this step can compromise the integrity of the entire manicure. A well-applied base coat is the invisible foundation that supports the beauty and durability of your DIY gold stud manicure, ensuring your chosen color and intricate embellishments stay put.
Applying Your Base Color: The Canvas for Gold
With a properly prepared nail and a dry base coat, you are ready to apply your chosen base color. This is the canvas upon which your gold studs will create their striking contrast. Select a nail polish color that complements your personal style and the occasion for which you are creating this manicure. Whether you opt for a classic nude, a bold jewel tone, or a sophisticated deep shade, the application technique remains consistent. Apply the first coat of your base color in thin, even strokes, working from the cuticle upwards towards the free edge of the nail. Aim for smooth, consistent coverage, but don’t worry about achieving perfect opacity with the first coat. Allow this first layer to dry partially before applying the second coat. A slightly tacky surface will help the second coat adhere better. Apply a second, and if necessary, a third thin coat to achieve full opacity and a smooth, streak-free finish. It’s always better to apply multiple thin coats than one thick coat, as thick coats are more prone to smudging, bubbling, and prolonged drying times. Ensure each layer is dry to the touch before proceeding to the next. The precision and patience exercised during this stage will significantly impact the overall aesthetic of your gold stud manicure.
The Art of Gold Stud Application: Precision and Placement
This is the pivotal stage of your DIY gold stud manicure, where creativity and precision converge. The strategic placement of gold studs can elevate your nail art from simple to spectacular. Begin by ensuring your final coat of base color is still slightly tacky, or alternatively, use a small dot of clear nail polish or nail glue on the nail where you intend to place a stud. This acts as the adhesive. Using a pair of fine-tipped tweezers, carefully pick up a single gold stud. Patience is key here; work with one stud at a time. Gently press the stud onto the tacky polish or glue. You can use the tip of your tweezers or a dotting tool to nudge the stud into its desired position.
There are numerous ways to incorporate gold studs:
- Accent Nail: Apply studs to a single accent nail for a subtle yet impactful statement.
- French Tip: Place small studs along the free edge of the nail, mimicking a gold French tip.
- Geometric Patterns: Arrange studs in lines, clusters, or geometric shapes for a modern and edgy look.
- Full Coverage: For a truly glamorous effect, cover portions of the nail with an intricate arrangement of studs.
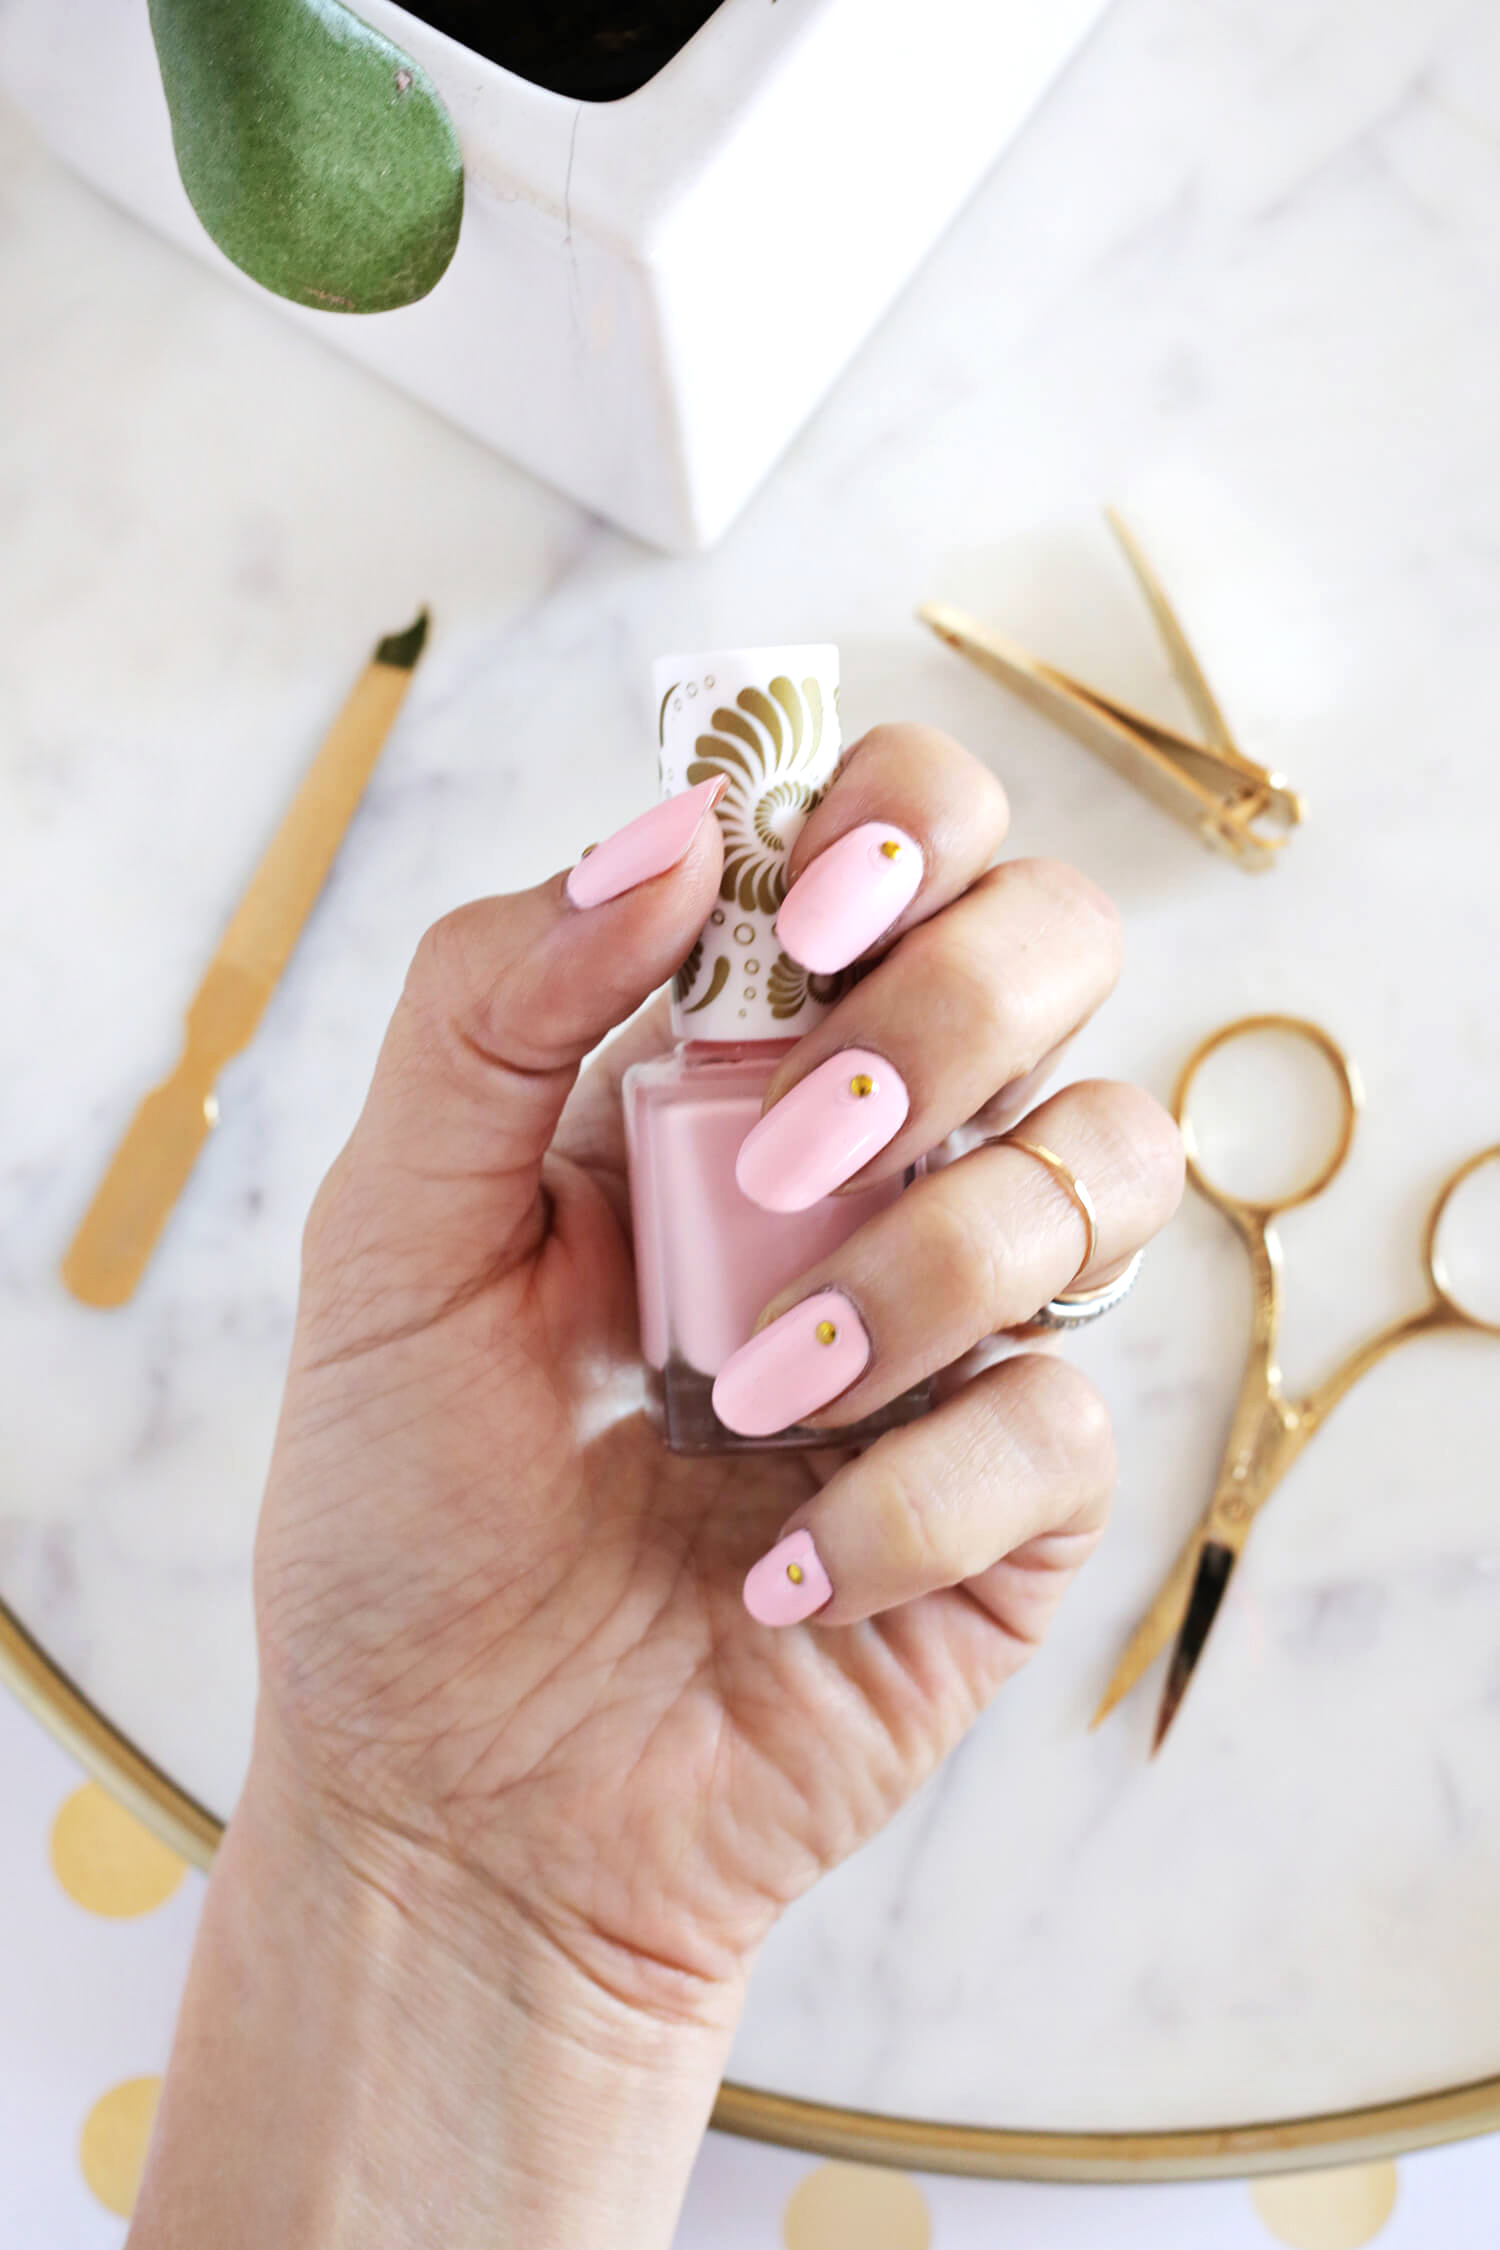
- Single Stud Focus: Place a single, larger stud at the base of the nail or on one side for a minimalist, chic design.
Experiment with different stud sizes and shapes to create depth and visual interest. Smaller studs can be used to fill in gaps or create intricate details, while larger studs can serve as focal points. Remember to work methodically and clean your tweezers periodically if they accumulate polish or debris. Avoid applying too many studs in one go, as this can make the polish dry too quickly and reduce your ability to adjust placement. It is often helpful to have a visual reference, such as a photograph of a gold stud manicure you admire, to guide your design choices. The careful and deliberate placement of each gold stud is what defines the unique character of your DIY creation.
Securing Your Gold Studs: Ensuring Longevity
Once you have meticulously placed all your gold studs, the next crucial step is to secure them effectively to ensure your manicure lasts. This stage is critical for preventing the studs from falling off prematurely. After placing the studs on the tacky polish or glue, gently press down on each one with your tweezers or a dotting tool to ensure they are firmly adhered. Now, it’s time to apply a top coat. However, a word of caution is necessary here. Applying top coat directly over the studs can sometimes wash out their shine or even dislodge them if the coat is too fluid.
The best approach is to carefully apply a thin layer of top coat around the studs, essentially "framing" them. Use a fine-tipped brush or the applicator of your top coat to meticulously paint the polish around the edges of each stud, ensuring it adheres to the nail and the stud. This method provides a protective barrier without obscuring the shine of the studs. For added durability, especially if you are using traditional nail polish, you can apply a second, thin layer of top coat after the first has partially dried. If you are using gel polish, a specific gel top coat will be necessary, and you will need to cure it under a UV or LED lamp.
An alternative method, particularly for enhancing the longevity of individual studs, is to apply a tiny bead of nail glue or a clear polish directly onto each stud after it has been placed and then gently press it down. Once this has dried, you can then proceed with your top coat application, being mindful of framing the studs as described above. For maximum security, especially for larger or more elaborate designs, consider using a dedicated nail jewelry glue, which is formulated for stronger adhesion of embellishments. The careful application of top coat or specialized adhesives is the final protective layer that seals in your stunning gold stud manicure, guaranteeing its beauty for days to come.
Finishing Touches and Maintenance for Your Gold Stud Manicure
To complete your DIY gold stud manicure and ensure its enduring beauty, a few finishing touches and a routine for maintenance are essential. Once your top coat is completely dry (which can take longer for gel polish requiring curing), you can gently buff away any residual tackiness from the surface with a lint-free wipe. For any small imperfections, such as stray polish on your skin, use a small brush dipped in nail polish remover to clean up the edges for a super-sharp, professional look.
When it comes to maintaining your gold stud manicure, the key is to be gentle. Avoid using your nails as tools; for instance, do not use them to open cans or scrape surfaces. This can put undue stress on the studs and the polish, leading to chipping or loss. When washing dishes or cleaning, wear rubber gloves to protect your manicure from harsh chemicals and prolonged exposure to water. Regular application of cuticle oil can help keep your nails and cuticles hydrated, which in turn helps maintain the overall health and appearance of your manicure.
If you notice any minor lifting around the edges of a stud, you can attempt a small touch-up by carefully applying a tiny amount of clear polish or nail glue around the affected area and gently pressing the stud back down. However, this is a temporary fix. For optimal results, it’s best to be proactive with protection. Avoid prolonged soaking of your hands in water, as this can soften the adhesive and the polish. By following these simple maintenance tips, you can significantly extend the life and preserve the exquisite charm of your DIY gold stud manicure, allowing you to enjoy its glamorous appeal for an extended period.
