
Crafting a Cozy Pom Pom Hat from an Old Sweater: A Sustainable DIY Guide
Transforming a pre-loved sweater into a charming and functional pom pom hat is a rewarding and eco-conscious DIY project. This guide will walk you through the process step-by-step, offering detailed instructions and tips to ensure a successful outcome. Beyond mere aesthetic appeal, upcycling an old sweater into a hat diverts textile waste from landfills, giving new life to materials that might otherwise be discarded. The inherent warmth and unique textures of sweaters lend themselves perfectly to creating cozy headwear, ideal for cooler weather. This project requires minimal specialized tools, making it accessible to crafters of all skill levels. Whether you have a favorite sweater that’s developed a snag or a sweater that no longer fits, this method provides a practical and creative solution.
The first crucial step in creating your sweater pom pom hat is selecting the right sweater. Not all sweaters are created equal when it comes to this project. Prioritize sweaters made from natural fibers like wool, cashmere, or a wool blend. These fibers are durable, warm, and generally easier to work with. Acrylic or synthetic blends can also be used, but they may be less breathable and might not offer the same luxurious feel or warmth. Consider the thickness of the sweater. A medium-weight knit will offer good warmth without being overly bulky. Avoid very thin knits, as they might not hold their shape well or provide sufficient insulation. Also, examine the condition of the sweater. Look for any significant holes, tears, or excessive pilling that might compromise the structural integrity of your hat. Minor imperfections can often be worked around, but large damaged areas will necessitate finding a different sweater. The color and pattern of the sweater will, of course, dictate the final look of your hat, so choose something that appeals to your personal style. If the sweater has a prominent design, consider how you can incorporate it into the hat’s aesthetic. A classic cable knit, a bold stripe, or a subtle textured pattern can all add character.
Before you begin cutting, it’s essential to prepare your sweater. Washing and drying the sweater will pre-shrink the fabric, ensuring that your finished hat maintains its size and shape after subsequent washes. Follow the care instructions on the sweater’s label to avoid damage during the laundering process. If the sweater is particularly delicate, handwashing or using a mesh laundry bag on a gentle cycle is recommended. Once washed and dried, lay the sweater flat and smooth out any wrinkles. This will help you achieve precise measurements and cleaner cuts. Inspect the sweater again for any loose threads or seams that might unravel during the cutting and sewing process. If you find any, reinforce them with a few stitches by hand or with a sewing machine. This attention to detail at the preparation stage will prevent potential issues later on.
To begin the construction of your hat, you’ll need to create a pattern. The simplest method is to use a hat you already own as a template. Choose a beanie or a close-fitting hat that you like the style of. Lay this hat flat on the smoothed-out sweater. Position the hat so that the brim of your template hat aligns with the hem of the sweater. This is crucial because the sweater’s original hem will serve as the finished brim of your pom pom hat, eliminating the need for hemming and providing a clean, professional edge. You will then trace around the template hat, leaving a seam allowance of approximately 1/2 inch (1.25 cm) to 3/4 inch (2 cm) all around. This allowance is important for sewing the pieces together. If you don’t have a hat to use as a template, you can create a simple pattern by measuring the circumference of your head and dividing it by two (for the front and back panels). Then, measure from your hairline to where you want the hat to end at the crown, adding an inch or two for curvature. Draw a U-shaped pattern with these dimensions on paper or directly onto the sweater, again remembering to include your seam allowance. It’s a good idea to cut out one larger piece that will form the main body of the hat, rather than two separate front and back panels. This creates a seamless crown, which is often more comfortable and aesthetically pleasing. Ensure the grain of the knit runs vertically on your pattern piece to prevent stretching and distortion of the hat.
With your pattern in place, it’s time to cut the fabric. Using sharp fabric scissors, carefully cut along the traced lines, adhering to your chosen seam allowance. For the main body of the hat, you will typically need one large piece if you are using the seamless crown method, or two mirrored pieces if you are creating front and back panels. If your sweater has a significant texture or pattern, pay attention to how it will lay on the hat when you cut. You might want to center a particular design element or ensure a stripe runs straight up the center front. Once the main body pieces are cut, you’ll need to create the lining if desired. A soft cotton jersey or a complementary fabric makes an excellent lining, adding an extra layer of warmth and comfort against the skin, especially for wool sweaters which can sometimes feel itchy. The lining should be cut to the same dimensions as the outer hat pieces, minus the seam allowance. So, if you added a 1/2 inch seam allowance to your outer pieces, cut your lining pieces precisely to the pattern lines. This ensures that the lining sits neatly inside the hat without bunching.
Now comes the sewing. If you’re using a sewing machine, a serger or a knit stitch is ideal for stretchy fabrics like sweater knits, as it will prevent the seams from popping when the hat is stretched. If you don’t have a serger, use a zigzag stitch or a twin needle on your regular sewing machine. If you are hand-sewing, a sturdy backstitch will provide durability. Begin by sewing the main body pieces together. If you cut two mirrored pieces, sew them along the curved crown edges, creating a dome shape. If you are using a single large piece, you will fold it in half and sew the curved crown edge to create the dome. Ensure you are sewing with the right sides of the fabric together. This means the outer sides of the sweater material should be facing each other.
If you are adding a lining, repeat the sewing process for the lining pieces, leaving a small opening of about 2-3 inches (5-7.5 cm) in one of the seams of the lining’s crown. This opening will be used to turn the hat right side out later. Once the main hat body and the lining are sewn, it’s time to attach them. Place the outer hat and the lining together, right sides facing each other. Align the raw edges of the brims. Stitch around the entire brim, securing the outer hat to the lining. This will create a neat, finished edge for your hat.
After sewing the brim, carefully turn the entire hat right side out through the opening you left in the lining. Gently push out the seams and the crown to ensure a smooth, rounded shape. Once the hat is fully turned, you will have the outer sweater fabric on the outside and the lining on the inside. Now, you need to close the opening in the lining. You can do this by hand-sewing the opening shut using a ladder stitch or slip stitch for an invisible finish. Alternatively, you can use your sewing machine to stitch the opening closed, though this may be slightly more visible. Ensure the stitches are small and secure to prevent the lining from coming undone. Once the opening is closed, gently tuck the lining back inside the hat.
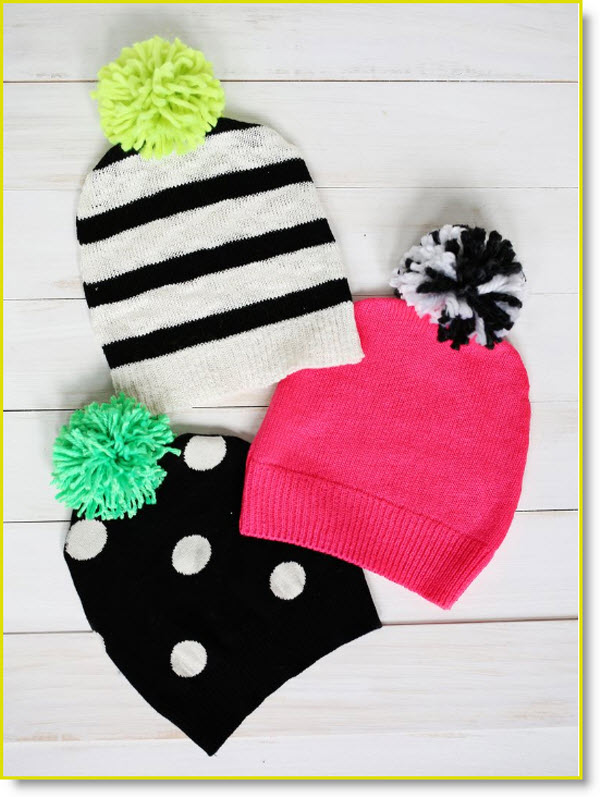
The final, and arguably most fun, step is creating and attaching the pom pom. The size of your pom pom is a matter of personal preference, but a generally pleasing size for a hat is around 3-4 inches (7.5-10 cm) in diameter. You can create a pom pom using a variety of methods. The most common and easiest is using a pom pom maker, available at most craft stores. These come in various sizes and make creating uniform pom poms simple. Alternatively, you can create a pom pom by hand using two pieces of cardboard cut into donut shapes, or even by wrapping yarn around your fingers or a fork. For a truly integrated look, you can even create a pom pom from the leftover scraps of your sweater. If using leftover sweater material, cut thin strips of the fabric, about 1/4 inch wide and as long as possible. Gather a bundle of these strips and tie them tightly in the middle with another strip of fabric. Then, trim and fluff the ends to create a pom pom shape.
Once your pom pom is created and fluffed, it’s time to attach it to the crown of your hat. You can attach it securely using a needle and strong thread. If your pom pom has a tail of yarn or fabric, thread this through the crown of the hat and stitch it securely from the inside. For fabric pom poms made from sweater scraps, you can create a small loop of fabric at the base of the pom pom when you tie it. Thread a needle through this loop and then through the top of the hat’s crown, securing it firmly from the inside. For an even more robust attachment, you can sew the pom pom to the hat multiple times, ensuring it won’t detach with wear and tear.
To further enhance your sweater pom pom hat, consider adding decorative elements. Ribbons, buttons, or even embroidered patches can add a personalized touch. A simple grosgrain ribbon tied in a bow at the side of the hat can add a touch of elegance. Vintage buttons can be sewn onto the brim for a unique accent. If your sweater had interesting details, like decorative stitching or a subtle pattern, consider how you can highlight these on the hat. For example, if the sweater had a prominent ribbed cuff, you could position this as the brim of your hat. For a playful touch, consider adding a small charm or a tassel to the pom pom itself. These embellishments are not only aesthetically pleasing but also offer another avenue for personalization and creative expression.
Finally, a word on care. To maintain the longevity and appearance of your upcycled sweater pom pom hat, follow the same care instructions as you would for the original sweater. Handwashing in cold water with a mild detergent is generally the safest option, especially for wool or delicate knits. Avoid machine washing and drying, as the agitation and heat can cause the fibers to felt, shrink, or lose their shape. Gently squeeze out excess water, and then lay the hat flat on a clean towel to air dry. Reshape the hat while it is damp to ensure it maintains its intended form. Proper care will ensure your cozy, homemade hat remains a favorite accessory for seasons to come, a testament to your creativity and commitment to sustainable fashion.
