
DIY Felt Leaf Wall Decor: A Comprehensive Guide to Crafting Natural Beauty
Felt leaf wall decor offers a charming, sustainable, and versatile way to bring the beauty of nature indoors. This DIY project allows for immense customization in terms of color, size, and arrangement, making it suitable for a wide range of interior design styles, from minimalist to bohemian and modern farmhouse. Unlike real foliage, felt leaves require no watering, sunlight, or maintenance, providing long-lasting visual appeal with minimal effort. This guide will delve into every aspect of creating your own felt leaf wall art, from material selection to advanced design techniques, ensuring you can craft a stunning and personalized statement piece for your home.
The foundational element of any felt leaf wall decor project is, naturally, felt. Understanding the different types of felt available is crucial for achieving the desired texture, drape, and durability. Wool felt, derived from sheep’s wool, offers a natural, luxurious feel with excellent resilience. It has a beautiful, slightly fuzzy texture that mimics the organic quality of real leaves. While more expensive than synthetic options, wool felt provides superior quality and a rich aesthetic. It’s also biodegradable and eco-friendly. For crafters seeking a budget-friendly alternative, acrylic felt (also known as craft felt or polyester felt) is readily available and comes in an extensive array of vibrant colors. It is generally less durable and can pill over time, but for decorative purposes, it is perfectly adequate and offers excellent ease of cutting and handling. Felt blends, a combination of wool and synthetic fibers, can offer a balance of quality and affordability, inheriting some of the best attributes of both. When choosing felt, consider the thickness. Thicker felt will hold its shape more rigidly, ideal for larger, more structured leaves. Thinner felt will drape more softly, lending itself to delicate, cascading arrangements. Many craft stores and online suppliers offer felt by the yard, sheet, or in pre-cut packs, allowing you to purchase exactly what you need. Consider purchasing a variety of greens, browns, and autumnal tones to create a realistic or whimsically colored collection of leaves.
The design process for your felt leaf wall decor begins with conceptualization. What aesthetic are you aiming for? Are you replicating specific tree leaves, or creating an abstract botanical arrangement? Gathering inspiration is key. Pinterest, Instagram, and interior design magazines are excellent resources for observing how natural foliage is incorporated into decor. Consider the scale of your project. A few scattered leaves can add a subtle touch of nature, while a large cluster or a cascading vine can become a focal point. For realistic designs, research the shapes of various leaves. Oak, maple, fern, eucalyptus, and monstera leaves are popular choices due to their distinctive silhouettes. You can find numerous free leaf templates online by searching for "leaf templates printable" or "botanical leaf outlines." Print these templates to your desired size. If you’re aiming for a more abstract or whimsical look, you can sketch your own unique leaf shapes. Don’t be afraid to experiment with asymmetrical designs and varied sizes to create a more dynamic and visually interesting display. For an extra touch of realism, consider variations within a single leaf type, such as slightly curled edges or subtle vein patterns.
Cutting the felt is a critical step that requires precision and the right tools. For clean, sharp edges, investing in a good pair of fabric scissors or a rotary cutter and cutting mat is highly recommended. For intricate leaf shapes with delicate curves, sharp scissors are essential to prevent fraying and tearing. If you’re cutting a large number of leaves, a rotary cutter can significantly speed up the process and ensure uniformity. Tracing the templates onto the felt can be done with a disappearing ink fabric pen, a chalk pencil, or even a light-colored crayon for darker felt. Alternatively, you can pin the paper template directly to the felt and cut around it, although this can sometimes lead to slight inaccuracies if the paper shifts. For more complex veining details, a craft knife or X-Acto knife can be used to carefully cut thin lines into the felt. Always cut on a protective surface like a self-healing cutting mat to avoid damaging your work surface. Ensure you’re cutting on a single layer of felt for best results. If you’re making many leaves of the same design, consider using a Cricut or Silhouette cutting machine for ultimate precision and efficiency.
Attaching the felt leaves to your wall is a crucial decision that depends on the surface of your wall and the weight of your finished decor. For lighter arrangements, double-sided adhesive tape specifically designed for walls (such as Command strips) is an excellent choice. These are residue-free and come in various weight capacities, ensuring your leaves stay put without damaging paint. For heavier arrangements or if you prefer a more permanent solution, hot glue or craft glue can be used to attach small fabric loops or grommets to the back of each leaf, which can then be secured to the wall with small nails or pushpins. Another option for a more structured look is to glue the felt leaves onto a backing material. This could be a piece of canvas, a wooden plaque, or even a large, sturdy piece of cardboard. This approach allows for greater control over the arrangement and can be hung like a traditional piece of art. When using glue, ensure you apply it evenly to avoid lumps and allow it to dry completely before hanging. For a very minimalist approach, Washi tape can be used to attach smaller felt leaves, offering a temporary and decorative solution, especially for renters. Consider the texture of your wall when choosing an adhesive; smoother walls generally accommodate a wider range of adhesives.
Adding depth and realism to your felt leaves can elevate your DIY project from simple cutouts to sophisticated art. One effective technique is adding veins. This can be achieved through several methods. Embroidery floss in a contrasting or matching color can be hand-stitched along the natural vein lines of the leaf. This adds a tactile dimension and a touch of elegance. Another method is to use a fabric marker or fabric paint to draw vein details. Experiment with fine-tipped markers for delicate lines or a slightly thicker brush for bolder patterns. For a more subtle effect, you can use a disappearing ink pen to sketch out the veins and then carefully burnish them with a rounded tool, creating a slight indentation. Layering felt is another excellent way to add dimension. Cut out a slightly smaller leaf shape in a darker or lighter shade of felt and glue it onto the base leaf, creating a subtle shadow effect or highlighting the edges. You can also layer smaller leaf shapes on top of larger ones to mimic overlapping foliage. Curling and shaping the felt can also add realism. Gently bend and crease the edges of the leaves to create a more natural, organic look. You can use your fingers for this or even a warm iron on a low setting (with a pressing cloth) to set curves in place for some felt types.
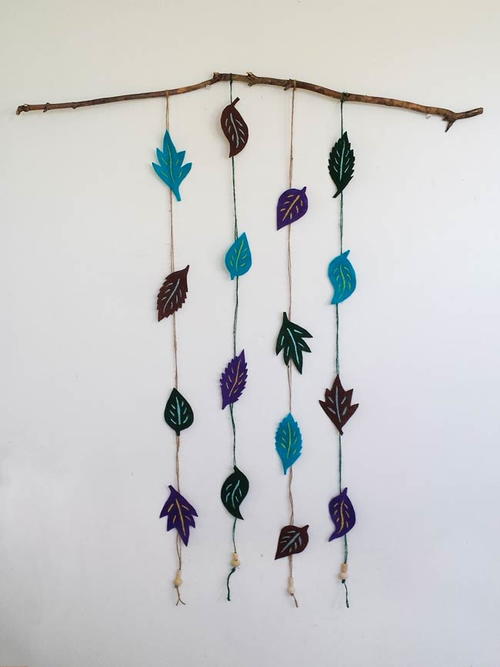
Beyond individual leaves, consider creating more complex felt leaf wall decor arrangements. Felt leaf garlands are a popular and relatively simple project. Cut out a series of leaves and string them together using embroidery floss, twine, or thin ribbon. You can vary the size and color of the leaves to create a dynamic garland. Felt leaf wreaths offer a beautiful focal point for doors or walls. Start with a wire or foam wreath base and gradually attach your felt leaves, overlapping them to create a full and lush appearance. You can also incorporate other natural elements like felt acorns, berries, or pinecones. Felt leaf branches or vines can be created by cutting long, thin strips of felt for the stem and then attaching leaves at intervals. These can be arranged to drape over furniture, frame doorways, or cascade down a wall. For a more intricate display, consider creating a felt leaf tapestry by gluing or stitching various sized leaves onto a larger fabric backing in a cohesive pattern. Think about creating a gradient of colors or a repeating motif. When planning these larger arrangements, sketch out your design on paper first to visualize the layout and ensure a balanced composition.
The color palette of your felt leaf wall decor is a powerful tool for setting the mood and complementing your existing interior design. For a realistic natural look, stick to a range of greens, from deep forest green to vibrant emerald and lighter lime hues. Incorporate browns, tans, and russets for autumnal or earthy themes. For a more whimsical or contemporary feel, don’t shy away from bold and unexpected colors. Think vibrant blues, sunny yellows, soft pinks, or even metallic-flecked felt. Consider the existing colors in your room. If you have a neutral-toned room, a burst of colorful felt leaves can add a much-needed pop of personality. Conversely, if your room is already very colorful, opt for a more subdued palette of greens and browns to create a calming effect. Seasonal changes can also inspire your color choices. Lighter, brighter greens can be perfect for spring and summer, while richer oranges, reds, and yellows evoke autumn. Deep blues and whites can create a winter wonderland feel. Experiment with color gradients within individual leaves or across your entire arrangement for a sophisticated and visually appealing effect.
Maintaining your felt leaf wall decor is exceptionally easy, which is one of its greatest advantages. Because felt is a synthetic or natural fiber that doesn’t decompose like real plants, it’s remarkably low-maintenance. The primary concern is dust accumulation. Regularly dust your felt leaves using a soft brush, a feather duster, or a low-suction vacuum cleaner attachment. If a leaf becomes lightly soiled, you can often spot-clean it with a damp cloth and a very mild detergent. Gently blot the area rather than rubbing, which can spread the stain and damage the felt. For wool felt, it’s best to avoid excessive moisture and harsh cleaning agents. If you find that your felt leaves have lost their shape over time, particularly thinner acrylic felt, you can often gently reshape them by hand. For specific creases or curves that you want to maintain, you can try a low-heat iron with a pressing cloth, but always test this on a scrap piece first. Store your felt leaves in a cool, dry place away from direct sunlight to prevent fading and damage.
For those looking to add a unique touch or explore more advanced techniques, consider incorporating other materials into your felt leaf wall decor. Beads can be sewn onto the leaves to represent dew drops, berries, or to add a subtle shimmer. Sequins can create a glamorous effect, perfect for a festive or bohemian style. Embroidery can be used not only for veins but also for intricate patterns, outlines, or even small motifs like ladybugs or butterflies to add to the natural theme. Wire can be incorporated into the stems for a more robust and shapeable branch structure. You can also use natural elements like small dried flowers, twigs, or even small pieces of bark to add texture and authenticity to your felt creations. Combining felt with different fabric textures, such as burlap or linen for a backing or accent, can create a rich and layered aesthetic. Think about the contrast in textures and how they will interact visually. For a truly unique piece, consider creating 3D felt leaves by cutting multiple identical leaf shapes and layering them with a small amount of stuffing between each layer before gluing or stitching them together, giving them a plump, realistic appearance.
The environmental benefits of choosing felt for your wall decor are significant. Felt, especially wool felt, is a natural and biodegradable material, making it a more sustainable choice than many plastic-based decorative items. By crafting your own decor, you are also reducing the waste associated with mass-produced items and the transportation emissions associated with their shipping. Opting for acrylic felt, while less biodegradable, is still a durable material that can be recycled in some facilities. The DIY nature of this project also promotes resourcefulness and creativity, encouraging a mindful approach to consumption. When sourcing your felt, look for suppliers who emphasize sustainability and ethical production practices. Even small choices, like using recycled materials for backing or choosing eco-friendly adhesives, contribute to a more environmentally conscious project.
In conclusion, DIY felt leaf wall decor is an accessible and rewarding project for crafters of all skill levels. From the careful selection of felt to the intricate details of vein creation and thoughtful arrangement, each step offers an opportunity for personalization and creativity. Whether you aim for a hyper-realistic botanical display or a whimsical explosion of color, the versatility of felt allows you to transform your living space with a touch of natural beauty. The longevity and low maintenance of felt make it an ideal medium for creating lasting wall art that brings the outdoors in, season after season, without requiring constant upkeep. Embrace the process, experiment with different techniques, and enjoy crafting a unique and beautiful statement piece that reflects your personal style.
